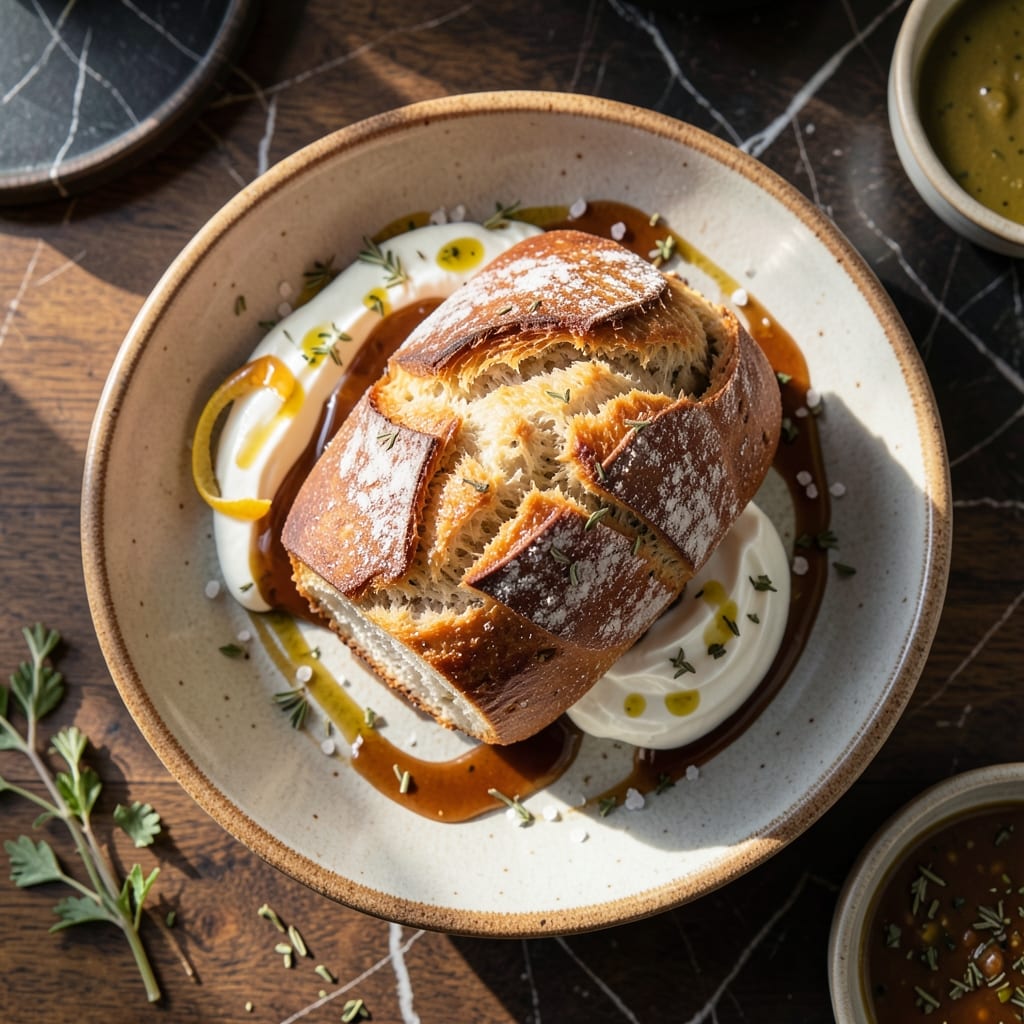
This bread recipe changed my approach to homemade loaves. Using self-rising flour eliminates yeast entirely while delivering soft, tender results every time.
I developed this method after years of traditional bread baking, seeking a no-fuss alternative that still tastes artisanal. The flour does all the work, creating perfect rise without proofing.
The texture is what surprises most—light and fluffy with a golden crust, just like Nonna’s. It’s the kind of bread that makes your kitchen smell like a Sicilian bakery.
With just a handful of ingredients and no special equipment, you’ll have fresh bread ready in under an hour. This is baking made simple and rewarding.
Ingredients for Homemade Bread Recipe with Self Rising Flour
Just a handful of pantry staples for no-fuss homemade bread with perfect rise.
| Ingredient | Amount | Notes |
|---|---|---|
| Self-Rising Flour 🌾 | 4 cups | All-purpose self-rising for best texture |
| Greek Yogurt 🥛 | 1 ½ cups | Full-fat for tenderness |
| Honey 🍯 | 2 tbsp | Warm for easier mixing |
| Olive Oil 🫒 | 2 tbsp | Extra-virgin for richness |
| Salt 🧂 | 1 tsp | Fine sea salt preferred |
| Large Egg 🥚 | 1 whole | Room temperature for even mixing |
| Unsalted Butter 🧈 | 2 tbsp | Melted for brushing crust |
| Milk 🥛 | ¼ cup | Whole milk for richness |
| Sugar 🍚 | 1 tsp | Granulated for subtle sweetness |
| Garlic Powder 🧄 | ½ tsp | Optional for savory variation |
| Dried Italian Seasoning 🌿 | 1 tsp | Optional herb blend |
[recipe_ingredient_scaler]
Self-rising flour is the magic here—White Lily or Martha White are my go-tos at the grocery store. The Greek yogurt adds that tender crumb (full-fat is non-negotiable for this texture). Honey keeps it moist, but maple syrup works too. Most supermarkets carry everything you need, no specialty shops required for this one.
Out of Greek yogurt? Sour cream at the same amount keeps the softness. No honey? Sugar dissolved in warm water does the trick. The egg can be skipped if needed—just add 1 extra tbsp of yogurt. Want it savory? Stir in garlic powder or Italian seasoning (about a teaspoon of either).
Baked loaves stay fresh wrapped in a towel for 2 days. Slice and freeze for up to 3 months—toast straight from frozen. The dough itself? Mix and bake immediately, no resting needed (that’s the beauty of self-rising flour).
Why You’ll Love This Recipe
- Five-Minute Mix: No kneading, no waiting—just stir the self-rising flour, yogurt, honey, and oil together and it’s ready for the oven.
- Warm Honey Sweetness: The honey bakes in so every slice tastes like a cozy hug with just the right touch of sweetness.
- Meal-Prep Magic: I bake two loaves on Sunday, slice and freeze one, and we’re set for sandwiches and toast all week.
- Pantry Hero: Self-rising flour does the heavy lifting, so I spend pennies and skip the yeast aisle entirely.
Step-by-Step Instructions for Homemade Bread With Self Rising Flour
No yeast, no waiting—just simple mixing and baking for soft, tender loaves.
Step 1: Combine Dry Ingredients and Wet Components Separately
In a large mixing bowl, whisk together the 4 cups Self-Rising Flour, 1 tsp Salt, 1 tsp Sugar, 0.5 tsp Garlic Powder, and 1 tsp Dried Italian Seasoning until evenly distributed. The seasonings add subtle depth, but you can omit them for a classic loaf.
In a separate bowl, combine the 1.5 cups Greek Yogurt, 2 tbsp Honey, 2 tbsp Olive Oil, 0.25 cup Milk, and 1 whole Large Egg. Whisk vigorously for 1-2 minutes until the mixture is smooth and homogeneous. The honey and milk balance the tang of the yogurt, creating a slightly sweet, rich base.
Step 2: Form the Dough and Let It Rest
Pour the wet mixture into the dry ingredients. Using a silicone spatula or wooden spoon, fold everything together until no dry flour remains. The dough will be thick and slightly sticky—that’s perfect. Don’t overmix; just ensure all the 4 cups Self-Rising Flour is hydrated.
Lightly grease a second bowl, transfer the dough into it, and cover with a damp towel. Let it rest at room temperature for 10-15 minutes. This brief pause relaxes the gluten, making the dough easier to shape and ensuring a tender crumb.
Step 3: Shape the Loaf and Prepare for Baking
After resting, turn the dough onto a lightly floured surface. Gently pat it into a round or oval shape, about 1.5 inches thick. For a traditional loaf, you can also shape it into a log if preferred. The dough shouldn’t fight you—if it’s too sticky, dust with a bit more flour, but avoid adding too much.
Place the shaped dough on a parchment-lined baking sheet. Using a sharp knife, score the top with a shallow X or a few diagonal slashes. This isn’t just for looks—it controls how the bread expands in the oven, preventing cracks.
Step 4: Bake to Golden Perfection
Preheat your oven to 375°F. Bake the loaf on the center rack for 30-35 minutes, or until the top is deep golden brown and the internal temperature reaches 190-200°F. Rotate the pan halfway through for even browning if your oven has hot spots.
The bread is done when it sounds hollow when tapped on the bottom. If the top browns too quickly, tent loosely with foil for the remaining time. The Greek Yogurt ensures a moist, tender interior, so don’t be fooled by the dark crust—it won’t be dry.
Step 5: Finish and Cool Properly
Remove the bread from the oven and immediately brush the crust with the 2 tbsp Unsalted Butter, melted. This adds a glossy sheen and extra richness to the crust. Let it cool on a wire rack for at least 20 minutes before slicing.
I know it’s tempting to dive in, but cooling allows the structure to set. Slicing too soon can result in a gummy texture. Serve warm with butter or your favorite spread, or let it cool completely for sandwiches the next day.
Pro Tips For Making Homemade Bread Recipe With Self Rising Flour
- Preheat the Oven: I learned this the hard way—crank it to 400°F and let it sit for 10 minutes before baking. Self-rising flour needs that immediate heat to rise properly.
- Warm the Yogurt: Sounds weird, but it works: take the Greek yogurt out of the fridge 20 minutes before mixing. Cold yogurt can shock the dough and slow the rise.
- Skip Overmixing: Resist the urge to knead it like traditional bread—just stir until combined. Overworking the dough makes it tough, and self-rising flour doesn’t need much help.
- Brush with Oil: Right after shaping, brush the top with olive oil—about 1 tablespoon. It keeps the crust soft and adds a subtle richness that pairs perfectly with the honey.
Regional Styles of This homemade bread recipe with self rising flour
Southern Comfort
In the American South, this bread gets a rich twist with buttermilk replacing milk and a touch of baking soda for extra lift. The tang of buttermilk pairs beautifully with the sweetness of honey. I love serving it warm with peach jam for Sunday brunches. 💛
New England Simplicity
New England bakers often add maple syrup instead of honey, giving the loaf a subtle woodsy note. They also prefer a slightly denser crumb, so they reduce the yogurt to 1 cup. It’s perfect with a bowl of clam chowder on chilly evenings.
Appalachian Tradition
In Appalachia, cornmeal is mixed into the dough for texture, about ¼ cup. The bread takes on a hearty, rustic quality that reminds me of Nonna’s Sicilian country loaves. Serve it with sorghum molasses for an authentic taste.
Texas Ranch Style
Texas ranch cooks add cheddar cheese and jalapeños to the dough for a savory kick. The cheese melts beautifully, while the jalapeños add a mild heat. I brush the crust with garlic-infused butter to complement the flavors.
Midwest Farmhouse
Midwestern bakers often use sour cream instead of yogurt, which gives the bread a slightly tangier flavor. They also love adding dried herbs like rosemary or thyme. It’s a comforting loaf that pairs well with beef stew. ✨
Pacific Northwest
Out west, bakers incorporate whole wheat self-rising flour for a nuttier taste. They also add seeds like flax or sunflower for extra crunch. This version is hearty and perfect for sandwiches. I love it with honey butter on top.
Nutrition Facts
Frequently Asked Questions
Can I use all-purpose flour instead?
No, you’ll need to add 1.5 tsp baking powder and 0.5 tsp salt per cup to replicate self-rising flour. The leavening is already included in self-rising, which is why it works so well here.
Why does my bread come out dense?
Overmixing the dough or using expired self-rising flour can cause this. Also, ensure your oven is fully preheated to 375°F before baking. The yogurt should be fresh and full-fat for best rise.
How do I know when it’s done?
The bread is ready when it’s golden brown and sounds hollow when tapped. For accuracy, check the internal temperature reaches 190-200°F with a meat thermometer.
Can I make this in a loaf pan?
Yes! Grease a 9×5-inch pan and bake for 35-40 minutes. The shape will be different but the texture remains soft and tender. Let it cool in the pan for 10 minutes before removing.

Trained in classic French technique but raised on slow-cooked ribs and spicy rubs, she blends culinary skill with smoke and soul.
- Recipe for French Pork Spread Gorton: Savory Gallic Flavors in a Spreadable Delight - October 3, 2026
- Recipe for Pan Fried: Golden Crust with Savory Depth - October 3, 2026
- Recipe For Fried Chicken In A Pressure Cooker: Crispy Golden Bites in Half the Time - October 3, 2026