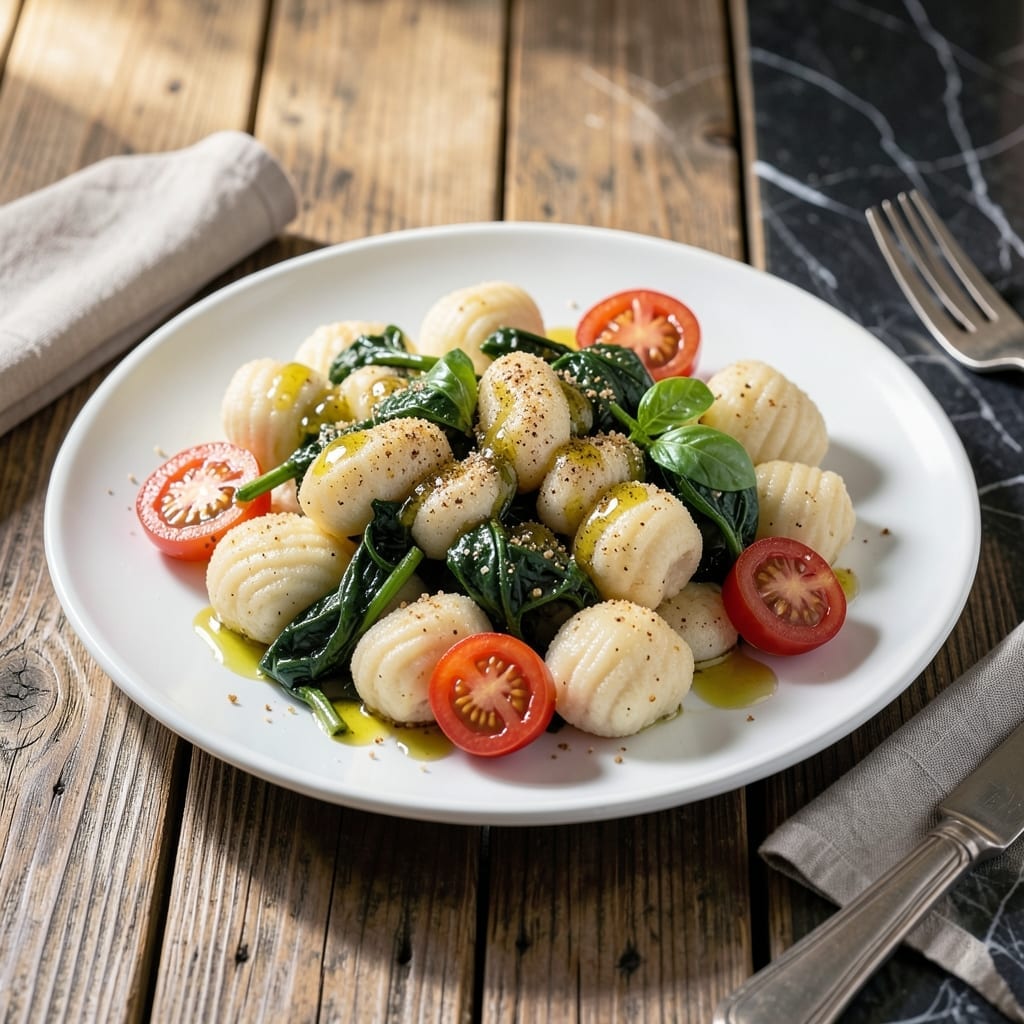
Creating homemade vegan gnocchi that’s both pillowy soft and has that rustic bite takes a few key adjustments. I’ve adapted my grandmother’s method, replacing eggs with simple plant-based ingredients that work just as well.
The dough comes together with minimal effort, using mashed potatoes and flour as the base. A touch of olive oil adds richness without dairy, while salt enhances the natural potato flavor. The trick is handling the dough gently to keep it light.
Once shaped, these gnocchi cook in minutes, floating to the surface when ready. They hold their shape beautifully and deliver that classic tender-yet-chewy texture. The result is a dish that feels indulgent but stays true to vegan principles.
Serve them with your favorite sauce or simply tossed in olive oil and herbs. This method proves that traditional comfort food can be just as satisfying without animal products.
Ingredients for Homemade Gnocchi Recipe Vegan
Simple pantry staples and fresh potatoes create light, fluffy vegan gnocchi with perfect texture.
| Ingredient | Amount | Notes |
|---|---|---|
| Russet Potatoes 🥔 | 2 lb | Peeled and boiled until tender |
| All-Purpose Flour 🌾 | 2 cups | Plus extra for dusting |
| Extra-Virgin Olive Oil 🫒 | 2 tbsp | For dough richness |
| Fine Sea Salt 🧂 | 1 tsp | Adjust to taste |
| Nutritional Yeast 🧀 | 2 tbsp | For cheesy depth |
| Garlic Powder 🧄 | ½ tsp | Optional for extra flavor |
| Black Pepper 🌶️ | ¼ tsp | Freshly ground preferred |
| Fresh Basil 🌿 | ¼ cup | Chopped for serving |
| Tomato Sauce 🍅 | 2 cups | For serving (optional) |
| Semolina Flour 🌾 | ½ cup | For dusting (optional) |
[recipe_ingredient_scaler]
The potatoes are the foundation here. Russets give you that light, fluffy texture—Yukon Golds work but are denser. I grab mine from Whole Foods or the local farmers market (look for firm, unblemished spuds). The nutritional yeast is key for that cheesy depth—Bragg is my go-to brand. Don’t skip the olive oil; it keeps the dough from getting sticky (trust me on this one).
No Russets? Sweet potatoes work but change the flavor (and color). Out of nutritional yeast? Miso paste at half the amount adds umami. Need gluten-free? Swap the all-purpose for a 1:1 gluten-free blend. The semolina is optional but gives a nice bite—cornmeal works too. Always taste your dough before shaping; adjust salt as needed.
Cooked gnocchi keep in the fridge for 2 days (toss with a little oil first). Freeze uncooked on a tray, then bag for up to 3 months. That batch of tomato sauce? 5 days in the fridge or freeze for 6 months.
Why You’ll Love This Recipe
- I’ll be real: all it takes is potatoes, flour, and a few basics I always have on hand—no last-minute grocery runs.
- Unfussy Dough: I just boil, mash, and mix—no eggs or fancy tools, just russets and flour coming together like they were made for each other.
- Cheesy Without Cheese: Here’s what sold me—the nutritional yeast gives that umami depth, so even my dairy-loving friends ask for seconds.
- Freezer Friendly: Honestly, I double the batch and freeze half for those nights I need dinner in 10 minutes flat.
Step-by-Step Instructions for Vegan Gnocchi
Here’s how I make these little pillows of joy—simple, satisfying, and totally plant-based.
Step 1: Boil and Rice the Russet Potatoes
Peel the 2 lb Russet Potatoes and cut them into even chunks. Boil in salted water for 15-20 minutes until they’re fork-tender but not falling apart. Drain well—any excess moisture will make your dough gummy.
While still hot, press the potatoes through a ricer or fine-mesh sieve onto a clean surface. I’ve found this creates the smoothest texture without overworking the dough. Let them cool slightly so they’re warm but not scalding to the touch—this makes mixing easier and safer.
Step 2: Form the Vegan Gnocchi Dough
On your work surface, spread out the riced potatoes and sprinkle with the 1 tsp Fine Sea Salt, 2 tbsp Nutritional Yeast, 0.5 tsp Garlic Powder, and 0.25 tsp Black Pepper. These add layers of flavor without compromising the texture.
Drizzle the 2 tbsp Extra-Virgin Olive Oil over the potatoes, then gradually add the 2 cups All-Purpose Flour, mixing gently with your hands until a soft, slightly sticky dough forms. Avoid kneading too much—just bring it together until it holds its shape. Too much handling makes gnocchi tough.
Step 3: Shape and Cut the Gnocchi
Divide the dough into 4 equal portions and roll each into a 1-inch thick rope. Lightly dust your surface with all-purpose flour if it sticks, but don’t over-flour—this can make the gnocchi dense. Cut each rope into 1-inch pieces.
For that classic ridged texture, press each piece gently against the tines of a fork or a gnocchi board. This helps them hold onto the 2 cups Tomato Sauce later. Place the shaped gnocchi on a floured tray, making sure they don’t touch—this prevents them from sticking together.
Step 4: Cook Until They Float
Bring a large pot of salted water to a rolling boil. Drop in the gnocchi in batches—don’t overcrowd the pot or they’ll stick. They’re done when they float to the surface after 2-3 minutes. Let them cook for another 30 seconds once they rise, then remove with a slotted spoon.
If you’re not serving them immediately, toss the cooked gnocchi with a little Extra-Virgin Olive Oil to prevent sticking. For extra crispiness, you can pan-fry them in a little oil after boiling until golden brown on each side.
Serve hot, topped with 2 cups Tomato Sauce and a sprinkle of 0.25 cup Fresh Basil for a burst of freshness. For a rustic touch, dust with a little 0.5 cup Semolina Flour before serving.
Pro Tips For Making Homemade Gnocchi Recipe Vegan
- Bake, Don’t Boil: I learned this the hard way—boiling Russets makes them waterlogged. Bake them at 400°F until fork-tender, then rice while hot for the fluffiest gnocchi.
- Weigh Your Flour: After dense, rubbery gnocchi disasters, I now use a scale: 1 part flour to 2 parts riced potato by weight. Eyeballing it always backfires.
- Skip the Overworking: Knead just until the dough comes together—about 30 seconds. The second it feels smooth, stop, or you’ll end up with tough little dumplings.
- Toast Nutritional Yeast: Sounds weird, but it works: Lightly toast the nutritional yeast in a dry pan for 1-2 minutes before mixing it in. It deepens the cheesy flavor.
Storing and Reheating homemade gnocchi recipe vegan
Refrigerator Storage
Let cooked gnocchi cool completely, then toss with 1 tbsp Extra-Virgin Olive Oil to prevent sticking. Store in an airtight container at 40°F or below for up to 2 days. The texture stays best when you don’t overcrowd the container. ❄️
Freezer Storage
For uncooked gnocchi, freeze on a floured tray first for 1-2 hours, then transfer to a freezer bag. They’ll keep for 3 months without losing quality. Cook from frozen—no need to thaw, just add 1 extra minute to boiling time.
Stovetop Reheating
My preferred method: heat a skillet with 1 tbsp Extra-Virgin Olive Oil over medium heat. Add gnocchi in a single layer and cook for 2-3 minutes until crispy. This revives their texture better than microwaving.
Microwave Reheating
Place gnocchi in a microwave-safe dish with 1 tbsp water and cover with a damp paper towel. Heat on 70% power for 1-2 minutes, stirring halfway. Sprinkle with Fresh Basil after reheating to refresh the flavor.
Sauce Storage
Store leftover Tomato Sauce separately in an airtight container for up to 5 days. For longer storage, freeze for 6 months. Reheat gently in a saucepan over low heat to maintain consistency.
Nutrition Facts
Frequently Asked Questions
What can I use instead of eggs in vegan gnocchi?
Nutritional yeast and olive oil work perfectly as binders. The 2 tbsp nutritional yeast adds structure and cheesy flavor, while 2 tbsp olive oil keeps the dough tender without animal products.
Why did my gnocchi turn out gummy?
Too much moisture is the usual culprit.
Can I make these gluten-free? Yes! Swap the 2 cups all-purpose flour for a 1:1 gluten-free blend. The texture may be slightly different, but they’ll still have that pillowy softness. Test a small batch first to adjust flour amounts.
How do I know when they’re done cooking?
They’re ready when they float to the surface after 2-3 minutes in boiling water. Let them cook for an additional 30 seconds once they rise for the perfect texture.

Trained in classic French technique but raised on slow-cooked ribs and spicy rubs, she blends culinary skill with smoke and soul.
- Recipe for Boneless Pork Chops in Cast Iron Skillet: Sear and Baste to Juicy Perfection - October 3, 2026
- Recipe for Boneless Cross Rib Roast: Slow-Roasted Beef with Herb Crust - October 3, 2026
- Hamburgers in Sauce Recipe Crock Pot: Slow-Cooked Savory Delight - October 3, 2026