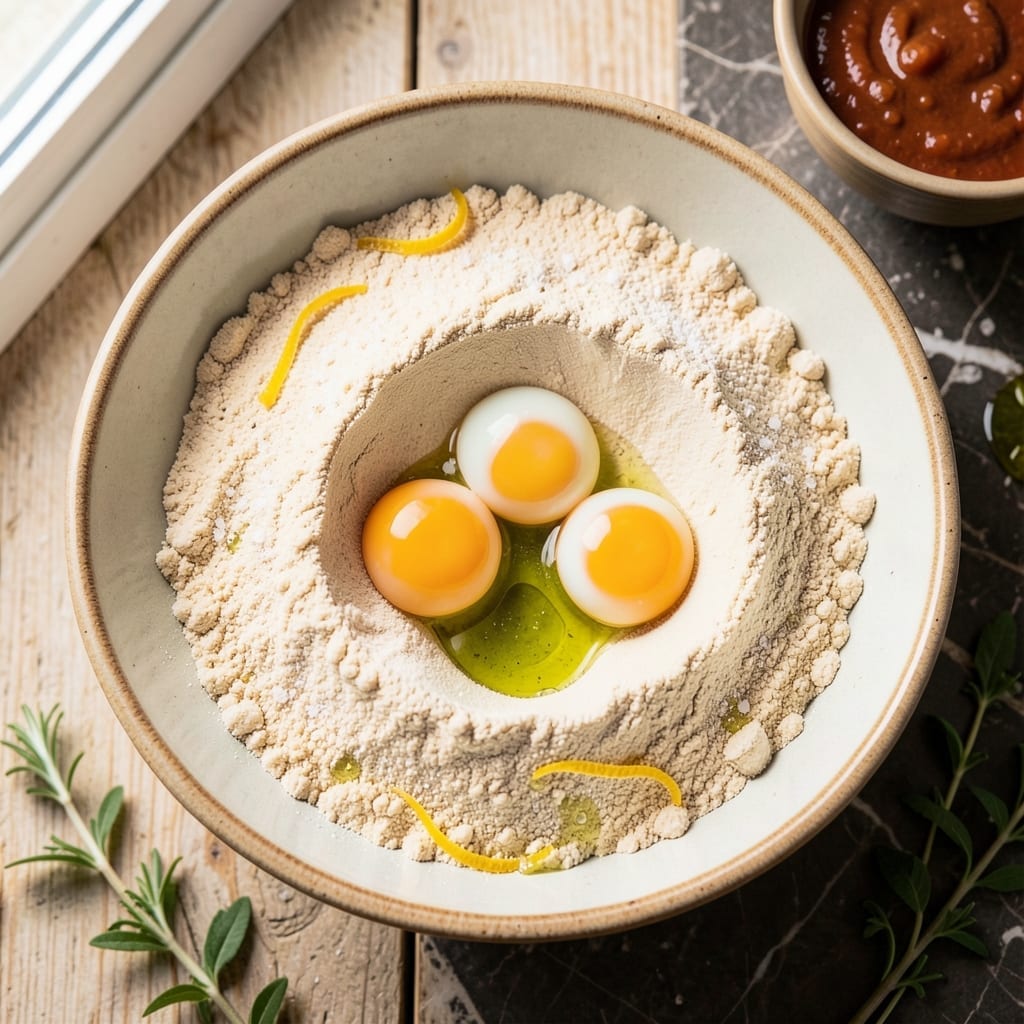
Fresh pasta dough makes all the difference when crafting homemade ravioli. This recipe delivers silky, elastic sheets that hold fillings perfectly without tearing. I developed this method after years of testing ratios and techniques.
The foundation is simple: just flour and eggs, kneaded until smooth and rested to relax the gluten. This creates dough that rolls out thin enough for delicate ravioli but strong enough to contain your favorite fillings.
What results is pasta with a tender bite and superior texture to any store-bought version. The sheets will be ready to fill and shape into beautiful ravioli that cook up perfectly every time.
Use this dough as your base for cheese, meat, or vegetable fillings. The process is straightforward and rewarding.
Ingredients for Homemade Pasta Dough Recipe for Ravioli
Six ingredients transform into silky, elastic pasta dough ready for ravioli perfection.
| Ingredient | Amount | Notes |
|---|---|---|
| All-Purpose Flour 🌾 | 2 cups | Plus extra for dusting |
| Large Eggs 🥚 | 3 whole | Room temperature preferred |
| Semolina Flour 🌾 | ½ cup | For texture and bite |
| Olive Oil 🫒 | 1 tbsp | Extra-virgin for richness |
| Salt 🧂 | ½ tsp | Fine sea salt preferred |
| Water 💧 | 1 tbsp | As needed for consistency |
[recipe_ingredient_scaler]
The flour is the foundation—all-purpose from King Arthur is my go-to, but any good brand works. Semolina adds that authentic texture you get from Italian pasta (worth hunting down at Whole Foods or a specialty store). Room temperature eggs incorporate better, so pull them out an hour before starting. Don’t skip the salt—it enhances the flavor of the dough itself.
No semolina? Replace with more all-purpose flour. Out of eggs? This isn’t a vegan recipe, so you’ll need them—but 1/4 cup beaten egg per egg works in a pinch. Olive oil can be swapped for another neutral oil, but extra-virgin adds a nice depth. The dough should feel slightly dry—resist adding too much water, or it’ll be sticky.
Fresh pasta dough keeps in the fridge for 24 hours (wrapped tightly) or freezes for 1 month. Let it come to room temperature before rolling. For best results, use it the same day—it’s a game-changer for texture.
Why You’ll Love This Recipe
- No-Fuss Dough: I mix the eggs, flours, and olive oil in one bowl—no stand mixer, no fuss, just my hands and 10 minutes of kneading.
- Rich, Toasty Depth: That semolina gives it a nutty backbone while the olive oil adds a silky finish that store-bought just can’t touch.
- Freezer Friendly: I make a double batch, shape into sheets, and freeze—so I can roll out fresh ravioli anytime without starting from scratch.
- Penny-Wise Feast: A pound of flour and a few eggs feed my whole family for what a single box of dried pasta costs. Honestly, it’s ridiculous how affordable it is.
Step-by-Step Instructions for Homemade Pasta Dough for Ravioli
Here’s my method for creating silky pasta sheets that roll out perfectly every time.
Step 1: Mix the Dry Ingredients
On a clean work surface or in a large bowl, combine the 2 cups All-Purpose Flour, 0.5 cup Semolina Flour, and 0.5 tsp Salt. I like to make a well in the center of the flour mixture—this creates a perfect nest for the wet ingredients.
Using your fingers, gently mix the flours and salt together until evenly distributed. The semolina adds a subtle texture and bite that makes your ravioli stand out. Don’t skip this mixing step; it ensures the salt is evenly dispersed throughout the dough.
Step 2: Incorporate the Wet Ingredients
Crack the 3 whole Large Eggs into the well you created. Add the 1 tbsp Olive Oil to the eggs. Using a fork, gently whisk the eggs and olive oil together until they’re fully combined and slightly frothy.
Begin incorporating the flour into the egg mixture, starting from the inner edge of the well and working your way outward. I use my fork at first, then switch to my hands once the mixture becomes too thick to stir. Keep mixing until a shaggy dough starts to form.
Step 3: Knead the Dough to Smooth Perfection
If the dough feels too dry, add the 1 tbsp Water, 1 teaspoon at a time, until it comes together. If it’s too sticky, dust with a bit of extra all-purpose flour from your work surface. Knead the dough for 8-10 minutes until it’s smooth and elastic.
You’ll know it’s ready when the dough springs back when you press it with your finger and feels slightly tacky but not sticky. This kneading process develops the gluten, which gives your pasta its structure and chew. Don’t rush this step—properly kneaded dough rolls out thin without tearing.
Step 4: Rest the Dough for Optimal Texture
Shape the dough into a ball, wrap it tightly in plastic wrap, and let it rest at room temperature for 30 minutes. This resting period allows the gluten to relax, making the dough much easier to roll out thinly.
I’ve found that dough that hasn’t rested properly tends to shrink back as you try to roll it out. During this rest, the flour also fully hydrates, resulting in a more uniform texture. After 30 minutes, your dough will be ready to roll out into those silky sheets perfect for ravioli.
Pro Tips For Making Homemade Pasta Dough Recipe For Ravioli
- Knead Until Smooth: Work the dough for at least 8-10 minutes by hand—it’ll start rough but should end up silky. I learned this the hard way after my first few batches turned out dense and chewy.
- Use Room-Temp Eggs: Pull your eggs out 30 minutes before mixing. Cold eggs make the dough fight you, and nobody wants a workout just to make ravioli.
- Skip Over-Flouring: Resist dumping extra flour on the counter—too much toughens the dough and makes the ravioli edges crack. A light dusting is all you need.
- Rest Before Rolling: Wrap the dough in plastic and let it sit for 20 minutes. My grandmother swore by this, and she was right—it relaxes the gluten so it rolls out thin without springing back.
Storing and Reheating Leftovers
Refrigerator Storage
Wrap your pasta dough tightly in plastic wrap or place it in a ziplock bag with all air pressed out. Store in the fridge at 40°F or below for up to 24 hours. This short rest actually improves the texture as the gluten relaxes further. ❄️
Freezer Storage
For longer storage, freeze the dough ball wrapped in plastic wrap and placed in a freezer bag for up to 1 month. I like to portion it into 4 equal pieces before freezing so I can thaw just what I need. Label with the date to track freshness.
Thawing Dough
Move frozen dough to the fridge 12 hours before use or leave at room temperature for 2-3 hours. Never microwave—this can activate the gluten unevenly. Once thawed, let it sit at room temperature for 30 minutes before rolling.
Reusing Scraps
If you have leftover dough scraps after cutting ravioli, gather and reroll them. Brush with a bit of water to help them stick together. Knead gently and rest for 10 minutes before rolling again—this prevents toughness.
Cooked Ravioli Storage
Cooked ravioli can be refrigerated in an airtight container with a bit of olive oil to prevent sticking for up to 3 days. Reheat by dropping in boiling water for 30-45 seconds to refresh the texture. 💡
Nutrition Facts
Frequently Asked Questions
What’s the ideal thickness for ravioli dough?
Roll the dough to about 1-2mm thick, or the thickness of a nickel. This ensures it cooks evenly and holds fillings without tearing. Use a pasta machine for consistent results.
Can I make this dough without a pasta machine?
Yes! A rolling pin works just as well. Roll the dough as thin as possible, dusting with flour to prevent sticking. It may take a little more effort, but the results are just as good.
Why did my ravioli burst while cooking?
This usually happens if the dough is too thin or not properly sealed. Ensure edges are pressed tightly and avoid overfilling. Also, cook in gently boiling water, not a rolling boil.
How do I prevent the dough from drying out?
Keep it covered with a damp towel or plastic wrap while working. If it starts to dry, lightly brush with water and let it rest for 5-10 minutes before continuing.

Trained in classic French technique but raised on slow-cooked ribs and spicy rubs, she blends culinary skill with smoke and soul.
- Recipe for Boneless Pork Chops in Cast Iron Skillet: Sear and Baste to Juicy Perfection - October 3, 2026
- Recipe for Boneless Cross Rib Roast: Slow-Roasted Beef with Herb Crust - October 3, 2026
- Hamburgers in Sauce Recipe Crock Pot: Slow-Cooked Savory Delight - October 3, 2026