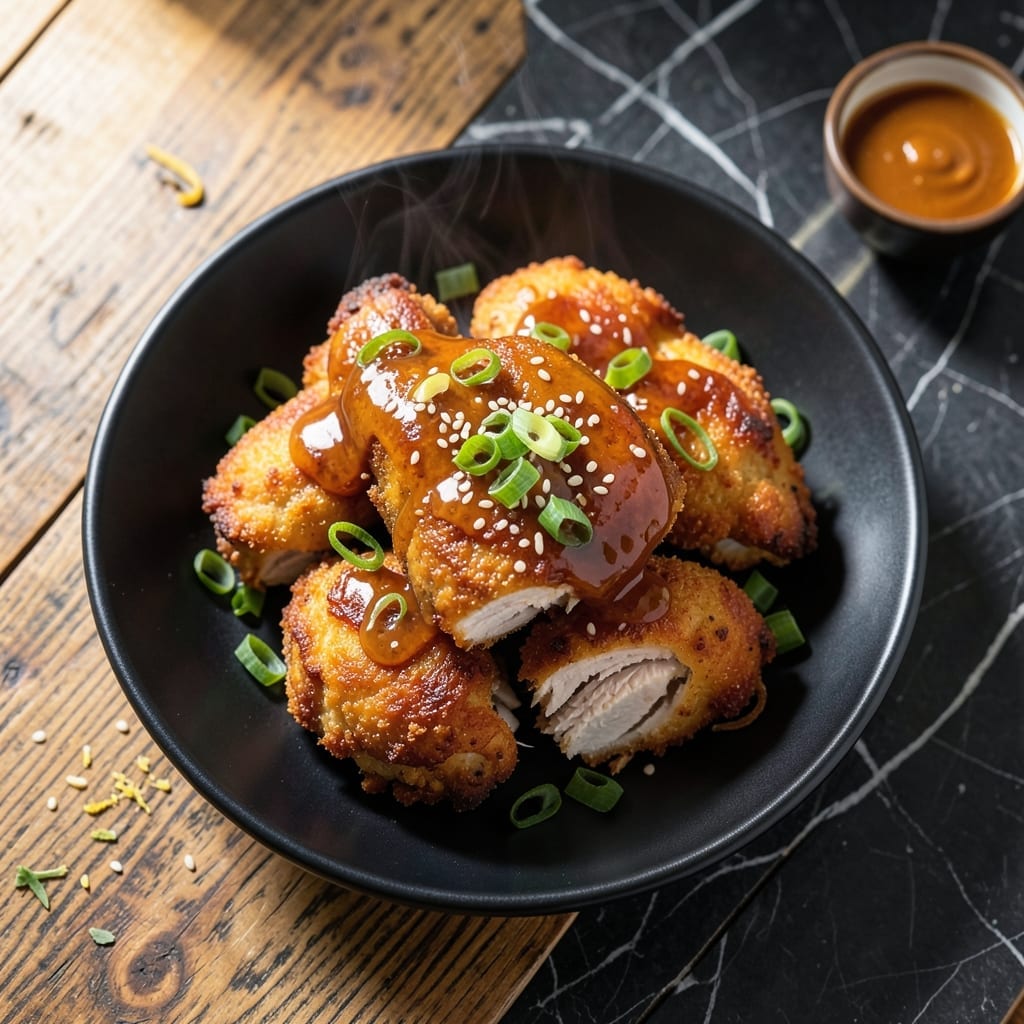
This air fryer method delivers golden crisp chicken with a sticky-sweet honey butter glaze every time. The hot air circulation creates an even, shatteringly crisp coating without the mess of deep frying.
The secret lies in double-dipping the chicken: first in seasoned flour, then in a honey butter mixture that caramelizes beautifully. This ensures each piece emerges with a perfect balance of crunch and glaze.
What sets this apart is the air fryer’s precision—20 minutes at 375°F achieves what would take much longer in an oven. The result is juicy chicken with a glossy, finger-licking finish.
Serve immediately while the glaze is still warm and sticky. This dish proves that restaurant-quality results are possible at home with minimal effort.
Ingredients for Honey Butter Chicken Recipe Air Fryer
Quality ingredients create that perfect balance of crispy coating and sweet glaze here.
| Ingredient | Amount | Notes |
|---|---|---|
| Chicken Thighs 🍗 | 1 ½ lb | Boneless, skinless, patted dry |
| All-Purpose Flour 🌾 | 1 cup | For dredging coating |
| Cornstarch 🌾 | 2 tbsp | For extra crispiness |
| Salt 🧂 | 1 tsp | Kosher or sea salt |
| Black Pepper 🌶️ | ½ tsp | Freshly ground preferred |
| Paprika 🌶️ | 1 tsp | Sweet or smoked variety |
| Garlic Powder 🧄 | 1 tsp | For savory depth |
| Onion Powder 🧅 | 1 tsp | Balances sweet glaze |
| Unsalted Butter 🧈 | 6 tbsp | For honey butter glaze |
| Honey 🍯 | ⅓ cup | Pure, liquid consistency |
| Vanilla Extract 💧 | ½ tsp | Pure extract preferred |
| Olive Oil 🫒 | 1 tbsp | For air fryer basket |
[recipe_ingredient_scaler]
The chicken thighs are key—boneless, skinless ensures even cooking and maximum crispiness. Costco or Whole Foods carry high-quality options with good marbling. For the flour, all-purpose is standard, but the cornstarch addition is non-negotiable for that shatteringly crisp texture. Always check your salt is kosher or sea salt—iodized can taste harsh in the coating.
No honey? Maple syrup or agave works at a 1:1 ratio. Butter can be salted if that’s what you have—just reduce the added salt in the seasoning. For a deeper flavor, swap regular paprika for smoked paprika. The vanilla extract might seem unusual, but it adds a subtle complexity to the glaze that’s worth it.
Cook the chicken immediately after dredging—letting it sit can make the coating soggy. Leftovers keep 3-4 days in the fridge, but the coating is best fresh. Reheat in the air fryer at 350°F for 5 minutes to restore some crispness.
Why You’ll Love This Recipe
- Set and Forget: I toss the thighs in flour and cornstarch, pop them in the air fryer, and let the machine do the work while I prep the honey butter glaze.
- Sticky Sweet Crunch: That first bite of crispy skin giving way to juicy meat coated in rich, buttery honey? Ridiculously good.
- Weeknight MVP: Between us, this is my go-to for busy Tuesdays—ready faster than takeout and way more satisfying.
- Pocket-Friendly Feast: Chicken thighs are cheap, the pantry staples do the rest, and I end up with leftovers that taste even better the next day.
Step-by-Step Instructions for Honey Butter Chicken in Air Fryer
Here’s the method that delivers crispy, golden chicken with a luscious sweet glaze every time.
Step 1: Season and Coat the Chicken Thighs
In a shallow bowl, whisk together the 1 cup All-Purpose Flour, 2 tbsp Cornstarch, 1 tsp Salt, 0.5 tsp Black Pepper, 1 tsp Paprika, 1 tsp Garlic Powder, and 1 tsp Onion Powder until evenly combined. This blend creates a coating that crisps beautifully in the air fryer.
Pat the 1.5 lb Chicken Thighs completely dry with paper towels. Dredge each piece in the flour mixture, pressing firmly to adhere on all sides. Shake off any excess—you want a thin, even layer that fries up crunchy, not a thick, gummy coating.
Step 2: Air Fry to Golden Perfection
Preheat your air fryer to 375°F for 3 minutes. Lightly brush the basket with 1 tbsp Olive Oil to prevent sticking. Arrange the coated chicken thighs in a single layer, ensuring they don’t touch—this allows hot air to circulate freely for even crisping.
Air fry for 12 minutes, then flip each piece. Cook for another 8-10 minutes until the coating is deep golden brown and the internal temperature reaches 165°F. The cornstarch in the coating will create an extra-crispy exterior that stays crunchy even after glazing.
Step 3: Prepare the Honey Butter Glaze
While the chicken cooks, melt 6 tbsp Unsalted Butter in a small saucepan over low heat. Once melted, stir in 0.33 cup Honey and 0.5 tsp Vanilla Extract. Simmer gently for 2-3 minutes, stirring occasionally, until the mixture thickens slightly and becomes glossy.
Remove from heat and let it cool for 1 minute—this prevents it from being too thin when tossed with the hot chicken. The vanilla adds a subtle depth that balances the sweetness of the honey perfectly.
Step 4: Glaze and Serve Immediately
Transfer the crispy chicken to a large bowl. Pour the warm honey butter glaze over the top and toss gently until every piece is evenly coated. The residual heat from the chicken will help the glaze cling beautifully, creating a sticky, caramelized finish.
Serve immediately while the chicken is still hot and the coating remains crisp. The contrast between the crunchy exterior and the tender, juicy interior—paired with that rich, sweet glaze—makes this dish irresistible. Any leftovers (if there are any) won’t keep their crispness, so enjoy right away.
Pro Tips For Making Honey Butter Chicken Recipe Air Fryer
- Preheat the Air Fryer: I learned this the hard way—start with the air fryer at 375°F for 5 minutes before adding the chicken. It prevents the coating from sticking and gives you that crispy crust right away.
- Pat Thighs Dry: Sounds weird, but it works: use a paper towel to dry the chicken thighs completely before dredging. The flour and cornstarch stick better, and you’ll skip the soggy coating disaster.
- Don’t Overcrowd: After burning three batches, I finally figured out that leaving space between pieces lets the hot air circulate. Crowding steams the chicken instead of frying it.
- Double-Dredge for Crisp: My grandmother swore by this, and she was right: dip the thighs in flour, shake off the excess, then repeat with cornstarch. It makes a real difference in the crunch factor.
Essential Equipment for Great honey butter chicken recipe air fryer
Air Fryer Selection
For this recipe, I recommend a 5.8-quart air fryer as the sweet spot for capacity. Brands like Ninja Foodi or Instant Vortex offer excellent hot air circulation. A larger basket prevents overcrowding, which is crucial for even crisping.
Essential Accessories
Invest in silicone-tipped tongs to flip chicken without scratching your basket. I also love parchment liners with holes—they prevent sticking while allowing air flow. These small tools make the process smoother and more efficient. 💡
Thermometer for Precision
An instant-read meat thermometer is non-negotiable for perfect results. I use the ThermoWorks ThermoPop for its accuracy and speed. Check each piece reaches 165°F internally to ensure safe, juicy chicken.
Glaze Preparation Tools
A small saucepan is ideal for melting butter and honey together. I prefer one with a heavy bottom to prevent scorching. A whisk helps emulsify the mixture smoothly for that perfect glossy finish.
Serving Essentials
Have a large mixing bowl ready for tossing the crispy chicken with glaze. I also recommend heatproof spatulas to scrape every last bit of that delicious honey butter from the pan. This ensures nothing goes to waste.
Cleanup Helpers
Keep dish soap and a non-abrasive sponge nearby for quick cleanup. The air fryer basket will be sticky after cooking. I find warm soapy water soaks off the residue easily if you start cleaning immediately after serving. 🔥
Nutrition Facts
Frequently Asked Questions
Can I use chicken breasts instead of thighs?
Yes, but adjust the time to 10-12 minutes per side at 375°F. Breasts cook faster but may be less juicy. For best results, brine them first to prevent dryness.
Why did my coating turn out soggy?
Overcrowding the basket traps steam. Always cook in a single layer with space between pieces. Also, pat the chicken completely dry before coating to prevent moisture issues.
Can I make the glaze ahead of time?
Prepare and store it in an airtight container for up to 3 days. Warm it gently before using to restore the perfect consistency for coating.
What’s the best way to reheat leftovers?
Use the air fryer at 350°F for 5 minutes to revive crispness. Microwaving will make the coating soft. Always check internal temp reaches 165°F.

Trained in classic French technique but raised on slow-cooked ribs and spicy rubs, she blends culinary skill with smoke and soul.
- Recipe for Boneless Pork Chops in Cast Iron Skillet: Sear and Baste to Juicy Perfection - October 3, 2026
- Recipe for Boneless Cross Rib Roast: Slow-Roasted Beef with Herb Crust - October 3, 2026
- Hamburgers in Sauce Recipe Crock Pot: Slow-Cooked Savory Delight - October 3, 2026