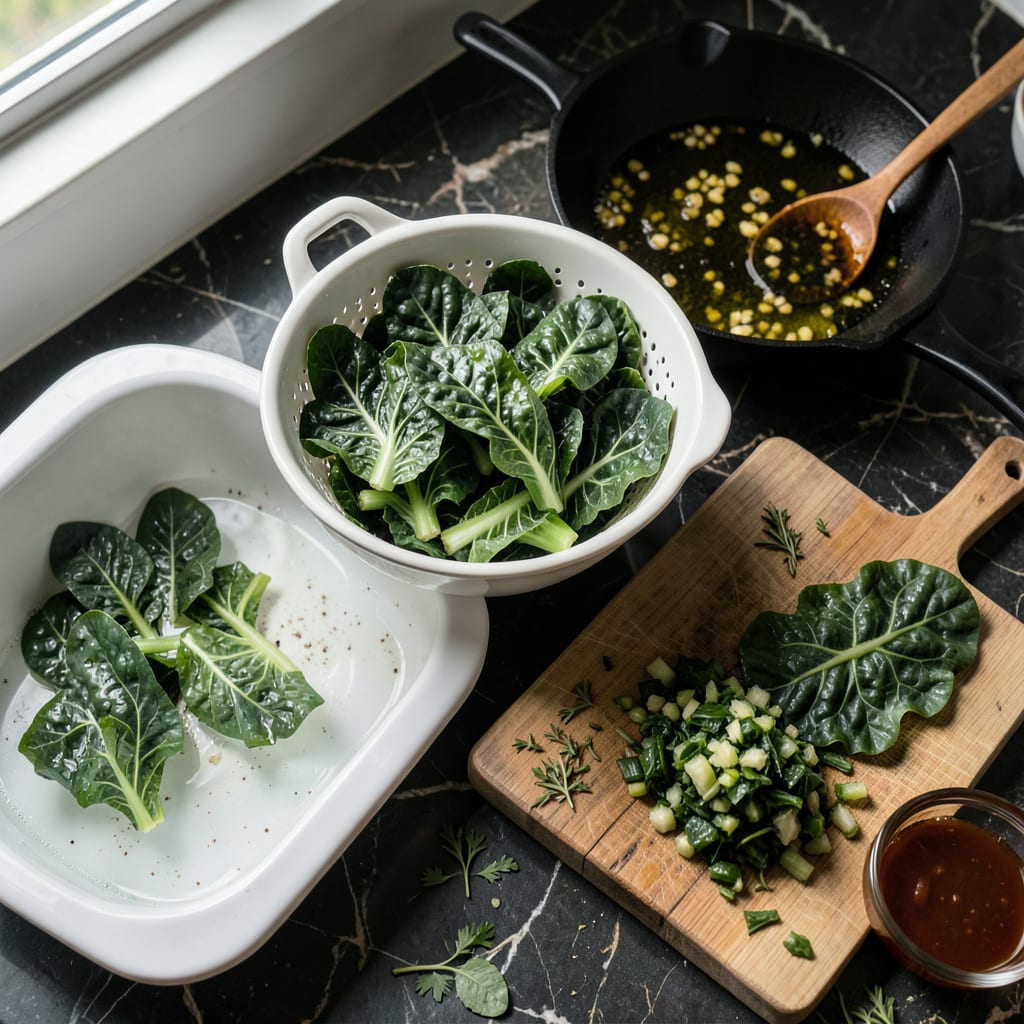
Let me tell you, cleaning and cooking collard greens the right way transforms them from tough leaves to tender, flavorful bites. I grew up watching my grandma wash each leaf individually in her farmhouse sink, and that attention to detail makes all the difference. The secret is in the prep—removing those thick stems and giving them a proper soak to get rid of any hidden grit.
Now, cooking these greens low and slow is where the magic happens. We’re talking about simmering them with aromatics until they’re so soft they practically melt in your mouth. I like to start with a base of onions, garlic, and just a splash of vinegar for brightness. The whole house will smell amazing while they cook down into Southern-style perfection.
Here’s the thing—this recipe works beautifully whether you keep it vegan or add a smoky ham hock for extra depth. I’ve made it both ways more times than I can count, and either version delivers that rich, comforting flavor we all crave. The greens absorb all those savory notes while keeping their vibrant color and that signature tender texture.
By the time you’re done, you’ll have a pot of greens that pairs perfectly with cornbread or over rice. This is the kind of dish that feels like a warm hug on a plate, and it’s ready in just 45 minutes. Let’s get those greens cleaned and cooking the right way.
📚 In This Guide
- What You’ll Need
- Instructions
- Tips and Common Mistakes
What Youll Need
- ● Fresh collard greens: 1 large bunch (about 1–1.5 lbs) – look for crisp, vibrant leaves.
- ● Water: 4–6 cups (for cleaning and blanching).
- ● Salt: 1–2 tbsp (for seasoning water and cooking; kosher or sea salt preferred).
- ● Vinegar: ¼ cup (white or apple cider vinegar for cleaning).
- ● Cooking fat: 2 tbsp (bacon grease, olive oil, or butter for flavor).
- ○ Aromatics: ½ onion (diced), 2–3 garlic cloves (minced), and 1 smoked ham hock or turkey neck (optional but recommended).
- ○ Broth: 2 cups (chicken, vegetable, or water for simmering).li> Seasonings: ½ tsp black pepper, ½ tsp red pepper flakes (optional for heat).
- ● Large colander or salad spinner.
- ● Sharp chef’s knife and cutting board.
- ● Large pot or Dutch oven (5–6 quart capacity).
- ● Wooden spoon or tongs.
- ○ Optional: Instant-read thermometer (to check doneness).
Step-by-Step Instructions for Cleaning and Cooking Collard Greens
Let me walk you through the process that transforms tough greens into melt-in-your-mouth Southern perfection.
Wash the Greens Thoroughly
Fill your kitchen sink or a large bowl with cool water. Submerge the collard greens completely and let them soak for 5 minutes. This first soak loosens any dirt or grit that’s clinging to the leaves.
Lift the greens out of the water (don’t pour them through a colander) and discard the dirty water. Repeat this process 2-3 times until the water remains clear after soaking. I’ve found that collards often need that third soak to remove all the hidden grit.
After the final soak, transfer the greens to a colander and rinse under cool running water. Shake off excess water and spread them on clean kitchen towels to air dry slightly while you prepare your cooking station.
Remove Stems and Chop the Leaves
Lay each collard leaf flat on your cutting board with the stem side facing up. Using a sharp chef’s knife, cut along both sides of the thick center stem to remove it completely. This step is crucial because those stems stay tough even after long cooking.
Stack 4-5 stemless leaves together, roll them tightly like a cigar, and slice crosswise into 1-inch wide ribbons. I prefer this method over chopping because it creates uniform pieces that cook evenly. Don’t worry about perfection—the rustic look is part of the charm.
As you chop, transfer the greens to a large bowl. You’ll notice the volume seems enormous, but collards cook down dramatically. For 4 servings, you’ll need about 2 large bunches of fresh collards to yield enough cooked greens.
Sauté Aromatics for Flavor Foundation
Heat a large pot or Dutch oven over medium heat. Add 2 tablespoons of bacon fat or vegetable oil and let it shimmer. Then add 1 diced onion and cook for 5 minutes until translucent and beginning to soften.
Stir in 3 minced garlic cloves and 1 teaspoon of red pepper flakes (adjust to your heat preference). Cook for 1 minute just until the garlic becomes fragrant—don’t let it brown or it will turn bitter. This aromatic base infuses the greens with incredible depth of flavor.
If you’re using smoked meat like ham hocks or turkey wings, add them now and let them brown slightly for 2-3 minutes. The rendered fat and caramelized bits will enhance the final dish tremendously.
Cook the Greens to Perfect Tenderness
Add the chopped collards to the pot in batches, stirring after each addition to wilt them down. Once all greens are in the pot, pour in 4 cups of chicken broth or water. The liquid should just cover the greens—add a little more if needed.
Bring the mixture to a boil, then reduce heat to low and cover. Simmer for 45-60 minutes, stirring occasionally, until the greens are fork-tender and the liquid has reduced by about half. You’ll know they’re done when the leaves are silky and the stems (if any remain) are easily pierced.
Taste and adjust seasoning with salt and black pepper. I like to finish with a splash of apple cider vinegar—about 1 tablespoon—to brighten all the rich flavors. The vinegar cuts through the fat and makes the greens taste even more vibrant.
Serve with Potlikker
Use a slotted spoon to transfer the greens to a serving bowl, but don’t discard that precious potlikker! This flavorful broth is the soul of Southern collard greens. Serve it alongside the greens for soaking into cornbread or spooning over rice.
For the best texture, let the greens rest for 5-10 minutes before serving. This allows them to absorb any remaining liquid and reach that perfect balance between tender and slightly toothsome. The greens should hold their shape but yield easily to your fork.
These collards taste even better the next day as the flavors meld. Store leftovers in the refrigerator for up to 5 days, and reheat gently with a splash of broth to maintain that perfect tenderness you worked so hard to achieve.
Tips and Common Mistakes
After years of cooking collards, I’ve learned these key details that make all the difference between good greens and extraordinary ones.
The Washing Secret: Don’t rush the soaking process in Step 1. That initial 5-minute soak is crucial for loosening grit that’s been clinging to the leaves since harvest. I always do the full 2-3 soaks until the water stays clear—this prevents that unpleasant gritty texture in your final dish. The third soak often reveals surprising amounts of hidden dirt.
Stem Removal Technique: In Step 2, take your time removing those tough stems. I fold each leaf in half lengthwise and make one clean cut along the stem—this is faster than cutting both sides separately. The stems won’t soften no matter how long you cook them, so thorough removal ensures every bite is perfectly tender.
Low and Slow Matters: During the 45-60 minute simmer in Step 4, resist the urge to crank up the heat. That low setting is what transforms the fibrous leaves into silky ribbons. Stir occasionally and check tenderness with a fork—they should yield easily but still hold their shape. The liquid reduction is just as important as the greens themselves.
Potlikker Preservation: When serving in Step 5, don’t discard that flavorful broth! I always serve it alongside the greens in small bowls for dipping cornbread or spooning over rice. The potlikker carries all the smoky, savory essence of the dish and is considered the soul of Southern collard greens.
Pro Tips for Clean And Cook Collard Greens
- After years of cooking collards, I’ve learned these key details that make all the difference between good greens and …
- The Washing Secret: Don’t rush the soaking process in Step 1. That initial 5-minute soak is crucial for loosening gri…
- Stem Removal Technique: In Step 2, take your time removing those tough stems. I fold each leaf in half lengthwise and…
Frequently Asked Questions
How long do collard greens take to cook until tender?
Collard greens typically need 45–60 minutes of simmering for that melt-in-your-mouth tenderness. Start checking at 40 minutes—stir occasionally and test with a fork. If they’re still tough, extend cooking by 10-minute increments. Pro tip: Older, larger leaves take longer than young, tender ones!
Can I use bacon grease or oil instead of ham hocks?
Swap ham hocks for 2 tbsp bacon grease, smoked turkey wings, or olive oil for a lighter twist. Bacon grease adds smoky richness, while olive oil keeps it vegan-friendly. Adjust salt to taste—ham hocks are salty, so you may need to add a pinch extra with alternatives.
Why are my collard greens bitter? How do I fix it?
Bitterness comes from undercooking or older leaves. Simmer longer (up to 90 minutes) to mellow flavors, or add a pinch of sugar/baking soda (⅛ tsp) to balance. Choose younger, brighter green leaves next time—they’re naturally sweeter!
Do I have to blanch collard greens before cooking?
Nope! Blanch only if you prefer extra-tender greens or plan to freeze them. For stovetop cooking, a thorough wash and chop is enough. Blanching (2–3 minutes in boiling water) can cut simmering time by ~15 minutes but isn’t required for most recipes.
What’s the best substitute for collard greens?
Try kale, mustard greens, or turnip greens—they’re close cousins! Kale needs less cooking (30–40 minutes), while mustard greens add a peppery kick. Adjust seasoning accordingly, as flavor profiles vary slightly.
Now you’ve got the know-how to turn tough collard greens into a tender, flavorful Southern masterpiece in under an hour! 🎉 From thorough cleaning to slow-cooked perfection, the secret lies in patience and a little love—just like Grandma’s recipe. Whether you’re serving them as a hearty side or a star dish, these greens are sure to impress.
Ready to dig in? Grab a fork and enjoy your soulful creation, or try experimenting with spices like smoked paprika or a splash of apple cider vinegar for extra zing. Your next batch could be even better!

Trained in classic French technique but raised on slow-cooked ribs and spicy rubs, she blends culinary skill with smoke and soul.
- Recipe for Boneless Pork Chops in Cast Iron Skillet: Sear and Baste to Juicy Perfection - October 3, 2026
- Recipe for Boneless Cross Rib Roast: Slow-Roasted Beef with Herb Crust - October 3, 2026
- Hamburgers in Sauce Recipe Crock Pot: Slow-Cooked Savory Delight - October 3, 2026