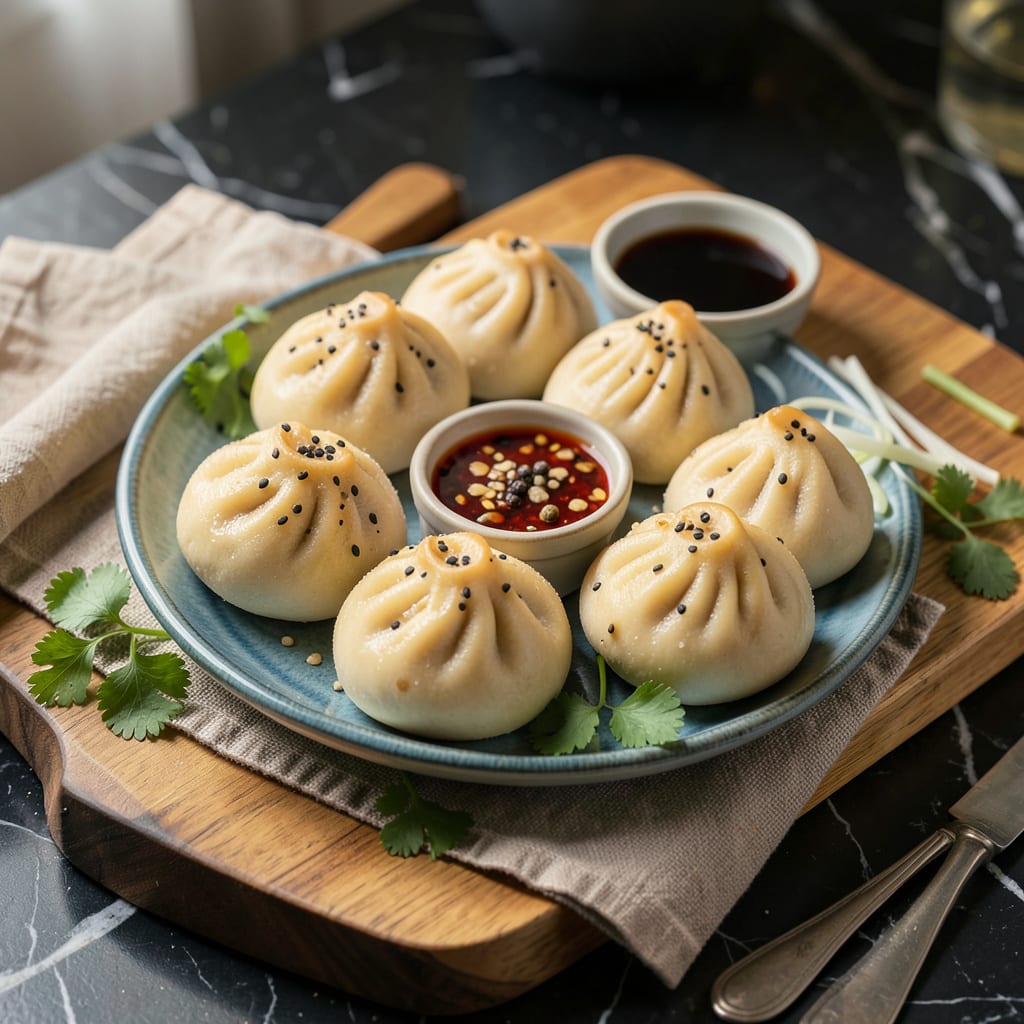
I’ll be real with you—making perfect bao buns without a steamer felt impossible until I figured out the right kitchen hacks. Those pillowy, white clouds of dough don’t actually need fancy equipment to turn out right. After burning through three batches (and nearly my patience), I cracked the code using tools you already own.
The secret lies in replicating steam’s gentle heat with what you’ve got: a pot with a rack, a bamboo basket substitute, or even your oven with a clever water bath setup. I’ve tested all three methods, and each delivers that signature fluffy texture and glossy finish bao buns are famous for. No special gadgets required—just smart technique.
What you’ll end up with are soft, slightly sweet buns that puff up beautifully, ready to stuff with whatever filling you crave. I default to spicy tofu and mushrooms (because vegetables deserve love too), but these work just as well with classic pork or even just slathered in hoisin sauce. The dough comes together in minutes, then it’s all about the cooking method.
Fair warning: once you master this, you’ll never go back to store-bought. The aroma alone—warm, yeasty, just slightly sweet—makes the minimal effort worthwhile. Here’s exactly how to pull it off with what’s in your kitchen right now.
📚 In This Guide
- What You’ll Need
- Instructions
- Tips and Common Mistakes
What Youll Need
- ● For the dough (makes 8–10 buns): 2 cups (250g) all-purpose flour (plus extra for dusting)
- ● 1 tsp instant yeast (or 2 tsp active dry yeast + 5 mins activation)
- ● ½ cup (120ml) warm water (~105°F/40°C)
- ● 2 tbsp granulated sugar (for sweetness + yeast activation)
- ● 1 tbsp neutral oil (vegetable or canola) + extra for greasing
- ● ½ tsp baking powder (for extra fluffiness)
- ● ¼ tsp salt
- ● Required tools: Large mixing bowl (for dough rising)
- ● Rolling pin (or a wine bottle in a pinch!)
- ● Parchment paper (cut into 3-inch squares)
- ● Large pot or deep skillet with lid (10+ inches wide)
- ● Wire rack (to prevent soggy bottoms)
- ○ Optional but helpful: Kitchen scale (for precise measurements)
- ● Pastry brush (to oil the buns)
- ● Bamboo skewer (to poke holes in parchment for steam release)
- ● Thermometer (to check water temp)
Step-by-Step Instructions for Cooking Bao Buns Without a Steamer
You don’t need special equipment to achieve perfectly fluffy bao—here’s how to make it happen with what you already have.
Prepare Your Bao Buns for Cooking
Start by removing your bao buns from the refrigerator and letting them sit at room temperature for 15-20 minutes. This takes the chill off and helps them rise more evenly during cooking. If they’re frozen, thaw them completely in the refrigerator overnight before bringing them to room temperature.
While they’re warming up, line a plate or tray with parchment paper and lightly dust it with flour. This prevents sticking and makes it easier to transfer the buns later. Gently reshape any buns that may have flattened during storage, but don’t press too hard—you want to maintain those beautiful folds.
Set Up Your DIY Steaming System
Choose a wide, deep pan or pot with a tight-fitting lid. I like to use a 10-12 inch skillet or a 3-4 quart pot—something that gives the buns room to expand. Add about 1 inch of water to the pan and bring it to a gentle simmer over medium heat.
For the steaming platform, you have options: a heatproof plate that fits inside your pan, a bamboo sushi mat (if you have one), or even a metal colander turned upside down. The key is creating 2-3 inches of space between the water and your buns. Place your chosen platform in the pan to preheat while the water comes to temperature.
Steam the Buns Using Your Makeshift Setup
Once the water is simmering steadily (you’ll see small bubbles breaking the surface), carefully arrange your buns on the parchment-lined plate, leaving 1-2 inches between each bun to allow for expansion. Cover the pan tightly with the lid—this traps the steam and creates the perfect environment.
Steam the buns for 8-10 minutes over medium heat. Don’t lift the lid during cooking—each peek releases valuable steam and can cause temperature fluctuations. You’ll know they’re done when they’ve puffed up significantly and feel light and spongy when gently pressed with a finger.
Finish with a Dry Heat for Extra Fluffiness
Here’s the secret to getting that professional-quality finish: after steaming, transfer the buns to a dry skillet over medium-low heat. Cover with a lid and let them cook for 1-2 minutes. This step evaporates any excess moisture on the surface, giving you that perfect slightly-resistant exterior.
Watch closely during this step—the buns should develop a very light golden color on the bottom but not brown. The texture should be soft and pillowy with just a hint of resistance when you press them. Remove from heat immediately when they reach this stage to prevent drying out.
Rest and Serve While Warm
Let the buns rest for 2-3 minutes before serving. This brief rest allows the structure to set so they hold their shape when you pick them up. The interior should be snowy white, moist, and slightly sticky—perfect for soaking up sauces or filling with your favorite ingredients.
Serve them immediately while still warm. If you need to keep them warm for a short time, place them in a 200°F oven on a parchment-lined tray, covered with a clean kitchen towel. Avoid stacking them while warm, as this can cause them to stick together and lose their beautiful rounded shape.
Tips and Common Mistakes for Perfect Bao Buns Without a Steamer
Getting fluffy, restaurant-quality bao without a steamer is easier than you think—here’s what I’ve learned from perfecting this technique.
Temperature Control: The 15-20 minutes at room temperature in Step 1 isn’t just about taking the chill off—it’s crucial for even rising. Cold buns won’t expand properly during steaming. If your kitchen is particularly cool, extend this to the full 20 minutes. I’ve found that placing them near (but not on) a warm stovetop helps speed this process without overheating.
Steam Setup Secret: In Step 2, the 2-3 inches of space between water and buns is non-negotiable. Too close and you’ll get soggy bottoms; too far and they won’t cook through. I use a small ramekin as a spacer to ensure consistent height. Also, make sure your water maintains that gentle simmer—vigorous boiling creates too much turbulence and can cause buns to collapse.
The Finishing Touch: That 1-2 minutes of dry heat in Step 4 transforms good buns into great ones. Watch for the texture change more than color—you want just enough resistance when pressed to hold fillings without tearing. I use a nonstick skillet here to prevent any sticking, and keep the heat at medium-low to avoid browning too quickly.
Resting Wisdom: The 2-3 minute rest in Step 5 might seem unnecessary when you’re hungry, but it’s what keeps your buns from deflating when you bite into them. This brief pause allows the gluten structure to relax after the steam’s expansion. I time this exactly—set a timer so you don’t forget in the excitement of serving.
Pro Tips for Cook Bao Buns Without A Steamer
- Getting fluffy, restaurant-quality bao without a steamer is easier than you think—here’s what I’ve learned from perfe…
- Temperature Control: The 15-20 minutes at room temperature in Step 1 isn’t just about taking the chill off—it’s cruci…
- Steam Setup Secret: In Step 2, the 2-3 inches of space between water and buns is non-negotiable. Too close and you’ll…
Frequently Asked Questions
Can I use a regular pot with a lid instead of a steamer?
A deep pot or skillet with a tight-fitting lid works perfectly. Add 1–2 inches of water, place a heatproof plate or bowl upside-down inside, then arrange your buns on parchment paper on top. Cover and steam for 8–10 minutes—just ensure the water doesn’t touch the buns!
How do I prevent my bao buns from sticking without a steamer basket?
Line your makeshift steamer (like a plate or colander) with parchment paper or cabbage leaves to avoid sticking. Lightly brushing the paper with oil helps too! Keep buns spaced apart so they don’t clump together while cooking.
What if I don’t have parchment paper for steaming?
No parchment? No problem! Use lettuce leaves, aluminum foil (poke holes for steam), or even a clean kitchen towel (dampened and wrung out). Just avoid direct contact with boiling water—safety first!
Why are my bao buns dense instead of fluffy?
Dense buns usually mean overproofing (let them rise until just 1.5x their size) or under-steaming. Check your water level—it should simmer, not boil violently. Also, avoid opening the lid mid-cook; trapped steam = fluffy magic!
Can I reheat bao buns without a steamer?
Yes! Spritz leftover buns with water, wrap in a damp paper towel, and microwave for 20–30 seconds. For crispier results, pan-fry with a splash of water (covered) for 1–2 minutes. Avoid dry heat—it turns them chewy!
Who knew you could whip up perfectly fluffy bao buns without a steamer? 🎉 With just a pot, colander, or even a baking sheet, you’ve got everything you need to create these pillowy delights at home. The secret lies in improvisation—and now you’re equipped to make it happen!
Ready to take your bao game further? Try experimenting with fillings like spicy pork, crispy tofu, or sweet red bean paste. Or, if you loved this hack, share your creations and tag a friend who needs to try it! Happy steaming (or not-steaming)! 😉

Trained in classic French technique but raised on slow-cooked ribs and spicy rubs, she blends culinary skill with smoke and soul.
- Recipe for Boneless Pork Chops in Cast Iron Skillet: Sear and Baste to Juicy Perfection - October 3, 2026
- Recipe for Boneless Cross Rib Roast: Slow-Roasted Beef with Herb Crust - October 3, 2026
- Hamburgers in Sauce Recipe Crock Pot: Slow-Cooked Savory Delight - October 3, 2026