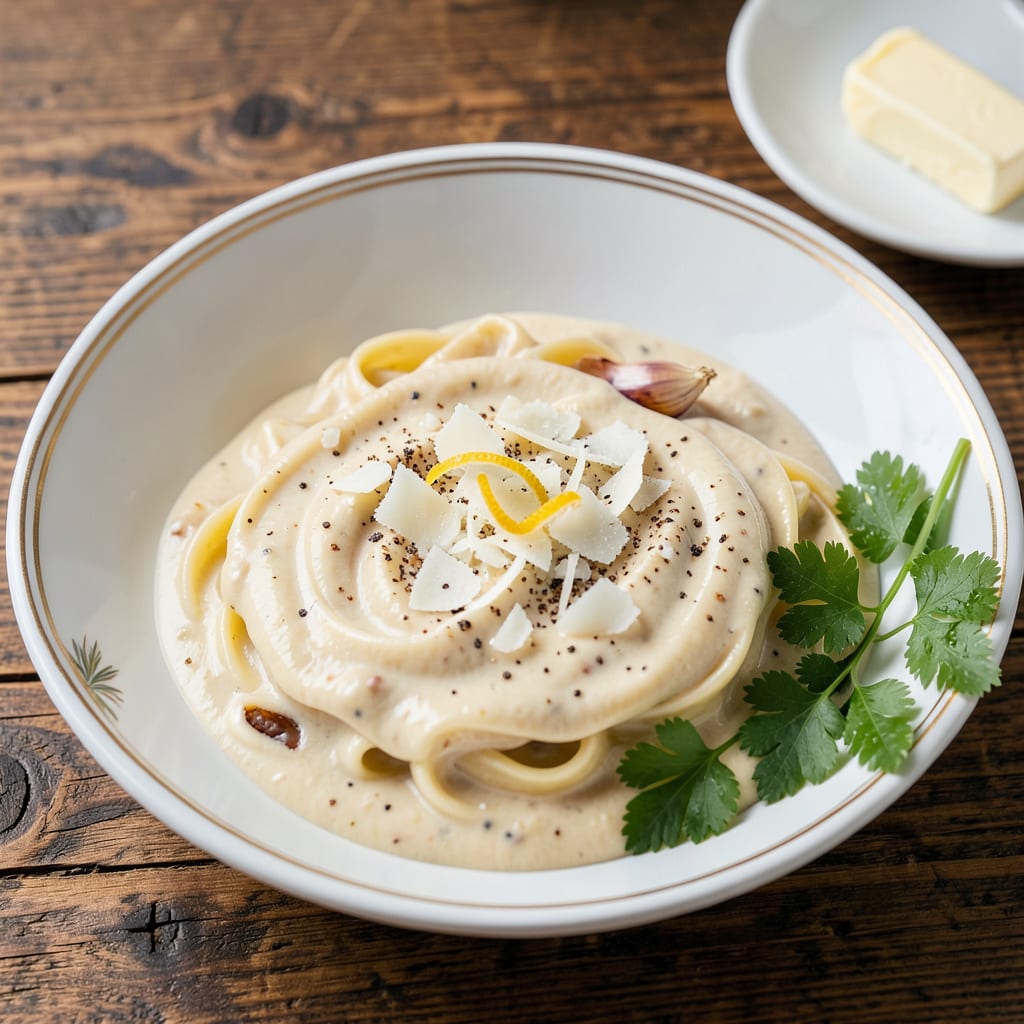
Creating authentic Classico Alfredo sauce at home requires just three fundamental ingredients and precise technique. This isn’t the heavy, glue-like sauce many restaurants serve—it’s the original Roman preparation where emulsification creates a silky, velvety texture that clings perfectly to pasta. The foundation rests on the proper ratio of butter to cream to cheese, with Parmigiano-Reggiano being non-negotiable for authentic flavor.
The process begins with gentle heat and constant motion, allowing the butter and cream to form a stable base before incorporating the cheese. Temperature control is critical—too hot and the sauce will separate, too cool and it won’t achieve that signature creamy consistency. Traditional methods skip garlic entirely, relying solely on the richness of dairy and cheese, though modern variations often include a single clove for depth.
What emerges is a sauce of remarkable simplicity yet profound flavor—a pale ivory creation with just enough body to coat pasta without overwhelming it. The texture should be smooth enough to pour but substantial enough to leave a light trail on the back of a spoon. When executed properly, this sauce transforms basic fettuccine into a restaurant-quality dish in under 15 minutes.
While vegetarian by nature, this sauce adapts easily to dietary needs. For vegan versions, cashew cream replaces dairy and nutritional yeast stands in for cheese, though the flavor profile shifts noticeably. The classic version, however, remains unmatched in its ability to elevate simple pasta into something extraordinary through nothing more than technique and quality ingredients.
📚 In This Guide
- What You’ll Need
- Instructions
- Tips and Common Mistakes
What Youll Need
- ● Ingredients (Serves 4): 1 cup (2 sticks) unsalted butter 🧈 – cold, cubed
- ● 2 cups heavy whipping cream (36% fat) – chilled
- ● 1½ cups freshly grated Parmigiano-Reggiano 🧀 – finely grated, no pre-shredded!
- ○ ½ cup freshly grated Pecorino Romano – optional, for extra tang
- ● 4 garlic cloves – minced (or 1 tsp garlic powder for mild flavor)
- ● ½ tsp freshly cracked black pepper ⚫ – plus extra for garnish
- ○ ¼ tsp ground nutmeg – optional, for warmth
- ● ½ tsp kosher salt – adjust to taste
- ● ½ cup reserved pasta water – for adjusting consistency
- ● Tools: Large, heavy-bottomed skillet (10–12″) – stainless steel or enamel preferred
- ● Whisk or wooden spoon – for constant stirring
- ● Microplane or fine grater – for cheese
- ● Measuring cups/spoons
- ○ Thermometer (optional) – to monitor heat (ideal: 160–180°F)
- ● Prerequisites: Cook 1 lb of fettuccine, penne, or your favorite pasta to al dente – save ½ cup pasta water!
- ● Pre-grate cheeses (they melt smoother when fresh).
- ● Chill cream and butter for 30+ mins before starting.
Instructions
Mastering this classic sauce requires precision timing and proper technique for that signature velvety texture.
Prepare Your Ingredients and Equipment
Gather heavy cream, unsalted butter, freshly grated Parmigiano-Reggiano, garlic, salt, and freshly ground black pepper. Use a heavy-bottomed saucepan to prevent scorching, and have a whisk ready for constant stirring. The quality of your cheese matters—avoid pre-grated varieties, as they contain anti-caking agents that prevent smooth melting.
Measure all ingredients before starting. I recommend using 1 cup heavy cream, ½ cup butter, 1½ cups freshly grated Parmigiano-Reggiano, 2 cloves minced garlic, and seasoning to taste. Cold ingredients straight from the fridge will incorporate more smoothly than room-temperature components.
Infuse the Cream with Garlic
In your saucepan, melt ½ cup butter over medium-low heat until it begins to foam but doesn’t brown. Add the minced garlic and cook for 1-2 minutes until fragrant but not colored. The goal is to extract the garlic’s aroma without developing bitterness.
Pour in the 1 cup heavy cream and increase heat to medium. Bring the mixture to a gentle simmer, watching for small bubbles forming around the edges of the pan. This infusion step builds the flavor foundation while heating the cream gradually to prevent curdling when cheese is added.
Create the Emulsion
Reduce heat to low and begin whisking in the 1½ cups Parmigiano-Reggiano gradually, about ¼ cup at a time. Each addition should be fully incorporated before adding more. The sauce will thicken noticeably as the cheese melts and the emulsion forms.
Maintain constant motion with your whisk, moving it in small circles across the entire bottom of the pan. Watch for the sauce to reach a smooth, velvety consistency that coats the back of a spoon. If the mixture becomes too thick, thin it with 1-2 tablespoons of the pasta cooking water.
Season and Finish
Taste the sauce and season with salt and freshly ground black pepper to your preference. Remember that Parmigiano-Reggiano is naturally salty, so add salt judiciously. The sauce should have a balanced richness without being overly heavy.
Remove from heat immediately once the desired consistency is achieved. Overcooking at this stage risks breaking the emulsion. For immediate use, toss with freshly cooked pasta. For later use, press plastic wrap directly onto the surface to prevent a skin from forming.
Serve with Proper Technique
For restaurant-quality presentation, toss the sauce with al dente pasta in the saucepan over low heat for 1-2 minutes. This allows the pasta to absorb some sauce while maintaining the proper texture. Add a splash of pasta water if needed to achieve the perfect coating consistency.
Garnish with additional grated Parmigiano-Reggiano and a crack of black pepper. Serve immediately while the sauce is still creamy and glossy. The sauce should cling to each strand of pasta without pooling at the bottom of the plate.
Tips and Common Mistakes
Achieving that perfect velvety texture requires attention to detail and understanding the science behind each step.
Heat Control: The medium-low heat in Step 2 is critical for infusing the garlic flavor without burning. When you see the butter begin to foam after about 30 seconds, that’s your cue to add the garlic. Keep the heat steady—too high and the garlic will bitter; too low and you won’t extract enough flavor during those 1-2 minutes. I recommend using a heavy-bottomed pan to maintain even heat distribution throughout the process.
Cheese Incorporation Technique: In Step 3, adding the 1½ cups Parmigiano-Reggiano gradually—¼ cup at a time—prevents clumping and ensures a smooth emulsion. Each addition should be fully melted before adding more. I’ve found that maintaining low heat and using a flat whisk creates the silkiest texture. If you rush this step, you risk breaking the emulsion and ending up with a grainy sauce.
Consistency Management: The sauce should coat the back of a spoon but still flow smoothly. If it becomes too thick during Step 3, use the 1-2 tablespoons of pasta water mentioned in the instructions—this is your secret weapon for adjusting texture without diluting flavor. Remember, the sauce will thicken slightly as it cools, so aim for a consistency that’s just slightly looser than your final goal when you remove it from heat.
Serving Precision: When tossing with pasta in Step 5, those 1-2 minutes over low heat make all the difference. This brief cooking time allows the pasta to absorb just enough sauce while maintaining its al dente texture. Use tongs to lift and turn the pasta rather than stirring, which helps distribute the sauce evenly without breaking the noodles. The sauce should glisten on each strand without pooling in the bottom of the pan.
Pro Tips for Cook Classico Alfredo Sauce
- Achieving that perfect velvety texture requires attention to detail and understanding the science behind each step.
- Heat Control: The medium-low heat in Step 2 is critical for infusing the garlic flavor without burning. When you see …
- Cheese Incorporation Technique: In Step 3, adding the 1½ cups Parmigiano-Reggiano gradually—¼ cup at a time—prevents …
Frequently Asked Questions
Can I use milk instead of heavy cream for Classico Alfredo sauce?
While you can substitute milk, the sauce won’t be as rich or creamy. For a lighter version, use half milk and half cream or add 1 tbsp of cornstarch to thicken milk-based sauce. Heavy cream (or half-and-half) gives that classic velvety texture!
How do I fix Alfredo sauce if it’s too thin or runny?
No stress! Simmer it uncovered for 2-3 minutes to reduce. If still thin, whisk in 1-2 tbsp grated Parmesan or a cornstarch slurry (1 tsp cornstarch + 1 tbsp cold water). Avoid boiling—it can cause curdling!
What’s the best cheese for authentic Alfredo sauce?
Freshly grated Parmigiano-Reggiano is the gold standard—it melts smoothly and adds nutty depth. Avoid pre-shredded cheese (it contains anti-caking agents that make sauce grainy). Pecorino Romano works too for a sharper flavor!
How long does homemade Alfredo sauce last in the fridge?
Store it in an airtight container for 3-4 days. Reheat gently on low heat with a splash of cream or milk, stirring constantly to prevent separation. Don’t freeze—it can split or become grainy!
Can I make Alfredo sauce ahead of time for a party?
Prepare it up to 2 days ahead, but keep it warm in a slow cooker on “low” or a double boiler. If it thickens, thin with warm pasta water (1-2 tbsp at a time) before serving. Pro tip: Cook pasta fresh—sauce clings best!
Now you’ve got the secret to rich, velvety Classico Alfredo sauce—just like your favorite Italian restaurant, but made in your own kitchen! 🎉 With just a few simple ingredients and a little patience, you can turn any pasta night into a gourmet experience. Whether you’re whipping it up for a weeknight dinner or impressing guests, this sauce is your new go-to.
Ready to take it further? Pair it with fettuccine, drizzle it over grilled chicken, or even use it as a dip for garlic bread—the possibilities are endless! Grab your whisk and start cooking—your creamy, dreamy Alfredo adventure begins now. 🍝✨

Trained in classic French technique but raised on slow-cooked ribs and spicy rubs, she blends culinary skill with smoke and soul.
- Recipe for Boneless Pork Chops in Cast Iron Skillet: Sear and Baste to Juicy Perfection - October 3, 2026
- Recipe for Boneless Cross Rib Roast: Slow-Roasted Beef with Herb Crust - October 3, 2026
- Hamburgers in Sauce Recipe Crock Pot: Slow-Cooked Savory Delight - October 3, 2026