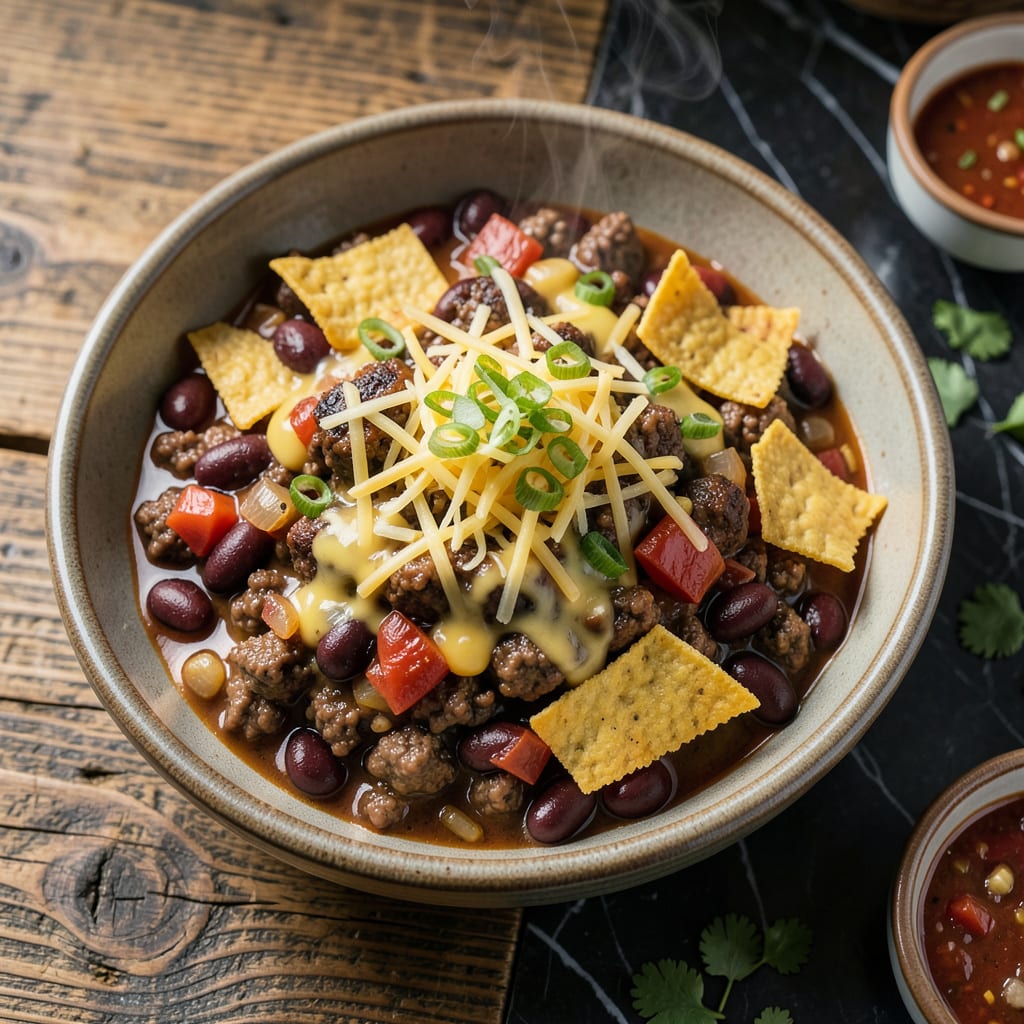
Let me be real with you—canned chili doesn’t have to taste like a last-minute compromise. I’ve turned more cans of Hormel into something worth bragging about than I can count, and it takes less than 15 minutes. The secret? Treating that can as your flavor foundation, not the final product.
Here’s the thing—most people just heat and eat, missing the chance to add real depth. A splash of beef broth, some diced onions sautéed until golden, and a shake of smoked paprika transform that basic chili into something rich and complex. I always keep these upgrades simple because, honestly, who has time for complicated?
What you end up with is chili that tastes like it simmered all day: heartier texture, deeper flavor, and that homemade feel. The toppings matter too—sharp cheddar, fresh jalapeños, and crushed tortilla chips add crunch and brightness that balance the richness. It’s the kind of upgrade that makes people ask for seconds.
Perfect for game day, weeknight dinners, or when you need comfort food fast. No fancy skills required—just smart tweaks that deliver big results. Let’s get that chili working harder for you.
📚 In This Guide
- What You’ll Need
- Instructions
- Tips and Common Mistakes
What Youll Need
- ● 1 can (15 oz) Hormel chili (any variety you love)
- ● 1 medium skillet or saucepan (non-stick or cast iron works best)
- ● 1 wooden spoon or spatula (for stirring like a pro 👨🍳)
- ● 1 sharp knife + cutting board (for prepping fresh toppings)
- ● 1/2 cup shredded cheddar cheese (or pepper jack for a kick!)
- ○ 1/4 cup diced white or red onion (optional but highly recommended)
- ● 2 tbsp sour cream or Greek yogurt (for creamy balance)
- ● 1/4 cup chopped cilantro or green onions (freshness boost!)
- ○ 1 tsp hot sauce or diced jalapeños (optional for heat lovers 🔥)
- ● 1/2 tsp ground cumin or smoked paprika (secret flavor weapon ✨)
- ● 1 tbsp butter or olive oil (for sautéing aromatics)
- ● Salt & black pepper (to taste—always!)
Instructions
Transforming canned chili into something extraordinary takes just a few simple steps. Here’s how to do it right.
Brown Some Ground Beef or Sausage
Heat a large skillet over medium-high heat and add 1 pound of ground beef or Italian sausage. Break it up with a wooden spoon as it cooks, letting it develop a deep brown crust before stirring. This adds rich, meaty flavor that canned chili lacks.
Cook until fully browned and no pink remains, about 6-8 minutes. Drain off excess fat if needed, but leave about 1 tablespoon for flavor. This step alone makes the chili taste homemade rather than canned.
Sauté Aromatics for Depth
In the same skillet, add 1 diced onion and 3 minced garlic cloves. Cook over medium heat for 4-5 minutes, stirring occasionally, until the onions soften and turn translucent. Don’t rush this—you want the onions sweet and the garlic fragrant but not burned.
If you like heat, stir in 1-2 diced jalapeños or 1 teaspoon of chili powder at this stage. The goal is to build layers of flavor before combining everything. This simple step makes the chili taste fresh and vibrant.
Combine and Simmer with Canned Chili
Pour the canned chili into the skillet with the cooked meat and aromatics. Stir well to combine, then add ½ cup of beef broth or water to loosen the mixture. Bring it to a gentle simmer over medium-low heat.
Let it cook uncovered for 10-15 minutes, stirring occasionally. This allows the flavors to meld and the liquid to reduce slightly, giving the chili a richer, heartier texture. Taste and adjust seasoning with salt and pepper as needed.
Add Bright, Fresh Toppings
Just before serving, stir in 1 tablespoon of lime juice or apple cider vinegar. This brightens the flavors and cuts through the richness. Then, ladle the chili into bowls and top with fresh ingredients like shredded cheese, diced avocado, or chopped cilantro.
Offer extra toppings on the side, such as sour cream, diced red onions, or crushed tortilla chips. These fresh elements contrast the deep, savory flavors of the chili and make every bite more exciting.
Let It Rest for Best Flavor
If you have time, let the chili sit off the heat for 10 minutes before serving. This allows the flavors to meld even further. The chili will thicken slightly as it cools, making it even more satisfying.
Serve with warm cornbread or crusty bread to soak up every last bite. The difference between this upgraded version and plain canned chili will surprise you—it tastes like you spent hours cooking!
Tips and Common Mistakes
These simple adjustments will transform your canned chili from basic to restaurant-worthy in no time.
Browning Technique: In Step 1, don’t rush the 6-8 minutes of browning time for your ground beef or sausage. Let the meat develop a deep crust before stirring—this creates rich, caramelized flavors that canned chili lacks. I like to press down on portions with my wooden spoon to encourage even browning. The fond (browned bits) that forms will dissolve into your chili during simmering, adding incredible depth.
Aromatics Matter: For Step 2, cook your onions and garlic over medium heat for the full 4-5 minutes until they’re truly translucent. This builds a sweet, savory base. If you’re adding jalapeños or chili powder, bloom them with the garlic for 30 seconds to wake up their flavors. The difference between properly cooked aromatics and rushed ones is night and day in the final dish.
Simmering Secret: During Step 3’s 10-15 minute simmer, keep the heat at a gentle medium-low. You want small bubbles breaking the surface, not a rolling boil. This slow simmer lets flavors meld without reducing the liquid too quickly. Stir occasionally and taste at the 10-minute mark—if flavors seem muted, let it go the full 15 minutes.
Resting Period: That final 10-minute rest in Step 5 isn’t just for show. As the chili cools slightly, the flavors concentrate and the texture becomes more cohesive. I’ve found this makes the difference between good chili and “wow, this is amazing” chili. While it rests, prep your toppings so everything’s ready to serve at once.
Pro Tips for Make Hormel Chili Better
- These simple adjustments will transform your canned chili from basic to restaurant-worthy in no time.
- Browning Technique: In Step 1, don’t rush the 6-8 minutes of browning time for your ground beef or sausage. Let the m…
- Aromatics Matter: For Step 2, cook your onions and garlic over medium heat for the full 4-5 minutes until they’re tru…
Frequently Asked Questions
Can I add these upgrades to Hormel chili while it’s still in the can?
Nope! Always transfer the chili to a saucepan first. Heating it in the can can release harmful chemicals (plus, it’s harder to stir in extras!). Warm it on the stove over medium-low heat, then add your upgrades for even cooking and better flavor blending.
How long does it take to upgrade Hormel chili?
Most upgrades take 5–10 minutes —just enough time to simmer and meld flavors. Quick fixes (like cheese or hot sauce) are instant, while sautéed veggies or spices may need 5 minutes to soften or bloom. Perfect for a speedy meal!
What’s the best cheap alternative to Hormel chili for upgrading?
Try store-brand chili (like Great Value or Kroger) or canned beans + tomato sauce (add your own spices). For meat lovers, canned sloppy joe mix works in a pinch—just thin with broth and season like chili!
Why does my upgraded chili taste bland or too salty?
Hormel chili is already seasoned, so go easy on salt! If it’s bland, add acid (lime juice, vinegar) or umami (Worcestershire, soy sauce). Too salty? Stir in a diced potato or splash of water to dilute.
Can I make Hormel chili in a slow cooker or Instant Pot?
Dump the chili in with your upgrades, then:
- Slow cooker: 2–3 hours on Low (stir occasionally).
- Instant Pot: 5 minutes on High Pressure + natural release.
With just a few simple tweaks, your can of Hormel chili can transform into a restaurant-worthy bowl bursting with flavor! 🌟 Whether you added fresh toppings, bold spices, or hearty mix-ins, the key is to make it your own. Don’t be afraid to experiment—every great recipe starts with a little creativity.
Ready to take it further? Try pairing your upgraded chili with homemade cornbread or a crisp side salad for the ultimate comfort meal. Now, grab a spoon and dig in—your taste buds will thank you! 😋

Trained in classic French technique but raised on slow-cooked ribs and spicy rubs, she blends culinary skill with smoke and soul.
- Recipe for Boneless Pork Chops in Cast Iron Skillet: Sear and Baste to Juicy Perfection - October 3, 2026
- Recipe for Boneless Cross Rib Roast: Slow-Roasted Beef with Herb Crust - October 3, 2026
- Hamburgers in Sauce Recipe Crock Pot: Slow-Cooked Savory Delight - October 3, 2026