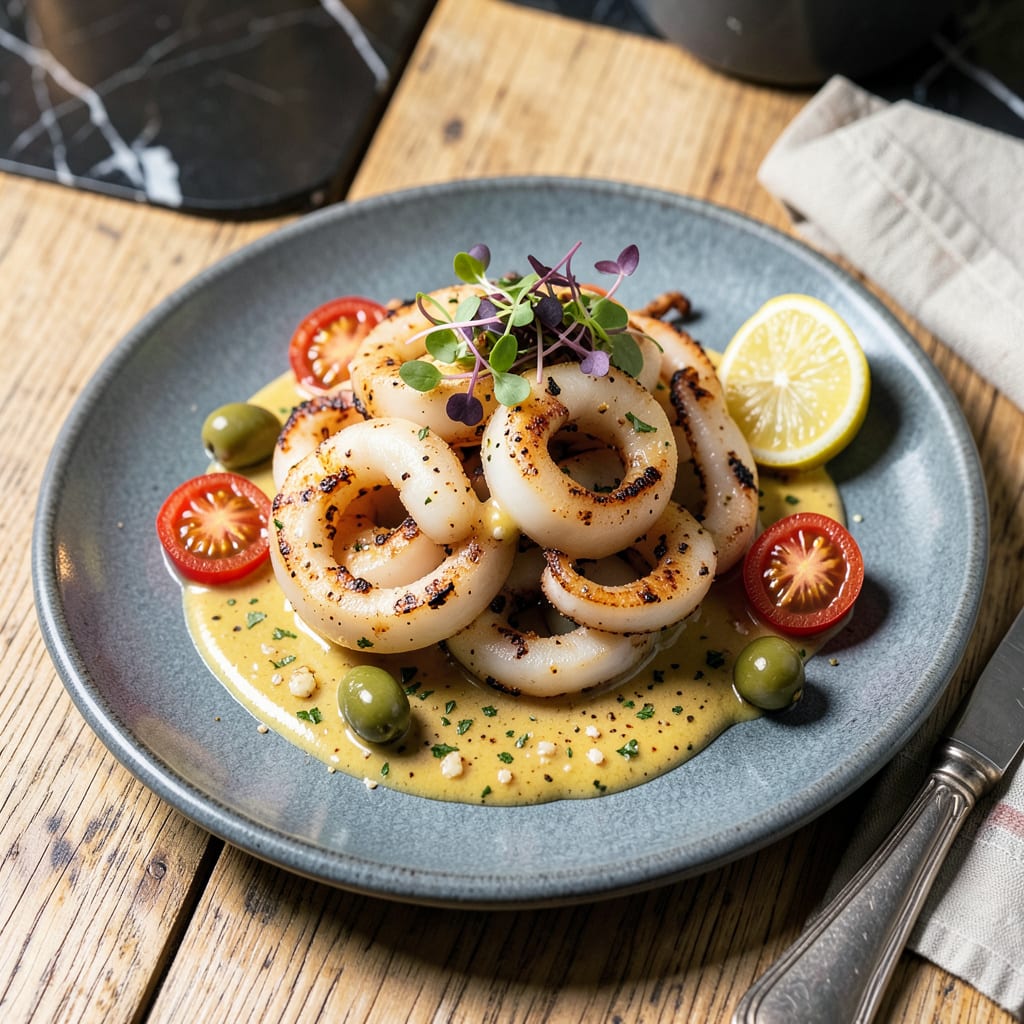
Let me tell you—cooking frozen squid rings right is all about nailing that crispy, golden texture without turning them into rubbery chew toys. I’ve burned through more batches than I care to admit, but the secret comes down to two things: proper thawing and high heat. No fancy equipment needed, just a few smart moves to transform those icy rings into something restaurant-worthy in minutes.
Here’s the thing—most people skip the thawing step or rush it, and that’s where things go wrong. I let mine sit in cold water for 15 minutes (never hot water—that starts cooking them unevenly), then pat them bone-dry. This ensures they sear instead of steam when they hit the pan. Whether you’re pan-frying, air-frying, or deep-frying, that dry surface is your ticket to getting them golden and crispy every time.
The cooking itself is faster than you think—we’re talking 2-3 minutes max. Overcooking is the enemy here, turning tender squid into something closer to a bike tire. I pull them the second they turn opaque with just a hint of golden edges. That moment when they’re still slightly translucent in the center? That’s when they’ll be most tender.
Fair warning: these disappear fast. Serve them with lemon wedges and a simple garlic aioli, or toss them in a spicy marinara for instant calamari vibes. Either way, you’re about to make the easiest seafood dish that’ll have everyone asking for seconds. Let’s get those rings sizzling.
📚 In This Guide
- What You’ll Need
- Instructions
- Tips and Common Mistakes
What Youll Need
- ● 1 lb frozen squid rings (thawed or cooked from frozen—check package instructions)
- ● 1 cup all-purpose flour (for dredging)
- ● 1 tsp salt (adjust to taste)
- ● ½ tsp black pepper (freshly ground for best flavor)
- ○ 1 tsp paprika (optional, for a smoky kick)
- ○ ½ tsp garlic powder (optional, for extra flavor)
- ● Vegetable or canola oil (enough for 1-2 inches in your pan for frying)
- ● Lemon wedges (for serving)
- ○ Tartar sauce or cocktail sauce (optional, for dipping)
- ● Deep skillet or frying pan (with high sides to prevent oil splatter)
- ● Paper towels (for draining excess oil)
- ● Tongs or slotted spoon (to flip and remove squid safely)
- ● Mixing bowls (for seasoning flour)
- ○ Thermometer (optional, to check oil temperature—ideal: 350°F)
Instructions
Here’s the simple method I use to transform frozen squid rings into crispy, golden bites every time.
Thaw and Prep the Squid Rings
Start by properly thawing your frozen squid rings. I recommend placing them in a colander and running cold water over them for 5-7 minutes until completely thawed. This method is faster than refrigerator thawing and helps remove any excess ice crystals that could make your squid soggy.
Once thawed, pat the squid rings completely dry with paper towels. This is crucial – any moisture left on the surface will prevent that perfect crispy texture we’re after. I like to press gently but firmly to absorb all the water. You’ll notice the squid becomes slightly sticky when properly dried, which helps the coating adhere better.
Create the Perfect Coating
Set up your coating station with three shallow dishes. In the first, place all-purpose flour seasoned with salt and pepper. In the second, beat eggs with a splash of water until frothy. In the third, combine panko breadcrumbs with your preferred seasonings – I love adding a pinch of garlic powder and paprika for extra flavor.
Working in batches, dredge the squid rings in flour, shaking off excess. Then dip them in the egg wash, letting any excess drip off. Finally, roll them in the panko mixture, pressing gently to ensure full coverage. The key here is even coating – you want every surface covered but not so thick that it masks the squid’s natural texture.
Fry to Golden Perfection
Heat about 2 inches of vegetable oil in a deep skillet to 350°F. You’ll know it’s ready when a small pinch of panko sizzles immediately upon contact. Carefully add the coated squid rings in a single layer, working in batches to avoid crowding the pan. Crowding lowers the oil temperature and leads to greasy, not crispy, results.
Fry for 2-3 minutes until the coating turns deep golden brown and the squid becomes opaque. Don’t walk away during this step – squid cooks quickly and can go from perfect to overdone in seconds. Use a slotted spoon to transfer the cooked rings to a paper towel-lined plate to drain excess oil.
Serve Immediately for Best Texture
Crispy squid is best enjoyed right away while the coating is still crunchy and the interior is tender. I like to serve mine with a simple dipping sauce – maybe some lemon wedges or a quick mix of mayonnaise and sriracha. The acid from the lemon or the creaminess of the sauce provides a perfect contrast to the crispy texture.
If you need to keep them warm for a few minutes, place them on a wire rack in a 200°F oven. Never stack them or cover them, as this will trap steam and make the coating soggy. Remember, the secret to perfect squid is serving it immediately after cooking for that ideal crispy-tender contrast in every bite.
Tips and Common Mistakes
After years of perfecting crispy squid, I’ve learned these key details make all the difference between rubbery disappointment and golden perfection.
Thawing Technique: Those 5-7 minutes under cold running water in Step 1 aren’t just about speed—they’re critical for texture. The rapid thaw removes ice crystals that would otherwise turn to steam during frying, creating that dreaded soggy coating. I always use a colander to let water drain freely while I prep my coating station. This method also prevents the squid from sitting in its own meltwater, which can make it mushy.
Drying Secret: When patting the squid dry after thawing, don’t just dab—press firmly with paper towels until the surface feels slightly tacky. This isn’t just about removing water; it’s about creating the perfect surface for the coating to adhere. I’ve found that properly dried squid actually makes a little squeaky sound when you rub it between your fingers, which tells me it’s ready for the flour.
Oil Temperature Control: Maintaining that 350°F oil temperature in Step 3 is non-negotiable for crispiness. Here’s what I’ve learned: if you don’t have a thermometer, test the oil with a single panko crumb—it should sizzle violently and turn golden in about 10 seconds. Between batches, let the oil recover to temperature for 30-60 seconds. Crowding the pan can drop the temp by 50 degrees or more, leading to greasy instead of crispy results.
Timing Precision: During those critical 2-3 minutes of frying, watch for two visual cues: the coating should turn deep amber (not light golden), and the squid flesh should change from translucent to opaque white. I set a timer for 2 minutes, then start checking individual pieces. The moment the coating looks like well-toasted bread and the squid curls slightly at the edges, it’s done. Overcooking by even 30 seconds can turn your squid rubbery.
Pro Tips for Cook Frozen Squid Rings
- After years of perfecting crispy squid, I’ve learned these key details make all the difference between rubbery disapp…
- Thawing Technique: Those 5-7 minutes under cold running water in Step 1 aren’t just about speed—they’re critical for …
- Drying Secret: When patting the squid dry after thawing, don’t just dab—press firmly with paper towels until the surf…
Frequently Asked Questions
Got questions about cooking frozen squid rings? You’re not alone! Here are the most common concerns—and quick answers—to help you nail that perfect crispy bite every time.
Do I need to thaw frozen squid rings before cooking?
Nope! Cooking them straight from frozen actually helps retain moisture and texture. Just pat off excess ice with a paper towel before seasoning or breading. Thawing can make them mushy—skip it for best results!
How long does it take to cook frozen squid rings?
Most methods are super fast! Air-fry for 6–8 minutes at 400°F, deep-fry for 2–3 minutes at 375°F, or pan-fry for 3–4 minutes per side. Overcooking turns them rubbery—set a timer!
Can I bake frozen squid rings instead of frying?
Absolutely! Toss them in oil and bake at 425°F for 12–15 minutes, flipping halfway. For extra crispiness, broil for 1–2 minutes at the end. Baking’s healthier but may lack that deep-fried crunch.
Why did my squid rings turn out rubbery?
Rubbery squid = overcooking or low heat. High heat and short cook times are key! If frying, maintain oil temp (350–375°F). For air-frying, avoid overcrowding the basket.
What’s the best dipping sauce for squid rings?
Classic pairings: tartar sauce, spicy mayo (mix mayo + sriracha), or lemon-garlic aioli. For a tangy kick, try sweet chili sauce or a squeeze of fresh lime!
Cooking frozen squid rings doesn’t have to be intimidating—with the right steps, you’ll get tender, crispy results every time! 🍽️ Whether you fry, air-fry, or sauté, the key is proper thawing and quick cooking to lock in flavor. Now that you’ve mastered the basics, why not experiment with dipping sauces (like spicy mayo or garlic butter) or add them to stir-fries and salads? Your next seafood feast is just a recipe away!

Trained in classic French technique but raised on slow-cooked ribs and spicy rubs, she blends culinary skill with smoke and soul.
- Recipe for Boneless Pork Chops in Cast Iron Skillet: Sear and Baste to Juicy Perfection - October 3, 2026
- Recipe for Boneless Cross Rib Roast: Slow-Roasted Beef with Herb Crust - October 3, 2026
- Hamburgers in Sauce Recipe Crock Pot: Slow-Cooked Savory Delight - October 3, 2026