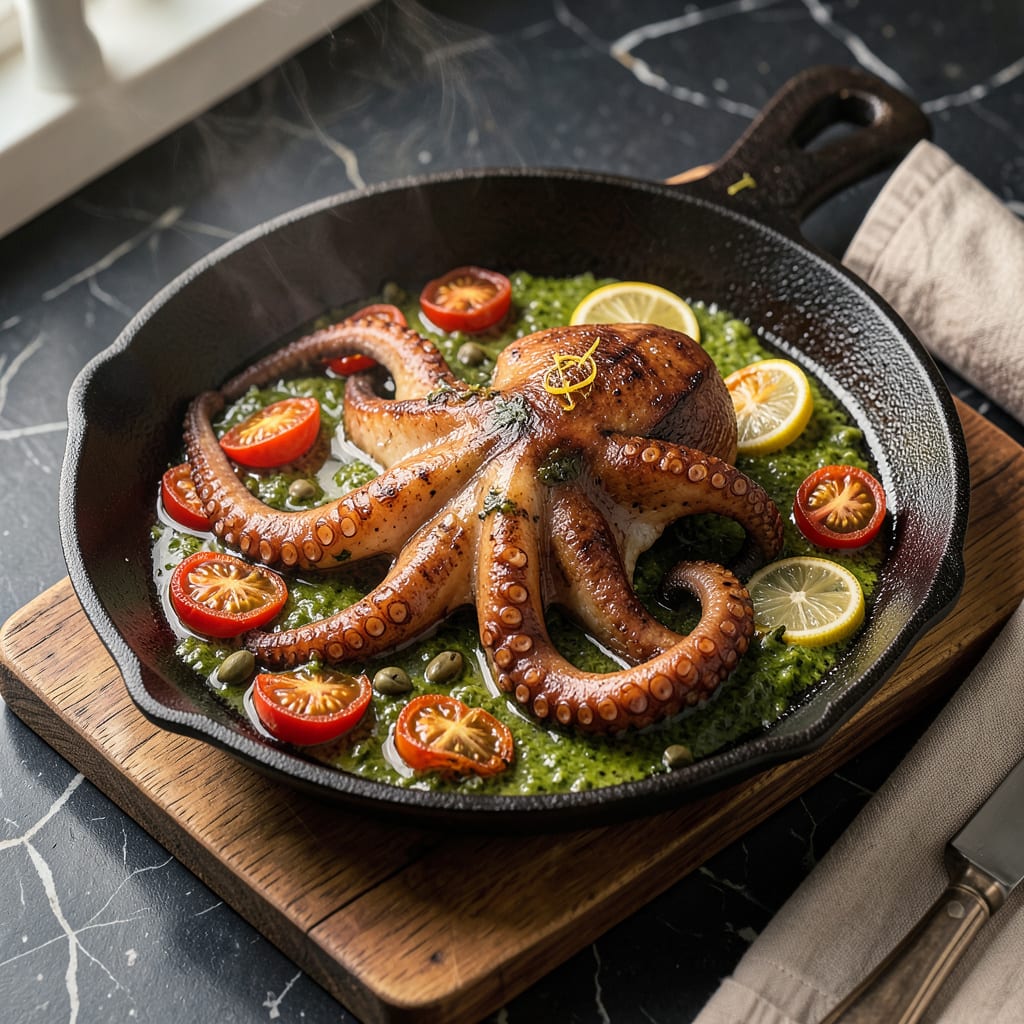
Cooking octopus at home might seem intimidating, but I’m here to tell you it’s actually super straightforward once you know the tricks. Honestly, I was nervous my first time too—until I discovered the simple secret to tender results every time. No fancy equipment needed, just a pan and about 20 minutes of your time.
Here’s the thing—most home cooks skip the crucial prep step that makes all the difference. I learned from a Greek fisherman friend that blanching the octopus first (yes, even before pan-searing) guarantees that melt-in-your-mouth texture. The science is simple: it breaks down the tough muscle fibers before they hit the hot pan.
What you’ll end up with is octopus that’s crispy on the edges, tender throughout, and packed with smoky charred flavor. I love finishing mine with a squeeze of lemon, good olive oil, and a sprinkle of oregano—it’s the kind of dish that looks fancy but comes together faster than takeout.
Serve it alongside roasted potatoes or a simple green salad for a complete meal. The best part? Leftovers (if you have any) taste even better the next day. Let me show you exactly how to nail this technique.
📚 In This Guide
- What You’ll Need
- Instructions
- Tips and Common Mistakes
What Youll Need
- ● 1 whole octopus (1.5–2 lbs, fresh or thawed if frozen)
- ● 2 tbsp olive oil (extra virgin for best flavor)
- ● 1 lemon (cut into wedges, for serving)
- ○ 2 garlic cloves (minced, optional but recommended)
- ● 1 tsp smoked paprika (or regular paprika for milder taste)
- ● Salt and black pepper (to taste)
- ● 1 tbsp red wine vinegar (or balsamic glaze for depth)
- ● Fresh parsley (chopped, for garnish)
- ● Large, heavy-bottomed skillet or frying pan (stainless steel or cast iron works best)
- ● Tongs (for flipping and handling)
- ● Sharp knife (for prepping)
- ● Cutting board (preferably non-slip)
- ○ Meat mallet or rolling pin (optional, for tenderizing)
- ● Kitchen paper towels (to pat dry)
Instructions
Here’s the foolproof method I use to achieve perfectly tender octopus with crispy charred edges.
Prepare the Octopus for Cooking
Begin by rinsing the octopus under cold water to remove any residual brine or salt. Pat it completely dry with paper towels—this is crucial for achieving that beautiful sear later. I like to use a clean kitchen towel for the final drying to ensure every surface is bone-dry.
If your octopus is whole, separate the tentacles from the head by cutting just below the eyes. Then cut the tentacles into manageable pieces, leaving the suction cups intact. For pre-cut octopus, simply arrange the pieces on your work surface.
Tenderize with a Quick Simmer
Bring a large pot of water to a rolling boil. The water should be unsalted since octopus naturally contains sodium. Add the octopus pieces and let them simmer for 5-7 minutes until they begin to curl and the flesh turns from translucent to opaque white.
You’ll notice the octopus pieces will shrink slightly and their texture will change from rubbery to more pliable. This brief simmering step is what guarantees that melt-in-your-mouth tenderness in the final dish. Drain immediately in a colander and let cool for 2 minutes.
Sear for Crispy, Charred Edges
Heat a heavy skillet (cast iron works best) over medium-high heat until very hot. Add just enough olive oil to lightly coat the bottom of the pan—about 2 tablespoons. When the oil shimmers and you see the first wisp of smoke, carefully add the octopus pieces in a single layer.
Cook undisturbed for 3-4 minutes per side until you achieve a deep golden-brown crust with slightly charred edges. The tentacles will naturally curl as they cook, creating those beautiful crispy tips. Resist the urge to move them around—this is how you get that perfect caramelization.
Finish with Aromatics and Serve
Once the octopus is beautifully charred on both sides, reduce the heat to medium. Add minced garlic, red pepper flakes, and a squeeze of lemon juice to the pan. Toss everything together for 30-45 seconds until the garlic becomes fragrant but doesn’t burn.
Transfer the octopus to a serving platter while it’s still sizzling. The contrast between the crispy exterior and tender interior is what makes this dish so special. I like to finish with a drizzle of good olive oil, a sprinkle of flaky sea salt, and some fresh parsley for color.
Rest Briefly Before Enjoying
Let the octopus rest for 2-3 minutes before serving. This brief resting time allows the juices to redistribute throughout the meat, ensuring every bite is perfectly moist. The tentacles should be tender enough to cut with a fork, with a slight resistance that gives way to creamy flesh.
Serve immediately with lemon wedges on the side. The bright acidity cuts through the richness beautifully. For the best experience, enjoy while the charred edges are still crispy and the aromatics are at their most fragrant.
Tips and Common Mistakes
The difference between rubbery and melt-in-your-mouth octopus comes down to a few key details. Here’s what I’ve learned from years of perfecting this technique.
Simmering Secret: In Step 2, those 5-7 minutes of simmering are absolutely critical. Watch for the octopus to curl and turn from translucent to opaque white – this visual cue is more reliable than the clock. The moment you see this transformation, drain immediately. Over-simmering by even a minute can make the texture mushy rather than tender.
Heat Control: When searing in Step 3 at medium-high heat, don’t rush the oil heating process. The oil should be shimmering with that first wisp of smoke before adding the octopus. I test it by flicking a drop of water in – if it sizzles violently, you’re ready. This ensures that perfect crust forms in the 3-4 minutes per side without burning.
Resting Wisdom: The 2-3 minutes of resting in Step 5 might seem insignificant, but it’s when the magic happens. As the octopus rests, the juices redistribute from the charred exterior back into the flesh. Skip this step and you’ll lose that perfect balance of crispy edges and creamy interior we worked so hard to achieve.
Texture Test: Here’s what nobody tells you – the suction cups are your doneness indicator. After searing, they should be slightly crispy on the edges but still pliable at the base. If they’re uniformly hard, you’ve gone too far. If they’re completely soft, you need more time in the pan.
Pro Tips for Cook Octopus In A Pan
- The difference between rubbery and melt-in-your-mouth octopus comes down to a few key details. Here’s what I’ve learn…
- Simmering Secret: In Step 2, those 5-7 minutes of simmering are absolutely critical. Watch for the octopus to curl an…
- Heat Control: When searing in Step 3 at medium-high heat, don’t rush the oil heating process. The oil should be shimm…
Frequently Asked Questions
How long does it take to cook octopus in a pan?
Cooking octopus in a pan takes about 15-20 minutes after pre-boiling (if needed). For fresh, pre-cooked octopus, sear it 2-3 minutes per side on high heat for a crispy exterior. If starting raw, boil first for 30-45 minutes until tender before pan-searing.
Do I need to boil octopus before pan-frying?
For raw octopus, boiling (or simmering) first is key to tenderize it! Skip this step only if using pre-cooked octopus from the store. Pro tip: Add a cork or bay leaf to the boiling water—it helps soften the meat!
What’s the best oil for pan-searing octopus?
Use oils with a high smoke point, like avocado, grapeseed, or refined olive oil. Extra virgin olive oil works too but may smoke more. For extra flavor, finish with a drizzle of chili-infused oil or butter!
Why is my pan-seared octopus rubbery?
Rubbery octopus usually means it’s undercooked or boiled too aggressively. Simmer it gently first (no rolling boil!), then sear hot and fast. Overcrowding the pan can also steam it instead of charring—cook in batches if needed!
Can I grill octopus instead of using a pan?
Grilling gives amazing smoky flavor. After boiling (if raw), pat it very dry, brush with oil, and grill over high heat for 2-3 minutes per side. Use a grill basket for smaller pieces to prevent sticking.
Cooking octopus in a pan doesn’t have to be intimidating—now you’ve got the secrets to tender, flavorful results with minimal effort! 🎉 Whether you’re searing it crispy or simmering it in a bold marinade, the key is patience and the right technique. Ready to impress? Grab a fresh octopus (or pre-cooked for convenience) and put your new skills to the test tonight!
For your next adventure, try pairing it with a zesty lemon-garlic sauce or a smoky paprika rub. Hungry for more? Check out our guide on grilling octopus for another show-stopping method!

Trained in classic French technique but raised on slow-cooked ribs and spicy rubs, she blends culinary skill with smoke and soul.
- Recipe for Boneless Pork Chops in Cast Iron Skillet: Sear and Baste to Juicy Perfection - October 3, 2026
- Recipe for Boneless Cross Rib Roast: Slow-Roasted Beef with Herb Crust - October 3, 2026
- Hamburgers in Sauce Recipe Crock Pot: Slow-Cooked Savory Delight - October 3, 2026