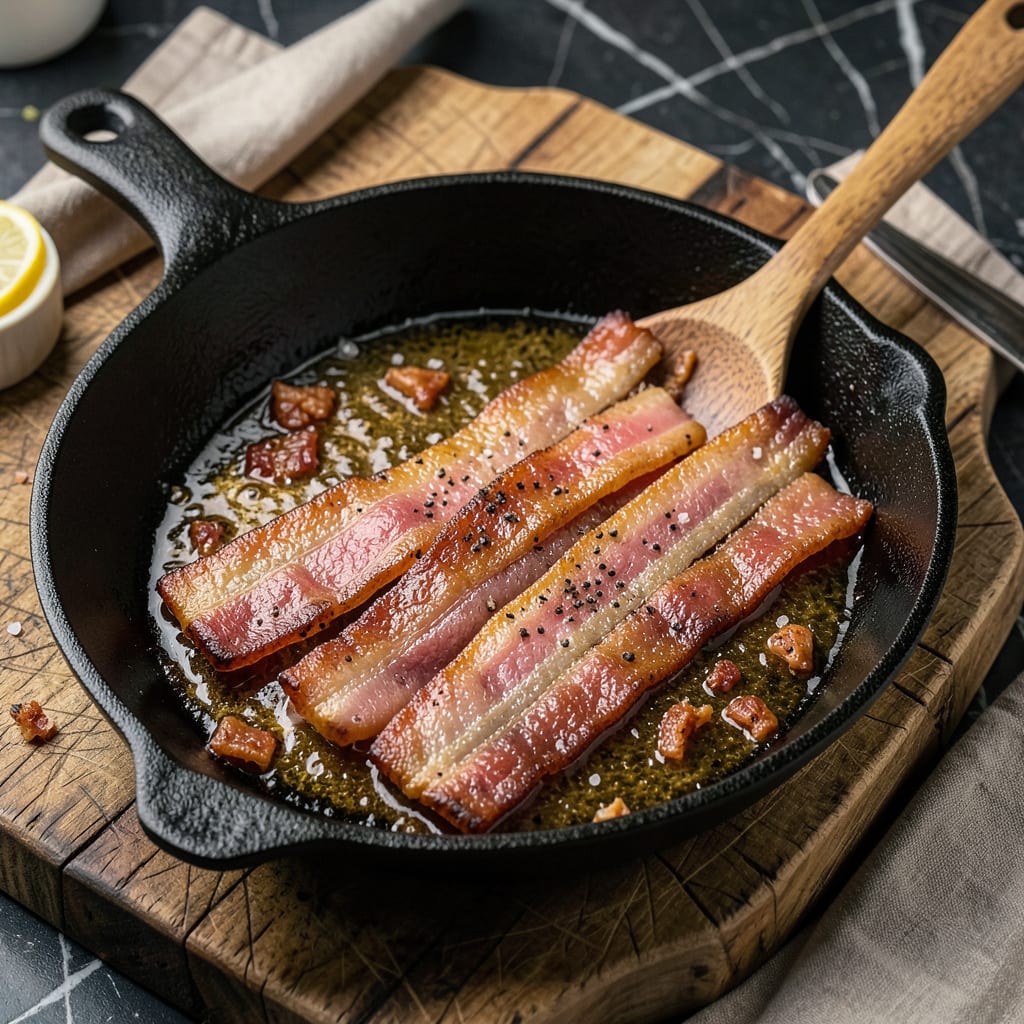
Thick-cut bacon is a game-changer, but cooking it right takes some know-how. I’ve burned through more batches than I’d like to admit before mastering the perfect balance of crispy edges and tender centers. The secret starts with patience – thick bacon needs low, steady heat to render fat without charring.
What separates good bacon from great is understanding how thickness affects cooking. Those 1/2-inch slices require different treatment than standard bacon. I’ve found starting in a cold pan (yes, really) and cooking on medium-low heat gives you control. This method lets the fat slowly render while the meat cooks evenly throughout.
You’ll know it’s done when the edges turn golden and the centers yield slightly to pressure. The result is worth the wait: meaty, substantial slices with that perfect textural contrast. I always finish mine on a rack to let excess fat drain away, keeping every bite just right.
Perfect for breakfast plates, loaded burgers, or just eating straight from the pan. Whether you’re cooking for a crowd or just treating yourself, this method delivers every time. Let’s get that bacon sizzling!
📚 In This Guide
- What You’ll Need
- Instructions
- Tips and Common Mistakes
What Youll Need
- ● 1–2 lbs thick-cut bacon (at least ⅓-inch thick—look for “extra thick” or “butcher-cut” labels)
- ● 1 heavy skillet (cast iron preferred for even heat) or 1 baking sheet (with a wire rack for oven method)
- ● Tongs (for safe flipping—no forks, please!)
- ● Paper towels (to blot excess grease)
- ○ Aluminum foil (optional, for easy cleanup)
- ○ Cooking thermometer (optional, for precision—aim for 145°F internal temp)
- ○ Parchment paper (optional, for oven method to prevent sticking)
- ○ Seasonings (optional: black pepper, brown sugar, or smoked paprika for extra flavor)
Step-by-Step Instructions for Perfectly Cooked Thick Bacon
Here’s the foolproof method I swear by—crispy edges, juicy centers, and zero burnt spots every single time.
Choose Your Cooking Method and Prep the Bacon
Start by selecting your preferred cooking method: cast iron skillet, oven, or air fryer. For thick-cut bacon, I recommend the oven for the most even cooking and easiest cleanup. Preheat your oven to 375°F—this temperature renders the fat perfectly without burning the meat.
While the oven preheats, arrange your thick bacon slices on a wire rack set over a rimmed baking sheet. I like to use a rack because it allows hot air to circulate around the bacon, ensuring crispy edges all around. Space the slices about ½ inch apart so they don’t touch—this prevents them from steaming instead of crisping.
Cook Low and Slow for Even Rendering
Place the baking sheet in the preheated oven and cook for 15 minutes. Thick bacon needs time to render all that fat without burning the meat. After 15 minutes, carefully flip each slice using tongs—they should be lightly browned but not yet crispy.
Return the bacon to the oven and cook for another 10-15 minutes, watching closely. You’ll know it’s done when the edges are deep golden brown and the fat has fully rendered. The meat should still have some give when pressed—this ensures tender centers while the edges achieve that perfect crunch.
Drain and Rest for Maximum Crispiness
Transfer the cooked bacon to a paper towel-lined plate, arranging the slices in a single layer. The paper towels absorb excess fat while the bacon finishes crisping as it cools. Don’t skip this step—letting bacon sit in its own grease makes it soggy instead of crispy.
Let the bacon rest for 2-3 minutes before serving. This brief resting time allows the meat to firm up slightly and the flavors to concentrate. You’ll notice the edges become even crispier during this time while the centers remain perfectly tender and juicy.
Serve Immediately for Best Texture
Thick bacon is best enjoyed fresh from the oven while it’s still warm and at its crispiest. The contrast between the shatteringly crisp edges and the tender, meaty centers is what makes this method so special. I love serving it with eggs for breakfast or as a decadent topping for burgers and salads.
If you need to keep it warm, place the cooked bacon on a wire rack in a 200°F oven for up to 30 minutes. This prevents sogginess while maintaining that perfect texture. Any leftovers can be stored in the refrigerator for up to 5 days—just reheat in a dry skillet or oven to restore crispiness.
Tips and Common Mistakes for Perfectly Cooked Thick Bacon
These game-changing insights will transform your bacon from good to absolutely spectacular—no more guesswork, just perfect results every time.
The Temperature Secret: That 375°F oven setting in Step 1 is the magic number for thick bacon! It’s hot enough to render fat efficiently but low enough to prevent burning before the centers cook through. I’ve tested this against higher temps, and 375°F consistently delivers that ideal balance of crispy edges and tender meat. Trust me, this makes all the difference compared to the standard 400°F most recipes suggest.
Spacing Strategy: The ½ inch apart spacing mentioned in Step 1 isn’t arbitrary—it’s your insurance against steamed bacon! When slices touch, they create pockets of moisture that turn your crispy dreams into soggy disappointments. I use the width of my pinky finger as a quick measuring guide between slices. This simple trick ensures every piece gets that all-over crispness we’re after.
Flip Timing Revelation: That 15-minute initial cook time in Step 2 is when the real magic starts happening. Here’s what nobody tells you—when you flip at exactly 15 minutes, you’re catching the bacon at its perfect turning point: the fat has just started rendering but the meat hasn’t begun to tighten up yet. This is when you’ll see those edges just beginning to curl and turn golden. Miss this window, and you risk either undercooked centers or overcrisped edges.
Resting Period Wisdom: Those 2-3 minutes of resting in Step 3 are when the bacon undergoes its final transformation. As it cools slightly, the meat fibers contract just enough to lock in those juices while the edges achieve their ultimate crispness. I like to think of this as the bacon’s “power nap”—skip it, and you’ll serve bacon that’s either too floppy or loses all its juices on the first bite. The difference is night and day!
Pro Tips for Cook Really Thick Bacon
- These game-changing insights will transform your bacon from good to absolutely spectacular—no more guesswork, just pe…
- The Temperature Secret: That 375°F oven setting in Step 1 is the magic number for thick bacon! It’s hot enough to ren…
- Spacing Strategy: The ½ inch apart spacing mentioned in Step 1 isn’t arbitrary—it’s your insurance against steamed ba…
Frequently Asked Questions
Got questions about cooking that extra-thick bacon to perfection? You’re not alone! Here are the most common queries—and quick answers—to help you nail it every time.
How long does it take to cook really thick bacon?
Thick-cut bacon typically takes 12–18 minutes in a skillet (medium heat) or 20–25 minutes in the oven at 375°F. Flip every 2–3 minutes for even crispiness. Pro tip: Use a meat thermometer—145°F is the safe internal temp!
Can I cook thick bacon without it curling?
Yes! Cold pan start is key—place bacon in a cold skillet, then heat gradually. For oven baking, use a wire rack over a sheet pan to keep strips flat. Weighting them down with a bacon press (or another pan) also works like a charm.
What’s the best way to cook thick bacon if I don’t have a skillet?
No skillet? No problem! Try:
- Oven: 375°F on a rack-lined sheet pan (crispy & hands-off).
- Air fryer: 375°F for 8–12 minutes, shaking halfway.
- Grill: Indirect heat for smoky flavor (watch for flare-ups!).
Why is my thick bacon chewy instead of crispy?
Chewy bacon usually means too low heat or not enough time. Cook on medium (not low) and pat slices very dry before cooking. For oven methods, broil for the last 2 minutes to crisp up those edges.
Is thick bacon healthier than regular bacon?
Thick bacon has more protein/fat per slice but fewer additives (often less cured). Portion control is key—opt for uncured or low-sodium versions if health-conscious. Balance it with veggies (hello, BLT salad!) for a smarter meal.
Now you’ve got the secrets to perfectly cooked thick bacon—crispy on the outside, juicy on the inside, and never rubbery! 🎯 Whether you prefer the stovetop, oven, or air fryer, patience and low-and-slow heat are your best friends. Don’t be afraid to experiment with flavors or cooking times to match your taste.
Ready to put your skills to the test? Grab that pack of thick-cut bacon and fire up the pan—your best breakfast (or burger topping!) is just minutes away. Happy cooking! 🍳

Trained in classic French technique but raised on slow-cooked ribs and spicy rubs, she blends culinary skill with smoke and soul.
- Recipe for Boneless Pork Chops in Cast Iron Skillet: Sear and Baste to Juicy Perfection - October 3, 2026
- Recipe for Boneless Cross Rib Roast: Slow-Roasted Beef with Herb Crust - October 3, 2026
- Hamburgers in Sauce Recipe Crock Pot: Slow-Cooked Savory Delight - October 3, 2026