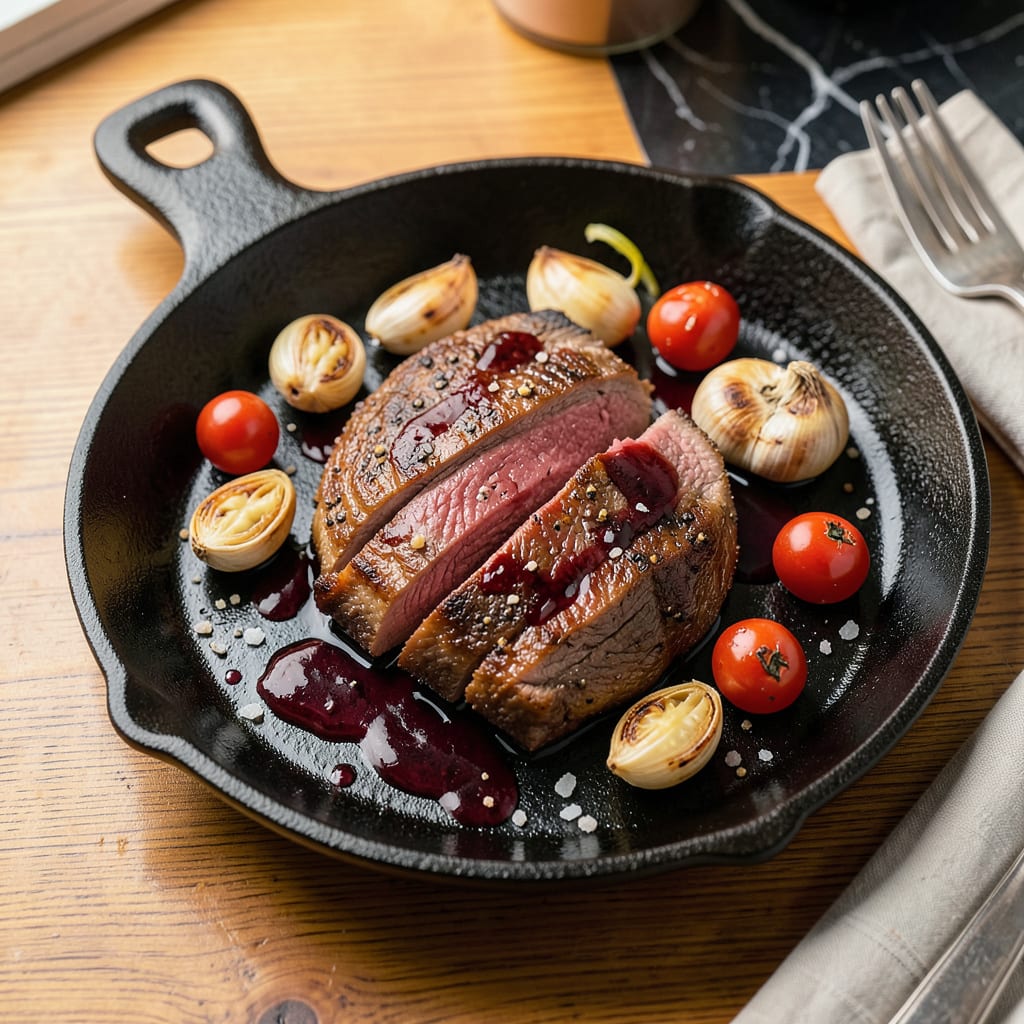
I’ll be real with you—cooking prime rib can feel intimidating, but this method breaks it down into foolproof steps for perfect medium-rare slices every time. There’s nothing like that first bite of tender, juicy beef with a caramelized crust, especially when you’ve nailed the technique yourself. I’ve cooked more prime ribs than I can count, from backyard smokers to restaurant kitchens, and this approach never fails.
The secret starts with proper prep: dry-brining overnight pulls moisture to the surface, creating that incredible crust while keeping the inside juicy. Then it’s all about temperature control—low and slow in the oven until it hits that sweet spot between 125-130°F internally. No guesswork, no stress, just science working in your favor.
Here’s where it gets interesting—resting is non-negotiable. That 30-minute pause lets juices redistribute so every slice stays moist. Carve against the grain into thick cuts, and you’ll have restaurant-quality prime rib that’ll make your guests think you’ve been hiding chef skills. The best part? Leftovers make killer sandwiches the next day.
Serve it with horseradish cream and roasted garlic potatoes, and you’ve got a meal worth celebrating. This isn’t just dinner—it’s the kind of dish that creates memories around the table. Let’s get that beef in the oven.
📚 In This Guide
- What You’ll Need
- Instructions
- Tips and Common Mistakes
What Youll Need
- ● Prime rib roast (bone-in or boneless): 4–6 lbs (for 6–8 servings). Look for USDA Prime or Choice grade with even marbling.
- ● Kosher salt: 2–3 tbsp for dry-brining (plus extra for seasoning).
- ● Freshly ground black pepper: 1–2 tbsp.
- ● Garlic powder & onion powder: 1 tsp each (or fresh garlic cloves for rubbing).
- ● Olive oil or melted butter: 2–3 tbsp for searing.
- ○ Fresh herbs (optional): Rosemary, thyme, or sage sprigs for aroma.
- ● Meat thermometer: Instant-read (critical for precision!).
- ● Roasting pan + rack: Heavy-duty, large enough to fit the roast.
- ● Aluminum foil: For resting the meat post-cook.
- ● Carving knife & fork: A long, sharp slicing knife (10–12 inches) for clean cuts.
- ○ Butcher’s twine (optional): If tying a boneless roast for even cooking.
- ○ Au jus ingredients (optional): Beef broth, red wine, or shallots for pan sauce.
Instructions for Perfect Sliced Prime Rib
This foolproof method guarantees restaurant-quality results with minimal effort—let’s make magic happen!
Select and Prep Your Prime Rib
Start with a well-marbled prime rib roast that’s already been sliced into 1½-inch thick steaks. The marbling is your insurance policy for juiciness, so don’t skimp on quality. Pat each slice completely dry with paper towels—this is non-negotiable for achieving that perfect crust.
Let the steaks rest at room temperature for 45 minutes before cooking. This crucial step ensures even cooking throughout the thickness. While they’re tempering, I like to prepare my seasoning station with kosher salt, freshly cracked black pepper, and any additional spices you prefer.
Season Aggressively for Maximum Flavor
Season each steak generously with kosher salt and freshly ground black pepper on all sides. I’m talking about a visible layer that completely coats the surface—this isn’t the time for timidity. The salt will form a beautiful crust while penetrating the meat for deep seasoning.
For extra flavor, I always add a sprinkle of garlic powder and smoked paprika to the mix. Press the seasoning into the meat firmly so it adheres during cooking. Let the seasoned steaks sit for 10 minutes before cooking—this gives the salt time to start working its magic on the meat’s surface.
Sear for the Perfect Crust
Heat a heavy cast-iron skillet over medium-high heat until it’s screaming hot. Add just enough high-smoke-point oil to coat the bottom lightly. When the oil shimmers and you see wisps of smoke, it’s showtime.
Lay the steaks in the pan gently—don’t overcrowd or you’ll steam them instead of searing. Cook undisturbed for 3-4 minutes per side until you develop a deep, mahogany-brown crust. You’ll know it’s ready to flip when the steak releases easily from the pan. For that perfect medium-rare, aim for an internal temperature of 125-130°F.
Rest and Slice for Optimal Juiciness
Transfer the seared steaks to a warm plate and let them rest uncovered for 8-10 minutes. This resting period allows the juices to redistribute throughout the meat instead of running out onto your cutting board. I promise this makes the difference between good and extraordinary.
After resting, slice each steak against the grain into ½-inch thick pieces. You’ll be rewarded with tender, juicy slices that practically melt in your mouth. The interior should be a perfect rosy pink from edge to edge, with that gorgeous crust you worked so hard to create.
Serve with Pan Juices for Extra Flavor
While the steaks rest, deglaze the hot pan with a splash of beef broth or red wine. Scrape up all those flavorful browned bits—they’re pure gold for your sauce. Reduce the liquid by half, then drizzle this pan sauce over your sliced prime rib.
Serve immediately while still warm. Each bite should deliver that perfect contrast of crispy exterior and buttery interior. The pan juices add an extra layer of richness that takes this dish from excellent to unforgettable. Pair with your favorite sides and enjoy the fruits of your labor!
Tips and Common Mistakes for Perfect Sliced Prime Rib
Let me share the game-changing secrets I’ve learned from years of perfecting this method—these details transform good steak into extraordinary.
The Temperature Factor: That 45-minute room temperature rest in Step 1 isn’t just suggestion—it’s critical for even cooking throughout the 1½-inch thickness. Cold steaks cook unevenly, leaving you with a gradient of doneness instead of that perfect edge-to-edge pink. I’ve ruined expensive prime rib by skipping this step, and I’ll never make that mistake again. The meat should feel cool but not cold to the touch when you’re ready to season.
Seasoning Science: When you’re aggressively salting in Step 2, think of it as building armor for your steak. The kosher salt doesn’t just season—it creates that coveted crust through the Maillard reaction during searing. Press the seasoning firmly into the meat so it adheres during those crucial 3-4 minutes per side in Step 3. I use about 1 teaspoon of salt per pound of meat, which might seem like a lot, but trust me, it’s what creates that restaurant-quality exterior.
Searing Strategy: Your cast-iron skillet needs to be screaming hot at medium-high heat before the steaks hit the pan. Here’s what nobody tells you—when you add the oil, it should shimmer and you should see those first wisps of smoke within seconds. That’s your visual cue that the pan is at the perfect temperature for creating that deep mahogany crust. If your oil isn’t hot enough, you’ll end up steaming the steaks instead of searing them, and that’s a crime against prime rib!
Resting Revelation: The 8-10 minute rest in Step 4 is where the magic happens. As the steak rests, the juices that were driven to the center during cooking redistribute throughout the meat. Cut into it too soon, and you’ll watch all that precious moisture spill onto your cutting board instead of staying in the meat where it belongs. I like to tent my steaks loosely with foil during resting—it keeps them warm without trapping steam that could soften that beautiful crust you worked so hard to create.
Pro Tips for Cook Sliced Prime Rib
- Let me share the game-changing secrets I’ve learned from years of perfecting this method—these details transform good…
- The Temperature Factor: That 45-minute room temperature rest in Step 1 isn’t just suggestion—it’s critical for even c…
- Seasoning Science: When you’re aggressively salting in Step 2, think of it as building armor for your steak. The kosh…
Frequently Asked Questions
Got questions about nailing that perfect sliced prime rib? You’re not alone! Here are the most common head-scratchers—answered fast so you can get back to cooking.
How long should I cook sliced prime rib for medium-rare?
For 1-inch-thick slices, sear 2–3 minutes per side in a ripping-hot skillet (or grill), then finish in a 375°F oven for 6–8 minutes. Use a meat thermometer—130–135°F internal temp is the sweet spot!
Can I cook prime rib slices from frozen?
Not ideal! Thaw overnight in the fridge for even cooking. If in a rush, use the cold-water bath method (sealed bag + 30–60 mins). Frozen slices risk a dry exterior and raw center.
What’s the best alternative if I don’t have a cast-iron skillet?
A heavy stainless-steel pan or grill works great! Avoid nonstick—it won’t get hot enough for a good sear. For oven-only, broil 4–5 minutes per side on high.
Why did my prime rib slices turn out tough?
Overcooking is the #1 culprit! Slice against the grain after resting 10 minutes. Also, check your cut—ribeye or bone-in slices stay juicier than leaner cuts.
Can I use an air fryer for sliced prime rib?
Yes! Preheat to 400°F, sear slices 3–4 minutes per side (no oil needed). Spritz with broth halfway for extra moisture. Perfect for small batches!
Now you’ve got the secrets to perfectly juicy sliced prime rib—every single time! 🥩✨ Whether you’re prepping for a holiday feast or a weekend indulgence, mastering the reverse sear and resting steps ensures tender, flavor-packed results. Don’t stop here: grab a high-quality cut, fire up your oven, and put this method to the test!
Ready to impress? Pair your prime rib with a bold red wine or creamy horseradish sauce, and watch your dinner guests ask for seconds. Happy cooking!

Trained in classic French technique but raised on slow-cooked ribs and spicy rubs, she blends culinary skill with smoke and soul.
- Recipe for Boneless Pork Chops in Cast Iron Skillet: Sear and Baste to Juicy Perfection - October 3, 2026
- Recipe for Boneless Cross Rib Roast: Slow-Roasted Beef with Herb Crust - October 3, 2026
- Hamburgers in Sauce Recipe Crock Pot: Slow-Cooked Savory Delight - October 3, 2026