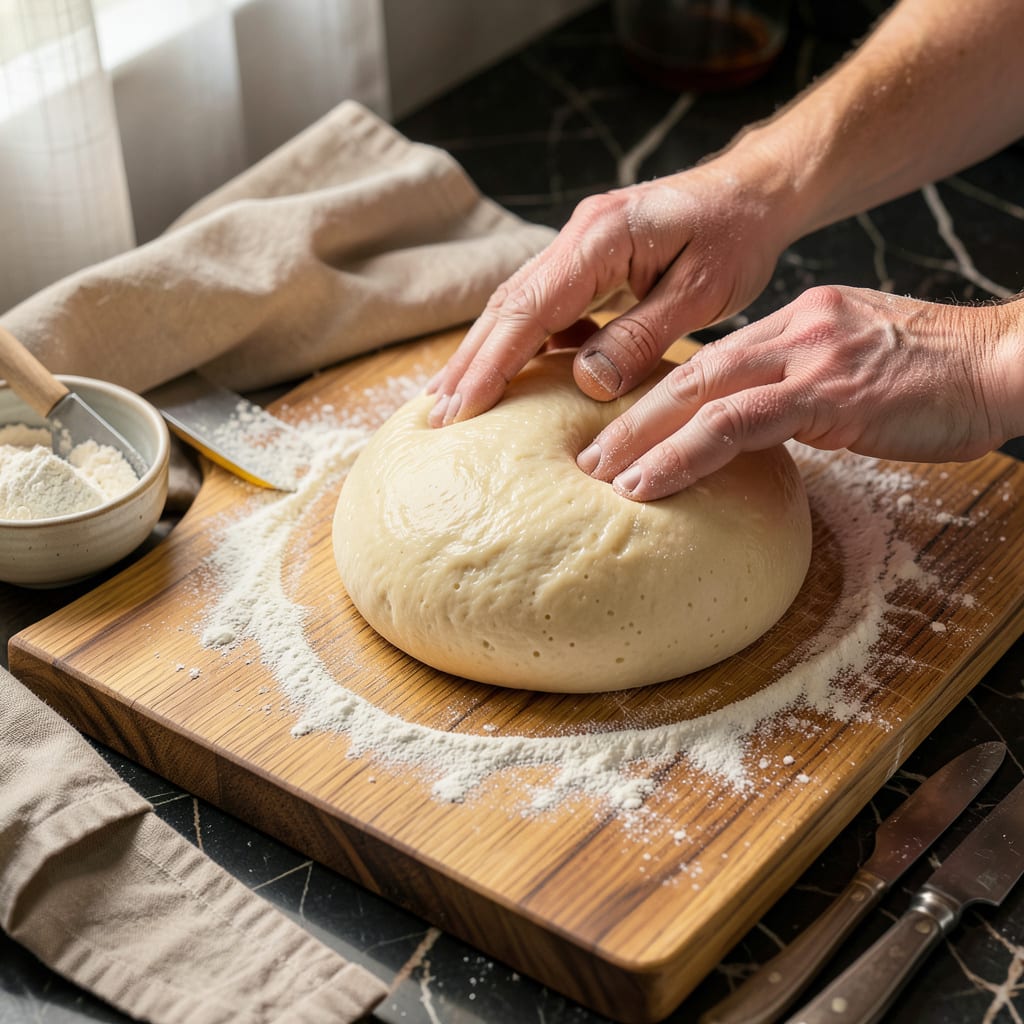
Here’s the thing—deflating dough isn’t about aggression, it’s about control. I’ve ruined more loaves by being too heavy-handed than I care to admit, but once you master this simple technique, your breads, rolls, and even pizza dough will transform from dense to perfectly light every time. That first punch down after the rise is where the magic starts.
The reason we deflate dough is all about texture. When yeast does its job, it creates gas bubbles that need redistribution for even baking. Skip this step, and you’ll end up with air pockets the size of quarters or a loaf that collapses in the oven. I learned this the hard way with my first attempt at cinnamon rolls—they looked great until I cut into them and found tunnels instead of soft layers.
This technique applies to almost everything with yeast: artisan bread gets that perfect crumb, focaccia develops its signature open structure, and pizza dough bakes up crisp instead of bubbly. The method’s the same—press gently with your fingertips until you feel the gas escape, then reshape. No fancy tools needed, just your hands and a little patience.
Fair warning: under-deflating is just as bad as overworking. You want to remove the large bubbles without compressing the dough completely. Think of it like letting a balloon deflate slowly rather than popping it. Get this right, and you’re 90% of the way to bakery-quality results at home.
📚 In This Guide
- What You’ll Need
- Instructions
- Tips and Common Mistakes
What Youll Need
- ● Dough: 1 batch of freshly risen dough (yeast-based, like bread, pizza, or brioche). Ensure it’s doubled in size! 🍞
- ● Clean work surface: A smooth, flat area (like a countertop or large cutting board) dusted with 1–2 tbsp flour to prevent sticking.
- ○ Rolling pin: 1 wooden or silicone pin (optional but helpful for even deflating).
- ● Bench scraper or dough card: 1 for lifting and folding dough without tearing.
- ● Flour (for dusting): Extra ¼–½ cup all-purpose or bread flour on standby.
- ● Plastic wrap or damp towel: 1 to cover dough if resting between steps.
- ● Kitchen scale: For precise dough division (if splitting after deflating).
- ● Cooking oil spray: Light mist to coat hands/tools if dough is sticky.
- ● Timer: To track resting periods (if recipe requires it). ⏰
Instructions
Deflating dough properly is simpler than you think—just follow these straightforward steps for ideal texture.
Prepare Your Work Surface and Dough
Start by clearing a clean, flat surface and lightly dusting it with flour. I prefer using a wooden cutting board or marble slab because they provide good grip and stay cool, which helps prevent the dough from sticking. Make sure your hands are clean and free of any lotions or oils that could transfer to the dough.
Gently remove your risen dough from its bowl. You’ll notice it’s puffy and full of air bubbles—that’s exactly what we want to work with. Place it on your floured surface and let it sit for 1-2 minutes to relax slightly before handling. This brief rest makes the dough easier to work with and prevents it from resisting as you deflate it.
Use the Fold-and-Press Technique
Here’s the method I’ve found works best: use your fingertips to gently press down on the dough, starting at the center and working your way outward. You’re not trying to squash it flat—think of it more like releasing the air in a controlled way. The dough should feel soft and pliable under your fingers.
After pressing, fold the dough in half, then give it a quarter turn. Repeat this fold-and-press motion 3-4 times total. You’ll feel the dough becoming smoother and more uniform with each fold. The goal isn’t to eliminate all air bubbles (you want some for texture), but to redistribute them evenly throughout the dough. You’ll know you’re done when the dough feels more dense but still springs back slightly when pressed.
Reshape According to Your Recipe
Now that you’ve deflated the dough, it’s time to reshape it based on what you’re making. For loaf bread, gently form it into a smooth ball, then shape into a log. For pizza dough, press it into a round disc. The key here is to handle the dough gently but with confidence—don’t overwork it or it may become tough.
As you shape, you might notice the dough trying to spring back. That’s normal. If it resists too much, let it rest for 5 minutes before continuing. This relaxation time allows the gluten to settle, making the dough more cooperative. Your reshaped dough should hold its form but still feel soft and slightly tacky to the touch—not sticky or dry.
Allow for Final Proofing (If Needed)
Most recipes will call for a second rise after deflating, though this period is usually shorter than the first. Place your shaped dough back in its bowl or on a baking sheet, cover it lightly with a clean kitchen towel or plastic wrap, and let it rise in a warm, draft-free spot. This final proof typically takes about 30-60 minutes, depending on your recipe and room temperature.
You’re looking for the dough to rise until it’s about 1½ times its deflated size. It should spring back slowly when you press it gently with your fingertip. If it springs back immediately, it needs more time. If it doesn’t spring back at all, it may have overproofed. This final rise gives your baked goods that perfect lightness while maintaining structure—exactly what we aimed for by deflating properly in the first place.
Tips and Common Mistakes
Mastering the art of deflating dough makes all the difference in your baking results. Here’s what I’ve learned from years of working with all kinds of dough.
The Resting Period: That 1-2 minutes of rest in Step 1 isn’t just downtime—it’s crucial. When you first remove dough from the bowl, the gluten is tight from rising. This brief pause lets it relax so you can work with it more easily. I’ve found that dough handled immediately after rising tends to resist and spring back more, making deflating uneven. The surface you choose matters too; marble or wood stays cooler than metal, which helps prevent sticking during this initial rest.
Fold-and-Press Technique: In Step 2, when you’re doing those 3-4 folds, focus on gentle but firm pressure. Many bakers make the mistake of being too timid, which leaves large air pockets that can create uneven textures in the final bake. You should feel the dough becoming progressively smoother with each fold, but it should still have some give when pressed. The quarter turns between folds ensure you’re redistributing air evenly throughout the entire mass of dough.
Gluten Relaxation: That 5-minute rest in Step 3 when reshaping isn’t just about convenience—it’s science. Gluten strands tighten when manipulated, and this pause lets them relax. I can always tell when I’ve skipped this step because the dough fights me more during shaping. The dough should feel noticeably more pliable after this short rest, making it easier to form into your desired shape without overworking it.
Final Proof Visuals: For the 30-60 minute final proof in Step 4, don’t just watch the clock—use the fingertip test. When gently pressed, the dough should spring back slowly, leaving a slight indentation. If it springs back immediately, it needs more time. If it doesn’t spring back at all, you’ve gone too far. This visual cue is more reliable than timing alone, especially since room temperature affects proofing speed.
Pro Tips for Deflate Dough
- Mastering the art of deflating dough makes all the difference in your baking results. Here’s what I’ve learned from y…
- The Resting Period: That 1-2 minutes of rest in Step 1 isn’t just downtime—it’s crucial. When you first remove dough …
- Fold-and-Press Technique: In Step 2, when you’re doing those 3-4 folds, focus on gentle but firm pressure. Many baker…
Frequently Asked Questions
How long does it take to deflate dough properly?
Most doughs need 5–10 minutes to deflate after gentle pressing or folding. Overworked dough may take longer (up to 15 minutes) to relax. For sourdough or high-hydration dough, let it rest 20–30 minutes post-deflation to avoid tearing.
Can I skip deflating dough if I’m in a hurry?
Skipping deflation risks uneven texture or dense spots, but you can partially compensate by: 1) Baking at a higher temp (25°F more) for a shorter time, or 2) Using a dough whisk to aerate quickly. For best results, though—don’t skip it!
What’s the difference between deflating and punching down dough?
“Punching down” is aggressive (releases all gas for shaping), while “deflating” is gentler (retains some air for texture). Use punching for sandwich bread; deflate for artisanal loaves or pizza dough. Think: punch = reset, deflate = refine.
My dough keeps springing back when I try to deflate it. What’s wrong?
Overproofed or high-gluten dough resists deflation. Fix it by: 1) Chilling the dough 15–20 minutes to relax gluten, or 2) Using wet hands to reduce sticking. If it’s severely overproofed, reshape and let rise again (add 30% less time).
Are there tools to make deflating dough easier?
Yes! Try these:
- Dough scraper: Lifts and folds without sticking.
- Dough whisk: Aerates while deflating (great for wet dough).
- Silpat mat: Non-stick surface for smooth handling.
Deflating dough doesn’t have to be intimidating—it’s just a simple step to ensure your baked goods turn out light, airy, and perfect every time! 🎯 Whether you’re working with bread, pizza, or pastries, gently releasing excess gas keeps textures even and flavors balanced. Now that you’ve got the technique down, why not put it to the test? Try deflating your next batch of dough and compare the results—you’ll taste the difference!

Trained in classic French technique but raised on slow-cooked ribs and spicy rubs, she blends culinary skill with smoke and soul.
- Recipe for Boneless Pork Chops in Cast Iron Skillet: Sear and Baste to Juicy Perfection - October 3, 2026
- Recipe for Boneless Cross Rib Roast: Slow-Roasted Beef with Herb Crust - October 3, 2026
- Hamburgers in Sauce Recipe Crock Pot: Slow-Cooked Savory Delight - October 3, 2026