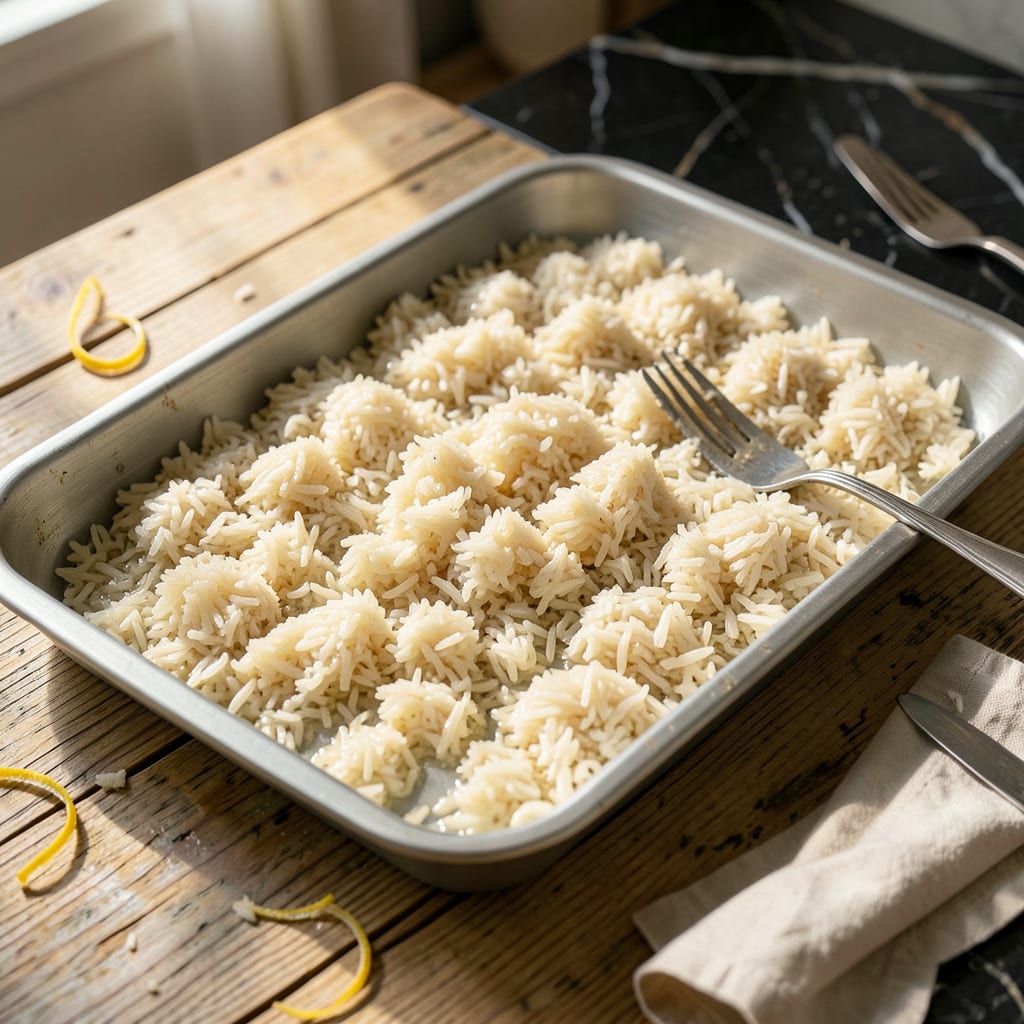
We’ve all been there—you lift the lid expecting perfect rice, only to find a mushy, soggy mess. Don’t toss it! I’ve rescued countless batches with one simple truth: soggy rice can be saved quickly with the right technique. No fancy equipment needed, just a few minutes and some kitchen smarts.
The problem usually starts with too much water or not enough evaporation. But here’s the thing—spreading rice on a baking sheet and hitting it with low heat (or even just air) works miracles. I’ve dried out rice in 15 minutes using this method, turning disaster into dinner. The key is acting fast before the grains turn to paste.
What you’ll end up with is rice that’s salvageable for fried rice, stuffing, or even just as a side. I once turned a soggy batch into the best crispy-edged fried rice my family’s ever had. The texture comes back surprisingly well when you know how to coax the moisture out properly.
Fair warning: don’t let it sit covered—that’s how you get gluey rice. We’re fixing this together, and I’ll show you exactly how to make it work. No more wasted rice on my watch.
📚 In This Guide
- What You’ll Need
- Instructions
- Tips and Common Mistakes
What Youll Need
- ● Soggy rice – The star of the show! 🍚 (Any quantity, but 1–4 cups is easiest to handle.)
- ● Clean kitchen towel or paper towels – 2–3 sheets (lint-free for best results).
- ● Large baking sheet – Rimmed, 11×17 inches (or similar) for even spreading.
- ○ Parchment paper – 1 sheet (optional, prevents sticking).
- ○ Fan – Small oscillating or box fan (optional but speeds up drying).
- ● Microwave-safe bowl – If using the microwave method (quart-sized or larger).
- ● Spatula or fork – For fluffing rice gently.
- ● Timer – Your phone or kitchen timer (for precision!).
- ● Sunny windowsill or dry area – If air-drying (bonus: natural warmth!).
Instructions
Here’s the fastest way to salvage soggy rice—no special tools, just simple techniques that work.
Spread the Rice in a Single Layer
Start by transferring the soggy rice to a large, rimmed baking sheet. I use the biggest one I have—usually a half-sheet pan—to give the rice maximum surface area. Spread it out in as thin and even a layer as possible, breaking up any clumps with your fingers or a fork.
The key here is exposure. When rice is piled up, the moisture gets trapped and redistributes back into the grains. A single layer lets air circulate around each grain, which speeds up the drying process dramatically. Don’t worry if it looks sparse—this is exactly what you want.
Apply Gentle, Even Heat
Place the baking sheet in a 300°F oven for 5-10 minutes, checking frequently after the 5-minute mark. I set my timer for 5 minutes first, then assess the texture. You’re looking for rice that’s dry to the touch but not hardened or crunchy.
Watch for visual cues: the grains should separate easily when stirred, and the surface should look matte rather than glossy. If you notice any browning or hear crackling sounds, remove it immediately—the rice is drying too fast. The goal is gentle evaporation, not toasting.
Stir and Rotate for Uniform Drying
After the initial 5 minutes, pull the sheet out and give the rice a good stir with a fork, redistributing it into an even layer again. I like to rotate the pan 180 degrees at this point to account for any hot spots in my oven. Return it to the oven for another 3-5 minutes.
This stirring step is crucial because the edges dry faster than the center. You might notice the rice along the pan’s perimeter is perfectly dry while the middle is still slightly damp—that’s normal. The second round of heating evens everything out.
Test and Adjust Texture
Remove the rice from the oven and let it sit on the counter for 2 minutes—this allows any residual steam to escape. Then take a small spoonful and let it cool completely on a plate. Taste it to check the texture: properly dried rice should be light and separate easily, with no gumminess or stickiness.
If it’s still not quite right, return it to the oven for 2-minute increments, stirring between each. I’ve found that most batches are perfect after 10-12 minutes total, but oven temperatures vary. The rice is done when it regains its original fluffy texture and holds its shape when pressed lightly with a fork.
Fluff and Serve Immediately
Once perfectly dried, transfer the rice to a serving bowl and fluff it gently with a fork. This aerates the grains and prevents any residual moisture from causing clumping. I like to add a pat of butter or a drizzle of sesame oil at this stage—just 1-2 teaspoons—to restore a bit of moisture and add flavor.
Serve the rice right away while it’s at its best texture. If you need to hold it for a few minutes, keep it uncovered in the warm (but turned-off) oven. The transformation is remarkable: what was once a mushy disappointment becomes light, separate grains ready for your favorite dishes.
Tips and Common Mistakes
Here’s what I’ve learned from rescuing countless batches of soggy rice—small details that make a big difference.
Heat Control: The 300°F temperature in Step 2 is crucial for gentle drying. I’ve found that home ovens often run hot, so I recommend checking your oven temperature with an oven thermometer if you’re having trouble. Even 25°F higher can turn your rice from perfectly dried to over-toasted in those 5-10 minutes. If your oven runs hot, reduce to 275°F and extend the time slightly.
The Technique That Changed Everything: In Step 3, when you stir and rotate the pan after the initial 5 minutes, pay special attention to the corners of your baking sheet. These areas dry fastest and can easily overcook while the center is still damp. I always scrape these corner grains toward the center during stirring to prevent them from becoming hard or crunchy during the final 3-5 minutes of drying.
Texture Secret: The 2-minute resting period in Step 4 isn’t just about cooling—it’s about stabilization. When you remove rice from heat, the surface grains cool quickly while the center retains heat. This brief rest allows the temperature to equalize throughout, preventing that unpleasant scenario where the top layer is perfect but the bottom is still slightly gummy. I set a timer for this step—it’s easy to rush, but those 2 minutes are non-negotiable for consistent results.
Equipment Recommendation: While any baking sheet works, I’ve had best results with aluminum half-sheet pans—they conduct heat evenly and have those helpful raised edges. Avoid nonstick sheets if possible; the dark color can cause the rice to dry too quickly on the bottom during those critical 10-12 minutes total drying time. If nonstick is all you have, reduce the oven temperature by 25°F to compensate.
Pro Tips for Dry Rice Out Quickly
- Here’s what I’ve learned from rescuing countless batches of soggy rice—small details that make a big difference.
- Heat Control: The 300°F temperature in Step 2 is crucial for gentle drying. I’ve found that home ovens often run hot,…
- The Technique That Changed Everything: In Step 3, when you stir and rotate the pan after the initial 5 minutes, pay s…
Frequently Asked Questions
How long does it take to dry rice quickly using these methods?
Most quick-drying methods (like the paper towel press or low-heat skillet) take 5–15 minutes, depending on moisture level. The oven method may need 10–20 minutes at 200°F. For best results, check every few minutes to avoid over-drying or burning.
Can I save rice that’s really mushy or waterlogged?
If rice is soupy, drain excess water first, then spread it on a baking sheet in a single layer. Use the oven (200°F) or fan-assisted air drying. Extremely mushy rice may turn out drier but slightly clumpy—break it up gently with a fork.
What’s the fastest way to dry rice without heat?
The paper towel method wins for speed: Spread rice on towels, press gently, and replace towels until dry (usually 5–10 minutes). For extra speed, pair with a fan blowing over the rice. Avoid squeezing—it can make rice sticky!
Will drying rice change its texture or taste?
Quick-drying preserves texture if done right, but over-drying can make rice hard or brittle. Taste stays intact unless burned (watch heat methods!). Rehydrate slightly with a splash of water or broth when reheating for best results.
Can I use a microwave to dry rice quickly?
Yes, but caution is key! Microwave in 10–15 second bursts on low power, stirring between intervals. High heat can scorch rice or create hot spots. This method works best for slightly damp rice, not soggy batches.
Drying out soggy rice doesn’t have to be a kitchen disaster! With simple tricks like paper towels, heat, or salt, you can revive your grains in minutes. 🎯 Next time you’re in a pinch, try the oven or stovetop method for fast, foolproof results—no waste, no stress!
Now that you’ve mastered the rescue, why not experiment with your newly dried rice? Whip up a quick fried rice or pair it with your favorite sauce. Happy cooking! 🍚✨

Trained in classic French technique but raised on slow-cooked ribs and spicy rubs, she blends culinary skill with smoke and soul.
- Recipe for Boneless Pork Chops in Cast Iron Skillet: Sear and Baste to Juicy Perfection - October 3, 2026
- Recipe for Boneless Cross Rib Roast: Slow-Roasted Beef with Herb Crust - October 3, 2026
- Hamburgers in Sauce Recipe Crock Pot: Slow-Cooked Savory Delight - October 3, 2026