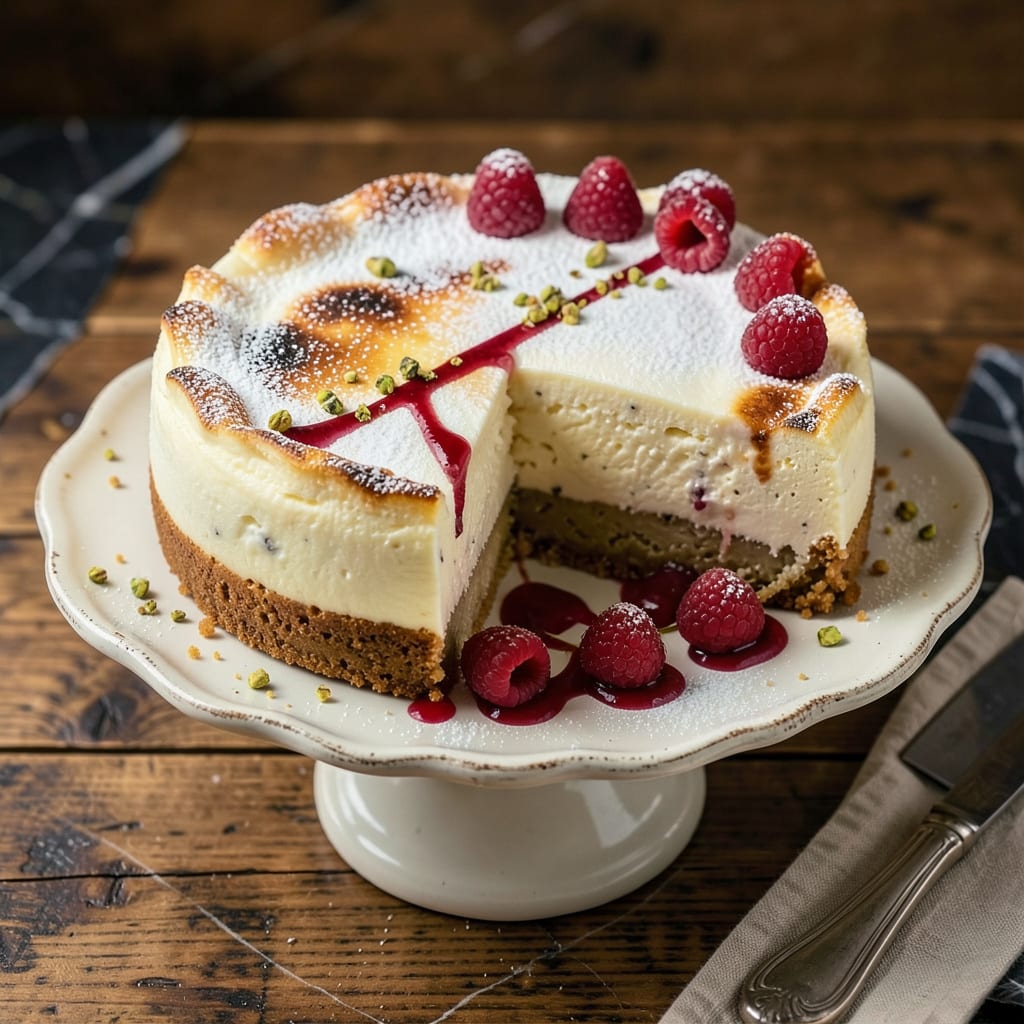
That sinking feeling when you open the oven to find your cheesecake top darker than intended? I’ve been there more times than I’d like to admit. The good news is that a burnt top doesn’t mean your entire cheesecake is ruined—it’s absolutely salvageable with a few simple tricks.
First, don’t panic. A slightly overbrowned top can often be trimmed or covered with creative toppings like fresh fruit compote, whipped cream, or even a dusting of powdered sugar. I once rescued a cheesecake by turning it into a trifle—layering the creamy filling with berries and whipped cream in individual glasses. No one could tell it wasn’t intentional!
The key is working with what you have. If the burnt layer is thin, carefully trim it off with a sharp knife. For deeper browning, consider transforming your cheesecake into parfaits or even cheesecake pops. Remember, the creamy texture underneath is still perfect—it just needs a little creative presentation.
Next time, try baking at a lower temperature or using a water bath to prevent overheating. But for now, let’s focus on saving this dessert. Your cheesecake can still be the star of the table—it just needs a little extra love to shine.
📚 In This Guide
- What You’ll Need
- Instructions
- Tips and Common Mistakes
What Youll Need
- ● Burnt cheesecake – 1 fully baked (but over-browned) cheesecake, cooled to room temperature 🍰
- ○ Sharp serrated knife – 8–10″ blade (for trimming) or a cheesecake leveler (optional but handy!) 🔪
- ● Offset spatula – small or medium size (for smoothing) 🪄
- ● Whipped cream or frosting – 1–2 cups (homemade or store-bought) to cover imperfections 🤍
- ○ Fresh fruit – ½ cup berries, sliced kiwi, or citrus zest (for garnish, optional) 🍓
- ● Powdered sugar – 2–3 tbsp (for dusting) ❄️
- ● Parchment paper or wax paper – 1 sheet (to protect the base while trimming) 📄
- ○ Fine-mesh sieve – (optional, for even sugar dusting) ✨
- ○ Torch (culinary) – (optional, for caramelizing a new sugar top) 🔥
- ● Plastic wrap or cake dome – to store while fixing 🎁
Instructions
Don’t panic—here’s exactly how to salvage your cheesecake and restore that creamy perfection.
Assess the Damage and Cool Completely
First, remove the cheesecake from the oven immediately and place it on a wire rack. Let it cool at room temperature for 1 hour before attempting any fixes. This cooling period stops the cooking process and prevents the burn from deepening.
While it cools, examine the damage. If the burnt layer is paper-thin and only on the very top, you’re in luck. If it’s thicker than ⅛ inch or has a bitter smell, you’ll need to be more aggressive with your fix. Don’t touch or poke at the burnt layer yet—let the cheesecake set completely first.
Trim the Burnt Layer Carefully
Once fully cooled, use a sharp, thin-bladed knife to gently scrape off the burnt top layer. Hold the knife at a 15-degree angle and work slowly in one direction—this gives you more control than trying to cut straight down. You’ll feel the resistance change when you hit the good cheesecake beneath.
For stubborn spots, dampen a paper towel with warm water and lightly press it against the burnt areas for 10 seconds. This softens the burnt sugar just enough to scrape it away cleanly. Work in small sections and blot dry immediately with a clean towel to prevent sogginess.
Create a Protective Topping Layer
Now you’ll rebuild the surface. Whip ½ cup heavy cream with 1 tablespoon powdered sugar until soft peaks form. Spread this evenly over the entire top of your cheesecake—it should be about ¼-inch thick. This creates a fresh, creamy barrier that covers any remaining discoloration.
For extra protection against dryness, brush the whipped cream layer with a thin coat of neutral glaze (melt 2 tablespoons apricot jam with 1 teaspoon water, then strain). This seals in moisture and adds a subtle sheen that makes your cheesecake look intentionally glossy rather than repaired.
Chill to Reset Texture
Refrigerate the cheesecake uncovered for at least 4 hours, preferably overnight. This chilling time allows the layers to meld together and the texture to become uniformly creamy again. The cold also firms up your new topping layer so it slices cleanly.
As it chills, the flavors will redistribute. Any slight bitter notes from the burn will mellow, while the fresh cream layer will dominate the taste. I’ve found this resting period makes the difference between a “fixed” cheesecake and one that tastes like it was meant to be this way.
Garnish Strategically Before Serving
When ready to serve, add garnishes that draw attention upward. Fresh berries, chocolate shavings, or a dusting of cocoa powder work beautifully. Arrange them in a circular pattern near the edges where any imperfections might show.
For the final touch, use a hot knife (dip in boiling water and wipe dry) to make clean slices. The heat melts through the layers slightly, giving each piece that perfect, smooth edge. Serve immediately—the contrast between the cool, creamy interior and the fresh toppings will have everyone focusing on how delicious it tastes, not how it looks.
Tips and Common Mistakes
Here’s what I’ve learned from rescuing countless burnt cheesecakes—these small details make all the difference between a salvage job and a seamless recovery.
The Cooling Period: That initial 1 hour of cooling in Step 1 isn’t just waiting time—it’s when the cheesecake’s structure stabilizes. I’ve found that placing it near an open window (but not in a draft) helps dissipate heat evenly. If you rush this step, the burnt layer will be harder to remove cleanly because the cheesecake won’t have set properly beneath it.
Knife Technique: When trimming in Step 2, the 15-degree angle isn’t arbitrary. Holding your knife this way lets you shave off the burnt layer in thin sheets rather than digging in. Use a paring knife rather than a chef’s knife—the smaller blade gives you more precision. Work from the center outward to avoid creating uneven patches.
Whipped Cream Layer: For the ½ cup heavy cream in Step 3, don’t over-whip it. Soft peaks should barely hold their shape when you lift the beaters. Over-whipped cream will create a dense layer that masks flavors rather than complementing them. I like to fold in the powdered sugar by hand after whipping to maintain that light texture.
Chilling Strategy: The 4 hours of refrigeration in Step 4 is when magic happens. Place your cheesecake on the middle shelf where air circulates evenly. If you’re short on time, you can speed this up by placing it in the freezer for 1 hour first, then transferring to the fridge. This gives you the firmness you need for clean slicing without compromising texture.
Pro Tips for Fix Burnt Cheesecake Top
- Here’s what I’ve learned from rescuing countless burnt cheesecakes—these small details make all the difference betwee…
- The Cooling Period: That initial 1 hour of cooling in Step 1 isn’t just waiting time—it’s when the cheesecake’s struc…
- Knife Technique: When trimming in Step 2, the 15-degree angle isn’t arbitrary. Holding your knife this way lets you s…
Frequently Asked Questions
Can I fix a burnt cheesecake top if it’s already cooled?
Even if your cheesecake is fully cooled, you can still salvage it. Gently scrape off the burnt layer with a knife or cover it with whipped cream, fresh fruit, or a sour cream glaze. For severe burns, try trimming the top and adding a new topping like chocolate ganache.
How do I prevent my cheesecake from burning in the first place?
Prevention is key! Bake at the correct temperature (usually 325°F–350°F) and avoid overbaking. Use a water bath to regulate heat, and tent the top with foil if it browns too quickly. Always check for doneness 5–10 minutes before the recipe’s suggested time.
What’s the fastest way to cover a burnt cheesecake top?
Need a quick fix? Spread a thick layer of whipped cream or dust with powdered sugar to mask the burn. For extra flair, add berries, caramel drizzle, or crushed cookies. If time allows, a 5-minute chocolate glaze (melted chocolate + cream) works wonders!
Can I still eat a cheesecake with a slightly burnt top?
Yes—if the burn is light and doesn’t taste bitter! Simply scrape off the darkest parts or pair it with strong flavors (like coffee or citrus) to balance the char. Avoid eating heavily burnt sections, as they can be unpleasantly dry or acrid.
Will a burnt top affect the cheesecake’s texture underneath?
Not always! The creamy filling is usually protected, but overbaking (the cause of burns) can make the center dense or cracked. If the inside is still smooth, your fix is purely cosmetic. If it’s dry, serve with a fruit compote or sauce to add moisture.
Don’t let a burnt cheesecake top ruin your dessert dreams! With a few simple tricks—like trimming, covering with toppings, or repurposing into a new treat—you can save your cheesecake and still impress your guests. 🎉 Remember, even baking pros face kitchen mishaps, but the key is knowing how to fix them.
Next time, try adjusting your oven temperature or using a water bath to prevent burning. Now, go ahead and enjoy that creamy slice—you’ve earned it! 🍰

Trained in classic French technique but raised on slow-cooked ribs and spicy rubs, she blends culinary skill with smoke and soul.
- Recipe for Boneless Pork Chops in Cast Iron Skillet: Sear and Baste to Juicy Perfection - October 3, 2026
- Recipe for Boneless Cross Rib Roast: Slow-Roasted Beef with Herb Crust - October 3, 2026
- Hamburgers in Sauce Recipe Crock Pot: Slow-Cooked Savory Delight - October 3, 2026