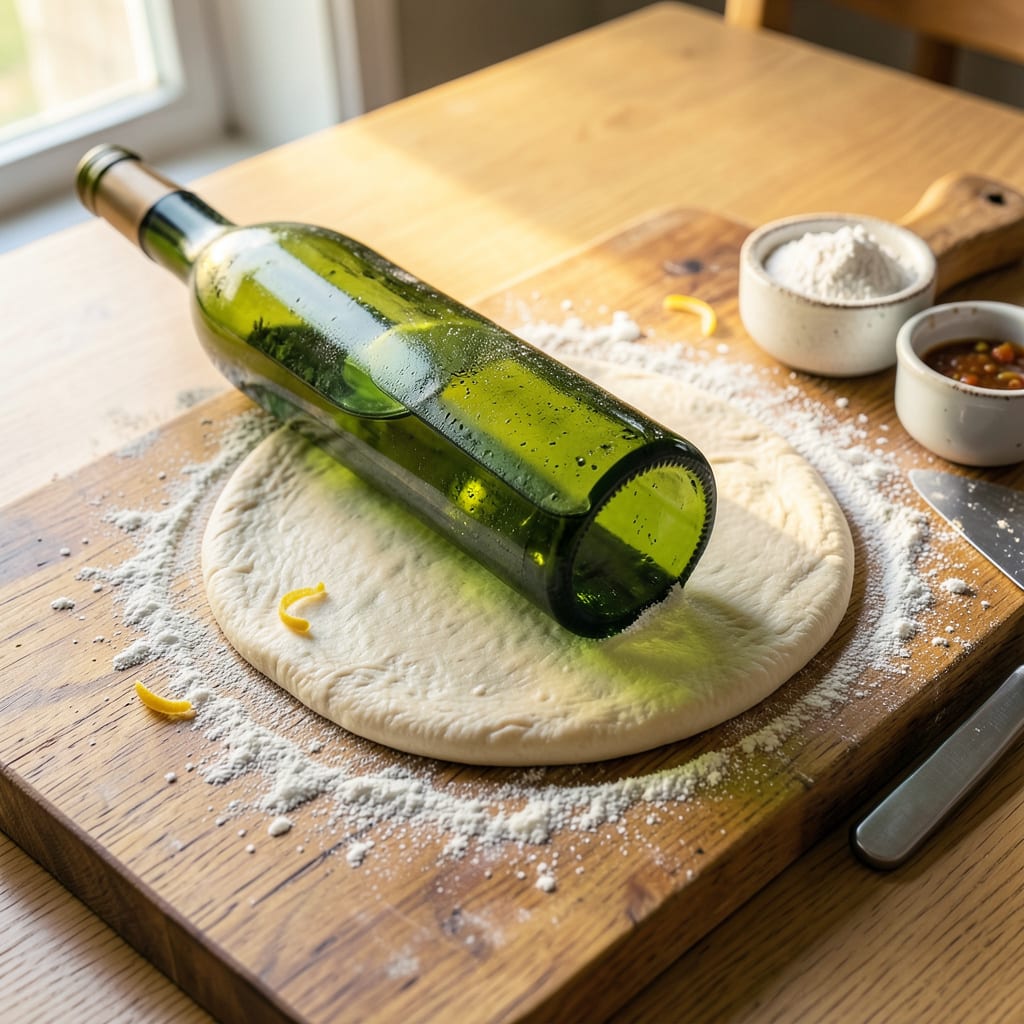
No rolling pin? No problem. I’ve flattened more dough with wine bottles and my bare hands than I care to admit—especially during those late-night pizza cravings when my rolling pin was buried somewhere in the back of the cabinet. The truth is, you can achieve perfectly even dough with everyday kitchen items, and I’m going to show you exactly how.
Here’s the thing—different doughs need different approaches. Stiff pizza dough responds beautifully to a smooth wine bottle, while delicate pie crust does better with gentle hand-pressing or a flat baking sheet. I’ve tested these methods during countless cooking sessions, and they work just as well as any fancy tool. The key is knowing which technique matches your dough’s texture.
What you’ll end up with is dough that’s evenly flattened without tears or sticking, ready for whatever recipe you’re making. Whether it’s crispy flatbread, flaky pie crust, or chewy pizza, these methods deliver restaurant-quality results without special equipment. And yes, I’ve even used a well-washed mason jar in a pinch—it works surprisingly well.
Fair warning: your first attempt might feel a little awkward, but that’s normal. By the second try, you’ll be flattening dough like a pro. Now let’s get into the best methods for your specific recipe—because the right technique makes all the difference.
📚 In This Guide
- What You’ll Need
- Instructions
- Tips and Common Mistakes
What Youll Need
- ● Dough: 1 batch of your favorite homemade or store-bought dough (pizza, pie, cookie, or pastry).
- ● Flat surface: A clean, smooth countertop, cutting board, or baking sheet (at least 12×12 inches).
- ● Flour or cornmeal: 2-3 tbsp for dusting (prevents sticking).
- ○ Plastic wrap or parchment paper: 1-2 large sheets (optional, for extra non-stick protection).
- ● Wine bottle: 1 clean, dry glass bottle (chilled works best!).
- ● Flat-bottomed pan or pot: 1 medium-sized (8-10 inches wide).
- ● Large can (unopened): 1 clean, smooth-sided can (e.g., soup or beans).
- ● Thick book: 1 hardcover book (like a cookbook).
- ○ Meat pounder (flat side): 1 kitchen mallet (optional, for tougher doughs).
- ● Ruler or measuring tape (for even thickness).
- ● Pastry brush (to sweep off excess flour).
- ● Bench scraper (to lift dough easily).
Step-by-Step Instructions for Flattening Dough Without a Rolling Pin
These simple techniques will give you perfectly even dough every time—no special equipment needed.
Use a Wine Bottle for Even Pressure
Choose a smooth, clean glass wine bottle with no labels or ridges. The cylindrical shape naturally distributes pressure evenly, just like a rolling pin. Chill the bottle in the freezer for 10 minutes first—this prevents the dough from sticking and gives you better control.
Place your dough ball on a lightly floured surface and press down gently with your hands to start flattening. Then roll the wine bottle over the dough using firm, even strokes from the center outward. Rotate the dough 90 degrees after every few rolls to maintain a circular shape.
I’ve found this method works especially well for pizza dough and pie crusts. The weight of the bottle does most of the work for you, so you don’t need to press hard. If the dough starts sticking, dust both the dough and bottle with a bit more flour.
Flatten Between Two Sheets of Parchment Paper
This is my go-to method for sticky doughs like cookie dough or sugar cookie dough. Place your dough between two sheets of parchment paper or wax paper. The paper creates a non-stick surface that prevents tearing and makes cleanup a breeze.
Start by pressing the dough gently with your palms to flatten it slightly. Then use a flat-bottomed pan (like a saucepan or skillet) to press and smooth the dough. Apply even pressure as you move the pan in small circular motions, working from the center outward.
For extra precision, you can place ¼-inch thick strips of wood or cardboard on either side of the dough as guides. Press down until the pan touches the guides—this gives you perfectly uniform thickness every time. Peel away the top sheet and you’re ready to bake.
Press with a Flat-Bottomed Pan or Plate
Select a heavy, flat-bottomed pan or dinner plate that’s slightly larger than your dough ball. A cast iron skillet works particularly well because of its weight. Lightly flour both the dough and the bottom of your pan to prevent sticking.
Place the pan on top of the dough and press down firmly but gently. Don’t push too hard at once—start with moderate pressure and gradually increase as the dough flattens. Lift the pan occasionally to check your progress and add more flour if needed.
For best results, rotate the dough 45 degrees after each press to maintain an even circle. This technique works wonderfully for tortillas, flatbreads, and even pie crusts. The broad surface area ensures you won’t create thin spots or tears in the dough.
Use Your Hands for Rustic, Even Results
Sometimes the simplest method is the most effective. Start by pressing your dough ball gently with your fingertips to create an even disc. Then use the heels of your hands to press from the center outward in smooth, gliding motions.
Keep your hands lightly floured to prevent sticking, but don’t use too much—you want just enough friction to shape the dough without tearing it. Rotate the dough a quarter turn after each press to maintain an even circle.
This method gives you great tactile control and works particularly well for bread doughs, focaccia, or any recipe where a rustic look is desirable. I’ve found that slightly wetter doughs respond best to this technique, as they’re more forgiving when stretching.
Repurpose a Sturdy Drinking Glass
Choose a heavy drinking glass with a smooth rim—pint glasses or mason jars work perfectly. The straight sides help create even thickness, and the weight provides good pressure. Chill the glass in the freezer for 5 minutes first to prevent sticking.
Start by pressing your dough ball into a rough disc with your hands. Then place the glass in the center and press down firmly but gently. Move the glass in small circular motions, working outward to the edges. Lift frequently to check your progress and add more flour if needed.
This technique is ideal for small batches of dough or when you need precise control over thickness. It’s particularly effective for sugar cookies, empanada dough, or small pie crusts. The glass’s smooth surface creates a beautifully even finish that’s hard to achieve with other methods.
Tips and Common Mistakes for Perfect Dough Flattening
These practical insights will help you avoid common pitfalls and achieve professional results with every batch.
Surface Preparation: Always start with a clean, lightly floured surface—this prevents sticking and makes rotation easier. I’ve found that all-purpose flour works best for most doughs, but you can use cornmeal for pizza dough to add texture and prevent sticking. Don’t over-flour though, as excess can dry out your dough and create a tough crust.
Chilling Your Tools: The 10-minute freeze for the wine bottle and 5-minute chill for the drinking glass in Steps 1 and 5 aren’t just suggestions—they’re game-changers. Cold surfaces prevent dough from sticking and give you better control. I learned this the hard way after ruining several batches of cookie dough that kept tearing. Now I always chill my tools first.
Rotation Technique: Notice how each method mentions rotation—90 degrees for the wine bottle, 45 degrees for the pan, and quarter turns for hand-pressing. This isn’t arbitrary; consistent rotation ensures even thickness and prevents lopsided results. I mark my work surface with a light pencil line as a visual guide until rotation becomes second nature.
Thickness Control: For the parchment paper method in Step 2, those ¼-inch thick guides make all the difference. Without them, it’s easy to end up with some areas too thin and others too thick. I use paint stir sticks from the hardware store—they’re free, perfectly straight, and exactly ¼-inch thick. This small investment saves me from uneven baking every time.
Pro Tips for Flatten Dough Without A Rolling Pin
- These practical insights will help you avoid common pitfalls and achieve professional results with every batch.
- Surface Preparation: Always start with a clean, lightly floured surface—this prevents sticking and makes rotation eas…
- Chilling Your Tools: The 10-minute freeze for the wine bottle and 5-minute chill for the drinking glass in Steps 1 an…
Frequently Asked Questions
Can I use a wine bottle instead of a rolling pin for dough?
A clean, dry wine bottle works great—just make sure it’s room temperature (cold bottles can make dough stick). Roll gently with even pressure, and dust the bottle with flour if needed. Avoid bottles with raised labels or textures for smooth results.
How thin should I roll the dough without a rolling pin?
It depends on the recipe! For pies or tarts, aim for ⅛-inch thickness; for cookies or flatbreads, ¼-inch works. Use a ruler or coin (a quarter = ~⅛ inch) as a guide. Press evenly to avoid thick spots that won’t bake uniformly.
What if my dough keeps sticking to the substitute tool?
Sticky dough? No problem! Lightly flour both the dough and your tool (bottle, pan, etc.), or place parchment paper over the dough before flattening. Chilling the dough for 10–15 minutes can also help reduce stickiness.
Can I use my hands to flatten dough instead of a tool?
Yes! For rustic results, press dough with your palms (great for pizza or focaccia). Start from the center and work outward, keeping fingers lightly floured. Avoid over-stretching—let the dough relax if it resists to prevent tearing.
How do I flatten dough evenly without a rolling pin?
Use a flat-bottomed pan or baking sheet for uniform pressure. Place parchment paper on top of the dough, then press down firmly in circular motions. Rotate the dough 90° after each press to maintain an even shape.
Who knew you could achieve perfectly flat dough without a rolling pin? 🎉 From wine bottles to your trusty hands, these simple hacks prove that creativity is the real secret ingredient in the kitchen. Whether you’re whipping up pie crusts, homemade pasta, or cookies, you now have five foolproof methods to get the job done—no special tools required!
Ready to put your new skills to the test? Pick your favorite hack and start rolling (or pressing, or patting!). For even better results, experiment with different techniques to find what works best for your recipe. Happy baking—and enjoy the delicious rewards! 🍪🥟

Trained in classic French technique but raised on slow-cooked ribs and spicy rubs, she blends culinary skill with smoke and soul.
- Recipe for Boneless Pork Chops in Cast Iron Skillet: Sear and Baste to Juicy Perfection - October 3, 2026
- Recipe for Boneless Cross Rib Roast: Slow-Roasted Beef with Herb Crust - October 3, 2026
- Hamburgers in Sauce Recipe Crock Pot: Slow-Cooked Savory Delight - October 3, 2026