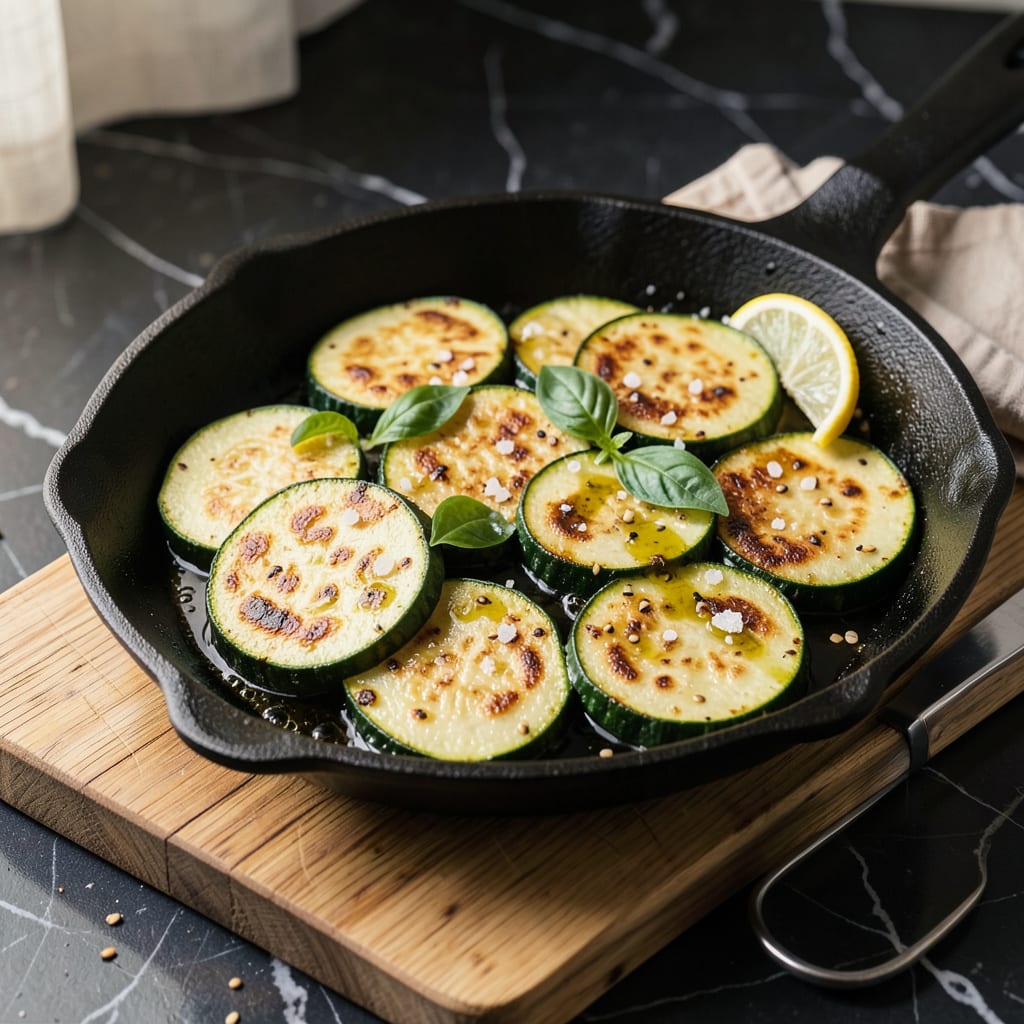
Let me tell you about the simplest way to turn boring zucchini into something you’ll actually crave. I used to think pan-fried zucchini was just a sad side dish until I figured out the trick for getting those crispy golden edges while keeping the centers tender. No fancy equipment needed—just a skillet, some oil, and 10 minutes of your time.
Here’s the thing—most people overcrowd the pan or don’t get the heat right, and end up with soggy slices. I’ve burned through more zucchini than I care to admit perfecting this method. The key is slicing them just right (not too thick, not too thin) and letting them sear undisturbed until they develop that perfect crust. A quick sprinkle of salt while they’re hot makes all the difference.
What you get is zucchini that’s actually exciting to eat—crispy on the outside, tender inside, with just enough char from the hot pan. I like to finish mine with a squeeze of lemon and some cracked black pepper, but they’re just as good with garlic powder or a dusting of parmesan if you’re feeling fancy. These disappear faster than any other veggie side I make.
Perfect alongside grilled chicken, tossed into pasta, or just eaten straight off the pan while they’re still hot. Honestly, I’ve been known to make a double batch just to snack on while cooking the rest of dinner. The best part? You can go from raw zucchini to golden, crispy slices faster than it takes to order takeout.
📚 In This Guide
- What You’ll Need
- Instructions
- Tips and Common Mistakes
What Youll Need
- ● Fresh zucchini: 2 medium (about 1 lb / 450g), washed and dried 🥒
- ● Olive oil or vegetable oil: 3–4 tbsp (enough for ¼-inch depth in the pan)
- ● Salt: ½–1 tsp (or to taste, plus extra for pre-salting)
- ● Black pepper: ¼ tsp (freshly ground preferred)
- ○ Garlic powder or paprika (optional): ½ tsp for extra flavor
- ○ Grated Parmesan or lemon zest (optional): 2 tbsp for garnish
- ● Large skillet (10–12 inches): Non-stick or cast-iron for even browning
- ● Sharp chef’s knife or mandoline: For ¼-inch-thick slices
- ● Paper towels: To pat zucchini dry and drain excess oil
- ● Tongs or spatula: For flipping slices safely
- ○ Mixing bowl (optional): For pre-salting zucchini (reduces sogginess!)
- ○ Slotted spoon (optional): To transfer slices to a plate without excess oil
Instructions
You’re just minutes away from perfectly crispy, golden zucchini that’ll disappear faster than you can make it!
Prep the Zucchini for Maximum Crispiness
Start by selecting medium-sized zucchini—they have fewer seeds and hold their shape better. Wash them thoroughly under cool water, then slice them into ¼-inch thick rounds. I like to cut them at a slight angle for more surface area, which means more crispy edges!
Lay the slices on paper towels and sprinkle lightly with salt. Let them sit for 5 minutes—this draws out excess moisture so your zucchini gets crispy instead of steaming. After 5 minutes, pat both sides completely dry with fresh paper towels. This step is non-negotiable for that perfect crunch!
Heat the Pan and Oil to the Right Temperature
Place a large skillet (cast iron works best) over medium-high heat and let it get properly hot for 2-3 minutes. You want the pan screaming hot before adding oil. Add just enough oil to coat the bottom—about 2 tablespoons—and let it heat until it shimmers but doesn’t smoke.
Here’s the secret: the oil should ripple when you tilt the pan. If it’s smoking, your heat is too high; if it’s not moving, it’s not hot enough. Getting this right means your zucchini will sizzle immediately when it hits the pan, creating that beautiful golden crust instead of absorbing oil and getting soggy.
Cook in Batches Without Overcrowding
Add zucchini slices in a single layer, making sure they don’t touch each other. You should hear an immediate, vigorous sizzle—if you don’t, wait until the pan is hotter. Cook undisturbed for 2-3 minutes until the edges turn deep golden brown and crispy.
Flip each piece carefully with tongs (don’t pierce them with a fork!) and cook the other side for another 2 minutes. The zucchini should be tender when pierced with a knife but still hold its shape. Transfer finished slices to a paper towel-lined plate to drain excess oil, and sprinkle with a pinch of salt while hot.
Keep Them Crispy Until Serving
If cooking multiple batches, place finished zucchini on a wire rack set over a baking sheet in a 200°F oven to keep warm. This prevents them from steaming on a plate and losing that perfect crispness you worked so hard to achieve. Never cover them—the trapped steam will turn your crispy masterpieces soggy in seconds!
Serve immediately while still hot and crispy. The contrast between the golden, crunchy exterior and tender interior is what makes this dish irresistible. For extra flavor, finish with a squeeze of lemon juice or a sprinkle of grated Parmesan right before serving—it takes them from great to extraordinary!
Tips and Common Mistakes
These game-changing tricks will transform your zucchini from good to absolutely irresistible—crispy, golden perfection every time!
Moisture Control: The 5-minute salting step in Step 1 isn’t just important—it’s everything! Don’t rush it. You’ll see little droplets form on the zucchini surface—that’s excess water leaving. Pat them completely dry afterward, or you’ll end up with steamed zucchini instead of crispy slices. I use fresh paper towels for this step to ensure maximum absorption.
Heat Timing Secret: When heating your pan in Step 2, those 2-3 minutes make all the difference. Here’s what nobody tells you—the pan should be so hot that when you flick water on it, the droplets dance and evaporate instantly. That’s when you know it’s ready for oil. If your zucchini doesn’t sizzle immediately when it hits the pan, your heat isn’t high enough yet.
Batch Cooking Wisdom: The 2-minute cook time per side in Step 3 is perfect when you don’t overcrowd the pan. I learned this the hard way—if slices touch, they steam instead of crisp. Work in batches if needed, and keep finished slices in that 200°F oven as directed. This maintains perfect crispness while you cook the next batch. Never skip the wire rack—it’s the difference between crispy and soggy!
Crispiness Preservation: That final sprinkle of salt while the zucchini is still hot is magic! It enhances flavor and helps draw out any last bit of moisture. For extra wow factor, try finishing with a tiny pinch of smoked paprika or garlic powder right after salting—it takes the flavor to another level without overpowering the natural zucchini taste.
Pro Tips for Fry Zucchini In A Pan
- These game-changing tricks will transform your zucchini from good to absolutely irresistible—crispy, golden perfectio…
- Moisture Control: The 5-minute salting step in Step 1 isn’t just important—it’s everything! Don’t rush it. You’ll see…
- Heat Timing Secret: When heating your pan in Step 2, those 2-3 minutes make all the difference. Here’s what nobody te…
Frequently Asked Questions
Do I need to peel zucchini before frying it?
Nope! The skin is totally edible and adds a nice texture. Just give it a good rinse under cold water and pat dry. Pro tip: Younger zucchini have thinner, more tender skin—perfect for frying!
How do I keep fried zucchini from getting soggy?
Sogginess is the enemy of crispiness! After slicing, pat the zucchini dry with paper towels to remove excess moisture. Fry in single layers (no crowding!) and drain on a wire rack—not paper towels—to let air circulate.
Can I use an air fryer instead of a pan?
Toss zucchini slices in oil and air fry at 375°F (190°C) for 8–10 minutes, flipping halfway. They’ll be crispy with less oil—but pan-frying gives that classic golden crust.
Why did my zucchini turn out bitter?
Bitterness usually comes from large, overripe zucchini (they develop more seeds). Pick smaller, firm zucchini (6–8 inches long) for sweeter flavor. A pinch of salt in the batter can also balance bitterness!
How long does fried zucchini stay crispy?
Best eaten fresh! Store leftovers in an airtight container in the fridge for up to 2 days. Re-crisp in a 350°F (175°C) oven for 5–7 minutes or an air fryer for 2–3 minutes.
Now you’ve got the secret to turning simple zucchini into crispy, golden perfection in just minutes! 🌟 Whether you’re whipping up a quick side or adding a veggie boost to your meal, pan-fried zucchini is a foolproof way to make the most of this versatile veggie. Next time, try experimenting with different seasonings—like a sprinkle of parmesan or a dash of smoked paprika—to keep things exciting!
Ready to level up? Pair your zucchini with a homemade dip or toss it into a fresh summer salad. Happy frying—your taste buds will thank you! 😉

Trained in classic French technique but raised on slow-cooked ribs and spicy rubs, she blends culinary skill with smoke and soul.
- Recipe for Boneless Pork Chops in Cast Iron Skillet: Sear and Baste to Juicy Perfection - October 3, 2026
- Recipe for Boneless Cross Rib Roast: Slow-Roasted Beef with Herb Crust - October 3, 2026
- Hamburgers in Sauce Recipe Crock Pot: Slow-Cooked Savory Delight - October 3, 2026