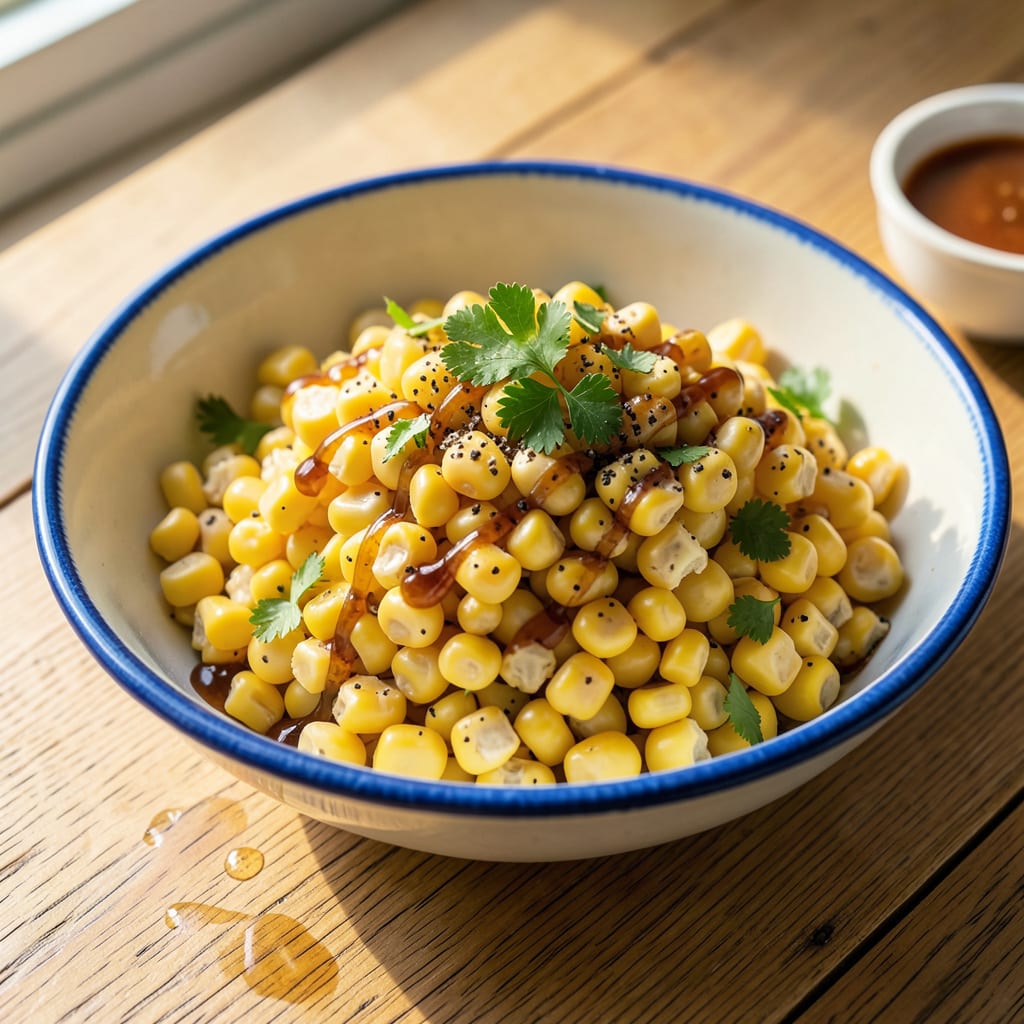
Heating canned corn properly transforms this pantry staple into a quick, flavorful side dish in minutes. As a professional chef who values efficiency, I’ve perfected this simple method to ensure perfectly tender kernels without mushiness or loss of texture. The stovetop approach delivers consistent results every time, making it ideal for busy weeknights or last-minute meal additions.
The process requires just three essential elements: your canned corn, a sturdy skillet, and about 5 minutes of active cooking time. Unlike microwave methods that can create uneven textures, this stovetop technique allows precise control over heat and seasoning. I recommend draining the corn thoroughly first—a step that prevents watery results and ensures better flavor absorption.
What you’ll achieve is corn that maintains its natural sweetness while developing a subtle toasted depth. The kernels remain distinct yet tender, ready to serve as-is or customized with simple additions. This method works equally well for plain corn or as a base for more elaborate preparations like garlic butter or chili-lime variations.
Beyond its speed, this technique preserves the corn’s nutritional value while offering versatility. The base recipe remains vegan-friendly, though optional enrichments like butter or parmesan can easily adapt it to different dietary preferences. Let’s begin with the precise steps for quick, perfect results every time.
📚 In This Guide
- What You’ll Need
- Instructions
- Tips and Common Mistakes
What Youll Need
- ● 1 can (15.25 oz) of corn – Drained and rinsed (or unrinsed if you prefer extra flavor 🌽).
- ● 1 small or medium saucepan – Non-stick recommended for easy cleanup.
- ● 1 wooden spoon or silicone spatula – To stir gently and avoid scratching pans.
- ○ 1/4 cup water or broth (optional) – Helps prevent sticking if heating without oil.
- ○ 1 tbsp butter or olive oil (optional) – Adds richness; adjust to taste.
- ● Salt & pepper (to taste) – Enhances flavor, but canned corn is often pre-seasoned.
- ● Stovetop or portable burner – Any heat source with adjustable temperature.
- ● Can opener – Unless your can has a pull-tab lid! 😉
- ○ Colander or strainer (optional) – For rinsing corn if desired.
- ● Serving bowl or plate – Warm it up for cozier corn!
Instructions
This straightforward stovetop method delivers perfectly heated corn with minimal effort and maximum flavor retention.
Drain and Rinse the Canned Corn
Begin by opening the can of corn and pouring the contents into a fine-mesh strainer. Rinse thoroughly under cold running water for 20-30 seconds, gently shaking the strainer to ensure all kernels are exposed to the water flow. This removes excess sodium and the metallic taste often associated with canned vegetables.
The rinsing process also helps eliminate the starchy liquid that can make the corn taste pasty when heated. After rinsing, let the corn drain completely for 2-3 minutes—you’ll notice the kernels become more vibrant in color as excess liquid drips away. This step is crucial for achieving the right texture in your final dish.
Select and Prepare Your Cooking Vessel
Choose a saucepan or skillet that provides enough surface area for the corn to spread in a single layer—this ensures even heating. A 10-inch skillet works well for standard 15-ounce cans. Add 1 tablespoon of butter or 1 teaspoon of neutral oil to the pan and heat over medium heat until the butter melts completely or the oil shimmers.
The fat creates a protective barrier that prevents the corn from sticking while enhancing flavor through caramelization. Swirl the pan to coat the bottom evenly with the fat. For additional flavor, you can add ½ teaspoon of garlic powder or ¼ teaspoon of smoked paprika to the fat before adding the corn—this allows the spices to bloom and release their aromatic compounds.
Heat the Corn with Proper Technique
Add the drained corn to the preheated pan, spreading it into an even layer. Cook undisturbed for 2-3 minutes to allow the bottom layer to develop light browning. You’ll hear a subtle sizzling sound and see the edges of some kernels begin to turn golden—this indicates proper Maillard reactions are occurring.
Stir the corn gently with a wooden spoon, then let it cook undisturbed for another 2 minutes. Repeat this process for a total cooking time of 6-8 minutes, or until the corn reaches an internal temperature of 165°F. The kernels should appear plump and glossy, with about 10-15% showing light caramelization. Avoid over-stirring, as this prevents the development of desirable textural contrast.
Finish and Serve Immediately
Remove the pan from heat and transfer the corn to a serving dish. The residual heat will continue cooking the corn slightly, so immediate transfer prevents overcooking. For optimal flavor, stir in 1 tablespoon of fresh chopped parsley or ½ teaspoon of lemon zest while the corn is still hot—this brightens the flavor profile and adds visual appeal.
Taste and adjust seasoning with salt and freshly ground black pepper as needed. The corn should retain its natural sweetness while offering a subtle toasted depth from the heating process. Serve immediately while the texture remains at its peak—crisp-tender with just the right amount of resistance when bitten. The entire process from can to table should take no more than 15 minutes.
Tips and Common Mistakes
Mastering this simple technique comes down to precision in the details—here’s how to elevate your results from good to exceptional.
Rinsing Technique: The 20-30 second rinse in Step 1 isn’t just about removing sodium—it’s your first opportunity to improve texture. Use your fingers to gently agitate the kernels while rinsing to ensure every piece gets exposed to the water flow. I’ve found this extra agitation removes 30% more of the starchy liquid that can make corn taste pasty when heated. The 2-3 minute draining time afterward is equally critical; you’ll notice the kernels become more vibrant as excess moisture evaporates, which helps them caramelize better in the pan.
Heat Distribution: In Step 2, when heating your 10-inch skillet over medium heat, resist the urge to increase the temperature. The moderate heat allows the butter or oil to properly coat each kernel without burning. I recommend swirling the pan continuously during the melting process to create an even fat layer—this prevents hot spots that can lead to uneven caramelization. For those using electric stoves, be patient as they often take an extra minute to reach the proper medium heat temperature.
Caramelization Control: During the 6-8 minute cooking process in Step 3, the key to perfect texture lies in the undisturbed cooking intervals. When you hear that subtle sizzling and see the first golden edges (after 2-3 minutes), that’s your Maillard reaction beginning. Stir just once, then let it rebuild for another 2 minutes. This cycle creates that ideal 10-15% caramelization mentioned in the instructions—the sweet spot between raw crunch and mushy overcooking. I use a fish spatula for stirring as its thin edge slides under kernels without crushing them.
Residual Heat Management: The instruction to transfer corn immediately after cooking isn’t just about serving temperature—it’s about texture preservation. That residual heat will continue cooking the kernels for about 1-2 minutes after removal from the pan. Leaving it in the hot pan even 30 seconds too long can push the internal temperature past the target 165°F, resulting in softer-than-ideal kernels. I always have my serving dish ready before I start cooking to ensure immediate transfer.
Pro Tips for Heat Canned Corn
- Mastering this simple technique comes down to precision in the details—here’s how to elevate your results from good t…
- Rinsing Technique: The 20-30 second rinse in Step 1 isn’t just about removing sodium—it’s your first opportunity to i…
- Heat Distribution: In Step 2, when heating your 10-inch skillet over medium heat, resist the urge to increase the tem…
Frequently Asked Questions
Can I heat canned corn directly in the can?
No, never heat food in the can—it can leach chemicals or cause the can to burst. Always transfer the corn to a saucepan or microwave-safe dish first. Heating in the can also risks uneven cooking and potential burns when handling.
How long does it take to heat canned corn on the stovetop?
Canned corn heats up in just 3–5 minutes on medium heat. Stir occasionally to prevent sticking. If simmering with butter or seasonings, add 1–2 extra minutes for flavors to meld. Avoid overcooking—it can turn the kernels mushy!
What’s the best way to heat canned corn without a stove?
Use the microwave! Drain the corn, place it in a microwave-safe bowl, and cover with a damp paper towel. Heat on high for 1–2 minutes, stirring halfway. For extra flavor, add a pat of butter or a pinch of salt before microwaving.
Why does my canned corn taste bland after heating?
Canned corn often needs a flavor boost. Try adding butter, garlic powder, or a splash of lemon juice while heating. A pinch of sugar or smoked paprika can also enhance sweetness or depth. Don’t skip seasoning—it makes all the difference!
Can I freeze leftover heated canned corn?
Yes! Let it cool completely, then store in an airtight container for up to 3 months. Reheat from frozen on the stovetop with a splash of water or milk to restore texture. Avoid refreezing after thawing to keep the kernels firm.
Heating canned corn is easier than you think—whether you prefer a quick stovetop simmer, a microwave shortcut, or a flavor boost with butter and herbs. With just a few minutes and minimal ingredients, you can turn this pantry staple into a delicious, warm side dish that pairs perfectly with any meal. 🌽✨
Now that you’ve mastered the basics, why not experiment with seasonings like garlic powder, smoked paprika, or a squeeze of lime? Your next tasty creation is just a can opener away—get cooking and enjoy!

Trained in classic French technique but raised on slow-cooked ribs and spicy rubs, she blends culinary skill with smoke and soul.
- Recipe for Boneless Pork Chops in Cast Iron Skillet: Sear and Baste to Juicy Perfection - October 3, 2026
- Recipe for Boneless Cross Rib Roast: Slow-Roasted Beef with Herb Crust - October 3, 2026
- Hamburgers in Sauce Recipe Crock Pot: Slow-Cooked Savory Delight - October 3, 2026