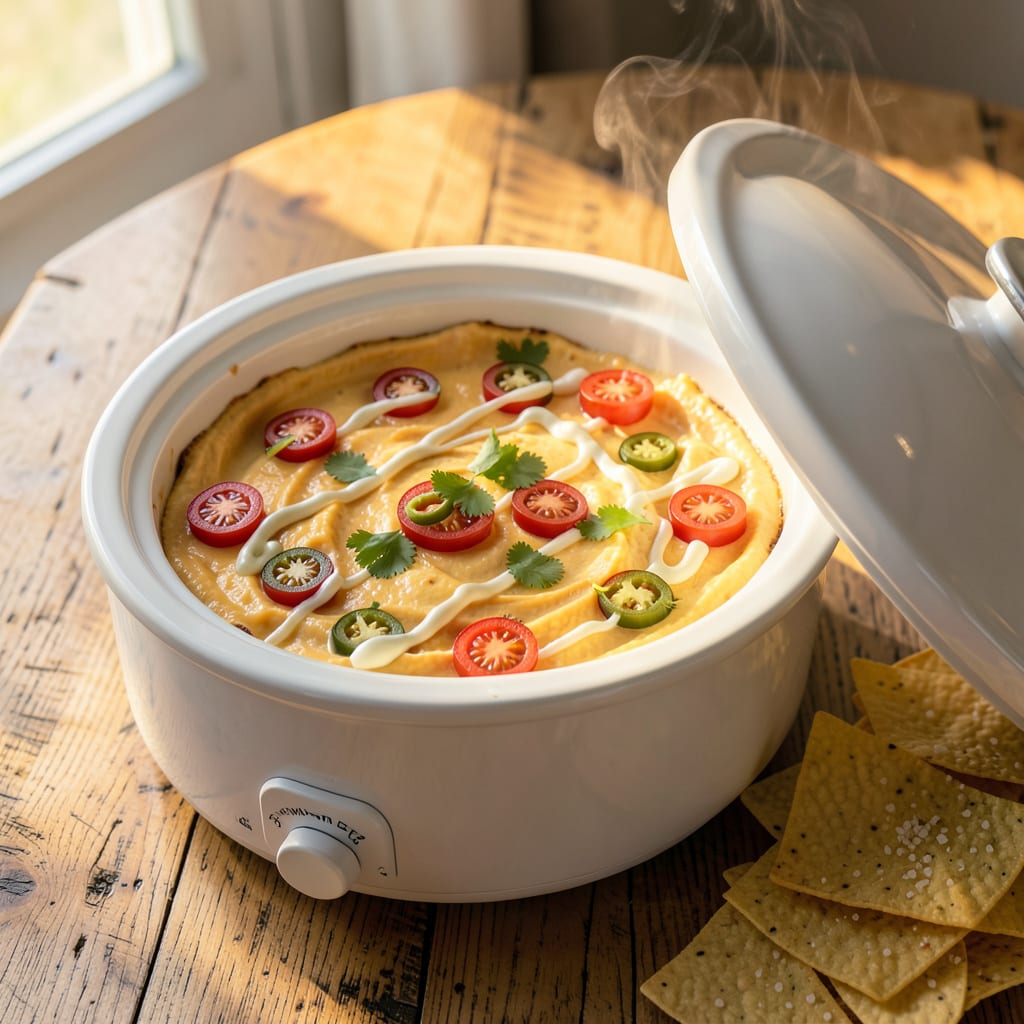
Hosting a party means keeping your queso silky smooth from the first guest to the last—no clumps, no separation, just perfect dipping consistency. I’ve been through the queso disasters (we’ve all seen the oily puddle at the bottom of the bowl), and the solution is simpler than you think. The right setup makes all the difference between a stress-free spread and a cheese catastrophe.
Your best tools? A slow cooker on warm or a chafing dish with a water bath—both maintain gentle, even heat without scorching. I learned the hard way that direct heat turns queso into a gluey mess, but these methods keep it creamy and stable for hours. Pro tip: Stir occasionally and add a splash of milk if it thickens too much. The goal is party-proof queso that stays luscious, not a science experiment gone wrong.
Storage matters too. If you’re prepping ahead, keep queso in an airtight container in the fridge, then reheat gently with extra liquid (broth or milk works). Serving suggestions? Double up on dippers—tortilla chips, pretzels, and fresh veggies give guests options. And if disaster strikes and your queso breaks, a quick whisk over low heat with a splash of cream usually saves the day.
Bottom line: Great queso isn’t just about the recipe—it’s about keeping it party-ready. Set up your warming station early, check the heat every hour, and you’ll have a bowl that stays as inviting at midnight as it was at happy hour. Now let’s make sure your spread steals the show.
📚 In This Guide
- What You’ll Need
- Instructions
- Tips and Common Mistakes
What Youll Need
- ● Slow cooker (1-2 units, 3-6 quart capacity) – The MVP for keeping queso warm! 🧀
- ○ Chafing dish (optional, with fuel canisters) – For a fancier setup.
- ● Heat-safe serving bowls (2-3, 4-6 cup capacity) – Double-walled or ceramic works best.
- ● Ladle or serving spoon (1-2, heat-resistant) – For easy scooping.
- ○ Thermal carafe or insulated container (optional, 1-2 quarts) – Great for transport.
- ● Aluminum foil or lid – To trap heat when not serving.
- ● Heat source: Slow cooker or
- ● Warming tray (110°F-140°F setting) or
- ● Stovetop (low heat, 1-2 burners)
- ● Stirring utensil (1, wooden or silicone) – Prevents sticking.
- ○ Thermometer (optional, food-safe) – To monitor temp (aim for 135°F+).
- ● Extra cheese (8-16 oz, shredded) – For thinning if queso thickens.
- ● Milk or broth (½-1 cup) – To adjust consistency.
- ● Extension cord (if needed) – For outdoor setups.
Step-by-Step Instructions for Keeping Queso Warm
Here’s exactly how to maintain that perfect creamy texture throughout your entire event.
Choose the Right Serving Equipment
Start by selecting a heat source that provides gentle, even warmth. I always recommend a slow cooker set to the warm setting for queso—it maintains a consistent temperature without scorching. If you don’t have a slow cooker, a chafing dish with a tea light or sterno can works beautifully too.
For smaller gatherings, a fondue pot with its adjustable flame is my secret weapon. Whatever you choose, make sure it’s large enough to hold all your queso without overfilling. I like to transfer the queso to the warming vessel right after making it, while it’s still hot and perfectly smooth.
Maintain the Perfect Temperature
The magic number for queso is between 140°F and 160°F. Any cooler and it starts to thicken; any hotter and it risks separating or developing a skin. If using a slow cooker, I check the temperature with an instant-read thermometer after the first 30 minutes to ensure it’s in this sweet spot.
Here’s the thing—queso continues to thicken as it sits, so I always add a splash of warm milk or broth (about ¼ cup per hour) to maintain that perfect dipping consistency. Stir gently each time you add liquid, scraping the bottom to prevent any sticking. The key is gradual adjustments rather than waiting until it’s too thick.
Stir Regularly for Consistent Texture
Set a timer to stir the queso every 15-20 minutes. This prevents a skin from forming on top and ensures even heat distribution. I use a silicone spatula that scrapes the sides and bottom completely—this prevents any cheese from sticking and burning, which can ruin the flavor.
Real talk: the edges and bottom are where queso tends to overheat first. Each time you stir, pay special attention to these areas. If you notice any thickening along the edges, that’s your signal to either lower the heat slightly or add a bit more liquid. The texture should always look glossy and smooth, never dull or grainy.
Protect from the Elements
Place your queso station away from drafts, air conditioning vents, or open windows. Even slight temperature fluctuations can cause the cheese to thicken or separate prematurely. I like to create a little “queso cozy” by wrapping a clean kitchen towel around the base of the slow cooker or chafing dish—this provides just enough insulation.
If you’re serving outdoors, position the queso in a spot that gets indirect sunlight rather than full sun. Direct heat can cause the top to form a skin while the bottom stays too cool. For outdoor parties, I always bring the queso inside for 10 minutes every hour to let it rest and stabilize before returning it to the heat source.
Refresh as Needed for Long Events
For parties lasting more than 2 hours, plan to refresh your queso. I keep a small pot of freshly made queso (just 2 cups is usually enough) warming on the stove. About halfway through the event, I stir this fresh batch into the serving dish to restore that just-made creaminess.
If you notice the queso starting to look oily or separated, don’t panic. Simply whisk in 1 teaspoon of cornstarch mixed with 1 tablespoon of cold water—this acts as an emulsifier and brings everything back together. The texture should always coat the back of a spoon smoothly, with no visible separation of fat or liquid.
Tips and Common Mistakes
After years of hosting parties and perfecting my queso technique, here’s what I’ve learned about keeping it silky smooth all night.
Temperature Precision: The 140°F to 160°F range mentioned in Step 2 is absolutely critical. I’ve found that queso starts to thicken noticeably below 140°F, while anything above 160°F causes the fats to separate. Use that instant-read thermometer after the first 30 minutes as suggested—it’s the only way to be certain you’re in the safe zone. Trust me, guessing leads to either cold, gloppy queso or a broken, oily mess.
Liquid Management: The ¼ cup of warm milk or broth per hour in Step 2 isn’t just a suggestion—it’s your insurance policy against thickening. Here’s what nobody tells you: cold liquid can shock the queso and cause clumping. Always warm your milk or broth to about 100°F before adding. I keep a small saucepan on the stove with extra liquid ready to go, so I’m never scrambling when it’s time to refresh.
Stirring Technique: Those 15-20 minute intervals in Step 3 aren’t arbitrary. Queso develops hot spots, especially along the edges and bottom where it contacts the heat source directly. When you stir, use a figure-eight motion that scrapes the sides completely—this prevents that dreaded cheese “film” from forming. I like to count to ten with each stir to ensure I’m being thorough enough to redistribute the heat evenly.
Outdoor Strategy: The 10-minute indoor break every hour mentioned in Step 4 might seem excessive, but it’s saved my queso at countless outdoor parties. Even indirect sunlight can create a 10-15 degree temperature difference between the top and bottom of your queso. That brief indoor rest equalizes the temperature and prevents the top from forming a skin while the bottom stays too cool to dip properly.
Pro Tips for Keep Queso Warm For A Party
- After years of hosting parties and perfecting my queso technique, here’s what I’ve learned about keeping it silky smo…
- Temperature Precision: The 140°F to 160°F range mentioned in Step 2 is absolutely critical. I’ve found that queso sta…
- Liquid Management: The ¼ cup of warm milk or broth per hour in Step 2 isn’t just a suggestion—it’s your insurance pol…
Frequently Asked Questions
How long can I safely keep queso warm in a slow cooker or chafing dish?
Queso stays safe for 2–4 hours at 140°F+ in a slow cooker or chafing dish. After that, bacteria risks rise. Stir occasionally and add a splash of milk if it thickens. For longer parties, refresh with a fresh batch halfway through!
Can I reheat queso that’s been sitting out for a while?
If queso sat at room temp for over 2 hours (or 1 hour if it’s 90°F+ outside), toss it—safety first! Otherwise, reheat to 165°F on the stove or microwave, stirring in milk or broth to restore creaminess.
What’s the best alternative if I don’t have a slow cooker?
No slow cooker? No problem! Use:
- A fondue pot (with a tea light or Sterno can)
- An insulated thermos (preheat with hot water first)
- A double boiler (DIY with a heat-safe bowl over simmering water)
Why does my queso get grainy or separate when kept warm?
Overheating or acidity (like salsa) can cause curdling. Fix it by:
- Stirring in 1–2 tbsp warm milk or cream
- Lowering the heat (aim for “Warm” setting, not “High”)
- Adding a pinch of cornstarch slurry for stability
Can I make queso ahead and keep it warm all day?
Yes, but prep smart! Make queso up to 2 days ahead, refrigerate, then reheat gently in a slow cooker on “Low” with extra liquid. For all-day events, use a warming tray with a water bath to prevent scorching.
Keeping your queso warm and creamy for the whole party is easier than you think! With the right tools—like a slow cooker, chafing dish, or even a thermos—and a few simple tricks, you can serve up velvety queso that steals the show. 🌟 Just
Now that you’re armed with these tips, it’s time to put them to the test! Whip up your favorite queso recipe, set up your warming station, and get ready to impress your guests. Pro tip: Try a practice run beforehand to fine-tune your setup. Happy dipping! 🧀🎉

Trained in classic French technique but raised on slow-cooked ribs and spicy rubs, she blends culinary skill with smoke and soul.
- Recipe for Boneless Cross Rib Roast: Slow-Roasted Beef with Herb Crust - October 3, 2026
- Hamburgers in Sauce Recipe Crock Pot: Slow-Cooked Savory Delight - October 3, 2026
- Sanjeev Kapoor Egg Biryani Recipe: Fragrant Spiced Rice With Boiled Eggs - October 3, 2026