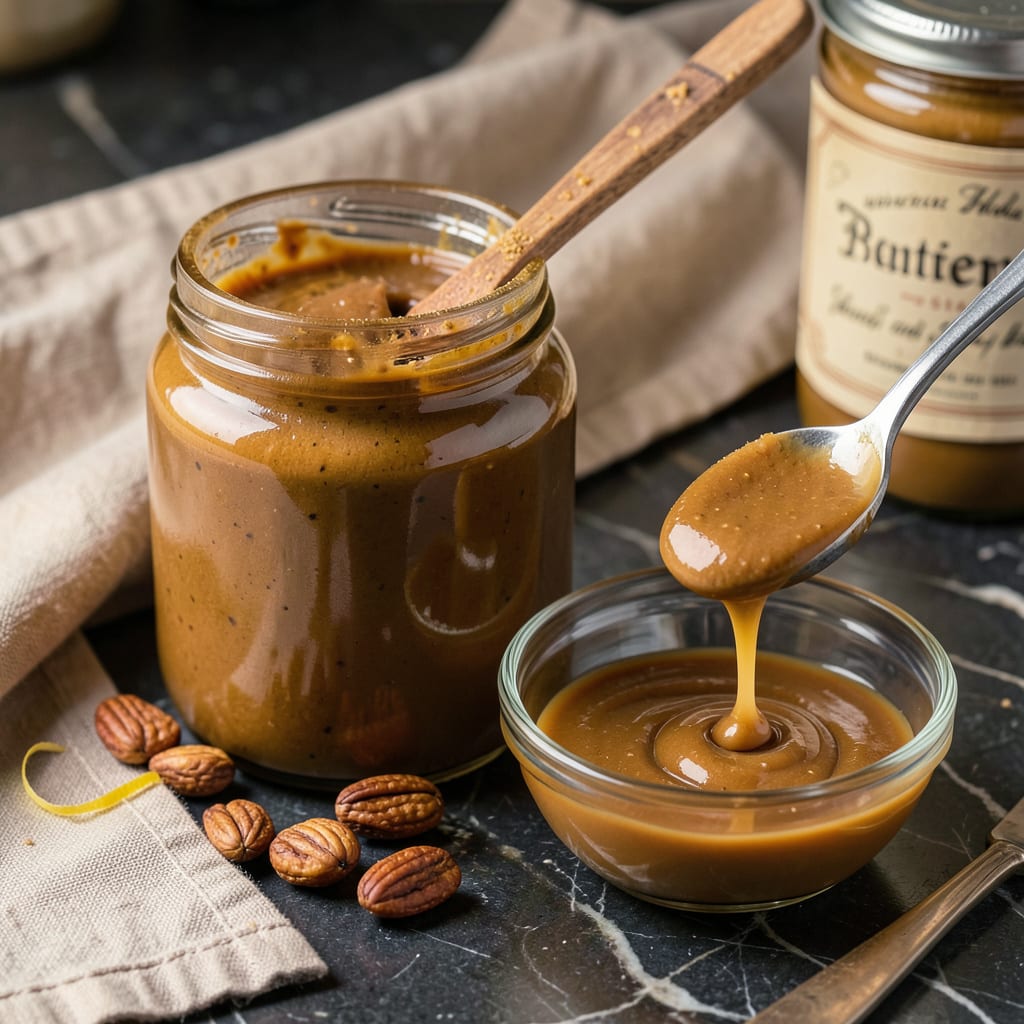
Let me tell you about the easiest way to transform thick, stubborn peanut butter into a silky, pourable dream. I’ve been making runny peanut butter for years—ever since I realized how much better it works for drizzling over ice cream, swirling into smoothies, or using as a dip. The secret isn’t fancy equipment or weird ingredients, just a simple technique that takes seconds.
What you’re after is that perfect drizzling consistency, like the peanut butter you see in food photos cascading over pancakes or oozing from sandwiches. I achieved this by accident one morning when I was in a rush and needed to thin out my peanut butter fast. Turns out, the solution was hiding in my pantry all along—no special trips to the store required.
This method works with any peanut butter—creamy, crunchy, natural, or even the separated kind at the bottom of your jar. You’ll end up with a smooth, velvety texture that’s easy to pour but still packed with that rich peanut flavor. And here’s the best part: it stays runny for days when stored properly, so you can make a batch ahead.
Whether you’re vegan, gluten-free, or just love peanut butter, this trick will change how you use it. No more wrestling with a stiff jar or settling for uneven drizzles. Let’s get that peanut butter flowing exactly how you want it.
📚 In This Guide
- What You’ll Need
- Instructions
- Tips and Common Mistakes
What Youll Need
- ● Raw materials: 2 cups (320g) roasted peanuts (unsalted, shelled—freshness matters!)
- ● 1–2 tbsp neutral oil (peanut, avocado, or coconut oil for smoothness)
- ○ Optional: ½ tsp salt (for flavor balance), 1 tbsp honey/maple syrup (for sweetness), or ½ tsp cinnamon (for warmth)
- ● Tools: High-speed blender or food processor (minimum 600W for ultra-smooth results)
- ● Rubber spatula (to scrape down the sides)
- ● Air-tight glass jar (for storage—16oz or larger)
- ○ Optional: Kitchen scale (for precise measurements), tamper tool (for blenders)
- ● Prerequisites: Peanuts fully cooled (if freshly roasted) to avoid oil separation.
- ● Clean, dry tools (moisture = clumpy peanut butter!)
Instructions
Here’s the simplest way to transform thick peanut butter into a silky, pourable consistency.
Choose Your Peanut Butter Base
Start with natural peanut butter that contains only peanuts and maybe salt—avoid brands with added hydrogenated oils or stabilizers. These additives prevent separation and make it harder to achieve that perfect runny texture. I always check the label to ensure there are no more than two ingredients.
If your peanut butter has separated (with oil pooling on top), that’s actually ideal. Don’t stir it yet—this separation means the natural oils are ready to be incorporated for maximum smoothness. If it hasn’t separated, don’t worry; we’ll still get great results.
Warm the Peanut Butter Gently
Transfer your peanut butter to a microwave-safe bowl or measuring cup. Heat it in 15-second intervals at 50% power, stirring well between each burst. This low-and-slow approach prevents overheating, which can make peanut butter grainy or burn the edges.
After each interval, stir thoroughly from the bottom up to distribute heat evenly. You’ll notice the texture changing gradually—it should become glossier and more fluid with each heating cycle. Stop when it reaches a pourable consistency, similar to warm honey. This usually takes 45-60 seconds total.
Thin with Oil if Needed
If your peanut butter still feels too thick after warming, add neutral oil like vegetable or peanut oil, 1 teaspoon at a time. Stir well after each addition and reassess the consistency. The goal is a smooth, easily pourable texture that coats the back of a spoon but isn’t watery.
Be patient with this step—it’s easier to add more oil than to fix peanut butter that’s become too thin. Natural peanut butter will thicken slightly as it cools, so aim for a consistency that’s just slightly thinner than your final goal. I find that 1-2 teaspoons of oil is usually perfect for a standard 16-ounce jar.
Maintain the Perfect Consistency
Once you’ve achieved the ideal runny texture, use it immediately for drizzling or mixing. If you need to store it, transfer to an airtight container and keep at room temperature. The peanut butter will thicken slightly as it cools, but a quick 10-second microwave burst will restore its pourable state.
For long-term storage, stir well before each use and warm briefly if needed. If the peanut butter separates again over time, simply repeat the stirring and gentle warming process. This method works every time to bring it back to that perfect silky consistency.
Tips and Common Mistakes
Getting that perfect drizzling consistency is easier than you think—here’s what I’ve learned from making this countless times.
Heating Technique: In Step 2, those 15-second intervals at 50% power are crucial. I’ve tried full power before and ended up with burnt edges and grainy texture. The low-and-slow method gives you complete control, letting you stop the moment it reaches that warm honey-like consistency. Trust me, patience here prevents disappointment later.
Oil Addition: When thinning in Step 3, remember that 1 teaspoon at a time really means one teaspoon. I ruined my first batch by adding 2 teaspoons all at once—it went from perfect to too thin in seconds. Stir thoroughly between each addition and give it 10 seconds to incorporate fully before deciding if you need more.
Storage Solution: After achieving the ideal texture, transfer to a small, wide-mouth jar rather than the original container. This makes it easier to stir when it thickens and prevents you from having to dig out hardened peanut butter from deep containers. A quick 10-second microwave burst works best when you use a shallow container that heats evenly.
Consistency Check: Here’s what nobody tells you—natural peanut butter will always thicken slightly as it cools. That’s why in Step 3, you want it just a hair thinner than your final goal when it’s warm. I aim for a texture that slowly drips off the spoon rather than running like water. This accounts for the natural thickening that happens during cooling.
Pro Tips for Make Runny Peanut Butter
- Getting that perfect drizzling consistency is easier than you think—here’s what I’ve learned from making this countle…
- Heating Technique: In Step 2, those 15-second intervals at 50% power are crucial. I’ve tried full power before and en…
- Oil Addition: When thinning in Step 3, remember that 1 teaspoon at a time really means one teaspoon. I ruined my firs…
Frequently Asked Questions
How long does it take to make runny peanut butter?
Most methods take 2-5 minutes! A food processor or blender gets you silky results fastest (2-3 minutes), while hand-stirring with oil can take up to 5 minutes. Patience is key—stop occasionally to scrape the sides for even texture.
Can I make runny peanut butter without oil?
Yes! Try these oil-free hacks:
- Blend in Greek yogurt (adds creaminess + protein ).
- Use apple sauce or mashed banana for natural sweetness.
- Warm the peanut butter gently (10-15 sec in microwave) to loosen it.
Note: Texture may thicken when cooled.
Why did my peanut butter separate after thinning it?
Natural oils rise to the top over time—it’s normal! Fix it by:
- Stirring vigorously before use.
- Storing it upside down in the jar (mixes oils back in).
- Adding a pinch of xanthan gum (1/8 tsp per cup) to stabilize.
What’s the best oil to use for thinning peanut butter?
Neutral oils work best:
- Peanut oil (enhances flavor ).
- Avocado or coconut oil (healthier, but coconut may solidify if cold).
- Avoid olive oil—its strong taste overpowers.
Start with 1 tsp per ½ cup and adjust.
How do I store runny peanut butter to keep it smooth?
Store in an airtight container at room temp for up to 2 weeks. For longer shelf life:
- Refrigerate (it’ll thicken—just warm slightly before use).
- Add 1 tsp honey or maple syrup to help retain moisture.
- Avoid metal utensils (they can speed up oil separation).
Now you’ve got the secret to perfectly runny peanut butter—no lumps, no fuss, just creamy goodness! 🥜✨ Whether you prefer a quick microwave trick, a splash of oil, or a food processor hack, smooth results are just minutes away. The best part? You can tweak the texture to match exactly what you crave.
Ready to put your new skills to work? Drizzle it over ice cream, swirl it into oatmeal, or use it as a dip—your culinary adventures are just beginning! For more sauce and condiment hacks, check out our guide on homemade nut butters next. Happy blending! 😊

Trained in classic French technique but raised on slow-cooked ribs and spicy rubs, she blends culinary skill with smoke and soul.
- Recipe for Boneless Pork Chops in Cast Iron Skillet: Sear and Baste to Juicy Perfection - October 3, 2026
- Recipe for Boneless Cross Rib Roast: Slow-Roasted Beef with Herb Crust - October 3, 2026
- Hamburgers in Sauce Recipe Crock Pot: Slow-Cooked Savory Delight - October 3, 2026