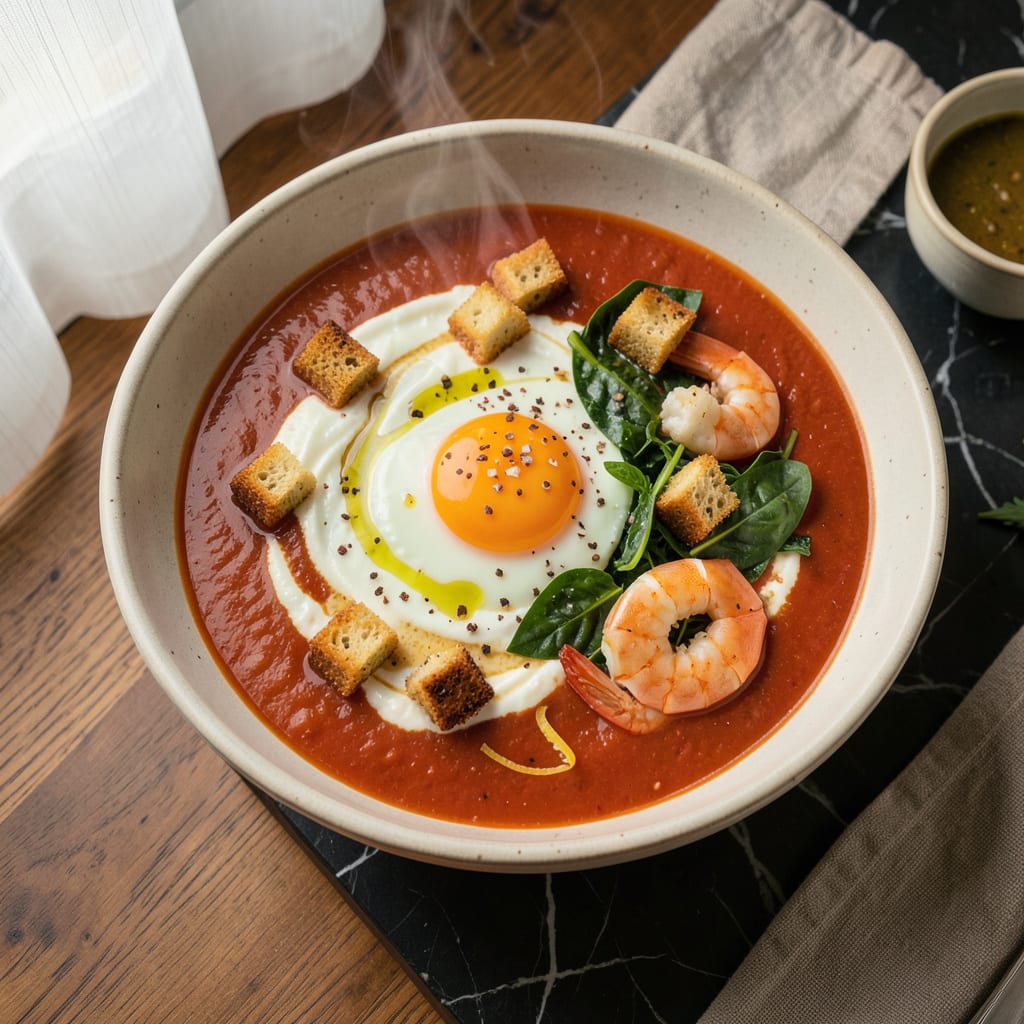
Let me be real with you—canned soup doesn’t have to taste like a sad desk lunch. With a few simple moves, you can turn that salt bomb into something rich, balanced, and actually exciting. I’ve been upgrading canned soups for years, and the difference is night and day.
The secret starts with aromatics. Sautéing onion, garlic, and a pinch of dried herbs in butter or olive oil takes 5 minutes but adds layers of flavor no canned soup has on its own. Then, stir in the soup and let it simmer with the infused oil—game-changer.
Next, bulk it up. A handful of fresh spinach, some diced mushrooms, or leftover shredded chicken transforms thin broth into a hearty meal. And don’t forget the finish: a splash of lemon juice or soy sauce cuts the saltiness, while a sprinkle of parmesan or fresh herbs makes it taste homemade.
No fancy skills required—just smart tweaks that work every time. Ready to make that can of soup actually worth eating?
📚 In This Guide
- What You’ll Need
- Instructions
- Tips and Common Mistakes
What Youll Need
- ● 1 can (10–15 oz) of soup – Any variety (cream-based, broth, or chunky)
- ● 1–2 tbsp olive oil or butter – For sautéing aromatics
- ● 1 small onion, diced – Yellow or white works best
- ● 2–3 garlic cloves, minced – Fresh is ideal, but ½ tsp garlic powder works in a pinch
- ○ ½ cup fresh veggies (optional) – Think carrots, celery, spinach, or mushrooms
- ○ ¼ cup protein (optional) – Cooked chicken, beans, tofu, or shredded rotisserie chicken
- ● ½ tsp dried herbs – Thyme, oregano, or basil (or 1 tbsp fresh)
- ● Salt & black pepper – To taste (start with ¼ tsp each)
- ● ½ cup broth or water – To thin if needed (low-sodium broth preferred)
- ○ 1–2 tbsp acid (optional) – Lemon juice, vinegar, or a splash of wine for brightness
- ○ Toppings (optional) – Grated cheese, fresh herbs, croutons, or a drizzle of hot sauce
Instructions for Upgrading Canned Soup
Here’s how to transform ordinary canned soup into something extraordinary with just a few simple tweaks.
Sauté Aromatics for Depth of Flavor
Start by heating 1 tablespoon of olive oil or butter in a saucepan over medium heat. I like to use butter for cream-based soups and olive oil for broth-based ones. Add ½ cup of diced onion and cook for 3-4 minutes until it becomes translucent and fragrant.
Next, stir in 1-2 minced garlic cloves and cook for just 30 seconds until you can smell the garlic—don’t let it brown or it will turn bitter. If you’re using vegetables like carrots or celery, add them now and cook for another 3-4 minutes until they start to soften. This simple step builds a flavor foundation that will make your soup taste homemade.
Bloom Spices and Herbs for Maximum Impact
After the aromatics have softened, push them to one side of the pan and add ½ teaspoon of dried herbs (like thyme, oregano, or basil) or 1 teaspoon of fresh herbs. Toast them for 10-15 seconds until they become fragrant—this “blooming” process wakes up their flavors.
For spiced soups, add ¼ teaspoon of ground spices like cumin, smoked paprika, or chili powder and toast for 10 seconds. You’ll notice the spices darken slightly and release their aroma. Stir everything together, then pour in the canned soup. This technique ensures your spices won’t taste raw or metallic.
Add Fresh Ingredients for Texture and Brightness
Once the soup is heated through, stir in ½ cup of fresh vegetables like spinach, kale, or diced tomatoes. For cream soups, try adding ¼ cup of grated carrots or zucchini—they’ll soften quickly and blend right in. Cook for just 2-3 minutes until the vegetables are tender but still vibrant.
Finish with a splash of acid—1 tablespoon of lemon juice, vinegar, or even a spoonful of plain yogurt or sour cream. This brightens the flavors and balances richness. Taste and adjust seasoning with salt and pepper—most canned soups need a little extra.
Garnish Like a Pro for Restaurant-Quality Results
Ladle the soup into bowls and top with fresh herbs like parsley, cilantro, or chives. A sprinkle of grated cheese, toasted nuts, or crumbled bacon adds crunch and depth. For cream soups, a drizzle of good-quality olive oil or chili oil elevates the presentation and flavor.
Serve with something crunchy on the side—toasted bread, crackers, or even popcorn for contrast. The key is layering textures and temperatures: warm soup with cool garnishes, creamy broth with crispy toppings. These final touches make your upgraded soup feel like a complete meal.
Tips and Common Mistakes
These simple tricks will transform your canned soup from basic to restaurant-worthy in no time.
Timing Secret: When cooking your onions in Step 1, those 3-4 minutes over medium heat make all the difference. You want them translucent but not browned – they should look like they’re just starting to soften and smell sweet. If they brown too quickly, lower the heat slightly. This builds the perfect flavor base without any bitterness.
Garlic Technique: The 30 seconds for garlic in Step 1 is crucial. I learned this the hard way after burning several batches – garlic goes from perfect to bitter in seconds. Stir constantly and pull it off the heat as soon as you smell its aroma. If you’re nervous, you can even remove the pan from heat while cooking the garlic.
Fresh Additions: In Step 3, when adding your ½ cup of fresh vegetables, don’t overcook them. Those 2-3 minutes should just wilt spinach or soften tomatoes slightly. You want them to retain their color and texture. I like to add delicate herbs like parsley or cilantro at the very end so they stay bright and fresh.
Seasoning Strategy: Most canned soups need more seasoning than you think. After adding your acid in Step 3, taste before adding salt. Then season gradually – you can always add more, but you can’t take it out. A good rule is to add half what you think you need, stir, taste, then adjust.
Pro Tips for Make Canned Soup Better
- These simple tricks will transform your canned soup from basic to restaurant-worthy in no time.
- Timing Secret: When cooking your onions in Step 1, those 3-4 minutes over medium heat make all the difference. You wa…
- Garlic Technique: The 30 seconds for garlic in Step 1 is crucial. I learned this the hard way after burning several b…
Frequently Asked Questions
Can I upgrade canned soup without fresh ingredients?
Absolutely! Pantry staples like dried herbs (thyme, oregano), spices (smoked paprika, garlic powder), canned beans, or frozen veggies work great. A splash of soy sauce, lemon juice, or even a dollop of peanut butter (for Asian-style soups) can add depth. Don’t underestimate the power of a good olive oil drizzle or grated Parmesan too!
How long does it take to improve canned soup?
Most upgrades take 5–10 minutes! Sautéing aromatics (onion, garlic) takes 3–5 minutes, while simmering with extra veggies or protein adds 5–7 minutes. Even just stirring in cream, cheese, or fresh herbs at the end takes under a minute. Perfect for busy weeknights!
What’s the best way to fix bland canned soup?
Start with acid (vinegar, lemon juice) or umami (soy sauce, Worcestershire, miso paste). Boost texture with crunchy toppings (croûtons, nuts) or creaminess (Greek yogurt, coconut milk). A pinch of salt and black pepper often works wonders too—taste as you go!
Are there healthier alternatives to cream or cheese for richness?
Yes! Blend in silken tofu, white beans, or cashew cream for creaminess without dairy. Nutritional yeast adds a cheesy flavor, while avocado or tahini lend richness. For low-cal options, try pureed cauliflower or a swirl of unsweetened almond milk.
Can I meal prep upgraded canned soup?
Most upgraded soups keep for 3–4 days in the fridge (dairy-based ones may thicken). Freeze broth-based versions without cream or pasta for up to 3 months. Reheat gently on the stove—add fresh herbs or crunchy toppings just before serving to keep textures vibrant!
With just a few simple tweaks, your canned soup can go from meh to magnificent! 🎉 Whether you added fresh herbs, protein, or a splash of acid, the key is to personalize it with flavors and textures you love. Next time you’re in the kitchen, grab a can of soup and experiment—your taste buds will thank you.
Ready to level up even more? Try making a quick homemade broth to swap in, or explore our 5-minute upgrade recipes for extra inspiration. Happy souping! 🥄

Trained in classic French technique but raised on slow-cooked ribs and spicy rubs, she blends culinary skill with smoke and soul.
- Octopus Recipe Pan Fried: Crispy Edges With Tender Bites - October 3, 2026
- Recipe For Fried Pork Chops In An Iron Skillet: Crispy Crust With Juicy Centers - October 3, 2026
- Recipe for Fully Cooked Spiral Ham: Sweet Glaze and Effortless Elegance - October 3, 2026