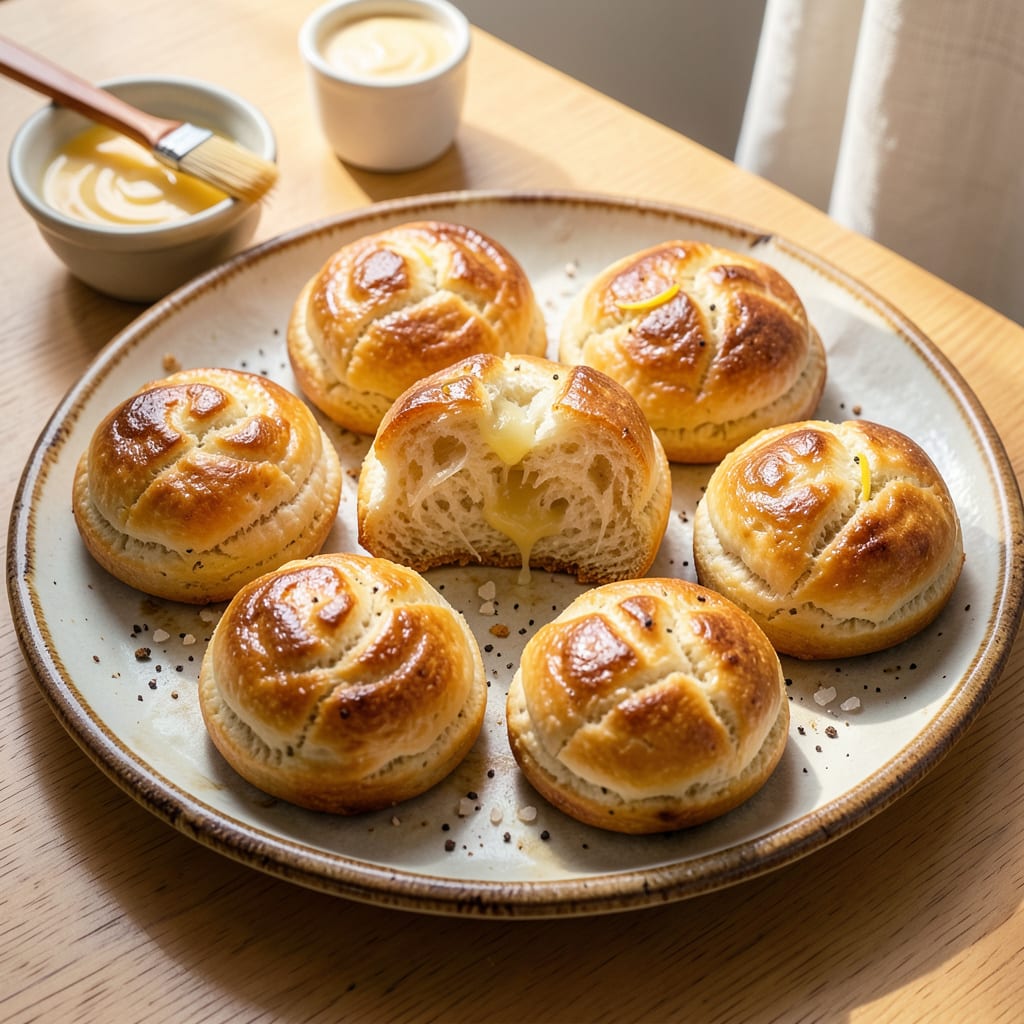
Let me be real with you—frozen biscuits don’t have to taste like cardboard. With just three simple upgrades, you can turn that sad little can into golden, flaky layers that actually taste homemade. I’ve burned through more biscuits than I’d like to admit perfecting this method, and the difference is shocking.
First, forget the package instructions. We’re adding real butter (the good stuff) and a sprinkle of garlic powder before baking—this creates that irresistible aroma and rich flavor missing from basic biscuits. Then comes the game-changer: brushing them with melted honey butter the second they come out of the oven. That extra minute makes all the difference.
You’ll end up with biscuits that have crispy golden tops, soft layers inside, and a flavor that’ll have people asking for your “secret recipe.” No one needs to know they started frozen. The whole process adds maybe 5 minutes of work but delivers bakery-quality results every time.
Perfect for breakfast sandwiches, sopping up gravy, or just eating warm with extra honey butter. Here’s exactly how to upgrade your biscuits—no fancy skills required, just smart little tweaks that actually work.
📚 In This Guide
- What You’ll Need
- Instructions
- Tips and Common Mistakes
What Youll Need
- ● 1 package (12–16 oz) frozen biscuits – Any brand works, but buttermilk-style biscuits upgrade easiest!
- ○ 2–3 tbsp unsalted butter – Melted, for brushing (or optional: garlic-herb butter for extra flavor).
- ● 1–2 tbsp heavy cream or whole milk – For a richer, golden-brown crust.
- ○ 1 egg – Lightly beaten (for egg wash, optional but recommended).
- ○ 1 tsp honey or sugar – Optional, for a touch of sweetness on top.
- ○ 1 tsp garlic powder, dried herbs, or grated cheese – Optional mix-ins for savory twists.
- ● Baking sheet + parchment paper – Prevents sticking and makes cleanup a breeze.
- ● Pastry brush – For even butter/egg wash application.
- ● Oven preheated to 375°F (350°F for convection) – Critical for that perfect rise!
- ○ Cooling rack – Keeps biscuits crisp after baking (optional but helpful).
Instructions
These simple upgrades will transform your frozen biscuits into bakery-quality treats with minimal effort.
Brush with Melted Butter Before Baking
Start by arranging your frozen biscuits on a parchment-lined baking sheet according to package directions. Before placing them in the oven, melt 2 tablespoons of unsalted butter and gently brush the tops of each biscuit with a pastry brush. This creates a golden, crispy crust that store-bought biscuits typically lack.
The butter doesn’t just add flavor—it promotes even browning and helps develop those coveted flaky layers. I’ve found that brushing immediately before baking (rather than after) gives the best texture because it allows the butter to absorb into the dough as it bakes. Watch for the butter to start bubbling around the 8-minute mark—that’s your visual cue that the magic is happening.
Add a Layer of Shredded Cheese for Depth
Here’s where we build flavor: after brushing with butter, sprinkle about 1 teaspoon of shredded sharp cheddar cheese on top of each biscuit. The cheese melts into the buttery layers, creating pockets of savory richness throughout. I recommend sharp cheddar for its bold flavor that stands up to the buttery dough, but you could also use pepper jack for a little kick.
As the biscuits bake, the cheese will bubble and brown, forming a delicious crust on top while also melting into the layers below. You’ll notice the aroma change around the 10-minute mark—that’s the cheese caramelizing. This simple addition transforms the texture from uniform to interesting, with those melty cheese pockets in every bite.
Bake at a Higher Temperature for Better Rise
Instead of following the package’s temperature instructions, preheat your oven to 400°F (typically 25°F higher than package directions). The higher heat creates more steam initially, which helps the biscuits rise taller and develop better layer separation. Place them in the center rack for even heat distribution.
Bake for 12-15 minutes until the tops are deep golden brown and the cheese is bubbling. The higher temperature reduces overall baking time while creating better browning and crispier edges. You’ll know they’re perfect when you can hear a slight crackle when you gently tap the top—that’s the sound of properly developed layers.
Finish with a Garlic Butter Glaze
While the biscuits are still warm, mix 1 tablespoon melted butter with ½ teaspoon garlic powder and ¼ teaspoon dried parsley. Brush this mixture over the hot biscuits immediately after removing them from the oven. The residual heat will help the flavors absorb while adding a glossy finish.
This final touch adds another dimension of flavor and keeps the tops soft while maintaining the crisp edges. Let them rest for 2-3 minutes before serving—they’ll be flaky on the inside with a buttery, cheesy, garlicky crust that makes them irresistible. The aroma at this stage is incredible, with the garlic and butter complementing the rich, baked dough perfectly.
Tips and Common Mistakes
These simple but powerful techniques will elevate your biscuits from ordinary to extraordinary with minimal extra effort.
Heat Control: The 400°F temperature in Step 3 is crucial for creating that perfect rise and golden crust. I’ve found that placing the baking sheet on the center rack ensures even heat distribution, preventing the bottoms from browning too quickly while the tops catch up. If your oven runs hot, start checking at the 12-minute mark—you might need to pull them out closer to that time to avoid over-browning.
Cheese Technique: When adding the 1 teaspoon of shredded sharp cheddar cheese in Step 2, press it gently into the buttery tops rather than just sprinkling. This helps it adhere better during baking, creating those beautiful melted pockets throughout the layers. The aroma change you’ll notice around the 10-minute mark signals the cheese is caramelizing perfectly—don’t open the oven door before then or you’ll lose valuable heat.
Butter Timing: The 2 tablespoons of unsalted butter in Step 1 should be melted just before brushing—don’t let it sit and cool. I melt it in the microwave in 10-second bursts until just liquid, which prevents it from soaking into the dough too quickly. Watch for that butter to start bubbling around the 8-minute mark—that’s your visual confirmation that the crust is developing beautifully.
Final Glaze Secret: For the garlic butter glaze in Step 4, make sure to brush it on immediately after removing the biscuits from the oven while they’re still piping hot. The residual heat helps the flavors absorb deeply. Those 2-3 minutes of resting time aren’t just for cooling—they allow the glaze to set slightly, creating that perfect glossy finish without making the tops soggy.
Pro Tips for Make Frozen Biscuits Better
- These simple but powerful techniques will elevate your biscuits from ordinary to extraordinary with minimal extra eff…
- Heat Control: The 400°F temperature in Step 3 is crucial for creating that perfect rise and golden crust. I’ve found …
- Cheese Technique: When adding the 1 teaspoon of shredded sharp cheddar cheese in Step 2, press it gently into the but…
Frequently Asked Questions
Can I add cheese or herbs to frozen biscuits before baking?
Sprinkle shredded cheddar, garlic powder, or dried rosemary right after brushing with butter (pre-bake) for extra flavor. Press toppings lightly so they stick—avoid overloading, or the biscuits may not rise evenly. Fresh herbs? Add them after baking to keep them vibrant.
Why do my frozen biscuits turn out dry or dense?
Overbaking is the usual culprit —check them 1–2 minutes before the package’s suggested time. If they’re dense, try spacing biscuits farther apart on the tray for better heat circulation. Brushing with melted butter before and after baking adds moisture and richness.
Can I make frozen biscuits in an air fryer?
Yes! Preheat the air fryer to 350°F, place biscuits in a single layer (don’t overcrowd), and cook for 6–8 minutes. Flip halfway for even browning. Air-fried biscuits get extra crispy edges—perfect for breakfast sandwiches! Check early to avoid over-browning.
What’s the best way to reheat leftover biscuits?
Wrap biscuits in damp paper towels and microwave for 10–15 seconds, or warm in a 300°F oven for 5–7 minutes. For crispiness, toast halved biscuits in a skillet with butter. Never reheat straight from the fridge—let them sit at room temp for 10 minutes first.
Are there healthier alternatives to butter for brushing biscuits?
Try olive oil (light flavor), honey-butter mix (50/50), or Greek yogurt thinned with milk for a tangy twist. For dairy-free, melted coconut oil or vegan butter works great—just watch browning time, as alternatives can burn faster than dairy butter.
With just a few easy tweaks—like brushing with butter, adding a sprinkle of cheese, or baking them just right—your frozen biscuits can taste homemade every time! 🍞✨ No need to settle for bland or dry results when small upgrades make a big difference. Next time you’re craving warm, flaky layers, grab that bag from the freezer and put these tips to the test. Your taste buds (and breakfast guests) will thank you!

Trained in classic French technique but raised on slow-cooked ribs and spicy rubs, she blends culinary skill with smoke and soul.
- Recipe for Boneless Pork Chops in Cast Iron Skillet: Sear and Baste to Juicy Perfection - October 3, 2026
- Recipe for Boneless Cross Rib Roast: Slow-Roasted Beef with Herb Crust - October 3, 2026
- Hamburgers in Sauce Recipe Crock Pot: Slow-Cooked Savory Delight - October 3, 2026