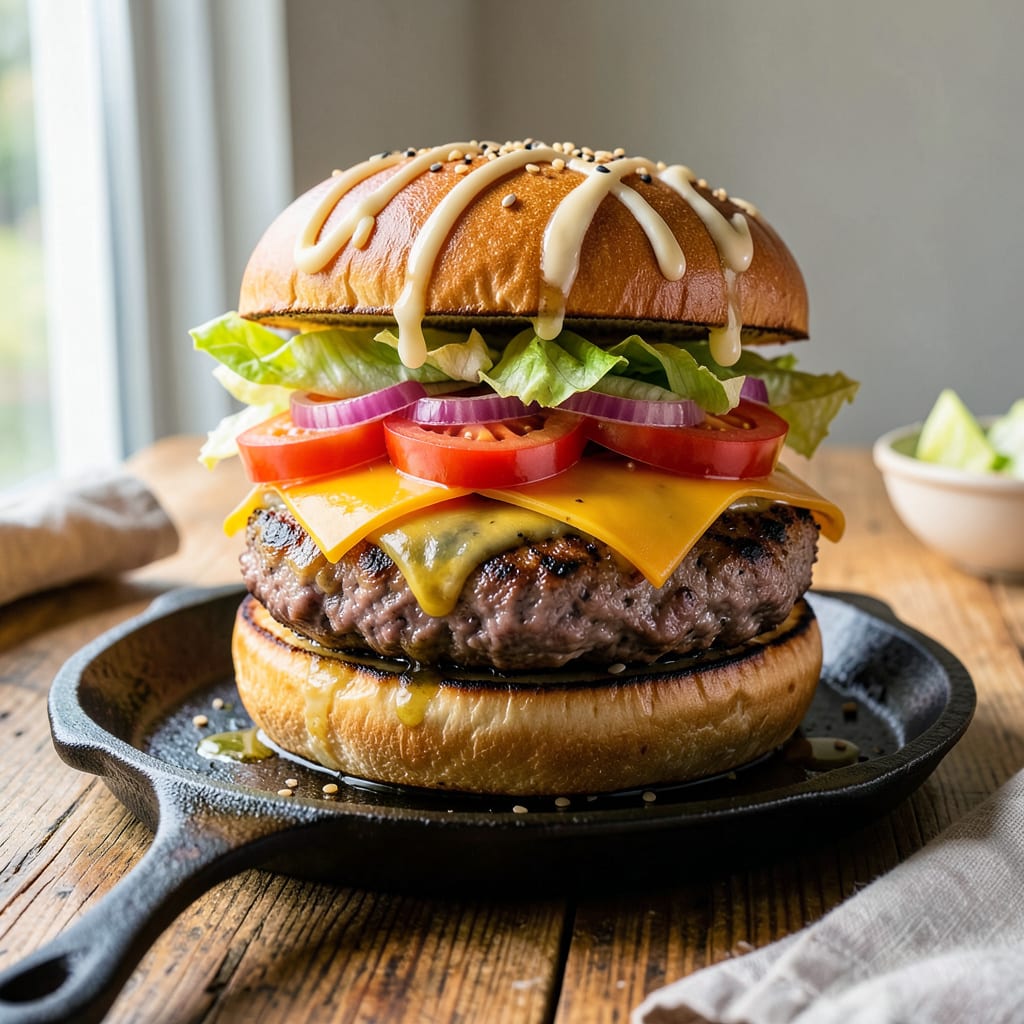
Frozen burgers don’t have to taste like a compromise—I’ve turned countless freezer-section patties into juicy, flavor-packed meals with just a few smart upgrades. After years of experimenting (and some disappointing hockey puck results), I cracked the code for transforming basic frozen burgers into something worth bragging about. The secret starts before they even hit the heat.
First, ditch the microwave thawing—it’s the enemy of texture. Instead, I use a simple 30-minute counter rest while prepping my toppings. Then comes the real game-changer: a quick sear in a screaming-hot cast iron skillet with a pat of butter and fresh garlic. That extra minute of contact creates a crispy crust that locks in moisture, guaranteeing that promised juicy bite every time.
The toppings are where you can really show off. Skip the sad lettuce and ketchup—try caramelized onions that melt into the patty, sharp cheddar that gets all gooey, and a quick homemade aioli with smoked paprika. Even the bun gets special treatment: a light toast with garlic butter makes all the difference. Suddenly, that frozen patty becomes the star of a meal worth sitting down for.
Best part? These upgrades take 10 minutes max of extra effort. I’m talking about the kind of burger that makes people ask for your secret, not realize you started with something from the freezer aisle. Now let’s get those patties sizzling—the right way.
📚 In This Guide
- What You’ll Need
- Instructions
- Tips and Common Mistakes
What Youll Need
- ● Frozen burger patties – 1 per person (4-6 oz each, 80/20 fat ratio for best juiciness)
- ● High-smoke-point oil – 1 tbsp (avocado, canola, or vegetable oil)
- ● Salt & black pepper – ½ tsp each (or to taste)
- ● Burger buns – 1 per patty (brioche or potato buns recommended)
- ○ Cheese slices (optional) – 1 per patty (cheddar, American, or pepper jack)
- ○ Toppings (optional) – lettuce, tomato, onion, pickles, or avocado
- ○ Condiments (optional) – ketchup, mustard, mayo, or BBQ sauce
- ○ Butter (optional) – 1 tbsp for toasting buns
- ● Cast-iron skillet or grill pan (for best sear) or grill (charcoal/gas)
- ○ Meat thermometer (optional but highly recommended for perfect doneness)
- ● Spatula (thin-edged for easy flipping)
- ● Tongs (for safe handling)
- ● Aluminum foil (to keep patties warm while prepping buns)
Instructions
Here’s exactly how to transform basic frozen patties into juicy, restaurant-worthy burgers in minutes.
Choose and Prep Your Patties
Start by selecting high-quality frozen beef patties with at least 80% lean meat. I always check the package for minimal additives – the shorter the ingredient list, the better your results will be. Remove the patties from the freezer and let them sit at room temperature for 10-15 minutes while you prep your toppings.
This brief thawing period is crucial because it allows the patties to cook more evenly. You’ll notice the edges start to soften slightly – that’s your signal they’re ready. Don’t skip this step, as cooking from completely frozen can lead to dry, overcooked exteriors before the centers are done.
Season Aggressively for Maximum Flavor
Here’s where we fix frozen burgers’ biggest flaw: blandness. Generously season both sides of each patty with kosher salt and freshly ground black pepper. I use about ½ teaspoon salt per patty – it might seem like a lot, but frozen meat needs extra seasoning to shine.
For even more flavor, I like to add a pinch of garlic powder and smoked paprika to each side. Press the seasonings gently into the meat so they adhere well. This creates a flavorful crust that compensates for any freezer taste. The patties should look well-coated but not caked with seasoning.
Cook Using the Right Technique
Heat your grill or skillet to medium-high heat (about 375-400°F). Add the patties and cook undisturbed for 3-4 minutes per side. The key here is patience – don’t press down on the burgers with your spatula. That squeezes out all the precious juices we’re working so hard to preserve.
You’ll know it’s time to flip when you see juices pooling on the uncooked surface and the edges develop a golden-brown crust. For cheeseburgers, add your cheese during the last 2 minutes of cooking and cover briefly to melt. I prefer sharp cheddar for its bold flavor that stands up to the beef.
Toast the Buns Properly
While the burgers cook, lightly butter the cut sides of your buns and toast them on the grill or in a dry skillet for 30-60 seconds until golden brown. This step is non-negotiable – a good bun makes all the difference. Watch them closely as they can burn quickly.
The toasted buns create a barrier that prevents the juices from soaking through, keeping your burger structurally sound. I like to brush the toasted sides with a tiny bit of the meat drippings from the pan for extra flavor. This little trick adds richness that makes your burger taste like it came from a gourmet kitchen.
Assemble with Smart Toppings
Build your burger immediately after cooking while everything is still hot. Start with a smear of mayonnaise on both bun halves – it adds moisture and helps other toppings stick. Then add your patty and cheese. For toppings, I recommend crisp lettuce, thinly sliced tomato, and pickles for textural contrast.
The final touch is a drizzle of special sauce (mix mayo with ketchup, mustard, and a dash of hot sauce) or your favorite condiments. Serve immediately while the cheese is still melty and the patties are juicy. Each bite should deliver that perfect balance of tender meat, crispy edges, and fresh toppings – nothing like the dry, bland frozen burgers you started with.
Tips and Common Mistakes
Let me share what I’ve learned from years of transforming frozen patties into burgers that taste like they came from a backyard grill master.
The Thawing Trick: That 10-15 minute rest at room temperature in Step 1 isn’t just about convenience—it’s about texture. You want the patties to soften just enough so they don’t steam when they hit the hot pan. I’ve found that patties straight from the freezer develop a gray, rubbery band around the edges because the outside cooks too fast while the center stays frozen. The brief thaw creates that perfect window where you get an even sear without drying out the meat.
Seasoning Strategy: When I say “generously” with that ½ teaspoon salt per patty in Step 2, I mean it—frozen beef loses flavor during processing. The salt doesn’t just season the surface; it actually penetrates the meat during those crucial minutes before cooking. Press the seasonings in firmly so they create a flavorful crust. I like to season right before cooking rather than ahead of time to prevent the salt from drawing out too much moisture.
Heat Control: At medium-high heat (375-400°F) in Step 3, you’re walking a fine line between perfect sear and burnt exterior. Here’s what nobody tells you: if your patties are releasing smoke before you flip them, your heat is too high. Those 3-4 minutes per side should give you a deep brown crust without charring. If you’re using a skillet, make sure it’s properly preheated—drop a pinch of salt in the pan; if it sizzles immediately, you’re ready.
Bun Technique: The 30-60 second toast in Step 4 isn’t just for texture—it’s your insurance against a soggy burger. I brush the cut sides with melted butter (not oil) because butter browns beautifully at high heat. Watch for the edges to turn just golden—any darker and you risk bitterness. Pro move: toast the buns right in the same pan after cooking the burgers to soak up those flavorful drippings.
Pro Tips for Make Frozen Burgers Better
- Let me share what I’ve learned from years of transforming frozen patties into burgers that taste like they came from …
- The Thawing Trick: That 10-15 minute rest at room temperature in Step 1 isn’t just about convenience—it’s about textu…
- Seasoning Strategy: When I say “generously” with that ½ teaspoon salt per patty in Step 2, I mean it—frozen beef lose…
Frequently Asked Questions
Can I cook frozen burgers without thawing them first?
Frozen burgers can go straight from the freezer to the grill, skillet, or oven. Just add 2-3 extra minutes per side for even cooking. For best results, pat them dry with a paper towel first to avoid excess moisture—this helps achieve that perfect sear!
How do I keep frozen burgers from drying out?
Dry burgers are a bummer, but easy to avoid! Brush them with a little olive oil or melted butter before cooking, and avoid pressing them with a spatula (that squeezes out juices!). Cooking at medium-high heat and letting them rest for 2-3 minutes off the heat also locks in moisture.
What’s the best way to season frozen burgers for maximum flavor?
Season generously—frozen burgers can handle it! Sprinkle both sides with kosher salt, black pepper, and garlic powder right before cooking. For extra oomph, mix in Worcestershire sauce or smoked paprika after thawing (if you have time). Don’t forget the cheese in the last minute for melty goodness!
Can I air-fry frozen burgers, and how long does it take?
Yes! Air fryers are a game-changer for frozen burgers. Cook at 375°F for 10-12 minutes, flipping halfway. For a crispy crust, spray lightly with oil and add an extra minute. Check the internal temp—160°F means they’re safe and juicy!
Why do my frozen burgers always taste bland compared to fresh ones?
Frozen burgers often lack fat and seasoning. Boost flavor by:
- Mixing in grated onion or breadcrumbs (if thawed)
- Topping with caramelized onions, bacon, or a bold sauce
- Using high-quality buns toasted with butter or garlic
With just a few simple tweaks—like seasoning generously, adding moisture, or customizing toppings—your frozen burgers can taste homemade in minutes! 🍔✨ No more settling for dry or bland patties when small upgrades make a huge difference. Ready to fire up the grill or skillet? Grab your favorite frozen patties and put these tips to the test—your taste buds will thank you! For even more flavor ideas, check out our guide on gourmet burger toppings next.

Trained in classic French technique but raised on slow-cooked ribs and spicy rubs, she blends culinary skill with smoke and soul.
- Recipe for Boneless Pork Chops in Cast Iron Skillet: Sear and Baste to Juicy Perfection - October 3, 2026
- Recipe for Boneless Cross Rib Roast: Slow-Roasted Beef with Herb Crust - October 3, 2026
- Hamburgers in Sauce Recipe Crock Pot: Slow-Cooked Savory Delight - October 3, 2026