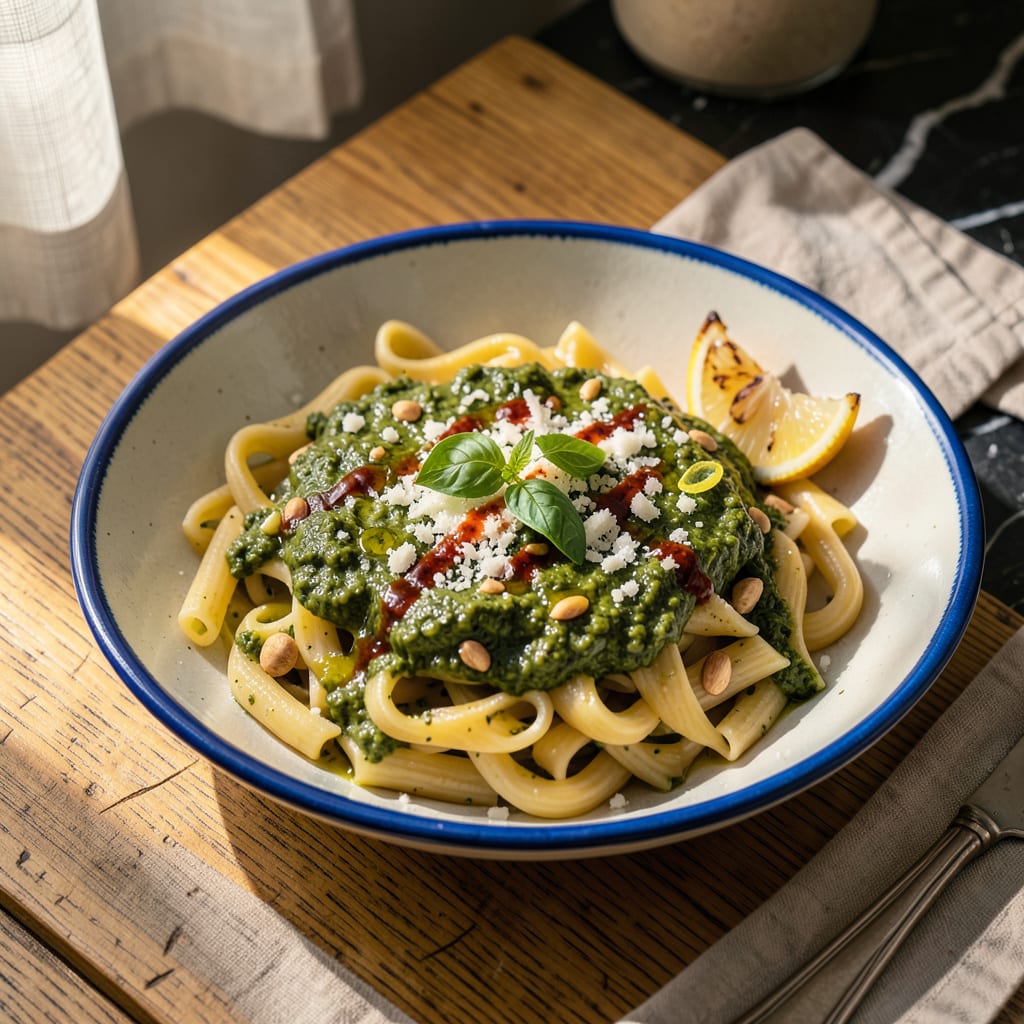
Store-bought pesto can be a real lifesaver, but let’s be honest—it often tastes flat compared to homemade. I’ve been there, staring at that jar wondering how to make it actually exciting. The good news? With just a few simple tweaks, you can transform that basic pesto into something vibrant, complex, and downright addictive.
My go-to move is adding fresh basil and a splash of high-quality olive oil. That alone wakes up the flavors. But here’s where it gets interesting—I also love stirring in toasted pine nuts or walnuts for crunch, and a pinch of red pepper flakes for subtle heat. These small upgrades take minutes but make a world of difference.
What you’re left with is pesto that tastes fresh and homemade, not jarred. The herbs brighten it up, the nuts add texture, and the olive oil smooths everything out. It’s the kind of quick fix that makes your pasta, sandwiches, or dips taste like you spent hours in the kitchen.
Best part? These upgrades work with any store-bought pesto, and you probably have the ingredients already. Let’s get that jar working harder for you.
📚 In This Guide
- What You’ll Need
- Instructions
- Tips and Common Mistakes
What Youll Need
- ● Store-bought pesto: 1 (6–8 oz) jar or container (pick a high-quality brand with real olive oil and basil for best results).
- ● Fresh ingredients: 1/4 cup fresh basil leaves (packed, about 10–12 large leaves) 🌿
- ● 1–2 cloves garlic (minced or grated, adjust to taste)
- ● 1/4 cup freshly grated Parmesan or Pecorino Romano (skip if pesto already contains cheese)
- ○ 2 tbsp pine nuts, walnuts, or pistachios (toasted, optional for crunch)
- ● Pantry staples: 2–3 tbsp extra-virgin olive oil (high-quality, like California Ranch or Italian DOP)
- ● 1/2 tsp lemon zest (or 1 tsp lemon juice for brightness)
- ○ 1/4 tsp red pepper flakes (optional, for heat)
- ● Salt & black pepper (to taste—store-bought pesto is often salty!)
- ● Tools: Small food processor or mortar and pestle (for blending fresh additions)
- ● Mixing bowl & spoon (for hand-stirring)
- ● Microplane (for zesting lemon or grating cheese)
- ○ Small skillet (for toasting nuts, optional)
- ○ Optional upgrades: 1 tbsp sun-dried tomatoes (oil-packed, chopped)
- ● 1/2 tsp anchovy paste (for umami depth)
- ● 1 tbsp ricotta or mascarpone (for creaminess)
Instructions
Transforming basic pesto into something extraordinary takes just a few simple upgrades. Here’s how to do it right.
Choose Your Base Pesto Wisely
Start with the highest quality store-bought pesto you can find. I look for brands with simple ingredient lists—olive oil should be the first ingredient, followed by basil, garlic, and pine nuts. Avoid anything with added preservatives or vegetable oils, as these create a muddy flavor that’s harder to elevate.
Check the color too—good pesto should be vibrant green, not dull or brownish. If you’re at the grocery store, compare a few jars side by side. The brighter the green, the fresher the basil used, which means better starting flavor for your upgrades.
Brighten with Fresh Herbs and Citrus
Add ¼ cup finely chopped fresh basil and 1 tablespoon lemon zest to your pesto. The fresh basil reinvigorates the flavor, while the lemon zest cuts through the richness and adds brightness. I like to gently fold these in rather than blending, so you get little bursts of freshness in every bite.
For extra depth, include 1 teaspoon lemon juice as well. The acidity balances the oiliness of store-bought pesto and makes the flavors pop. Taste as you go—you might want to add a bit more zest if your pesto needs extra brightness.
Enhance the Texture and Richness
Toast 2 tablespoons pine nuts in a dry skillet over medium heat for 2-3 minutes until golden brown and fragrant. Let them cool slightly, then stir them into your pesto. This adds a satisfying crunch and deepens the nutty flavor that often gets lost in mass-produced versions.
For creamier texture, mix in 2 tablespoons freshly grated Parmesan cheese. I prefer Parmigiano-Reggiano for its sharp, nutty flavor that complements the basil beautifully. The cheese also helps thicken the pesto slightly, giving it better body for coating pasta or spreading on sandwiches.
Balance the Flavors with Garlic and Salt
Sauté 1 clove minced garlic in 1 tablespoon olive oil over low heat for 1-2 minutes until just fragrant—don’t let it brown. Stir this into your pesto to add fresh garlic flavor without the harsh bite you sometimes get from raw garlic in store-bought versions.
Finish with ¼ teaspoon flaky sea salt and freshly cracked black pepper to taste. The salt enhances all the flavors you’ve added, while the pepper gives it a subtle warmth. Taste and adjust—you might need a pinch more salt depending on how salty your original pesto was.
Let It Rest and Serve
Let your upgraded pesto sit at room temperature for 15-20 minutes before using. This resting time allows all the flavors to meld together beautifully. The fresh herbs will infuse their brightness, the garlic will mellow, and the textures will harmonize.
Use your enhanced pesto immediately for best results—toss it with hot pasta, spread it on sandwiches, or use it as a dip. Store any leftovers in an airtight container in the refrigerator for up to 5 days, though it’s always best when fresh. The vibrant green color and complex flavors will make you forget you started with store-bought!
Tips and Common Mistakes
These simple adjustments will transform your pesto from good to extraordinary, avoiding common pitfalls along the way.
Selection Tip: In Step 1, choosing the right base pesto makes all the difference. I always compare jars at the store, looking for the brightest green color—this indicates fresher basil. Check the ingredient list too: olive oil should be first, followed by basil, garlic, and pine nuts. Avoid brands with preservatives or vegetable oils, as these create a muddy flavor that’s harder to upgrade.
Heat Control: When toasting pine nuts in Step 3, medium heat is crucial. I’ve learned the hard way that anything higher can burn them in seconds. Keep them moving in the skillet for those 2-3 minutes until they’re golden brown and fragrant. The moment you smell their nutty aroma, they’re done—remove them immediately to prevent overcooking.
Flavor Balance: The 15-20 minute resting time in Step 5 isn’t just waiting—it’s when the magic happens. All those fresh ingredients you added (the basil, lemon zest, and garlic) need this time to meld with the base pesto. I notice a significant difference when I skip this step: the flavors stay separate rather than harmonizing into that restaurant-quality taste.
Texture Secret: For the creamiest texture in Step 3, make sure your Parmesan cheese is freshly grated. Pre-shredded cheese contains anti-caking agents that prevent it from melting smoothly into the pesto. I prefer Parmigiano-Reggiano for its sharp, nutty flavor that perfectly complements the basil’s brightness.
Pro Tips for Make Store Bought Pesto Better
- These simple adjustments will transform your pesto from good to extraordinary, avoiding common pitfalls along the way.
- Selection Tip: In Step 1, choosing the right base pesto makes all the difference. I always compare jars at the store,…
- Heat Control: When toasting pine nuts in Step 3, medium heat is crucial. I’ve learned the hard way that anything high…
Frequently Asked Questions
Can I add fresh herbs to store-bought pesto, and which ones work best?
Fresh herbs like basil, parsley, or cilantro can brighten up store-bought pesto. Basil blends seamlessly, while parsley adds a fresh, slightly peppery note. Add 1-2 tablespoons of finely chopped herbs per cup of pesto for a quick upgrade.
How long does upgraded pesto last in the fridge?
Once enhanced with fresh ingredients (like cheese, garlic, or herbs), your pesto will stay fresh for 3-5 days in an airtight container. For longer storage, freeze it in ice cube trays for up to 3 months. Always cover the surface with a thin layer of olive oil to prevent browning.
What can I use instead of pine nuts if I want to upgrade my pesto?
No pine nuts? No problem! Try walnuts, almonds, pistachios, or even sunflower seeds for a budget-friendly twist. Toast them lightly (2-3 minutes in a dry pan) to deepen the flavor before blending or stirring into your pesto.
Why does my upgraded pesto taste bitter? How can I fix it?
Bitterness often comes from over-processed herbs or stale nuts. Balance it by adding 1 tsp honey, a splash of lemon juice, or a pinch of salt. If using fresh garlic, roast it first to mellow the sharpness. Taste as you go!
Can I make store-bought pesto creamier without dairy?
Yes! For a dairy-free creamy texture, blend in avocado, silken tofu, or white beans (1-2 tbsp per ½ cup pesto). A drizzle of extra-virgin olive oil also adds richness. Stir well and adjust seasoning to taste.
With just a few simple tweaks, that basic jar of pesto can transform into a restaurant-quality masterpiece! 🌿 Whether you added fresh basil, a splash of lemon, or a sprinkle of Parmesan, the key is balancing flavors to match your taste. Now that you’ve unlocked these easy upgrades, why not put them to the test?
Grab a jar from your pantry and experiment tonight—your pasta, sandwiches, or even grilled veggies will thank you! 🍝 Which upgrade will you try first?

Trained in classic French technique but raised on slow-cooked ribs and spicy rubs, she blends culinary skill with smoke and soul.
- Recipe for Boneless Pork Chops in Cast Iron Skillet: Sear and Baste to Juicy Perfection - October 3, 2026
- Recipe for Boneless Cross Rib Roast: Slow-Roasted Beef with Herb Crust - October 3, 2026
- Hamburgers in Sauce Recipe Crock Pot: Slow-Cooked Savory Delight - October 3, 2026