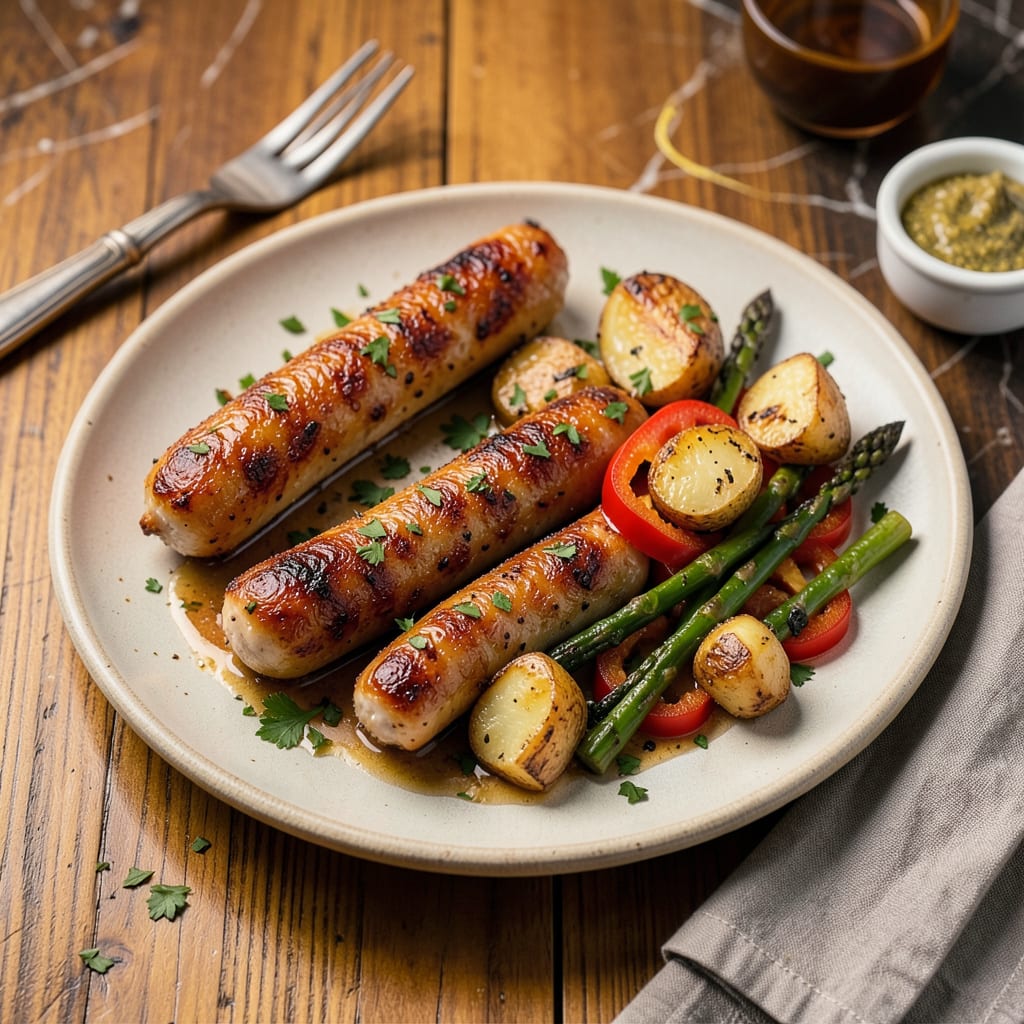
Let me tell you about the simplest way to get crispy-skinned, juicy chicken sausage every single time. I used to struggle with either burnt casings or dry centers until I figured out the perfect heat control and timing. This method works whether you’re using plain chicken sausage or something fancy with herbs and spices.
The secret starts with a hot pan—not screaming hot, but right at that sweet spot where the sausage sizzles immediately when it hits. I always use a touch of oil to prevent sticking and help that crust develop. The key is patience: don’t move the sausage around too much. Let it sear undisturbed for a few minutes to build that golden-brown crust.
By the time you’re done, you’ll have sausage with a shatteringly crispy exterior and centers that stay juicy and tender. The best part? It only takes about 15 minutes from start to finish. I love serving these with a quick mustard cream sauce or alongside roasted vegetables for an easy weeknight meal.
This technique works for any type of chicken sausage, whether it’s Italian-style, apple-flavored, or even spicy andouille. Once you master this method, you’ll never go back to boiled or steamed sausage again. Here’s exactly how to do it right.
📚 In This Guide
- What You’ll Need
- Instructions
- Tips and Common Mistakes
What Youll Need
- ● Chicken sausage: 4–6 links (about 12–16 oz total), fresh or thawed if frozen 🍖
- ● Cooking oil: 1–2 tbsp high-smoke-point oil (avocado, canola, or vegetable oil works best)
- ● Salt & pepper: To taste (or ½ tsp each for seasoning)
- ○ Optional seasonings: 1 tsp garlic powder, paprika, or Italian herb blend for extra flavor ✨
- ● Skillet: 10–12″ non-stick or cast-iron pan (for even heat distribution)
- ● Tongs or spatula: For flipping sausage safely
- ● Meat thermometer: Instant-read (to check doneness—165°F is the goal! 🌡️)
- ● Paper towels: For patting sausage dry (crispier skin!) and draining excess oil
- ○ Optional: Splatter guard (if you hate cleaning grease off the stovetop!)
Instructions
Here’s my foolproof method for achieving that perfect balance of crispy exterior and juicy interior every time.
Prepare the Sausage for Even Cooking
Start by removing the chicken sausage from its packaging and patting it completely dry with paper towels. This step is crucial—any moisture on the surface will steam instead of sear when it hits the hot pan. I like to let the sausage sit at room temperature for about 10 minutes while I prep the rest of my ingredients.
If you’re working with linked sausages, decide whether to keep them whole or cut them. For even cooking and maximum crispiness, I recommend cutting them into individual links or even halving them lengthwise. This exposes more surface area to the pan, creating that beautiful golden-brown crust we’re after.
Heat the Pan and Add Fat
Place a heavy skillet (cast iron works best) over medium heat and let it warm up for 2-3 minutes. You want the pan hot enough that a drop of water sizzles and evaporates immediately when flicked onto the surface. Add just enough oil to lightly coat the bottom—about 1 tablespoon should do it.
Here’s the thing—you don’t need much oil because chicken sausage has enough natural fat to prevent sticking. The oil is just there to help conduct heat evenly. Swirl the pan to distribute the oil, then let it heat until you see the first wisps of smoke. That’s your cue that the pan is ready for the sausage.
Cook for Perfect Crispiness
Carefully place the sausage in the pan, leaving some space between each piece so they don’t steam. I always use tongs for this to avoid any oil splatter. Cook undisturbed for 3-4 minutes on the first side—this gives the sausage time to develop that gorgeous brown crust.
You’ll know it’s ready to flip when the edges start to curl slightly and the bottom is deep golden brown. Flip the sausage and cook for another 3-4 minutes on the second side. For extra crispiness, I like to stand the sausages on their cut ends for the last 1-2 minutes of cooking to render out any excess fat.
Check for Doneness and Rest
Chicken sausage is fully cooked when it reaches an internal temperature of 165°F. Use an instant-read thermometer inserted into the thickest part of the sausage to check. If you don’t have a thermometer, you can cut into the center—it should be opaque with no pink, and the juices should run clear.
Transfer the cooked sausage to a paper towel-lined plate to drain any excess fat. Let it rest for 2-3 minutes before serving. This brief rest allows the juices to redistribute throughout the sausage, ensuring that first bite is as juicy as the last. The crispy exterior will stay crispy if you serve it immediately, so don’t let it sit too long!
Tips and Common Mistakes
After years of perfecting pan-fried chicken sausage, I’ve learned these key details make all the difference between good and exceptional results.
Temperature Control: The 10 minutes at room temperature in Step 1 isn’t just for convenience—it ensures even cooking. Cold sausage straight from the fridge will develop a tough exterior before the center warms through. I’ve found this simple step prevents that unpleasant rubbery texture while maintaining juiciness. Also, when heating your pan for 2-3 minutes in Step 2, watch for that first wisp of smoke—it’s the perfect moment to add your sausage for maximum crispiness without burning.
The Technique That Changed Everything: In Step 3, when you’re cooking for 3-4 minutes per side, resist the urge to move the sausage around. I know it’s tempting to peek, but that undisturbed time creates the crispy crust we’re after. The edges will start to curl slightly when it’s ready to flip—that’s your visual cue. And don’t skip standing the sausages on their cut ends for that final 1-2 minutes; it renders out excess fat while creating an extra-crispy finish.
Doneness Check: While 165°F is the safe internal temperature, I’ve noticed chicken sausage often looks done before it reaches this. Always use a thermometer—cutting into it releases precious juices. If you don’t have one, press the sausage gently with tongs. Properly cooked sausage should feel firm but still yield slightly, like a cooked chicken breast. The 2-3 minute rest in Step 4 is non-negotiable; it keeps all those juices inside where they belong.
Equipment Recommendation: A cast iron skillet is ideal because it holds heat consistently, but any heavy-bottomed pan works. Avoid nonstick for this recipe—the surface doesn’t get hot enough for proper browning. If you’re using stainless steel, make sure it’s properly preheated for those 2-3 minutes to prevent sticking. The right pan makes the difference between good and restaurant-quality results.
Pro Tips for Pan Fry Chicken Sausage
- After years of perfecting pan-fried chicken sausage, I’ve learned these key details make all the difference between g…
- Temperature Control: The 10 minutes at room temperature in Step 1 isn’t just for convenience—it ensures even cooking….
- The Technique That Changed Everything: In Step 3, when you’re cooking for 3-4 minutes per side, resist the urge to mo…
Frequently Asked Questions
Got questions about pan-frying chicken sausage? We’ve got answers! Here are the most common queries to help you nail that perfect crispy, juicy bite every time.
How long should I pan-fry chicken sausage?
Cook for 5-7 minutes total, flipping halfway. Sausages are done when the internal temp hits 165°F (74°C). Use a meat thermometer for accuracy—overcooking dries them out!
Do I need to boil chicken sausage before pan-frying?
Nope! Boiling can make them soggy. Pan-frying alone locks in juices and creates a crispy crust. If you’re worried about even cooking, prick the casing lightly with a fork to prevent bursting.
What’s the best oil for pan-frying chicken sausage?
Use oils with a high smoke point like avocado, canola, or vegetable oil. A light coating (1-2 tbsp) prevents sticking and adds crunch. Avoid butter—it burns easily!
Can I pan-fry frozen chicken sausage?
Yes, but thaw first for even cooking. If in a rush, cook frozen sausages on low heat for 10-12 minutes, covered, then uncover to crisp. Check the internal temp!
Why did my chicken sausage split while cooking?
High heat or overcrowding causes splitting. Cook on medium heat and leave space between sausages. Pricking the casing before cooking helps too!
Now you’ve got the secret to perfectly pan-fried chicken sausage—crispy on the outside, juicy on the inside, and packed with flavor! 🎉 Whether you’re whipping up a quick weeknight dinner or impressing guests, this method delivers restaurant-quality results with minimal effort. Don’t stop here—pair your sausage with roasted veggies, a fresh salad, or even a creamy pasta dish for a complete meal.
Ready to level up? Try experimenting with different seasonings or glaze options next time—your taste buds will thank you! 😉

Trained in classic French technique but raised on slow-cooked ribs and spicy rubs, she blends culinary skill with smoke and soul.
- Recipe for Boneless Pork Chops in Cast Iron Skillet: Sear and Baste to Juicy Perfection - October 3, 2026
- Recipe for Boneless Cross Rib Roast: Slow-Roasted Beef with Herb Crust - October 3, 2026
- Hamburgers in Sauce Recipe Crock Pot: Slow-Cooked Savory Delight - October 3, 2026