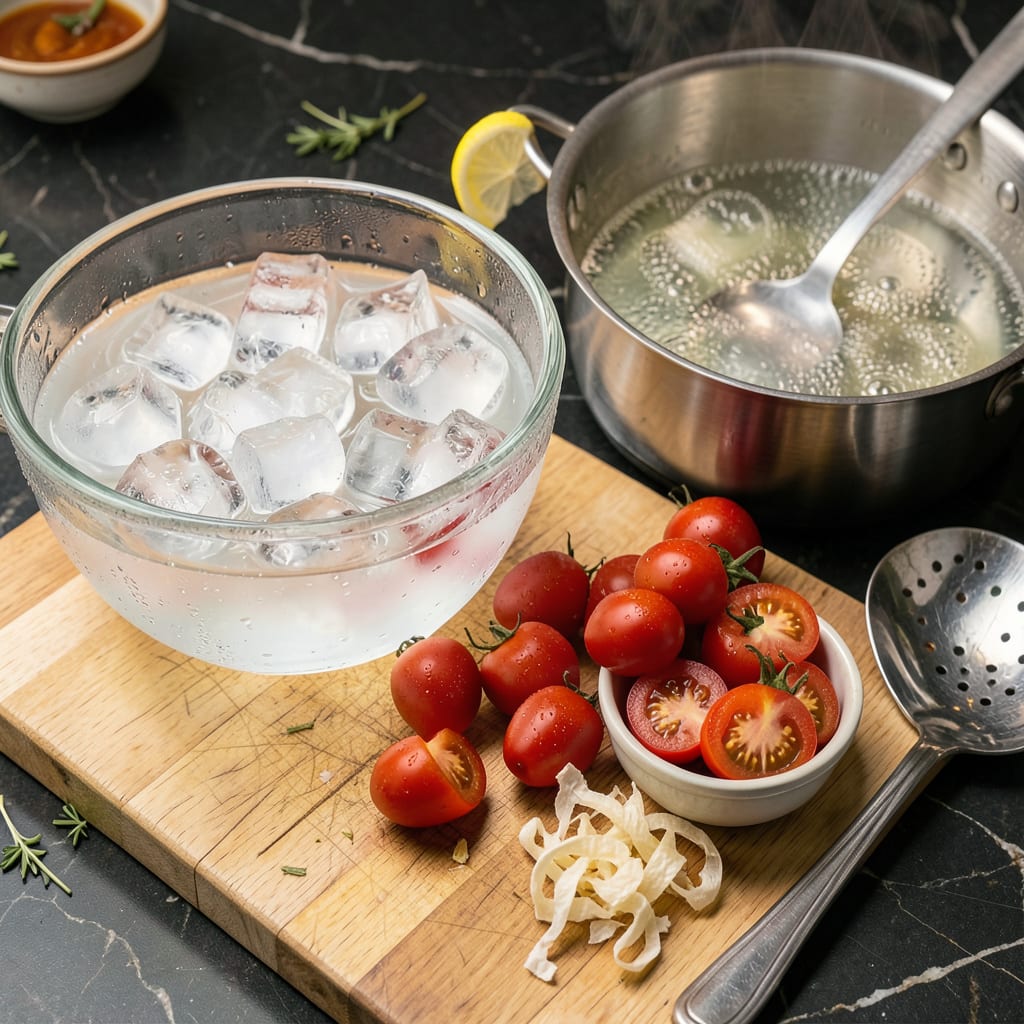
I’ll be real with you: peeling cherry tomatoes used to drive me crazy. Those tiny, slippery skins seemed impossible to remove without wasting half the tomato—until I discovered this 10-second trick that changed everything. No fancy tools, no wasted fruit, just perfectly peeled tomatoes every single time.
Here’s the thing—most methods make this process way too complicated. You don’t need special gadgets or hours of patience. My technique uses simple kitchen staples (a pot, ice water, and a paring knife) to transform this frustrating task into something you can do while your pasta water boils. The secret is in the timing: just long enough in hot water to loosen skins, but not so long that the tomatoes turn to mush.
Once you master this, you’ll wonder why you ever settled for unpeeled tomatoes in your dishes. Peeled cherry tomatoes elevate everything from delicate pasta sauces to elegant bruschetta. Their texture becomes silky-smooth, their flavor more concentrated, and they absorb dressings and marinades like little flavor sponges. I use them in my competition-worthy salsas and even as garnishes for fancy cocktails.
Fair warning: after trying this, you’ll never go back to struggling with a knife or settling for tough skins. The difference in your finished dishes will be immediate—smoother sauces, prettier presentations, and that restaurant-quality touch that makes people ask for your secret. Let’s get those tomatoes peeled the right way.
📚 In This Guide
- What You’ll Need
- Instructions
- Tips and Common Mistakes
What Youll Need
- ● Cherry tomatoes – 1 pint (or as many as you need; fresh and firm work best)
- ● Medium pot or saucepan – 2-3 quarts (for blanching)
- ● Water – Enough to fill the pot ~¾ full
- ● Large bowl – For an ice bath (preferably stainless steel or heatproof glass)
- ● Ice cubes – 2 cups (or enough to fill the bowl halfway with cold water)
- ● Slotted spoon – To transfer tomatoes quickly
- ○ Sharp paring knife – Optional (for scoring stubborn skins)
- ○ Cutting board – Optional (if using a knife)
- ● Paper towels or clean kitchen towel – For drying peeled tomatoes
Instructions
This foolproof method makes peeling cherry tomatoes effortless—no special tools required, just perfect results every time.
Prepare Your Ice Bath
Fill a large bowl halfway with ice and add enough cold water to cover. You want a proper ice bath, not just floating cubes—the water should be very cold to stop the cooking process instantly. Set this aside near your stove so it’s ready when you need it.
I like to use a bowl big enough to hold all the tomatoes in a single layer. This ensures they cool down quickly and evenly. The ice bath is crucial—it shocks the tomatoes so their skins slip right off, and it prevents them from cooking further once they’re out of the hot water.
Blanch the Tomatoes
Bring a medium pot of water to a rolling boil. While you’re waiting, use a sharp knife to make a small “X” on the bottom of each cherry tomato. This doesn’t need to be deep—just enough to break the skin. I find it easiest to hold the tomato between my fingers and make a quick, shallow cut.
Once the water is boiling, carefully drop the tomatoes into the pot. Let them blanch for 10-15 seconds—you’ll see the skins start to wrinkle and pull away slightly at the X marks. Don’t walk away during this step; over-blanching will start cooking the tomatoes, and we just want to loosen the skins.
Shock in Ice Water
Using a slotted spoon, immediately transfer the blanched tomatoes to your prepared ice bath. Let them sit for 1-2 minutes until completely cooled. You’ll notice the skins continue to pucker and separate from the flesh as they chill.
This temperature shock is what makes the peeling process so easy. The cold water stops the cooking process and causes the skins to contract, while the flesh underneath stays firm. I always test one tomato after about a minute—if the skin doesn’t slip off easily with a gentle tug, let them chill a bit longer.
Peel and Use
Remove the tomatoes from the ice bath and transfer them to a clean work surface. Starting at the X mark, gently pinch the skin between your fingers—it should slip right off with almost no effort. If you encounter any resistance, the tomato might need a few more seconds in the ice bath.
Once peeled, the tomatoes are ready to use in your recipe. I like to use them immediately for the best texture, but you can store them in an airtight container in the refrigerator for up to 2 days. The peeled tomatoes will be tender but still hold their shape, perfect for salads, sauces, or as a garnish.
Tips and Common Mistakes
This simple technique becomes even easier with a few professional insights—here’s what I’ve learned from peeling thousands of tomatoes.
Precision Timing: Those 10-15 seconds in Step 2 are absolutely critical. I set a timer because even 5 extra seconds can start cooking the flesh instead of just loosening the skin. Watch for the moment the X cuts begin to curl outward—that’s your visual cue they’re ready. The second you see this, pull them out immediately.
Ice Bath Technique: In Step 3, don’t just dump the tomatoes into the ice water—gently swirl them with your slotted spoon for the first 10 seconds in the bath. This ensures even cooling and prevents any tomatoes from sticking together. I also add a handful of extra ice cubes right as the tomatoes go in to reinforce the temperature shock.
Tomato Selection: Choose firm, unblemished cherry tomatoes that are similar in size. Overripe tomatoes become too soft during blanching and may fall apart when peeling. I always give them a quick rinse and pat them completely dry before scoring—the X cuts work best on clean, dry skin.
Efficiency Tip: Work in batches if you’re peeling more than a pint of tomatoes. Keep your boiling water at a steady roll between batches, and refresh your ice bath with cold water if it starts to warm up. I like to have a second bowl of ice water ready to swap in if needed—this maintains the crucial temperature contrast throughout the process.
Pro Tips for Peel Cherry Tomatoes
- This simple technique becomes even easier with a few professional insights—here’s what I’ve learned from peeling thou…
- Precision Timing: Those 10-15 seconds in Step 2 are absolutely critical. I set a timer because even 5 extra seconds c…
- Ice Bath Technique: In Step 3, don’t just dump the tomatoes into the ice water—gently swirl them with your slotted sp…
Frequently Asked Questions
Do I need to peel cherry tomatoes before eating them?
Not at all! The skin is totally edible and packed with nutrients. Peeling is mostly for texture (smoother sauces, salads, or dishes where skin might be distracting) or presentation. If you’re short on time, skip it—just wash them well!
What’s the fastest way to peel a large batch of cherry tomatoes?
Use the blanch-and-shock method! Boil them for 10–15 seconds, then plunge into ice water. The skins will slip right off. For 20+ tomatoes, work in small batches to keep the water hot. A slotted spoon speeds up transferring.
Can I peel cherry tomatoes without boiling them?
Yes! Try the knife trick: score an “X” on the bottom, then microwave for 10–15 seconds. The steam loosens the skin. Alternatively, freeze them for 1 hour—the skins peel easily when thawed. (Great for sensitive recipes like gazpacho!)
Why won’t the skins come off after blanching?
Common issues: under-blanching (water wasn’t boiling) or overcrowding the pot. Fix it: Re-boil fewer tomatoes for 5 extra seconds. If they’re overripe, the skin sticks—use a paring knife to help. Always shock in ice water immediately!
Are there tools to make peeling cherry tomatoes easier?
A tomato shark (serrated peeler) or grapefruit spoon with jagged edges can scrape skins off post-blanch. For bulk prep, a food mill removes skins after cooking. Pro tip: Look for “tomato-specific” gadgets in kitchen stores!
Peeling cherry tomatoes doesn’t have to be a tedious chore—with the right technique, you can do it in seconds! Whether you’re prepping for a fresh salad, a savory sauce, or a show-stopping garnish, this simple trick saves time while keeping your tomatoes intact. 🍅✨
Now that you’ve mastered the method, put it to the test! Try peeling a batch for your next recipe—maybe a burst tomato pasta or a vibrant bruschetta. Happy cooking, and enjoy the effortless results!

Trained in classic French technique but raised on slow-cooked ribs and spicy rubs, she blends culinary skill with smoke and soul.
- Recipe for Boneless Pork Chops in Cast Iron Skillet: Sear and Baste to Juicy Perfection - October 3, 2026
- Recipe for Boneless Cross Rib Roast: Slow-Roasted Beef with Herb Crust - October 3, 2026
- Hamburgers in Sauce Recipe Crock Pot: Slow-Cooked Savory Delight - October 3, 2026