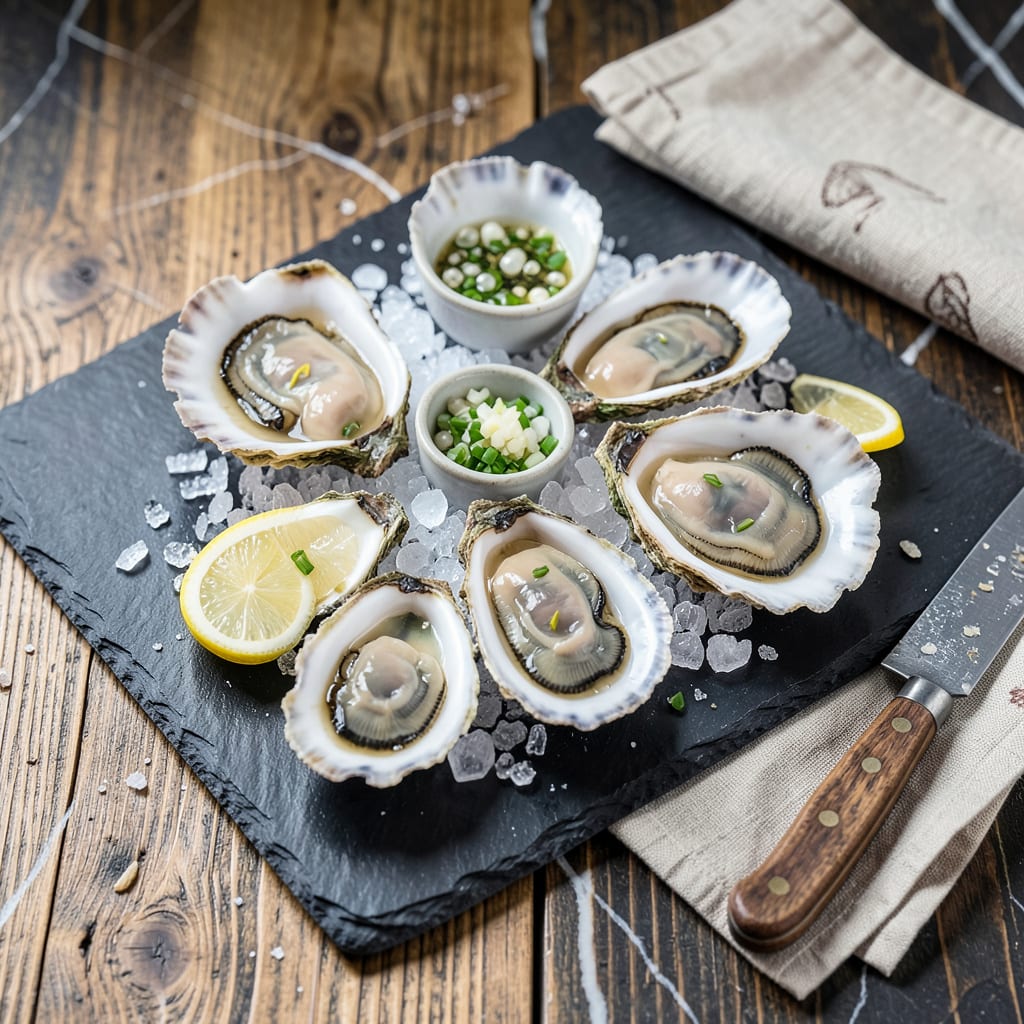
Shucking oysters at home feels intimidating at first—I remember my first attempt ended with a nicked thumb and oysters that looked more like abstract art than appetizers. But here’s the thing: with the right technique and a sharp oyster knife, anyone can master this. The key is confidence and understanding the hinge where the shell opens.
Freshness is everything when serving raw oysters. I source mine from trusted fishmongers who can tell me exactly when they were harvested (within 24 hours is ideal). You’ll want to look for tightly closed shells and a clean, briny ocean smell—anything fishy or open means trouble. Store them flat-side up in the fridge covered with a damp towel until ready to shuck.
The magic happens in the presentation. Classicists will love them on a bed of crushed ice with lemon wedges and cocktail sauce, but I like adding modern twists like yuzu kosho or chili-infused mignonette. The contrast of briny oyster with bright, tangy toppings creates that perfect first bite every time.
Fair warning: raw oysters aren’t for everyone, especially if you’re immunocompromised. But when you get it right—clean, crisp, and properly chilled—there’s nothing like that first slurp of ocean freshness. Here’s how to do it safely and deliciously.
📚 In This Guide
- What You’ll Need
- Instructions
- Tips and Common Mistakes
What Youll Need
- ● Fresh oysters – 12–24 (look for live, closed-shell varieties like Kumamoto, Bluepoint, or Pacific; discard any open or cracked ones).
- ● Oyster knife – 1 (sturdy, short-blade, 2–3″ with a guarded tip—no substitutes!).
- ● Heavy-duty gloves – 1 pair (cut-resistant, like Kevlar or mesh) for grip and safety.
- ● Towel or cloth – 1 (folded, for stabilizing oysters).
- ● Cutting board – 1 (wood or plastic, with a damp towel underneath to prevent slipping).
- ● Small bowl or tray – 1 (for holding shucked oysters and their liquor).
- ● Lemon wedges – 2–4 (for serving).
- ○ Hot sauce or mignonette – optional (2–3 tbsp per 12 oysters).
- ○ Crushed ice – optional (1–2 cups, for presentation).
- ○ Tongs – optional (for handling hot or slippery shells).
- ○ Small brush – optional (for scrubbing shells pre-shuck).
Step-by-Step Instructions for Preparing Raw Oysters
Here’s the method I’ve perfected for shucking and serving oysters like a pro—safe, simple, and foolproof.
Gather Your Tools and Prep Your Workspace
Before you even touch an oyster, set yourself up for success. You’ll need an oyster knife (not a regular kitchen knife), a thick kitchen towel or glove, and a stable surface. I place a folded towel on my countertop to prevent slipping—this gives me better control and protects my work surface.
Rinse the oysters under cold water to remove any dirt or sand from the shells. Scrub them gently with a stiff brush if needed, especially around the hinge area where you’ll be inserting the knife. This step isn’t just about cleanliness—it prevents grit from getting into your oysters when you open them.
Position the Oyster and Find the Sweet Spot
Hold the oyster with the curved side down and the hinge facing you. Fold the kitchen towel over your hand and grip the oyster firmly—this protects you if the knife slips. Look for the small indentation near the hinge; this is where you’ll insert your knife.
Here’s the thing—every oyster is slightly different. Some hinges are more pronounced, others are flatter. Don’t force it; if the knife isn’t going in easily, reposition and try again. The goal is to slip the tip of the knife into that natural gap without cracking the shell. Once you feel it catch, you’re in the right spot.
Shuck with Control and Precision
With the knife tip inserted, twist it gently to pry the shell open. You’ll feel resistance at first, then a sudden give—this is the moment that matters. Once the shell pops open, slide the knife along the top shell to sever the adductor muscle that holds the oyster in place.
Don’t rush this part. I’ve found that slow, steady pressure works better than forcing it. If the oyster doesn’t open easily, don’t pry harder—remove the knife and try a different angle. The top shell should come off cleanly, leaving the oyster sitting in its bottom shell with all its liquid intact.
Clean and Serve the Oysters
Run the knife under the oyster to detach it from the bottom shell, but leave it in its liquid. Check for any shell fragments that might have fallen in during shucking—this is why we rinsed them first. If you see any, use the tip of your knife to remove them.
Serve the oysters immediately on a bed of crushed ice or rock salt to keep them level. I like to serve them with classic accompaniments: fresh lemon wedges, hot sauce, and a simple mignonette. The key is to let the natural briny sweetness of the oyster shine through—less is more when it comes to toppings.
Master the Presentation
Arrange the oysters on a platter with their deep side down so the liquid doesn’t spill. If you’re serving a crowd, consider shucking them onto a tray as you go and keeping them chilled in the refrigerator until ready to serve. The ideal serving temperature is just above refrigerated—cool but not icy.
Real talk: your first few oysters might not look perfect, and that’s okay. Even professionals occasionally crack a shell or lose some liquid. What matters is that you’re serving fresh, safe oysters that taste amazing. With practice, your technique will improve, and soon you’ll be shucking like you’ve done it for years.
Tips and Common Mistakes for Perfectly Prepared Raw Oysters
Mastering oyster preparation comes down to technique and confidence. Here’s what I’ve learned from years of shucking.
Equipment Essentials: The right oyster knife makes all the difference. I prefer a short, sturdy blade with a comfortable grip—it gives better control than longer knives. Don’t substitute a regular kitchen knife; they’re too flexible and dangerous for this task. A thick kitchen towel or cut-resistant glove is non-negotiable for protecting your hand during the process.
Hinge Technique: In Step 2, finding that sweet spot near the hinge is everything. I’ve found that rotating the oyster slightly while applying gentle pressure helps locate the natural gap. If the knife won’t insert easily, don’t force it—try a different angle. The goal is to slip into that natural seam without cracking the shell, which preserves the precious liquid inside.
Liquid Preservation: When severing the adductor muscle in Step 3, keep the oyster level to prevent spilling that delicious briny liquor. I like to tilt the oyster slightly toward me as I work, using the bottom shell as a natural bowl. This technique helps maintain maximum flavor and presentation quality.
Serving Temperature: As mentioned in Step 5, serving temperature matters. I recommend taking oysters out of the refrigerator about 10 minutes before serving to let them come to that ideal “cool but not icy” temperature. This enhances their natural sweetness and makes them more pleasant to eat.
Pro Tips for Prepare Raw Oysters At Home
- Mastering oyster preparation comes down to technique and confidence. Here’s what I’ve learned from years of shucking.
- Equipment Essentials: The right oyster knife makes all the difference. I prefer a short, sturdy blade with a comforta…
- Hinge Technique: In Step 2, finding that sweet spot near the hinge is everything. I’ve found that rotating the oyster…
Frequently Asked Questions
Got questions about prepping raw oysters at home? You’re not alone! Here are the most common ones we hear—with quick, practical answers to help you shuck like a pro.
How long do fresh oysters last in the fridge before shucking?
Store live oysters in the coldest part of your fridge (35–40°F) for up to 5–7 days in a breathable container (like a mesh bag) covered with a damp towel. Discard any that gape open—they’re dead and unsafe to eat. Pro tip: Shuck them as close to serving time as possible for peak freshness!
What’s the easiest alternative if I don’t have an oyster knife?
A sturdy butter knife or flat-head screwdriver can work in a pinch, but be extra cautious! Wrap the oyster in a towel for grip, and never force it—wiggle the tip into the hinge and twist gently. For safety, invest in a proper shucking knife ($10–$20) if you plan to do this often.
Why do my oysters taste gritty? How can I fix it?
Grit usually means poor cleaning. After shucking, rinse oysters in a bowl of cold water to remove shell fragments, then let them sit for 5 minutes so sand settles. Never rinse under running water—it washes away their briny flavor. If they’re still gritty, the oysters may have been harvested from muddy waters.
Can I freeze raw oysters if I can’t eat them all?
Not ideal! Freezing ruins their texture (they’ll turn mushy when thawed). Instead, shuck and store them in their liquid in an airtight container for up to 3 days in the fridge. For longer storage, cook them first (e.g., grill or fry), then freeze for up to 3 months.
How do I know if an oyster is bad before shucking?
Check for these red flags:
- Smell: Should be briny like the ocean—not sour or rotten.
- Appearance: Shells should be closed tightly (or snap shut when tapped).
- Liquid: Clear or slightly milky is good; cloudy or discolored means toss it.
With the right tools and a little practice, shucking raw oysters at home becomes a rewarding (and delicious) skill! Freshness, safety, and technique are your keys to success—so start with high-quality oysters and take your time. Ready to impress? Gather some friends, chill a bottle of crisp white wine, and turn your kitchen into an oyster bar! 🍾 Next up: experiment with homemade mignonette sauces or grilled oyster variations to level up your seafood game.

Trained in classic French technique but raised on slow-cooked ribs and spicy rubs, she blends culinary skill with smoke and soul.
- Recipe for Boneless Pork Chops in Cast Iron Skillet: Sear and Baste to Juicy Perfection - October 3, 2026
- Recipe for Boneless Cross Rib Roast: Slow-Roasted Beef with Herb Crust - October 3, 2026
- Hamburgers in Sauce Recipe Crock Pot: Slow-Cooked Savory Delight - October 3, 2026