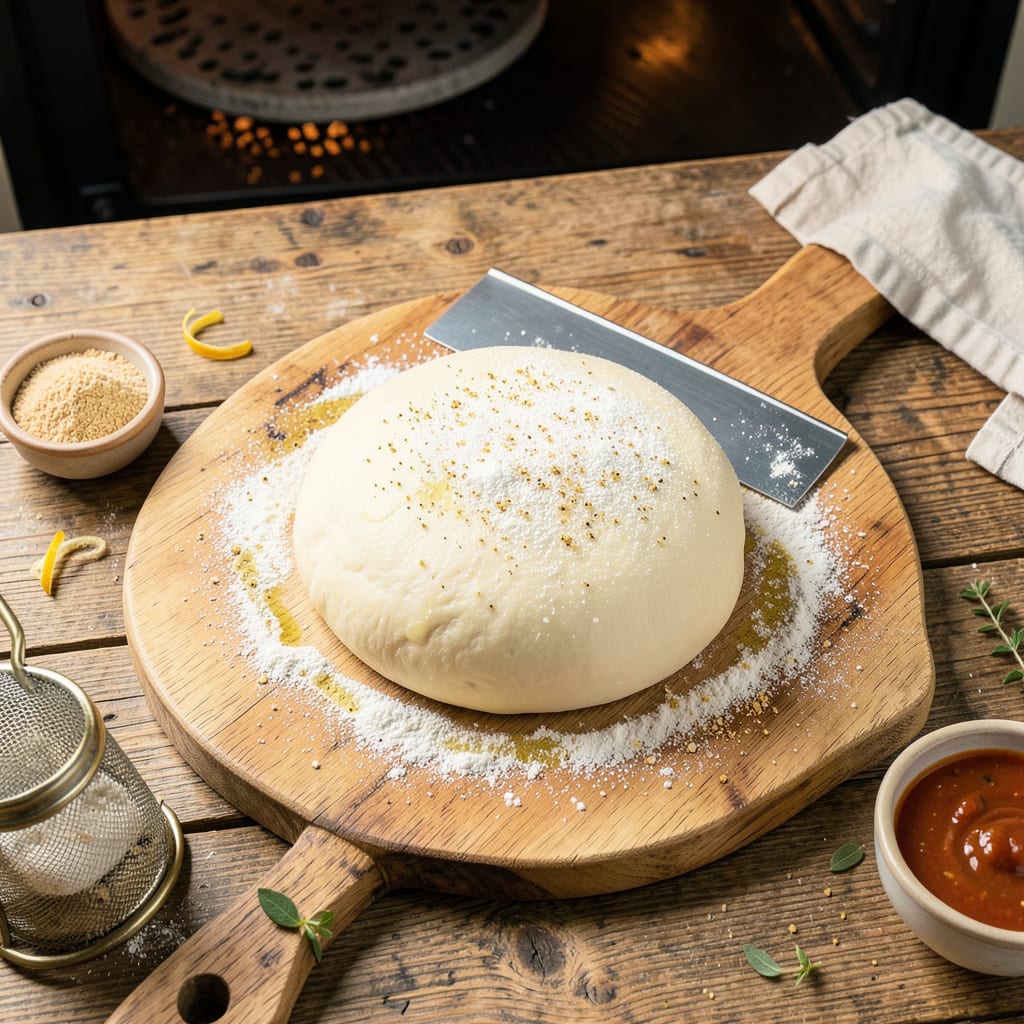
Nothing ruins pizza night faster than dough that sticks to your peel or pan like glue. I’ve been there—carefully stretched dough turning into a torn, misshapen mess the second you try to slide it into the oven. After years of trial and error (and more than a few pizza casualties), I’ve cracked the code for perfect, stick-free dough every time.
The problem usually comes down to three things: moisture, surface prep, and technique. High-hydration doughs (like Neapolitan-style) are especially prone to sticking because they’re wetter and more delicate. But even standard dough can cause issues if your peel isn’t prepped right or you’re using the wrong type of flour for dusting. The good news? Simple fixes make all the difference.
Here’s what actually works: semolina or fine cornmeal creates a friction layer that lets dough slide effortlessly, while rice flour is my secret weapon for high-moisture doughs. And forget about drowning your peel in flour—that just makes a mess. A light, even dusting with the right grain is all you need for that clean release.
Whether you’re working with a wooden peel, baking steel, or just a sheet pan, I’ll show you exactly how to prep each surface for flawless transfers. No more torn crusts or frustrating kitchen battles—just perfect pizza, exactly how you envisioned it.
📚 In This Guide
- What You’ll Need
- Instructions
- Tips and Common Mistakes
What Youll Need
- ● Pizza dough – 1 lb (450g) of fresh or thawed dough (homemade or store-bought 🍕).
- ● Flour – ½ cup (60g) all-purpose or semolina flour for dusting (semolina adds extra crispiness!).
- ● Olive oil or cooking spray – 1-2 tbsp for greasing (avoid overdoing it—just a light coat!).
- ● Parchment paper – 1 sheet (12×16 inches) for easy transfer (a game-changer! 🎯).
- ● Pizza peel or flat baking sheet – 1 (wooden or metal, at least 12 inches wide).
- ○ Cornmeal (optional) – 2-3 tbsp for extra non-stick texture under the crust.
- ○ Rolling pin (optional) – If stretching dough by hand isn’t your thing.
- ○ Bench scraper (optional) – Helps lift and shape sticky dough like a pro.
- ● Clean kitchen towel – 1, to cover dough while resting (prevents drying).
- ● Oven – Preheated to at least 475°F (245°C) for that perfect bake. 🔥
Step-by-Step Instructions for Preventing Pizza Dough From Sticking
You’re about to master the secret to pizza that slides right off the peel—every single time.
Prepare Your Work Surface Like a Pro
Start with a completely clean, dry work surface. I always use a large wooden cutting board or a dedicated pizza peel for this step. The key is to eliminate any moisture—even a tiny bit of dampness will cause your dough to stick later.
Wipe down the surface with a dry cloth, then let it air-dry for 2-3 minutes before you begin. This might seem excessive, but I’ve found that residual moisture from cleaning is the number one cause of sticking problems. For extra insurance, you can even warm the peel slightly by placing it near your preheating oven for 5 minutes—this helps create that perfect non-stick surface.
Use the Right Flour Technique (This Changes Everything)
Here’s the game-changer: instead of just sprinkling flour, use a 50/50 mix of semolina flour and all-purpose flour for dusting. Semolina’s coarse texture creates microscopic barriers that prevent sticking better than regular flour alone. I keep this mix in a small shaker for easy application.
Generously dust your work surface with this flour blend—don’t be shy! You want a visible layer that completely covers the surface. When you place your dough down, give it a gentle shake to ensure the flour gets underneath. Then dust the top of your dough ball lightly before you start stretching. This double-layer approach creates a protective barrier on both sides of your dough.
Stretch the Dough with Confidence
Begin stretching your dough directly on the prepared surface. Use your fingertips to press gently from the center outward, leaving a 1-inch border for your crust. The key here is to work quickly but deliberately—don’t let the dough sit too long in one spot before moving it.
As you stretch, periodically lift the dough and give it a quarter turn, adding more of your flour blend underneath if needed. You’ll know you’re doing it right when the dough moves freely and makes a slight “shushing” sound as it slides across the surface. If at any point the dough resists moving, stop immediately and add more flour blend to the sticky spots before continuing.
Transfer to Peel with the “Shake Test”
Once your dough is stretched to the desired size, it’s time for the critical shake test. Gently shake the peel back and forth—if the dough sticks anywhere, lift that section and add more semolina blend underneath. The dough should slide freely with just a slight resistance.
Here’s my pro trick: if you’re still nervous about sticking, slide a thin metal spatula under the dough and give it a quick lift and drop. This ensures there’s flour underneath the entire surface. For extra security with heavily topped pizzas, you can even place a sheet of parchment paper (lightly dusted with your flour blend) under the dough before adding toppings—just remove it halfway through baking for that perfect crispy bottom.
Launch with Perfect Technique
When you’re ready to bake, give the peel one final gentle shake to ensure everything is moving freely. Then, using a quick but controlled motion, slide the pizza onto your preheated stone or steel. The secret is to use a slight jerky motion rather than a smooth push—this helps overcome any final resistance.
If you’ve followed these steps, your pizza should glide right off with minimal effort. As it bakes, you’ll be rewarded with a crust that’s crispy on the bottom yet perfectly chewy inside—no torn dough or frustrating sticking. And here’s the best part: with practice, this technique becomes second nature, and you’ll never have to worry about pizza dough sticking again!
Tips and Common Mistakes for Perfect Non-Stick Pizza Dough
Here’s what I’ve learned from years of pizza-making—these details make all the difference between frustration and perfection.
Surface Preparation Secret: Those 2-3 minutes of air-drying in Step 1 aren’t just suggestion—they’re critical! Even the slightest moisture creates microscopic bonds between dough and surface. I’ve ruined more pizzas by rushing this than I care to admit. For extra insurance, warm your peel for the full 5 minutes near the oven; the gentle heat creates an invisible moisture barrier that’s pure magic.
Flour Blend Breakthrough: The 50/50 semolina-all-purpose mix in Step 2 changed my pizza game forever. Semolina’s gritty texture acts like tiny ball bearings under your dough. Don’t just dust lightly—you want to see the flour clearly when you shake the peel. I keep my mix in an old parmesan cheese shaker for perfect, even distribution every time.
Stretching Technique: When you’re working the dough in Step 3, speed matters more than you think. The moment dough sits still on the surface, it starts bonding. Keep it moving with those quarter turns, and listen for that “shushing” sound—it’s your audio cue that the flour barrier is working. If you hear silence, you’ve lost the battle and need more flour immediately.
Launch Confidence: The jerky motion in Step 5 isn’t just for show—it breaks any final suction between dough and peel. Practice this motion with an untopped dough first to build muscle memory. And here’s my secret: if you’re really nervous, do a test launch with just sauce (no toppings) to perfect your technique before committing to the full pizza.
Pro Tips for Stop Pizza Dough From Sticking
- Here’s what I’ve learned from years of pizza-making—these details make all the difference between frustration and per…
- Surface Preparation Secret: Those 2-3 minutes of air-drying in Step 1 aren’t just suggestion—they’re critical! Even t…
- Flour Blend Breakthrough: The 50/50 semolina-all-purpose mix in Step 2 changed my pizza game forever. Semolina’s grit…
Frequently Asked Questions
Why does my pizza dough stick even after flouring the surface?
If your dough sticks despite flouring, it’s often due to too much moisture in the dough or insufficient dusting. Try using a 50/50 mix of flour and semolina for extra grip, or let the dough rest longer (10–15 mins) to firm up before shaping. A lightly oiled surface can also help!
Can I use cornmeal instead of flour to prevent sticking?
Cornmeal is a game-changer for crispy crusts and non-stick surfaces. Sprinkle it generously on your peel or baking sheet—it adds texture and acts as tiny “ball bearings” to slide the pizza off easily. Just use it sparingly if you dislike a gritty bite.
How long should I let the dough rest before shaping to avoid sticking?
Rest the dough at room temp for 30–60 minutes after kneading. This relaxes the gluten, making it easier to stretch without tearing or sticking. If it’s still clingy, cover it and wait another 10–15 minutes—patience pays off!
What’s the best alternative to flour for gluten-free pizza dough?
For gluten-free dough, try rice flour, almond flour, or tapioca starch—they’re less gummy than traditional flour. A light spray of olive oil on your hands/tools also helps. Pro tip: Chill the dough 20–30 mins before shaping to reduce stickiness!
My dough sticks to the pizza peel when transferring. How do I fix this?
Shake the peel gently before sliding—the dough should move easily. If it resists, lift and re-dust with flour/cornmeal. For stubborn cases, use parchment paper: shape the pizza on it, then slide paper and all onto the stone. Remove the paper after 2–3 minutes!
No more dough disasters! Preventing sticky pizza dough comes down to the right flour, proper hydration, and smart prep—like dusting your surface with semolina or using parchment paper. With these simple tricks, you’ll pull off a perfectly crisp, non-stick crust every time. 🍕✨
Ready to put your new skills to the test? Grab your ingredients and try a homemade pizza tonight—your taste buds (and clean countertops) will thank you!

Trained in classic French technique but raised on slow-cooked ribs and spicy rubs, she blends culinary skill with smoke and soul.
- Recipe for Boneless Pork Chops in Cast Iron Skillet: Sear and Baste to Juicy Perfection - October 3, 2026
- Recipe for Boneless Cross Rib Roast: Slow-Roasted Beef with Herb Crust - October 3, 2026
- Hamburgers in Sauce Recipe Crock Pot: Slow-Cooked Savory Delight - October 3, 2026