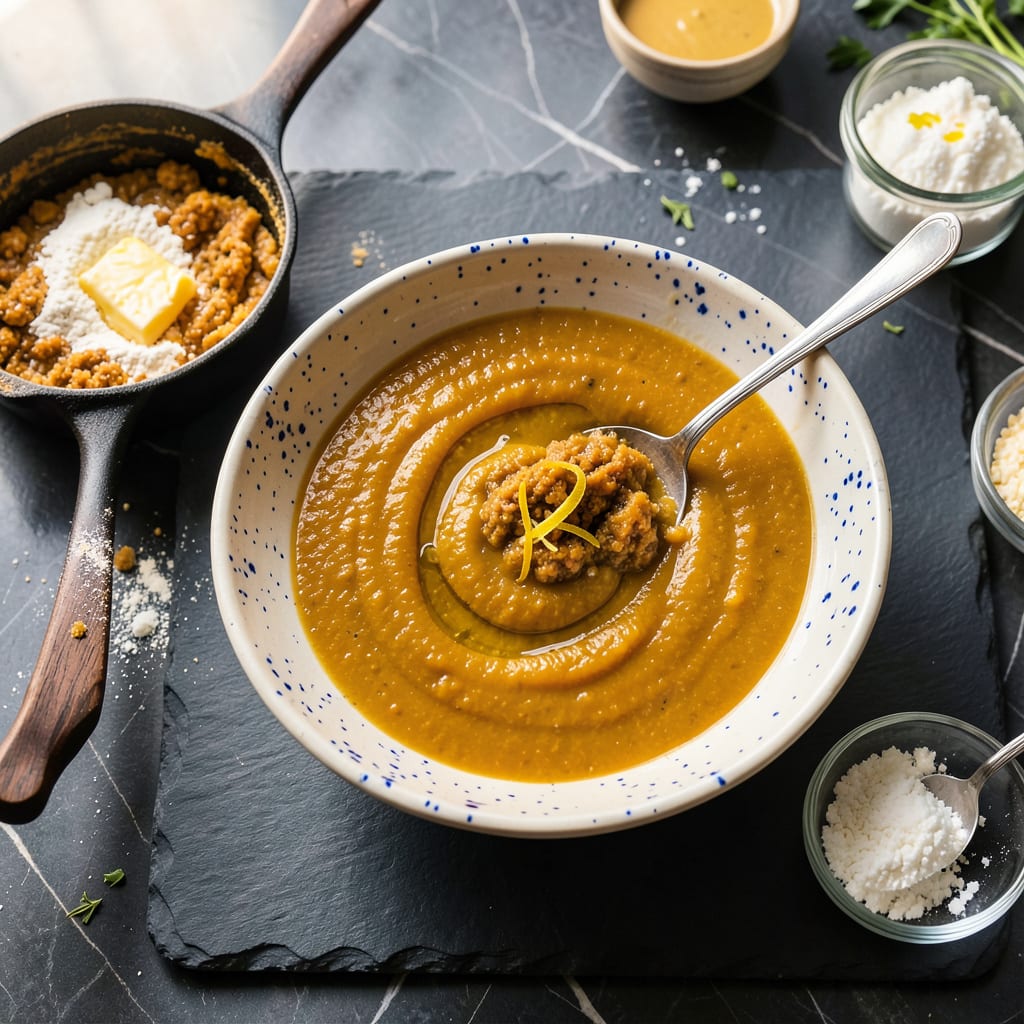
Nothing ruins a great soup like a watery, thin broth that slides right off your spoon. I’ve been there—staring at a pot of what should be rich, hearty soup, wondering where it all went wrong. The good news? Fixing it is easier than you think, and you probably have everything you need in your kitchen right now.
After years of working with everything from delicate consommé to thick, smoky chilis, I’ve nailed down the five most reliable methods to get that perfect texture—whether you’re making a creamy bisque or a chunky vegetable stew. Some take just minutes, others build richness slowly, but they all deliver that satisfying, spoon-coating consistency we’re after.
Here’s the thing—thickening soup isn’t just about adding starch. It’s about understanding how different ingredients interact with your broth. A simple flour roux can transform a thin soup into velvety perfection, while blended vegetables add body and nutrients without changing the flavor profile. I’ll walk you through each technique so you can choose exactly what your soup needs.
No more guessing, no more disappointment. By the end, you’ll know exactly how to rescue any soup—whether it’s over-thinned from extra broth or just needs that final touch to make it restaurant-worthy. Let’s fix that soup together.
📚 In This Guide
- What You’ll Need
- Instructions
- Tips and Common Mistakes
What Youll Need
- ● Your soup – 4+ cups of broth-based or creamy soup (already cooked 🥘).
- ● Thickening agents (pick 1-2): All-purpose flour – 1–2 tbsp (per 4 cups soup) 🌾
- ● Cornstarch – 1 tbsp (mixed with 1 tbsp cold water per 4 cups soup)
- ● Arrowroot powder – 1–1.5 tbsp (gluten-free alternative)
- ● Rice or potatoes – ½ cup (mashed or blended for natural thickness)
- ● Heavy cream or coconut milk – ¼–½ cup (for creamy soups)
- ● Tools: Whisk or fork (for smooth mixing 🥄)
- ● Small bowl (to mix slurries)
- ● Blender/immersion blender (for pureed thickeners)
- ● Measuring spoons (precision matters!)
- ○ Optional but helpful: Cheesecloth (for straining lumps)
- ● Butter or oil (for roux-based thickening)
- ● Fresh herbs (to adjust flavor after thickening 🌿)
Instructions for Thickening Your Soup
Here’s how to transform your thin soup into a velvety, restaurant-quality masterpiece using professional techniques.
Create a Classic Roux for Rich Body
Melt equal parts butter and flour in a separate saucepan over medium heat, whisking constantly for 3-5 minutes until the mixture turns a light golden color. This cooking process removes the raw flour taste while developing a nutty aroma that will deepen your soup’s flavor profile.
For a standard 4-serving pot of soup, I recommend starting with 2 tablespoons each of butter and flour. Gradually whisk this roux into your hot soup, allowing it to simmer for 5-7 minutes until fully incorporated. You’ll notice the liquid immediately taking on a silkier texture as the starch molecules expand and bind with the liquid.
Harness the Power of Starch Slurries
Combine cornstarch or arrowroot powder with an equal amount of cold water or broth in a small bowl, creating a smooth slurry. The key here is using cold liquid – hot liquid would prematurely activate the starch and create lumps. For our 4-serving soup, 1-2 tablespoons of starch should provide noticeable thickening without making it gluey.
Whisk this slurry into your simmering soup and allow it to cook for 2-3 minutes. You’ll see the transformation happen before your eyes as the starch granules absorb liquid and swell. The soup should coat the back of a spoon when properly thickened, with a glossy sheen that indicates the starch has fully gelatinized.
Incorporate Pureed Vegetables for Natural Thickness
Select starchy vegetables like potatoes, carrots, or cauliflower that are already in your soup, or add ½ cup of cooked vegetables specifically for this purpose. Puree them with a bit of the soup’s liquid until completely smooth. This technique not only thickens but also intensifies the soup’s flavor and nutritional value.
Return the puree to the pot and stir well to combine. Simmer for 5 minutes to allow the vegetable fibers to fully integrate. You’ll achieve a velvety texture that’s particularly effective for cream soups or bisques. The color should remain vibrant, not muddy, indicating you’ve maintained the soup’s visual appeal while improving its body.
Utilize the Reduction Method for Concentrated Flavor
Uncover your soup pot and increase the heat to medium-high, allowing the liquid to bubble vigorously. As steam rises and moisture evaporates, the flavors will concentrate and the soup will naturally thicken. This method works particularly well for broth-based soups where you want to maintain clarity while intensifying taste.
Stir occasionally and monitor closely – you’re looking for a reduction of about 20-25% in volume. The soup is ready when it reaches your desired consistency and the flavors have become more pronounced. Be careful not to over-reduce, as this can make the soup overly salty. The surface should show small, steady bubbles rather than a rolling boil for optimal control.
Finish with Cream or Yogurt for Luxurious Body
Temper ½ cup of heavy cream, whole milk, or Greek yogurt by gradually adding hot soup to it while whisking constantly. This prevents curdling when you incorporate it back into the main pot. The fat in dairy products creates a rich mouthfeel while the proteins contribute to the overall thickness.
Add the tempered dairy to your soup and simmer gently for 3-5 minutes – never let it boil. You’ll notice the soup taking on a creamy appearance and a smoother texture. The final consistency should be velvety rather than heavy, with just enough body to cling lightly to your spoon. This method works beautifully for finishing both cream and clear soups, adding richness without overwhelming the base flavors.
Tips and Common Mistakes
Perfecting soup thickness is all about understanding the science behind each method. Here’s what I’ve learned from years of kitchen experience to help you avoid common pitfalls.
Roux Perfection: When making your roux in Step 1, the 3-5 minutes of cooking time is crucial. You want to reach a light golden color – not too pale (which means undercooked flour) and not too dark (which can make your soup taste bitter). Keep the heat at medium and whisk constantly. I find that 2 tablespoons each of butter and flour creates the ideal ratio for a 4-serving pot without making it too heavy. The 5-7 minutes of simmering after adding the roux to your soup allows the starch to fully activate and distribute evenly.
Slurry Success: For the starch slurry in Step 2, using cold liquid is non-negotiable. Hot liquid will create instant lumps that are nearly impossible to smooth out. When you add the 1-2 tablespoons of cornstarch or arrowroot to your soup, those 2-3 minutes of cooking time are when the magic happens. Watch for the soup to develop that telltale glossy sheen – that’s your visual cue that the starch has fully gelatinized. If you don’t see this change, give it another 30 seconds before adding more starch.
Reduction Control: The reduction method in Step 4 requires your full attention. When you increase to medium-high heat, you’re looking for that 20-25% volume reduction, not an arbitrary time. I recommend using a wooden spoon to mark the soup level on the inside of your pot before starting. This gives you a clear visual reference. The bubbles should be steady but not violent – think a gentle rolling simmer rather than a full boil. Stir occasionally to prevent any ingredients from sticking to the bottom.
Dairy Integration: For the cream finish in Step 5, tempering is everything. When you gradually add hot soup to the ½ cup of heavy cream or yogurt, you’re raising its temperature slowly to prevent curdling. Those 3-5 minutes of gentle simmering after adding the tempered dairy are when the proteins relax and incorporate smoothly. Never let it boil – you’ll see the surface start to develop small bubbles around the edges when it’s at the right temperature.
Pro Tips for Thicken My Soup
- Perfecting soup thickness is all about understanding the science behind each method. Here’s what I’ve learned from ye…
- Roux Perfection: When making your roux in Step 1, the 3-5 minutes of cooking time is crucial. You want to reach a lig…
- Slurry Success: For the starch slurry in Step 2, using cold liquid is non-negotiable. Hot liquid will create instant …
Frequently Asked Questions
Can I thicken soup without flour or cornstarch?
Try blended veggies (like potatoes or cauliflower), lentils, or even oats for a gluten-free boost. Simmering longer to reduce liquid also works—just stir often to avoid burning. For creamy soups, a splash of coconut milk or puréed beans adds richness and thickness!
How long does it take for soup to thicken with a roux?
A classic roux (butter + flour) thickens soup in 5–10 minutes on medium heat. Stir constantly to avoid lumps! For a darker roux (nuttier flavor), cook longer (10–15 mins), but add liquid slowly to prevent clumping. Pro tip: Let the soup simmer after adding the roux for full effect.
Why did my soup get gluey instead of thick?
Overcooking starches (like flour or cornstarch) breaks them down, creating a gummy texture. Fix it by: 1) Adding more broth to dilute, 2) Balancing with acid (lemon juice or vinegar), or 3) Blending in a starchy veggie (like a cooked potato) to reset the texture.
Can I use a blender to thicken soup?
Yes! Puréeing half the soup (then mixing it back) adds body without extra ingredients. Use an immersion blender for ease, or a countertop blender in batches (vent the lid to avoid pressure buildup!). Works best for creamy or veggie-based soups—just strain if you want it silky smooth.
What’s the fastest way to thicken soup at the last minute?
For instant results:
- Cornstarch slurry: Mix 1 tbsp cornstarch + 1 tbsp cold water, stir into soup, and simmer 1–2 mins.
- Instant mashed potatoes: Whisk in 1–2 tbsp for a quick, neutral thickener.
- Egg yolks: Temper with hot broth, then stir into soup (great for egg drop or creamy styles).
Thickening soup doesn’t have to be complicated—whether you prefer a creamy roux, a slurry, or a natural puree, you’ve got options to match your dish’s flavor and texture. With these simple techniques, you can turn any thin, watery soup into a rich, hearty masterpiece in minutes! 🍲✨
Now that you’re armed with the know-how, pick your favorite method and give it a try in your next batch. Happy cooking—and enjoy that perfect, velvety spoonful!

Trained in classic French technique but raised on slow-cooked ribs and spicy rubs, she blends culinary skill with smoke and soul.
- Recipe for Boneless Pork Chops in Cast Iron Skillet: Sear and Baste to Juicy Perfection - October 3, 2026
- Recipe for Boneless Cross Rib Roast: Slow-Roasted Beef with Herb Crust - October 3, 2026
- Hamburgers in Sauce Recipe Crock Pot: Slow-Cooked Savory Delight - October 3, 2026