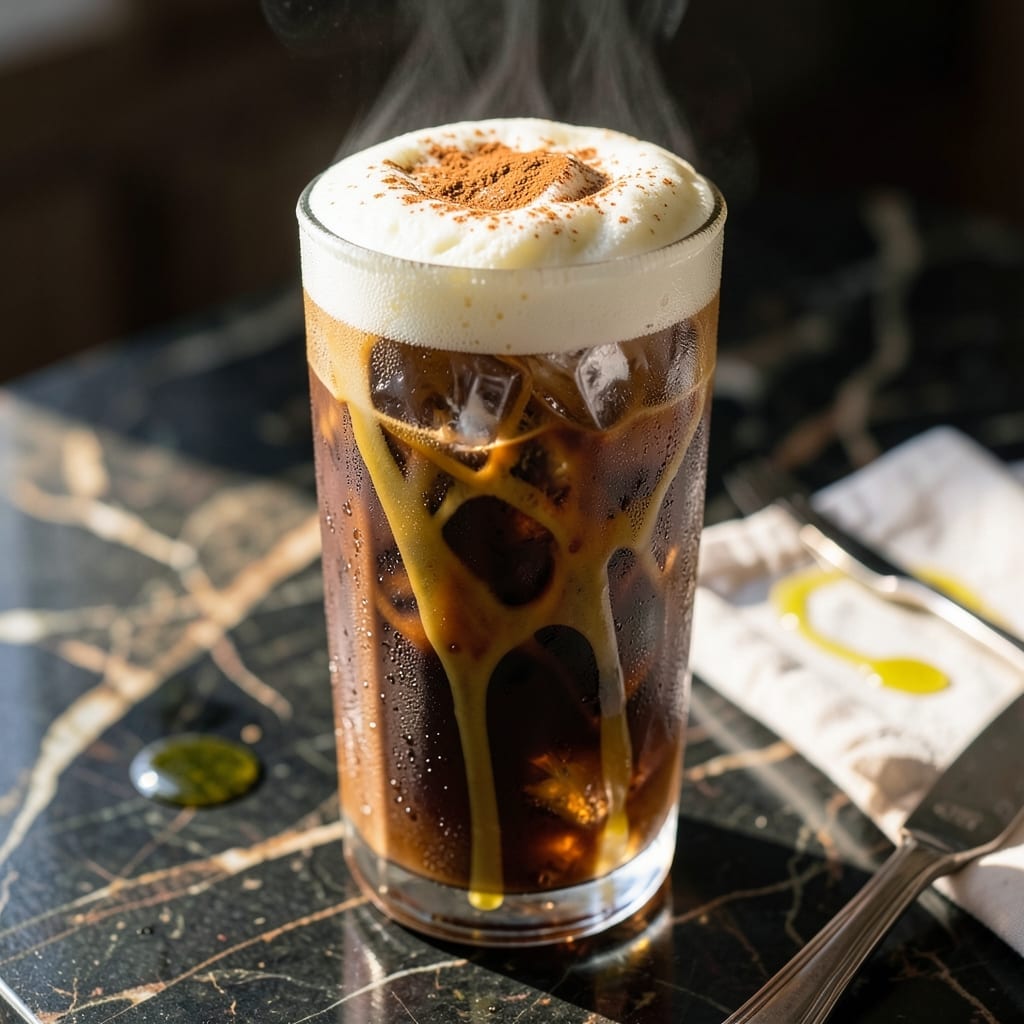
Creating barista-level iced cappuccino at home is simpler than you think. The key lies in balancing strong espresso with cold milk and just the right amount of foam.
I’ve perfected this method through trial and error, focusing on temperature and texture. The result is a refreshing drink with rich coffee flavor and velvety smoothness.
This recipe delivers café quality in 5 minutes using basic equipment. No fancy machines required—just good technique and fresh ingredients.
You’ll enjoy a perfectly chilled beverage with that signature layered look, ready to rival any coffee shop version.
Ingredients for Iced Cappuccino Recipe at Home
Eight ingredients. Café-quality chill. No espresso machine required.
| Ingredient | Amount | Notes |
|---|---|---|
| Espresso Shots ☕ | 2 whole | Freshly brewed, chilled |
| Whole Milk 🥛 | 1 cup | Cold, full-fat preferred |
| Ice Cubes ❄️ | 1 cup | Crushed or cubed |
| Granulated Sugar 🍚 | 2 tsp | Optional for sweetness |
| Vanilla Syrup 🍯 | 1 tbsp | Store-bought or homemade |
| Ground Cinnamon 🌿 | ¼ tsp | For garnish |
| Unsweetened Cocoa Powder 🍫 | ½ tsp | For dusting, optional |
| Heavy Cream 🥛 | ¼ cup | Cold, for foam layer |
[recipe_ingredient_scaler]
The espresso is non-negotiable here—use a dark roast for maximum depth. Illy or Lavazza pods work beautifully if you’re avoiding machines. For milk, whole dairy froths best, but oat milk (barista-style) is a great vegetarian alternative. Ice should be fresh, not freezer-burned, and crushed if you prefer a slushier texture (the good stuff, not the pre-bagged kind).
No espresso maker? Strong cold brew concentrate at two-to-one ratio gets you close. Skip the sugar if you’re watching intake, or try monk fruit sweetener for a zero-calorie option. Heavy cream can be swapped for coconut cream if you’re avoiding dairy, but it’ll taste different. Vanilla syrup is easy to swap—hazelnut or caramel work just as well.
Fresh is best—use within 24 hours for peak flavor. Store-bought syrups last 1 month unopened, 2 weeks once opened in the fridge. Froth the milk just before assembly (don’t pre-froth) to keep the texture perfect.
Why You’ll Love This Recipe
- No Fuss Brew: I can make this in 5 minutes flat with just espresso, milk, and my coffee machine.
- Sweet & Creamy: The vanilla syrup and whole milk blend into this rich, smooth drink that’s way better than takeout.
- Morning or Afternoon: Honestly, I sip this on my commute or as a 3 pm pick-me-up.
Step-by-Step Instructions for Iced Cappuccino
Master the layering technique that separates home brewers from baristas with these precise steps.
Step 1: Chill and Sweeten the Espresso Base
Begin by ensuring the 2 whole Espresso Shots are completely chilled. I recommend brewing them directly over 1 cup Ice Cubes to rapidly cool the espresso while preserving its bold flavor profile. This immediate chilling prevents the espresso from becoming bitter as it cools.
Once cooled, stir in the 2 tsp Granulated Sugar and 1 tbsp Vanilla Syrup until fully dissolved. This sweetened base forms the foundation of your drink. The sugar should disappear completely—if it doesn’t, your espresso wasn’t cold enough when you added it.
Step 2: Create the Creamy Milk Layer
In a separate container, combine the 1 cup Whole Milk with the 0.25 cup Heavy Cream. The full-fat whole milk provides body while the heavy cream adds that luxurious mouthfeel characteristic of professional cappuccinos. Whisk gently until just combined—overmixing can create unwanted bubbles.
This milk-cream mixture should be ice cold when you begin. The temperature contrast with the espresso layer is what creates the distinct separation between components. If your milk isn’t cold enough, the layers will blend prematurely.
Step 3: Assemble with Precision Layering
Pour the sweetened espresso mixture into your serving glass, filling it about halfway. Now, slowly pour the milk-cream mixture over the back of a spoon held just above the espresso surface. This technique creates a gentle cascade that maintains the separation between layers.
Move the spoon upward as the glass fills to create that signature gradient effect. The ideal result shows a clear demarcation between the dark espresso base and the creamy top layer, with no mixing between them. You should see about 1 inch of cream layer at the top.
Step 4: Add the Finishing Touches
Dust the surface with 0.5 tsp Unsweetened Cocoa Powder first, creating a thin, even layer across the cream. Then, using a fine mesh sieve, sprinkle the 0.25 tsp Ground Cinnamon in a light, artistic pattern. The cocoa provides a subtle bitterness that balances the sweetness, while the cinnamon adds visual appeal and a warm aromatic note.
The garnishes should sit atop the cream layer without sinking. If they disappear, your cream layer needs to be thicker or colder. Serve immediately with a long spoon for stirring at the table, allowing each person to blend the layers to their preferred taste.
Pro Tips For Making Iced Cappuccino Recipe At Home
- Chill the Glass: Pop your glass in the freezer for 10 minutes before assembling—I learned this the hard way after my first few iced cappuccinos turned into lukewarm soup.
- Use Cold Espresso: Brew your espresso shots and let them cool completely in the fridge, or pour them over ice to chill quickly. Hot espresso melts the ice instantly and waters down the flavor.
- Froth First, Then Pour: Froth your whole milk before adding it to the glass, then gently pour it over the ice. Skipping this step leaves you with a flat, sad drink instead of that creamy cappuccino texture.
- Sweeten the Milk: Mix the granulated sugar or vanilla syrup directly into the warm milk before frothing—it dissolves evenly and saves you from stirring a half-melted sugar pile at the bottom of your glass.
Troubleshooting Great iced cappuccino recipe at home
Layer Separation Issues
If your drink lacks distinct layers, the milk-cream mixture likely wasn’t cold enough. Chill it for 15 minutes before assembling. Also, pour the milk over the back of a spoon to slow its entry into the glass. This prevents mixing and creates that perfect gradient effect. 💡
Watery Espresso Problem
Watery espresso often results from using too much ice. Use exactly 1 cup Ice Cubes for 2 Espresso Shots. Brew the espresso directly over the ice to chill it quickly while maintaining its bold flavor. This prevents dilution that makes the base taste weak.
Foam Collapse
If your foam layer disappears, the heavy cream may not have been cold enough. Use 0.25 cup Heavy Cream straight from the fridge. Whisk just until slightly thickened—overmixing creates large bubbles that burst quickly. Serve immediately after assembling.
Garnish Sinking
The 0.5 tsp Unsweetened Cocoa Powder and 0.25 tsp Ground Cinnamon need a stable surface. Ensure your cream layer is at least 1 inch thick and properly chilled. Sprinkle garnishes lightly—they should sit on top, not mix in.
Bitter Espresso Taste
Bitterness often comes from espresso that wasn’t chilled quickly enough. Pour hot espresso directly over ice to cool it in 30 seconds. This preserves the bright, rich flavors. Avoid letting espresso sit at room temperature before chilling. 🌟
Nutrition Facts
Frequently Asked Questions
Can I use cold brew instead of espresso?
Yes, use 1/2 cup cold brew concentrate mixed with 1/4 cup water to match espresso strength. The flavor will be smoother but less intense. Chill thoroughly before assembling.
How do I get good foam without a machine?
Use a French press: pump the plunger up and down 10-15 times in cold milk. Or whisk vigorously for 30 seconds until frothy. The colder the milk, the better the foam holds.
Why did my layers mix together?
Your milk or espresso wasn’t cold enough. Chill both to 40°F before layering. Pour slowly over a spoon to maintain separation.
Can I make this dairy-free?
Use oat milk or coconut milk with 2 tbsp coconut cream for richness. Chill all ingredients well for best texture.

Trained in classic French technique but raised on slow-cooked ribs and spicy rubs, she blends culinary skill with smoke and soul.
- Recipe for Boneless Pork Chops in Cast Iron Skillet: Sear and Baste to Juicy Perfection - October 3, 2026
- Recipe for Boneless Cross Rib Roast: Slow-Roasted Beef with Herb Crust - October 3, 2026
- Hamburgers in Sauce Recipe Crock Pot: Slow-Cooked Savory Delight - October 3, 2026