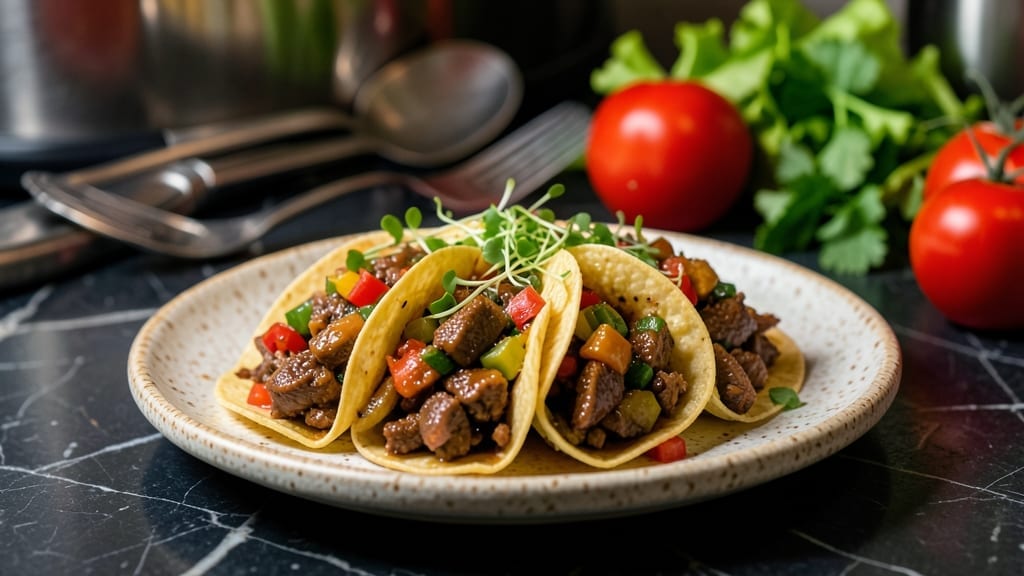
This Instant Pot brisket tacos recipe transforms tough cuts into fall-apart tender meat that practically melts in your mouth—all while cutting hours off traditional cooking time.
The pressure cooker extracts deep, smoky flavors while keeping the brisket incredibly juicy, making it perfect for tacos that taste like they came from a high-end Tex-Mex restaurant.
I developed this method after struggling with dry brisket in my early attempts, and now it’s my go-to for weeknight dinners that feel like a celebration.
The secret lies in the low-and-slow pressure cooking combined with a simple yet bold spice blend of cumin, smoked paprika, and garlic powder.
Unlike slow-cooked brisket that requires constant monitoring, the Instant Pot handles the work for you—just sear the meat first for that essential crust, then let the pressure do the rest.
By the time you’re done, you’ll have brisket that shreds effortlessly, ready to be piled into warm tortillas with all your favorite toppings.
What you’ll end up with is a restaurant-quality taco experience—tender, flavorful brisket that soaks up the juices of salsa and avocado, all wrapped in crispy shells. The brisket stays moist and packed with flavor, while the toppings add freshness and crunch.
This isn’t just a quick weeknight meal; it’s a dish that delivers the soul of Texas barbecue without the long wait.
Serve with Mexican rice, grilled onions, or a side of pickled jalapeños to round out the meal. The beauty of this recipe is its flexibility—doubling the brisket makes leftovers perfect for sandwiches or quesadillas. Let’s get started on creating tacos that will have everyone asking for seconds.
Ingredients for instant pot brisket tacos
A handful of pantry staples and one tough cut transform into restaurant-quality tacos.
| Ingredient | Amount | Notes |
|---|---|---|
| Chuck Roast Brisket 🥩 | 3 lb | Fat cap trimmed, cut into 2-inch cubes |
| Smoked Paprika 🌶️ | 2 tbsp | For dry rub seasoning |
| Ground Cumin 🌿 | 1 ½ tbsp | Toasted for deeper flavor |
| Garlic Powder 🧄 | 1 ½ tbsp | Not garlic salt |
| Sea Salt 🧂 | 1 ½ tbsp | Fine grain preferred |
| Black Pepper 🌶️ | 1 tbsp | Freshly ground preferred |
| Olive Oil 🫒 | ½ cup | For searing brisket |
| Beef Broth 💧 | 2 cups | Low-sodium preferred |
| Corn Tortillas 🌯 | 12 whole | Warm before filling |
| Shredded Lettuce 🥬 | 1 cup | Romaine or iceberg |
| Diced Tomatoes 🍅 | 1 cup | Fresh or canned, drained |
| Sour Cream 🥛 | 1 cup | Full-fat for creaminess |
| Shredded Cheese 🧀 | 1 cup | Monterey Jack or cheddar |
| Lime Wedges 🍋 | 4 whole | For serving |
| Pickled Jalapeños 🌶️ | ½ cup | Optional for heat |
[recipe_ingredient_scaler]
The brisket is where the magic happens. Chuck roast works best—it’s got that perfect balance of fat and muscle. Trader Joe’s or Costco often carry pre-cut brisket, but if you’re buying whole, ask for fat cap trimmed and cut it yourself into 2-inch cubes. The cubes cook more evenly in the Instant Pot. I always grab my spices from Penzeys—their smoked paprika and cumin have that extra depth that makes the difference. Don’t skip toasting the cumin though. Toast it in a dry pan for 30 seconds until fragrant—it’s worth the extra minute.
No smoked paprika? Regular paprika plus a pinch of cayenne gets you close, but honestly, the flavor’s not quite the same. Dried oregano at half the amount works in a pinch for the spice blend, but stick with cumin—it’s the heart of this dish. For the tortillas, corn over flour is non-negotiable for authentic flavor. Want to stretch the brisket? Mix in cooked ground beef at 1:1 ratio—no one will notice the difference. The broth can be low-sodium or regular, but homemade beef broth adds that extra layer of richness if you’ve got it.
The brisket keeps beautifully for 4-5 days in the fridge, and it tastes even better the second day. Freeze portions for up to 3 months—just reheat in the Instant Pot with a splash of broth. Tortillas go stale fast, so wrap them in a damp towel or freeze them for up to 2 months. I like to portion the toppings ahead—shredded lettuce and tomatoes keep in airtight containers for 3-4 days in the fridge. The lime wedges? Squeeze them right before serving—no one likes mealy lime.
Why You’ll Love This Recipe
- No-Fuss Feast: I can’t tell you how much I love that the brisket gets seared first—those 2-inch cubes develop that crispy edge in just 2-3 minutes per side. No fancy knife skills required, just a big skillet and a little patience. The Instant Pot does the rest while I prep toppings or clean up.
- Smoky, Spiced Magic: The rub with smoked paprika, toasted cumin, and garlic powder? Chef’s kiss. That 60-minute high-pressure cook turns tough chuck roast into fall-apart texture, and the spices cling like they’re meant to be there. Trust me, the first bite will make you forget store-bought seasoning ever existed.
- Leftovers That Outshine Takeout: Honestly, the brisket gets better the next day—so tender it practically dissolves. I freeze half the shredded meat for lazy weeknights, and reheating it in the Instant Pot with a splash of beef broth? Instant restaurant-quality flavor. My kids even ask for seconds (yes, even on a Tuesday night).
- Budget-Friendly Crowd-Pleaser: For under $20, I feed four people a meal that feels special. The chuck roast is cheap, the spices are pantry staples, and the toppings? You can swap in whatever’s on sale. It’s the kind of dish that makes me feel like a hero without breaking the bank.
Step-by-step instructions for Instant Pot brisket tacos
Here’s how to transform tough brisket into melt-in-your-mouth tacos using your Instant Pot.
Prepare and Sear the Brisket
Pat the 3 lb chuck roast brisket dry with paper towels, then trim any excess fat to about ¼-inch thickness. Cut it into 2-inch cubes—this size ensures even cooking and tender results. In a large skillet, heat the ½ cup olive oil over medium-high heat until shimmering.
Working in batches to avoid crowding, add the brisket cubes and sear for 2-3 minutes per side until deeply browned. You’ll know it’s ready when the edges develop a rich, caramelized crust. Transfer the seared brisket to your Instant Pot and set aside. This initial sear builds deep flavor that the slow cook won’t replicate.
Season and Slow Cook
In a small bowl, combine the 2 tbsp smoked paprika, 1½ tbsp ground cumin, 1½ tbsp garlic powder, 1½ tbsp sea salt, and 1 tbsp black pepper. Sprinkle this rub evenly over the seared brisket cubes in the Instant Pot, pressing gently to help the spices adhere.
Pour in the 2 cups beef broth, then secure the lid. Select the “Meat/Stew” setting and cook for 60 minutes on high pressure. The Instant Pot will automatically shift to keep the brisket tender without drying it out. When cooking completes, allow a natural pressure release for 10 minutes before quick-releasing any remaining pressure.
Shred and Prepare Tortillas
Once the pressure is fully released, use two forks to shred the brisket directly in the pot. The meat should pull apart easily with minimal resistance—this is your sign of perfect tenderness. Discard any large fat pieces that remain. While the brisket rests, warm the 12 corn tortillas in a dry skillet over medium heat for 20-30 seconds per side until pliable.
Here’s the thing—warm tortillas make all the difference. Cold tortillas soak up filling instead of providing that satisfying crunch. Keep them covered with a clean towel while you assemble the tacos to maintain their warmth.
Assemble and Serve
Fill each tortilla with ½ cup of shredded brisket, then layer with 1 tbsp shredded lettuce, 1 tbsp diced tomatoes, and a dollop of 1 cup sour cream. Sprinkle with 1 tbsp shredded cheese and top with a few slices of ½ cup pickled jalapeños if you like some heat. The acidity from the jalapeños cuts through the richness of the brisket beautifully.
Garnish each taco with a lime wedge and serve immediately. The brisket should be so tender it practically melts in your mouth, while the tortillas provide that perfect contrast of texture. This is where all the hard work pays off—juicy, flavorful tacos that taste like they came from your favorite Mexican spot.
Pro Tips For Making Instant Pot Brisket Tacos
- Skip the Crowding: I learned this the hard way—trying to sear all the 2-inch brisket cubes at once in the skillet just makes them steam instead of caramelize. Work in batches, even if it means two trips to the pot. That golden crust is worth the extra minute.
- Toast That Cumin: Sounds weird, but it works: dry-toast the 1.5 tbsp ground cumin in a skillet for 30 seconds until fragrant before mixing it into the rub. The nutty depth it adds is subtle but noticeable—like the difference between a good margarita and a great one.
- Pressure Release Smart: The 10-minute natural release isn’t just a suggestion—it’s the thing that keeps your brisket from turning into dry shreds. Resist the urge to quick-release early, even if you’re eager to eat. Patience here makes all the difference.
- Warm Tortillas Right: Cold tortillas are the silent taco killer. Heat those 12 corn tortillas in the dry skillet for just 20-30 seconds per side—no oil needed—and keep them wrapped in a towel. They’ll stay pliable and soak up filling like they’re supposed to.
Dietary considerations for these flavors
Gluten-Free Adaptation
Corn tortillas are naturally gluten-free, so this recipe already works perfectly for those avoiding gluten! I always stock Mission gluten-free corn tortillas or La Tortilla Factory brand for reliable texture.
Just double-check labels if you’re sensitive—some brands add fillers. The brisket itself is inherently gluten-free, making these tacos a safe choice for celiacs or gluten-intolerant diners. 🌯
Dairy-Free Options
Replace the 1 cup sour cream with dairy-free coconut yogurt or cashew cream for a tangy, creamy texture. I like Forager Project coconut yogurt—it holds up well to the brisket’s richness.
For cheese, swap Monterey Jack or cheddar with dairy-free cheddar shreds like those from Violife. The brisket’s bold flavors still shine through!
Lower-Sodium Adjustments
Skip the 1½ tbsp sea salt in the rub and use low-sodium beef broth instead. Instead, add ½ tsp liquid smoke (like McCormick brand) to enhance depth without sodium.
Taste as you go—your palate will adapt quickly. The Instant Pot’s pressure cooking still delivers flavorful results even with reduced salt. 💡
Spice-Free Version
Remove all spices from the rub—just use ½ cup olive oil for searing and 2 cups beef broth for cooking. The brisket will still be tender and flavorful, just with a milder profile.
This works well for kids or anyone sensitive to spices. The natural beefy taste remains intact, and the toppings can add any desired kick later.
Vegetarian Substitute
For a vegetarian version, swap the brisket for 1½ lbs extra-firm tofu, pressed and cubed. Marinate it in ½ cup soy sauce (or tamari) and 1 tbsp smoked paprika for 30 minutes before searing.
Cook in the Instant Pot with 2 cups vegetable broth for 30 minutes on high pressure. The texture becomes surprisingly meaty—perfect for taco lovers who want to skip the beef! 🌱
Nutrition facts
Frequently asked questions
Why does the recipe call for searing the brisket before pressure cooking?
The searing step creates a rich, caramelized crust on the brisket cubes that adds deep flavor—something the Instant Pot alone can’t achieve. This “Maillard reaction” builds complexity, making your tacos taste like they were slow-cooked for hours. Skipping this step leaves the brisket bland and less tender.
Can I use flour tortillas instead of corn tortillas?
Technically yes, but corn tortillas are the traditional choice for authentic Tex-Mex flavor. Flour tortillas will absorb more moisture and become soggy faster. If you prefer flour, warm them just 10 seconds per side and serve immediately to maintain crispness. The texture contrast will be less satisfying, though!
What if my brisket isn’t tender enough after cooking?
If the meat resists shredding, extend the pressure cook time by 10-15 minutes and check again. For stubborn pieces, let the brisket rest 10 extra minutes off heat—the residual heat will finish the job. Overcooking is less risky than undercooking, so err on the tender side.
How do I prevent the tortillas from getting soggy?
Warm the tortillas right before assembling and keep them covered with a clean towel while you work. Avoid overfilling them—½ cup brisket per tortilla is perfect. For extra crispness, lightly toast the tortillas in a dry pan for 5 seconds after filling. This creates a protective barrier against moisture.
Can I make these tacos ahead of time?
Assemble the tacos just before serving for best results, but you can prep components ahead. Cook the brisket and refrigerate it for up to 4-5 days, then reheat with broth. Warm tortillas and toppings separately to maintain texture. The brisket actually tastes better the second day as flavors meld!

Trained in classic French technique but raised on slow-cooked ribs and spicy rubs, she blends culinary skill with smoke and soul.
- Smoked Brisket Recipe: Low and Slow to Fall-Apart Tenderness - November 2, 2026
- Smoked Turkey Breast Recipe: Juicy Pink Center With Crispy Skin Every Time - November 2, 2026
- Leftover Smoked Pulled Pork Chili Recipe: Rustic Flavor Revival in One Pot - November 2, 2026