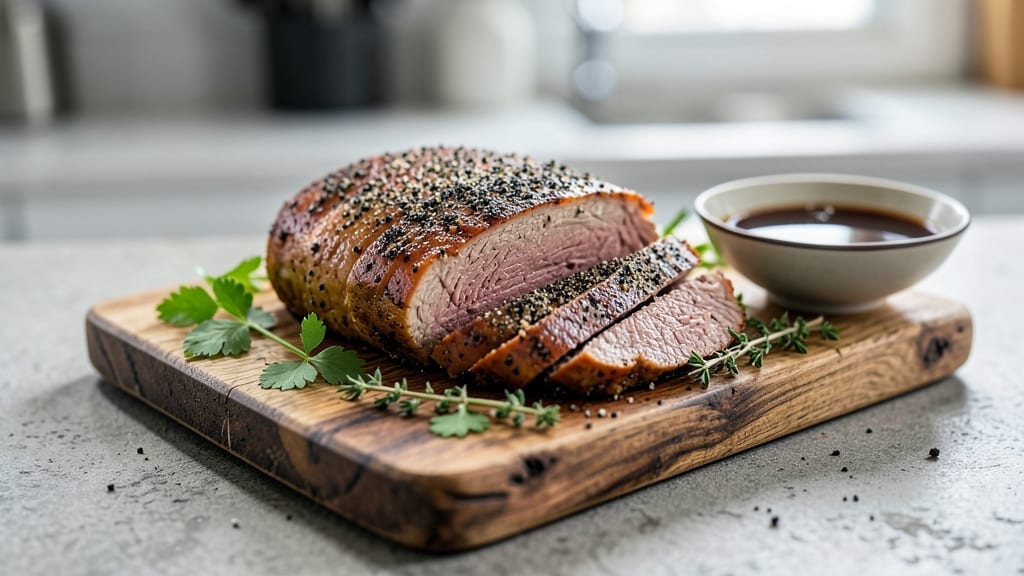
Transforming tough brisket into tender, fall-apart perfection is what this Instant Pot Jewish Beef Brisket recipe delivers—smoky, garlicky, and rich with the kind of depth that makes every bite unforgettable.
The secret lies in a precise blend of aromatics and pressure cooking, which breaks down the meat while infusing it with layers of flavor in just a few hours.
I’ve adapted the traditional method to work flawlessly in an Instant Pot, ensuring tender results without the need for overnight soaking or slow-cooking.
This recipe begins with a simple yet powerful seasoning of garlic, onions, and peppercorns, which form the backbone of the dish. The brisket cooks in its own juices, creating a natural gravy that’s rich and aromatic, while the pressure release method locks in moisture for that signature melt-in-your-mouth texture.
What sets this apart is the balance of sweetness and savory notes—just enough caramelization to enhance the natural richness of the beef without overpowering it.
By the time you serve it, you’ll have a brisket so tender it practically falls apart at the touch, with a deep, smoky aroma that fills your kitchen.
The dish pairs beautifully with classic sides like mashed potatoes, sauerkraut, or a simple gravy, making it a hearty centerpiece for family gatherings or special occasions. Ready in under 3 hours, this recipe proves you don’t need a smoker or hours of hands-on time to achieve restaurant-quality results at home.
The beauty of this method is its versatility—use it for holiday meals, game days, or even a cozy weeknight dinner. The key lies in the technique, not the time spent, so you can enjoy the process as much as the outcome.
Let’s get started on creating a brisket that rivals the best deli-style versions, right in your Instant Pot.
Ingredients for instant pot jewish beef brisket
A few aromatic ingredients transform tough brisket into melt-in-your-mouth perfection with Instant Pot magic.
| Ingredient | Amount | Notes |
|---|---|---|
| Beef Brisket 🥩 | 4 lb | Flat cut, trimmed of fat |
| Yellow Onions 🧅 | 2 whole | Thinly sliced, for depth |
| Garlic Cloves 🧄 | 8 cloves | Minced, aromatic base |
| Black Peppercorns 🌶️ | 1 tbsp | Whole, freshly cracked |
| Dried Thyme 🌿 | 1 tsp | Earthy, aromatic herb |
| Dried Rosemary 🌿 | 1 tsp | Piney, aromatic herb |
| Smoked Paprika 🌶️ | 1 tbsp | Smoky, flavorful spice |
| Brown Sugar 🍚 | 2 tbsp | Caramelizes for sweetness |
| Beef Broth 💧 | 2 cups | Rich, flavorful liquid |
| Apple Cider Vinegar 🍎 | 2 tbsp | Brightens the flavors |
| Salt 🧂 | 1 tsp | Kosher or sea salt |
| Olive Oil 🫒 | 1 tbsp | For searing brisket |
[recipe_ingredient_scaler]
The brisket is everything here. Flat cut, trimmed of fat cooks more evenly—ask the butcher to prep it for you. I always grab mine from Whole Foods or a local butcher shop; it’s worth the extra cost for quality. Look for good marbling—it’s the secret to that juicy, tender texture. If you’re short on time, pre-cut brisket from Costco works too, just trim the fat before cooking. Don’t skip the trimming; excess fat can turn greasy, even with pressure cooking.
No dried thyme or rosemary? Fresh herbs at half the amount will work, but dried is more concentrated and easier to store. Smoked paprika adds that signature smokiness—McCormick or Penzeys are my go-tos. Short on apple cider vinegar? White wine vinegar or lemon juice can substitute, though the flavor profile changes slightly. The beef broth should be low-sodium if you’re not adding extra salt, but homemade or high-quality store-bought makes a world of difference. I always use Imagine Foods or Pacific—they’re affordable and flavorful.
This keeps beautifully for 4-5 days in the fridge, reheating like it just came out of the pot. For longer storage, freeze portions in ziplock bags for up to 3 months. I portion mine into containers so I can grab a slice for sandwiches or wraps later. The brisket tastes even better the next day—the flavors meld together perfectly. If you’re making it ahead, let it rest for at least an hour before slicing to keep it juicy.
Why You’ll Love This Recipe
- No-Fuss Feast: Honestly, this is the kind of recipe where you spend more time slicing onions than actually cooking—literally just 4-5 minutes searing that brisket and 30 seconds toasting the spices. The Instant Pot does the heavy lifting while you sip coffee or scroll through your phone. That’s the magic.
- Smoky Garlic Magic: Between the freshly cracked black peppercorns, the smoky kick of smoked paprika, and the bright punch of apple cider vinegar, this brisket hits all the right notes. The garlic and thyme infuse the meat like a slow dance, turning tough brisket into something so tender it practically falls apart. I’ll be real: the first bite always makes my kids pause mid-chew to ask for seconds.
- Leftovers That Shame No Leftovers: This recipe is built for meal prep—it keeps its flavor locked in for 4-5 days in the fridge, and reheats so well you’d swear it’s fresh. Freeze portions, and you’ve got a secret weapon for lazy Sundays or impromptu dinner parties. My go-to when I’m too tired to think but still need to feed six people.
- Budget Beef Win: A 4-pound brisket is cheaper than you’d think, especially when you’re cooking it in bulk. The spices and broth stretch the flavor so far, you’ll feel like you’re eating restaurant-quality meat without the restaurant price tag. Plus, the brown sugar and vinegar add just enough sweet-tangy depth to make it feel special—no fancy cuts required.
Step-by-step instructions for Instant Pot jewish beef brisket
Here’s how to create tender, smoky brisket with fall-apart texture using your Instant Pot.
Prepare and Sear the Brisket
Begin by trimming the fat cap of the 4 lb beef brisket down to about ¼ inch thickness using a sharp knife. This ensures even cooking while preserving flavor. Pat the brisket dry with paper towels—this step is crucial for achieving a good sear later.
Heat the Instant Pot on the sauté function until shimmering. Add the 1 tablespoon olive oil and let it get hot. Place the brisket fat-side down in the pot and sear for 4-5 minutes until a deep golden-brown crust forms. Flip the brisket and sear the other side for another 3-4 minutes. This initial searing locks in juices and builds rich flavor.
Build the Flavor Base
Remove the brisket from the pot and set it aside. Add the 2 thinly sliced yellow onions to the same pot and sauté for 3-4 minutes until softened and slightly caramelized. Stir in the 8 minced garlic cloves and cook for 30 seconds until fragrant—don’t let them burn.
Add the 1 tablespoon smoked paprika, 1 teaspoon dried thyme, 1 teaspoon dried rosemary, and 1 tablespoon whole black peppercorns. Stir these spices into the onions and garlic for 30 seconds to toast them lightly. This releases their aromatic oils that will infuse the brisket during cooking.
Combine Ingredients and Pressure Cook
Return the brisket to the Instant Pot. Pour in the 2 cups beef broth and 2 tablespoons apple cider vinegar, scraping up any browned bits from the bottom. Sprinkle the 2 tablespoons brown sugar and 1 teaspoon salt evenly over the brisket. The sugar will caramelize slightly during cooking, adding depth to the sauce.
Place the lid on the Instant Pot, set the valve to sealing, and cook on high pressure for 90 minutes. This long cook time is essential for breaking down the tough brisket fibers. Resist the urge to check it early—the pressure needs to build fully for even cooking.
Natural Release and Rest
Once the cooking cycle completes, let the pressure release naturally for 20 minutes. This gradual release prevents the brisket from becoming tough. After the natural release, carefully remove the lid (use oven mitts—the steam will be hot) and let the brisket rest in the pot for an additional 15 minutes.
Use two forks to shred the brisket directly in the pot, separating it into tender strands. The meat should pull apart easily with minimal resistance—this is your indicator of perfect doneness. You’ll have rich, flavorful juices in the bottom of the pot that you can serve as a sauce.
Serve with Confidence
Spoon some of the cooking juices over the shredded brisket before serving. The brisket should be fork-tender with a beautiful caramelized crust in places from the initial sear. Serve immediately with crusty bread to soak up those delicious juices.
This method guarantees brisket that’s rich, tender, and packed with smoky garlic flavor—perfect for feeding a crowd of six. The Instant Pot makes this traditionally long-cooked dish achievable in just over an hour of active time.
Pro Tips For Making Instant Pot Jewish Beef Brisket
- CRACK THE PEPPERCORNS FIRST: I learned this the hard way—whole black peppercorns taste like nothing until they’re cracked, and they’ll just sit as tiny hard beads in your sauce. Use a mortar and pestle or roll them with a heavy pan lid for 30 seconds before adding them to the onions. The aroma hits instantly when they toast, and the flavor dissolves into the brisket like magic.
- SEAR IN BATCHES IF NEEDED: That 4 lb brisket might not fit flat in your Instant Pot without crowding the pot. If it doesn’t lay flush, sear it in two rounds—first the fat side, then flip and sear the lean side in the same oil. The brisket will still develop that deep crust, and you’ll avoid steaming instead of browning. (Yes, even if you’re impatient like me.)
- DON’T SKIP THE ONION CARAMEL: The recipe says to sauté the onions for 3-4 minutes, but I’ve found that’s the minimum—push it to 5-6 minutes until they’re golden and jammy. That caramelized depth is what turns this from “good brisket” to “unforgettable.” If they’re still pale, you’re missing the thing that matters most.
- SALT THE BROTH TOO: The 1 teaspoon salt goes on the brisket, but I double-check the broth’s flavor after pressure cooking—it’s easy to forget how much salt dissolves into the liquid. Taste it before serving; if it’s bland, a pinch more salt (or a splash of apple cider vinegar) brightens the whole dish. (Your future self will thank you.)
Common mistakes when making this recipe
Overcooking the Brisket
One of my biggest mistakes early on was rushing the cooking process. The Instant Pot’s high-pressure environment can be tricky—90 minutes on high pressure is non-negotiable for tender brisket.
I once cut it short to 75 minutes, only to end up with meat that was still tough and chewy. The pressure needs time to break down those tough collagen fibers, so trust the timer.
If you’re unsure, err on the side of longer cooking—it’s better to have slightly overcooked brisket that’s still tender than dry, undercooked meat. 🔥
Skipping the Sear
That initial sear on the Instant Pot’s sauté function is crucial for flavor development. I’ve made the mistake of skipping it or doing it too lightly, and the brisket lacks that deep, caramelized crust. Heat the oil until shimmering before adding the brisket, and sear each side until golden-brown.
This step locks in juices and creates the Maillard reaction that gives your brisket its rich, savory depth. Without it, the dish feels flat and uninspired.
Underestimating the Fat Trim
Trimming the fat cap to about ¼ inch isn’t just about aesthetics—it’s about even cooking. I’ve learned the hard way that leaving excess fat can lead to greasy results or uneven doneness. Use a sharp knife to trim it down, but leave enough to add flavor.
Pat the brisket dry afterward—this step is essential for achieving that perfect sear. If you skip trimming, you might end up with a brisket that’s either dry or undercooked in spots.
Ignoring the Natural Release
The natural release phase is where the magic happens. Skipping it or rushing it can turn your tender brisket into a tough, rubbery mess. Let the pressure release naturally for 20 minutes after cooking—this gradual cooling process keeps the meat moist and tender.
I’ve tried quick releases before, and the results were disappointing. Patience here pays off in perfect texture and juiciness. 💡
Using Low-Quality Broth
The broth is the backbone of your brisket’s flavor, so don’t skimp on quality. I’ve experimented with store-bought broths, and the difference is night and day. Opt for homemade broth or high-quality brands like Imagine Foods or Pacific.
Cheap broths can make your brisket taste bland or watery. The right broth enhances the natural flavors and creates a rich, savory sauce that ties everything together. Trust me, it makes a world of difference.
Nutrition facts
Frequently asked questions
Why does this recipe use a natural release instead of quick release?
The 20-minute natural release keeps your brisket moist and tender by allowing the pressure to decrease gradually. Quick releasing can cause the meat to tighten and become tough. This step is essential for achieving that perfect, fall-apart texture—it’s what turns tough brisket into melt-in-your-mouth perfection!
Can I use a different cut of beef for this recipe?
The recipe is specifically designed for a 4 lb flat-cut brisket, which cooks evenly and delivers the best results. While you could try other cuts like chuck roast, the texture and flavor won’t be the same. The brisket’s connective tissue breaks down beautifully with pressure cooking, creating that signature tenderness.
What if my Instant Pot doesn’t have a sauté function?
No worries! Use your stovetop to sear the brisket first—just heat 1 tablespoon olive oil in a pan over medium-high heat until shimmering. Sear the brisket for 4-5 minutes per side, then transfer it to the Instant Pot for the rest of the cooking steps. The key is getting that golden-brown crust before pressure cooking.
How do I know when the brisket is fully cooked?
After the 90-minute pressure cook and 20-minute natural release, let the brisket rest for 15 minutes. Then, use two forks to shred it directly in the pot. If it pulls apart easily with minimal resistance, it’s done! The juices should run clear, and the meat should look moist and tender. No need for a thermometer—this is your foolproof test.

Trained in classic French technique but raised on slow-cooked ribs and spicy rubs, she blends culinary skill with smoke and soul.
- Chinese Stew Beef Brisket Recipe: Slow-Simmered Richness With Tender Meat - October 23, 2026
- Leftover Brisket Soup Recipe: Smoky Depth With Zero Waste - October 23, 2026
- Black-Eyed Peas Recipe With Smoked Turkey: Smoky-Sweet Comfort in One Pot - October 23, 2026