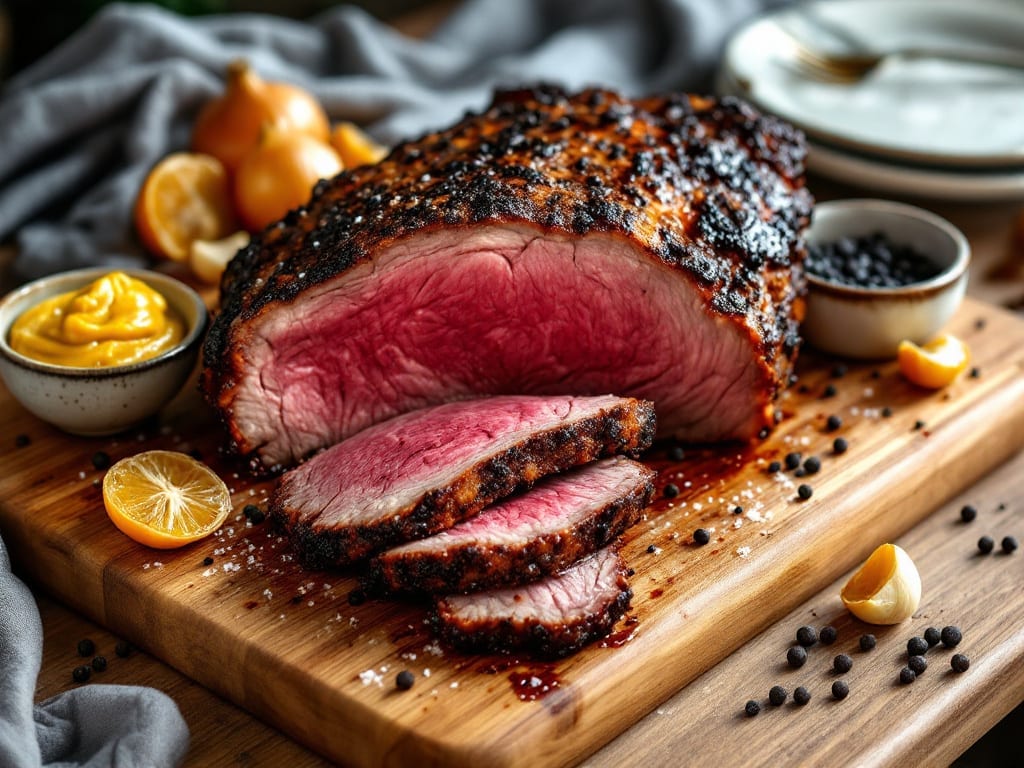
Mastering beef brisket in a Kamado Joe transforms tough cuts into melt-in-your-mouth perfection—smoky bark on the outside, buttery tenderness inside, all achieved with precision low-and-slow cooking.
I spent years perfecting this technique after watching my Nonna’s patience pay off with her Sunday roasts, adapting her methods to the Kamado Joe’s unmatched heat control. The secret lies in temperature consistency and a well-balanced dry rub that develops deep flavor without overpowering the beef’s natural richness.
This recipe delivers restaurant-quality results in your backyard, using just five core ingredients plus spices you likely already own. The Kamado Joe’s ability to maintain steady temperatures—between 225°F and 250°F—ensures even cooking and that coveted bark formation.
Unlike traditional smokers, the ceramic design retains heat efficiently, reducing flare-ups and letting you focus on the slow transformation of connective tissue into silky strands. Even beginners will achieve perfect results with this foolproof method.
By the time you pull that brisket from the Kamado Joe, you’ll have a whole cut that slices effortlessly, revealing layers of caramelized crust and juicy, fork-tender meat. The bark will be dark and crackly, while the interior remains moist and rich—no dry, stringy surprises here.
Serve with classic sides like tangy coleslaw or buttery cornbread to complete the meal. This is the kind of brisket that turns casual cookouts into legendary gatherings.
The best part? Leftovers reheat beautifully for sandwiches or tacos the next day. Whether you’re hosting a backyard feast or treating yourself to a Sunday dinner, this recipe delivers foolproof tenderness every time.
Let’s get started with the exact steps that’ll have your brisket falling apart at the touch of a fork.
Ingredients for kamado joe beef brisket
Five core ingredients plus spices transform tough brisket into Kamado Joe perfection—smoky bark and buttery tenderness in one pan.
| Ingredient | Amount | Notes |
|---|---|---|
| Beef Brisket 🥩 | 5 lb | Packer cut, fat cap intact |
| Yellow Onion 🧅 | 1 whole | Yellow or red, sliced |
| Fresh Garlic 🧄 | 8 cloves | Peeled, smashed for rub |
| Yellow Mustard 🍯 | ½ cup | For bark adhesion |
| Kosher Salt 🧂 | ½ cup | Diamond Crystal preferred |
| Black Peppercorns 🌶️ | 2 tbsp | Freshly cracked coarse |
| Smoked Paprika 🌶️ | 2 tbsp | Spanish or Hungarian |
| Ground Cumin 🌿 | 1 tbsp | Toasted for depth |
| Brown Sugar 🍚 | 1 tbsp | Light or dark |
| Apple Cider Vinegar 🍎 | 2 tbsp | For tenderizing |
| Wood Chips 🌳 | 1 package | Hickory or oak, soaked |
| Beef Broth 💧 | 1 cup | Low-sodium, for spritz |
| Unsalted Butter 🧈 | 4 oz | Cold, for basting |
[recipe_ingredient_scaler]
The brisket is non-negotiable here—packer cut with fat cap intact is your golden ticket. Costco or local butchers usually carry it, but if you’re buying online, Snake River Farms delivers consistently high-quality cuts. Look for good marbling and a vibrant red color. If you can’t find a whole packer cut, a 2-3 lb flat cut works in a pinch, but it’ll cook faster. The fat cap is crucial for flavor and moisture, so don’t trim it unless absolutely necessary. I’ve made this with both whole and pre-trimmed briskets—the whole cut always wins for that restaurant-quality bark.
No smoked paprika? Substitute regular paprika plus a pinch of liquid smoke (about 1/4 tsp). The apple cider vinegar might sound odd, but it tenderizes the meat while adding subtle sweetness—no need to substitute here. For the wood chips, hickory gives classic BBQ flavor, while oak adds a fruitier note. If you’re in a hurry, pre-soaked wood chips from Traeger save time. The beef broth for spritzing? Low-sodium is key—we’re not trying to over-salt the meat. And trust me on the cold butter basting—it creates that perfect bark while keeping the interior moist. Don’t skip it, even if it feels counterintuitive.
This brisket reheats like a dream—wrap slices in foil and warm in the oven at 275°F for 15 minutes. Keeps 5-6 days in the fridge, 3 months frozen when vacuum-sealed. I always portion leftovers into single-serving containers for easy sandwiches or tacos. The bark freezes beautifully too, so save some for next time. For that perfect second bark, just reheat uncovered at 350°F for 10 minutes. The Kamado Joe’s residual heat makes this easier than traditional smokers—no extra equipment needed.
Why You’ll Love This Recipe
- Kamado Joe Magic: I swear, that smoky-sweet garlic rub turns tough brisket into melt-in-your-mouth perfection. The mustard glaze? It’s the secret weapon—tangy, sticky, and impossible to resist.
- One-Pan Wonder: Honestly, it’s the kind of recipe where you just toss everything on the Kamado Joe, set it, and forget it. No flipping, no fussing—just pure, hands-off cooking while you sip your drink.
- Leftovers for Days: Between us, this brisket tastes even better the next day. I’ll make a double batch for game day or lazy Sundays, then repurpose slices into tacos, sandwiches, or even breakfast hash.
- Budget-Friendly Feast: A single brisket feeds my whole family (plus neighbors) for under $20. That’s a whole week’s worth of meals with minimal effort—plus, the salt and mustard are already in my pantry.
Step-by-step instructions for smoky Kamado Joe brisket
Here’s the method that delivers melt-in-your-mouth tenderness with a perfect bark every time.
Prepare the Brisket and Create the Rub
Begin by trimming the fat cap of the 5 lb beef brisket to about ¼ inch thickness using a sharp boning knife. This creates an even surface for the rub to adhere while preserving enough fat to protect the meat during cooking. Place the brisket fat-side up on a cutting board.
In a medium bowl, combine the 0.5 cup kosher salt, 2 tbsp black peppercorns (freshly cracked), 2 tbsp smoked paprika, 1 tbsp ground cumin, 1 tbsp brown sugar, and 2 tbsp apple cider vinegar. I like to toast the cumin and smoked paprika briefly in a dry skillet before adding to deepen their flavors. Let the mixture cool slightly before proceeding.
Generously coat the brisket with the 0.5 cup yellow mustard, then press the spice mixture firmly into all surfaces, including the fat cap. The mustard helps the rub stick and creates that signature bark. Wrap the brisket tightly in plastic wrap and refrigerate for at least 4 hours, preferably overnight. This resting period allows the rub to penetrate deeply and the meat to relax for even cooking.
Set Up the Kamado Joe for Indirect Heat
Soak the 1 package wood chips (hickory or oak) in water for 30 minutes to prevent flare-ups. Preheat your Kamado Joe to 225°F using the soaked wood chips. I use the “smoke” setting and monitor the temperature carefully—this low-and-slow approach is key to tenderizing the brisket without drying it out.
Once the temperature stabilizes, place the brisket fat-side up on the grill grate. Position it away from direct heat to encourage even cooking and smoke penetration. Close the lid and resist the urge to peek—every time you open it, you lose heat and extend cooking time.
After 2 hours, check the internal temperature using a meat thermometer. You’re aiming for 165-170°F, but don’t be surprised if you hit “the stall”—a period where the temperature plateaus. This is normal and happens when moisture evaporates from the meat. At this point, I spritz the brisket with the 1 cup beef broth to help maintain moisture and add flavor.
Wrap and Finish for Maximum Tenderness
When the internal temperature reaches 165°F, it’s time for the “Texas crutch.” Remove the brisket from the Kamado Joe and wrap it tightly in butcher paper (not aluminum foil—it breathes better and preserves the bark). Return it to the grill and continue cooking until the internal temperature reaches 203°F, about 4-6 hours total.
This wrapping technique, combined with the low-and-slow cook, breaks down the connective tissue while preserving moisture. The bark will remain crispy, and the meat will pull apart like butter. During this final stage, I like to add the 4 oz cold unsalted butter to the wood chips—this infuses the smoke with rich, buttery notes that complement the brisket beautifully.
Rest and Slice for Perfect Texture
Once the brisket reaches 203°F, remove it from the Kamado Joe and transfer it to a cutting board. Tent loosely with foil and let it rest for at least 1 hour. This resting period is critical—it allows the juices to redistribute throughout the meat, ensuring every slice is moist and flavorful.
After resting, locate the grain direction by looking for the natural lines in the meat. Using a sharp carving knife, slice the brisket against the grain into ¼-inch thick slices. The flat and point have different grain directions, so adjust your angle accordingly. Serve immediately with the rendered juices and any accumulated bark for the full experience.
Pro Tips For Making Kamado Joe Beef Brisket
- CRANK THE HEAT FIRST: Start your kamado at 450°F (232°C) for the initial sear—this isn’t the time to be gentle. I learned this after my first attempt at a pale, sad brisket; high heat for 10-15 minutes locks in those caramelized crust layers that make all the difference.
- SLICE THE FAT CAP THIN: Use a sharp knife to cut the fat cap into ¼-inch strips before cooking—this renders faster and keeps your brisket from steaming in its own juices. My grandmother swore by this, and she was right: even distribution means even cooking.
- DON’T SKIP THE MUSTARD WASH: Brush the yellow mustard over the brisket after the initial sear, not before—it’s the glue for your crust. I used to slap it on raw meat, and it just slid off; applying it warm lets it stick like magic.
- USE THE ONIONS STRATEGICALLY: Chop your yellow onions into ½-inch chunks and scatter them under the brisket in the kamado, not just around it. They’ll baste the meat with their juices while building a flavor base—no need for extra liquid, and you’ll save yourself from a soggy bottom.
Storing and reheating your leftovers
Refrigerator Storage
The Kamado Joe’s residual heat is your secret weapon for leftovers—brisket stays juicy for 5-6 days when stored properly. I slice the brisket into ¼-inch portions and store them in a single layer in an airtight container with the juices.
The key is to let it cool completely before refrigerating—rushing this step makes the meat soggy. For extra insurance, I add a paper towel layer between slices to absorb excess moisture. 🥩
Freezer Preservation
For longer storage, vacuum-seal the brisket in single-serving portions—this preserves texture and flavor for up to 3 months. I use FoodSaver vacuum bags because they remove all air, preventing freezer burn.
Label each bag with the date and portion size to avoid guesswork later. Thaw overnight in the fridge before reheating—never microwave from frozen, or you’ll end up with dry meat.
Reheating Perfection
My go-to method is oven reheating at 275°F for 15 minutes wrapped in foil. This gently warms the meat while keeping it moist. For quick sandwiches, I reheat slices in a skillet over medium heat for 2-3 minutes per side—the bark crisps up beautifully this way.
Avoid microwaving unless absolutely necessary—it turns the brisket rubbery. Pro tip: Spritz with 1 tsp beef broth before reheating to revive any lost moisture.
Second-Bark Technique
Here’s where the Kamado Joe really shines—you can recreate that smoky bark even after reheating. After warming the brisket, place it uncovered on the grill at 350°F for 10 minutes—just enough time to crisp the exterior without overcooking.
I add a few fresh wood chips to the charcoal for that authentic smoky finish. This works especially well for sandwiches or tacos—suddenly, your leftovers taste like they just came off the grill. 🔥
Portioning for Sandwiches
For brisket sandwiches, I portion 3 oz of brisket per serving—that’s about 3-4 slices—along with 1 slice of toasted Texas toast and 2 tbsp barbecue sauce.
Store these components separately in the fridge: the brisket stays fresh for 4 days, while the bread and sauce last 5 days. Assemble just before eating so the bread doesn’t get soggy. This is how I prep for game days—no last-minute scrambling!
Flavor Revival Tricks
If your reheated brisket tastes a little flat, don’t despair. A quick 1-minute sear in a hot skillet adds back that caramelized crust. For extra depth, I toss reheated slices with 1 tsp apple cider vinegar and ½ tsp smoked paprika**—this cuts through any dryness and restores that smoky complexity.
The Kamado Joe’s residual heat means you can even finish the reheat directly on the grill if you’re feeling ambitious. 💡
Nutrition facts
Frequently asked questions about Kamado Joe beef brisket
Why does my brisket turn out tough instead of tender?
The most common mistake is cooking too fast or at inconsistent temperatures. A Kamado Joe excels at maintaining 225°F for hours, but opening the lid frequently or using too much direct heat accelerates moisture loss. Always aim for 203°F internal temp and use the “Texas crutch” wrap when hitting 165°F—this breaks down collagen without drying the meat.
Can I use a whole packer cut or just the flat?
Both work, but a whole packer cut (with both flat and point) gives you more flavor and texture contrast. The point stays juicier while the flat develops bark. If using just the flat (2-3 lb), reduce cook time by 1-2 hours since it’s leaner. The fat cap on the whole cut protects the meat during cooking—never trim it completely!
How do I fix a brisket that’s dry on the outside?
This usually happens from overcooking or insufficient spritzing. For future attempts, wrap in butcher paper at 165°F and spritz with beef broth every 45 minutes during the final stages. If it’s already dry, try slicing thin against the grain and serving with extra rendered juices or a tangy sauce to restore moisture. The Kamado Joe’s ceramic design helps retain heat better than traditional smokers, so monitor temps closely.
What’s the best wood for brisket in a Kamado Joe?
Hickory delivers classic BBQ flavor, while oak adds a fruitier note. Fruitwoods like cherry or pecan work beautifully too. Soak chips for 30 minutes before use to prevent flare-ups. For extra richness, add 4 oz cold butter to the charcoal during the final hour—this creates a buttery smoke that complements the brisket perfectly.
How long should I rest the brisket before slicing?
Never skip resting! Transfer the brisket to a cutting board, tent loosely with foil, and let it rest for at least 1 hour. This allows juices to redistribute—slicing too soon causes dry, stringy meat. For a whole packer cut, extend resting to 1.5 hours to ensure even tenderness throughout both the flat and point. The bark will stay crispy while the interior becomes fork-tender.

Trained in classic French technique but raised on slow-cooked ribs and spicy rubs, she blends culinary skill with smoke and soul.
- Best Smoked Oxtail Recipe: Deep-Rich Flavor After Low-and-Slow Cooking - October 14, 2026
- Pit Boss Smoked Prime Rib Roast Recipe: Bark-to-Bone Crispness in 4 Hours - October 14, 2026
- Smoked Tuna Steak Recipe: Seared Crust Meets Silky Centers - October 14, 2026