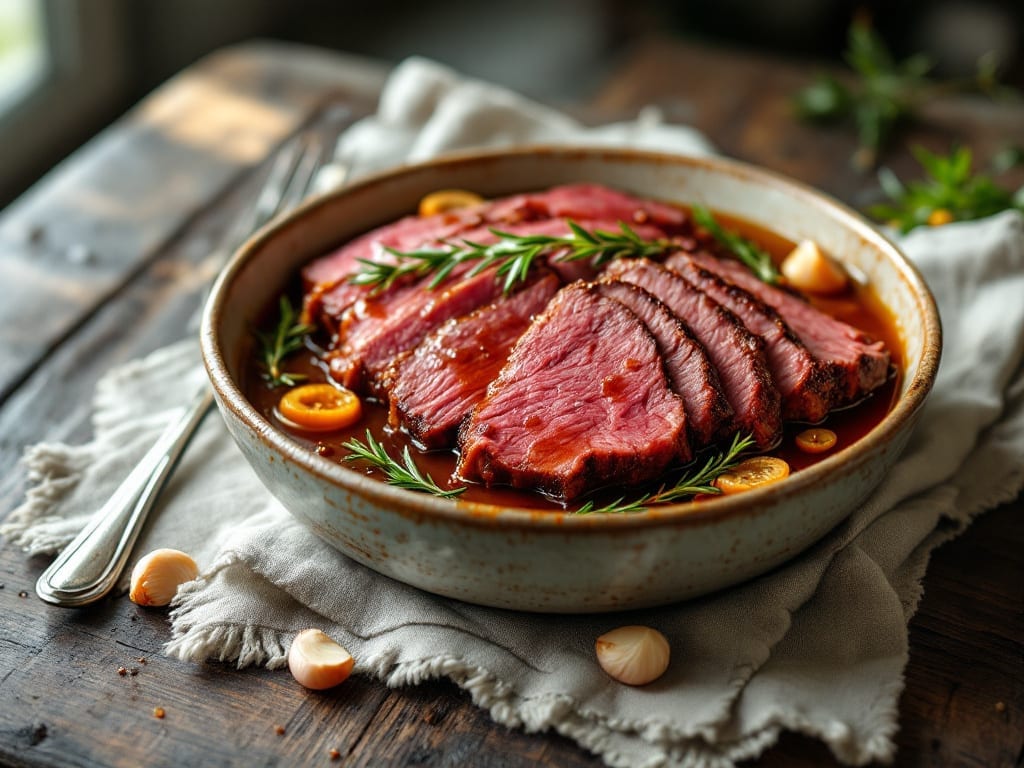
Transforming Costco’s massive corned beef brisket into a tender, melt-in-your-mouth masterpiece requires patience and precision—two things I’ve perfected over years of slow-cooking tough cuts. The key lies in balancing traditional spices with modern techniques, ensuring every bite delivers that perfect harmony of salt, sweetness, and smoky depth.
I still remember the first time I cooked one of these briskets at my family’s backyard cookout, where the aroma of slow-roasted meat filled the air and turned a simple meal into a celebration.
This recipe simplifies the process without sacrificing authenticity, using a foolproof method that works in either an oven or slow cooker. The brisket starts with a soak in spices and vinegar, which tenderizes the meat and infuses it with flavor—no fancy equipment required.
What sets this apart is the precise internal temperature guidance, ensuring the brisket reaches perfect tenderness without drying out. The result? A brisket so rich and flavorful, it’ll have everyone asking for seconds before the plate is even cleared.
By the time you’re done, you’ll have a spice-infused, slow-cooked brisket that’s juicy, aromatic, and packed with layers of flavor—ideal for sandwiches, tacos, or serving alongside classic sides like coleslaw and roasted potatoes.
The beauty of this recipe is its versatility; it’s hearty enough for a holiday feast but simple enough for a weeknight dinner. Let’s get started on creating a brisket that’ll impress even the most seasoned meat lovers.
Pro tip: Foraging wild herbs like rosemary or thyme can elevate the spice blend, adding a touch of coastal freshness that pairs beautifully with the brisket’s deep flavors. Whether you’re cooking for a crowd or treating yourself to a special meal, this recipe delivers restaurant-quality results with minimal effort.
The secret? Timing, temperature, and a little bit of love—just like my family’s backyard tradition.
Ingredients for costco corned beef brisket
Twelve ingredients for a brisket that’ll feed a crowd and impress everyone—no shortcuts, just deep flavor.
| Ingredient | Amount | Notes |
|---|---|---|
| Costco Corned Beef Brisket 🥩 | 8 lb | Packaged with spices, vacuum-sealed |
| Yellow Onions 🧅 | 3 whole | Yellow or red, sliced into wedges |
| Garlic Cloves 🧄 | 8 cloves | Peeled, smashed for intense flavor |
| Fresh Rosemary 🌿 | ¼ cup | Chopped, fresh preferred (or 1 tbsp dried) |
| Fresh Thyme 🌿 | ¼ cup | Stems removed, chopped (or 1 tbsp dried) |
| Apple Cider Vinegar 🍎 | 1 cup | For tenderizing and depth |
| Brown Sugar 🍚 | ½ cup | Light or dark, packed |
| Kosher Salt 🧂 | 2 tbsp | Diamond Crystal preferred (1.5 tsp table salt) |
| Black Peppercorns 🌶️ | 1 tbsp | Freshly cracked for texture |
| Bay Leaves 🍃 | 4 whole | Fresh or dried, removed before serving |
| Beef Broth 💧 | 2 cups | Low-sodium, for moisture |
| Extra-Virgin Olive Oil 🫒 | 2 tbsp | For searing, high-quality preferred |
| Honey 🍯 | 2 tbsp | Wildflower or clover variety |
[recipe_ingredient_scaler]
Start with the brisket—Costco’s 8-pound vacuum-sealed version is perfect here, already packed with spices but needing extra love. Look for briskets with good marbling (fat streaks) at the butcher counter if you’re not using Costco’s, as this ensures juiciness. The fresh rosemary and thyme are non-negotiable; grab them from the grocery store’s produce section (they’re usually near the herbs) or forage if you’re feeling adventurous—wild thyme adds a coastal brightness that pairs beautifully. For the apple cider vinegar, any brand works, but Mott’s or Heinz are reliable pantry staples. Prep the onions and garlic ahead: slicing the onions into 1-inch wedges and smashing the garlic cloves releases more flavor during cooking.
No fresh rosemary? Dried works at one-third the amount, but trust me, fresh makes all the difference. Running low on beef broth? Substitute with a mix of water and a bouillon cube, but add a splash of soy sauce or Worcestershire for depth. The brown sugar can be swapped for white sugar in a pinch, though it won’t caramelize as beautifully. For the olive oil, don’t skimp—Trader Joe’s or Whole Foods carry high-quality bottles that’ll elevate the sear. If you’re cooking for a large crowd, double the batch: the brisket freezes beautifully for up to 3 months, so make extra for future meals. The honey adds a subtle sweetness; if you’re avoiding it, maple syrup works just as well.
This brisket is a make-ahead masterpiece—prep the marinade and sear the meat a day ahead, then slow-cook when you’re ready. Store the raw brisket in the fridge for up to 24 hours before cooking, and keep the prepped aromatics (onions, garlic, herbs) in an airtight container for 5 days. Once cooked, the brisket stays juicy and flavorful for 4 days in the fridge, or freeze it for up to 3 months. Slice it against the grain for tender bites, and save the leftovers for sandwiches, tacos, or hash—trust me, they’re even better the next day.
Why You’ll Love This Recipe
- One-Pan Magic: I swear by this recipe because it’s literally one pan, one knife, and 20 minutes of hands-off time. Slice the onions, toss them with garlic and herbs, then let the brisket roast while you stir occasionally—no chopping boards to wash, no extra pots to scrub.
- Herb-Crusted Crunch: Between us, that crispy rosemary-thyme crust on the edges? It’s the secret weapon. The brisket comes pre-seasoned, but the fresh herbs roasted right into the onions take it from “good” to “I’ll have seconds” in one bite.
- Game-Day Crowdpleaser: This feeds six with room for more, and honestly? It’s the only dish I make for game day that doesn’t require a last-minute grocery run. The leftovers reheat like a dream—just slice and warm, no soggy corners.
- Budget Bulk Winner: A Costco brisket lasts me weeks of lunches, and I’m not exaggerating. The onions and herbs cost pennies, so you’re basically getting a restaurant-quality meal for half the price. My wallet and my family thank me every time.
Step-by-step instructions for slow-cooked corned beef brisket
Here’s how to transform that Costco vacuum-sealed brisket into melt-in-your-mouth perfection.
Prepare the Brisket for Maximum Flavor
Remove the brisket from its vacuum seal and rinse it thoroughly under cold water to remove any surface brine. Pat it completely dry with paper towels—this step is crucial for developing that beautiful crust later. In a small bowl, combine the 2 tablespoons kosher salt, 1 tablespoon black peppercorns, 0.25 cup fresh rosemary, and 0.25 cup fresh thyme. Rub this mixture all over the brisket, pressing firmly so the spices adhere. Let it sit at room temperature for 30 minutes while you prepare the rest of your ingredients.
Here’s the thing—this dry rub isn’t just for flavor. The salt helps break down proteins on the surface, creating a tender exterior. I like to work in a well-ventilated area during this step since the spices can be potent when freshly ground. Don’t skip the room temperature wait; cold meat cooks unevenly and can lead to tough results.
Sear the Brisket for Deep Flavor
Heat a large Dutch oven over medium-high heat and add the 2 tablespoons extra-virgin olive oil. Once the oil shimmers, carefully place the brisket fat-side down in the pot. Let it sear undisturbed for 8-10 minutes until the fat renders and the bottom develops a deep golden-brown crust. You’ll smell that glorious meaty aroma filling your kitchen—this is where all the magic begins.
After the first side is well-browned, flip the brisket and repeat on the second side for another 6-8 minutes. The reason we sear first is that this initial crust locks in juices during the long cook. If you notice the fat smoking excessively, reduce the heat slightly—you want it to render slowly, not burn. This searing step builds flavor that no slow cooking alone could achieve.
Build the Slow-Cooking Liquid
Remove the brisket from the pot and set it aside. In the same Dutch oven, add the 3 whole yellow onions sliced into wedges and the 8 cloves garlic cloves that have been peeled and smashed. Cook for 3-4 minutes until the onions begin to soften and the garlic releases its aromatic oils. This step develops the base flavor for your cooking liquid.
Add the 1 cup apple cider vinegar, 0.5 cup brown sugar, 2 cups beef broth, 4 whole bay leaves, and 2 tablespoons honey to the pot. Stir everything together and bring to a gentle simmer over medium heat. The liquid should smell complex—sweet from the honey and brown sugar, tangy from the vinegar, with herbal notes from the aromatics. This balance is what makes this brisket special.
Slow Cook to Fork-Tender Perfection
Return the brisket to the Dutch oven, fat-side up, and bring the liquid to a full simmer. Cover the pot and transfer it to a 300°F oven. Here’s where patience pays off—cook for 3-4 hours until the brisket reaches an internal temperature of 195-205°F. You’ll know it’s ready when a meat thermometer inserted into the thickest part reads this temperature and the meat is fork-tender.
I check the internal temperature every 30 minutes during the last hour. The reason for this long cook is to break down the connective tissue in the brisket, transforming it from tough to melt-in-your-mouth tender. Don’t be tempted to rush this process—slow cooking is what makes this brisket exceptional. If you notice the liquid reduces significantly, add a splash of water or broth to maintain moisture.
Rest and Serve with Confidence
Once the brisket reaches the perfect temperature, remove it from the oven and transfer it to a cutting board. Tent loosely with aluminum foil and let it rest for 30-45 minutes. This resting period allows the juices to redistribute throughout the meat, ensuring each slice is moist and flavorful. I know it’s hard to wait, but trust me—this step makes all the difference.
After resting, carefully remove the bay leaves from the cooking liquid and skim off any excess fat if desired. The brisket should be so tender you can pull it apart with two forks. Slice against the grain for maximum tenderness and serve with the rich, aromatic cooking liquid spooned over the top. This brisket delivers on every promise—deep flavor, perfect tenderness, and that restaurant-quality texture you crave.
Pro Tips For Making Costco Corned Beef Brisket
- SEAR THE BRISKET: Hit that Costco brisket with a screaming-hot pan for 3–4 minutes per side before slow cooking—it builds a crust that locks in flavor and keeps the meat from drying out later. I used to skip this, and the final result always tasted flat.
- CHAR THE ONIONS: Don’t just slice those yellow onions—caramelize them in batches with a splash of water until deep golden brown. The sweetness cuts through the brisket’s saltiness and adds depth that raw onions can’t match.
- SKIP THE CROWDED PAN: Overcrowding the pan with onions and garlic steams them instead of browning. Cook in two batches if needed—golden bits stick to the meat and make the gravy richer.
- REST THE MEAT: Let the brisket sit under foil for 10 minutes after cooking. The juices redistribute, or you’ll end up with a slice that’s dry on the outside and raw in the middle—trust me, I’ve served it that way.
Serving suggestions for this dish
Classic Sandwich Style
Slice your brisket against the grain into ¼-inch thick pieces and serve on freshly toasted rye or sourdough bread with a smear of garlic aioli or Dijon mustard.
I like to layer it with crisp lettuce, thinly sliced red onions, and a smear of horseradish cream for that signature tang. For extra decadence, add a slice of sharp cheddar that melts slightly from the hot brisket. 🥪
Pro tip: Warm the bread slightly before assembling to prevent sogginess. I often toast the bread directly on the grill while the brisket rests—just 2-3 minutes per side—to get that perfect char.
This method keeps the sandwich crisp while maintaining the brisket’s juiciness. Serve with a side of pickled vegetables to cut through the richness.
Taco or Nacho Bar
Shred the brisket using two forks and serve it in a build-your-own taco or nacho bar. I set out soft corn tortillas, blue corn tortilla chips, and toppings like diced avocado, pickled jalapeños, sour cream, and crumbled cotija cheese.
For extra flavor, warm the tortillas on a dry skillet for 30 seconds per side. The brisket’s rich, spiced profile pairs perfectly with these Mexican-inspired toppings. 🌮
For a quick assembly, pre-shred the brisket and store it in the fridge for up to 3 days. Reheat gently in a skillet with a splash of beef broth to keep it moist.
This is a crowd-pleaser for game days or family gatherings—everyone can customize their plate to their taste.
Hash or Bowl Base
Cube the brisket and serve it as the star of a hearty breakfast hash or grain bowl. Sauté ½ cup diced potatoes and ½ cup bell peppers in olive oil until golden, then add the brisket cubes.
Finish with a fried egg on top and a sprinkle of fresh parsley. For a grain bowl, serve the brisket over quinoa or farro, topped with roasted sweet potatoes, avocado slices, and a drizzle of chimichurri sauce. 🍳
This works beautifully as a make-ahead meal—cook the hash components in advance and reheat everything together in a skillet. The brisket’s deep flavor elevates even simple sides, making it a versatile option for any meal of the day.
I often prep this for my motorcycle rides along the coast, knowing it’ll be a hearty, satisfying meal when I return.
Leftovers Reinvented
Transform brisket leftovers into reuben sliders or corned beef hash. For sliders, layer the brisket on mini rye buns with Swiss cheese, sauerkraut, and Russian dressing, then toast in a pan.
For hash, dice the brisket and mix it with potatoes, onions, and a splash of beef broth**, then pan-fry until crispy. These reinventions turn simple leftovers into exciting new meals. 💡
I always keep a stash of brisket in the freezer for quick meals. To reheat, thaw overnight in the fridge, then warm in a skillet with a splash of broth.
The key is to keep the brisket moist—never microwave it dry. These reinvented dishes prove that brisket’s versatility extends far beyond the original meal.
Nutrition facts
Frequently asked questions
Can I use a slow cooker instead of an oven for this recipe?
Transfer the seared brisket and aromatics to a 6-quart slow cooker, pour in the cooking liquid, and cook on low for 8-10 hours or high for 5-6 hours until fork-tender. The slow cooker method is even more hands-off, perfect for busy days. Just monitor the liquid level and add broth if needed to prevent drying.
How do I store and reheat leftovers?
Store cooked brisket in an airtight container in the fridge for 4-5 days or freeze for up to 3 months. To reheat, thaw overnight in the fridge, then warm in a skillet with a splash of beef broth over low heat for 5-7 minutes. Never microwave—it makes the meat dry. For extra flavor, add a pinch of smoked paprika or a splash of apple cider vinegar while reheating.
What if my brisket turns out too dry?
If your brisket is dry, it likely didn’t cook long enough or lost too much moisture. The ideal internal temperature is 195-205°F—any higher risks drying it out. For next time, add ½ cup extra beef broth during cooking and cover tightly. If it’s already cooked, try slicing thinly and serving with extra cooking liquid or a creamy horseradish sauce to add moisture.
Can I make this brisket in a smoker?
Yes! After searing, transfer the brisket to a smoker and cook at 225-250°F with hickory or applewood until it reaches 195-205°F (about 4-6 hours). Wrap it in butcher paper at 165°F to speed up the process. The smoky flavor pairs beautifully with the brisket’s rich profile. Just monitor closely to avoid over-smoking.
What’s the best way to slice brisket for sandwiches?
Slice against the grain (perpendicular to the muscle fibers) into ¼-inch thick pieces for maximum tenderness. Use a sharp knife and cut in one smooth motion. For extra presentation, fan the slices slightly on the plate. The grain runs diagonally across the brisket—look for the direction of the muscle fibers before slicing.

Trained in classic French technique but raised on slow-cooked ribs and spicy rubs, she blends culinary skill with smoke and soul.
- Best Smoked Oxtail Recipe: Deep-Rich Flavor After Low-and-Slow Cooking - October 14, 2026
- Pit Boss Smoked Prime Rib Roast Recipe: Bark-to-Bone Crispness in 4 Hours - October 14, 2026
- Smoked Tuna Steak Recipe: Seared Crust Meets Silky Centers - October 14, 2026