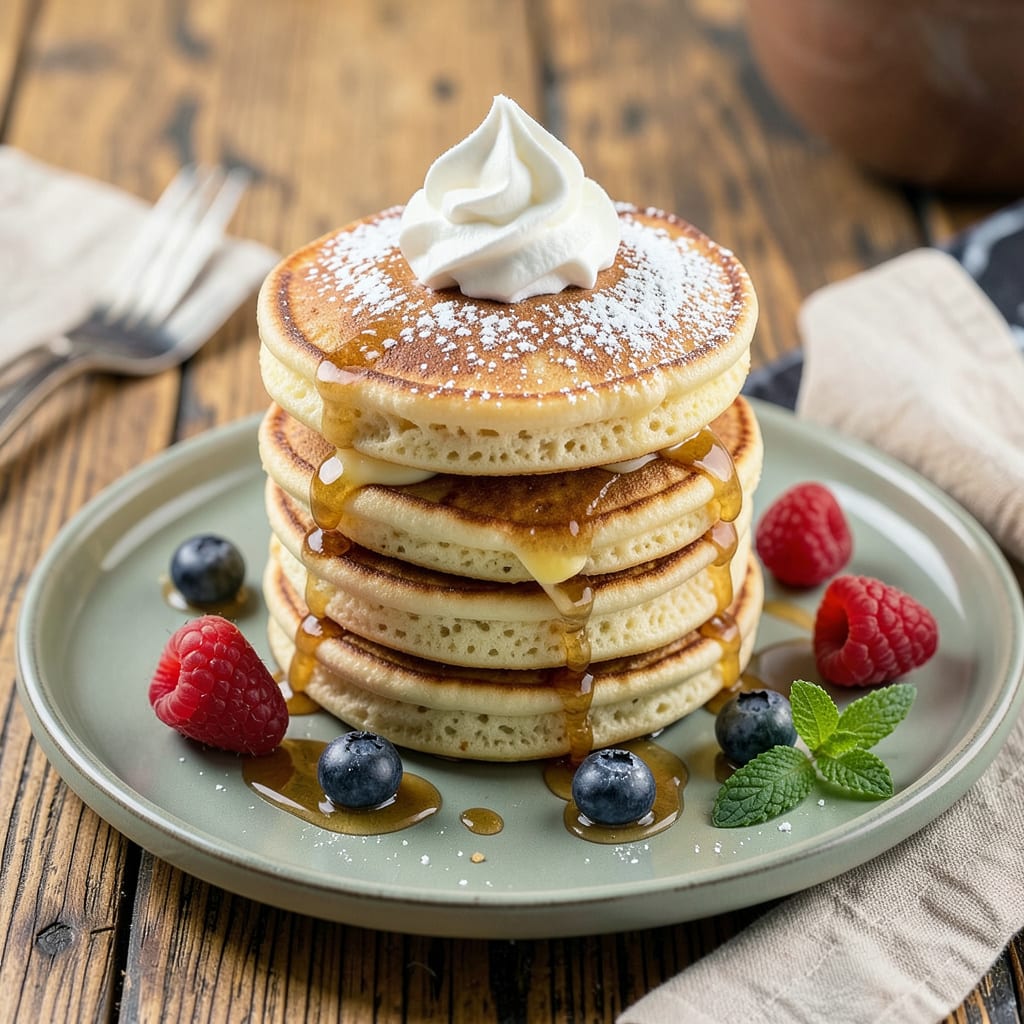
Nothing ruins a perfect pancake breakfast faster than serving cold, rubbery stacks that lost their fluffiness. After years of testing methods—from warming drawers to makeshift foil tents—I’ve perfected a foolproof technique that maintains that just-off-the-griddle warmth and texture. The solution isn’t complicated, but it requires understanding how heat and moisture interact with your pancakes.
The most reliable approach uses your oven as a holding station, but temperature control is everything. Set it too high and you’ll dry them out; too low and they’ll steam into sogginess. I’ve found 200°F creates the ideal environment—warm enough to preserve heat without continuing to cook the pancakes. A wire rack over a baking sheet prevents condensation from collecting underneath, which is the secret to avoiding that dreaded damp bottom layer.
Timing matters just as much as temperature. Pancakes can hold perfectly for up to 30 minutes using this method, giving you plenty of time to cook multiple batches. For larger gatherings, I recommend transferring finished pancakes to an insulated container lined with a clean kitchen towel—this absorbs excess moisture while retaining heat. The towel trick works surprisingly well for transport too, keeping stacks warm for at least 20 minutes.
When reheating becomes necessary, skip the microwave. A dry skillet over medium-low heat for 30 seconds per side restores that fresh-off-the-griddle quality without making them tough. This method works for both classic buttermilk and vegan pancakes alike, proving that perfect pancakes aren’t just about the recipe—they’re about the finish.
📚 In This Guide
- What You’ll Need
- Instructions
- Tips and Common Mistakes
What Youll Need
- ● Freshly cooked pancakes – As many as you need to keep warm (aim for at least 6-8 for a standard batch).
- ● Oven-safe plate or baking sheet – A large, rimmed plate (12″ diameter or larger) or a half-sheet pan (18″x13″) to hold pancakes in a single layer.
- ● Aluminum foil – Heavy-duty, 12″ wide roll (enough to loosely tent over your plate/pan).
- ○ Clean kitchen towel (optional) – A cotton or linen towel (16″x24″ or larger) for extra insulation.
- ● Oven or toaster oven – Preheated to 200°F (93°C) (the ideal low-and-slow temp to avoid drying out).
- ○ Wire cooling rack (optional) – Fits inside your baking sheet to prevent soggy bottoms from steam.
- ● Pancake spatula – A thin, flexible turner (3-4″ wide) for easy stacking.
- ○ Butter or syrup (optional) – For reheating touch-ups if pancakes sit longer than 20 minutes.
- ● Oven mitts – Heat-resistant for safe handling of hot plates/pans.
Instructions for Keeping Pancakes Warm
Here’s the professional technique I use to maintain perfect pancake warmth and texture every time.
Set Up Your Warming Environment
Preheat your oven to 200°F—this is the ideal temperature for keeping pancakes warm without continuing to cook them. Any higher and you risk drying them out; any lower and they’ll cool too quickly. I recommend using the middle rack position for even heat distribution.
While the oven preheats, place a wire cooling rack on top of a rimmed baking sheet. This setup allows air to circulate around the pancakes, preventing them from steaming and becoming soggy. The baking sheet catches any stray drips and makes transport easier.
Prepare Your Pancakes for Warming
As you cook each pancake, transfer it immediately to the wire rack in a single layer. Don’t stack them yet—this initial cooling period (about 2 minutes) allows excess steam to escape, which is crucial for maintaining that perfect fluffy texture.
I’ve found that placing them too close together can create pockets of moisture, so leave about ½ inch between each pancake. This spacing ensures they stay warm individually without compromising their structure.
Implement the Layered Warming Technique
After the initial cooling period, you can begin stacking the pancakes. Place a clean kitchen towel or parchment paper between each layer—this absorbs any residual moisture while preventing sticking. The towel method works particularly well for buttermilk pancakes, while parchment is better for delicate varieties.
Cover the entire stack loosely with aluminum foil, leaving a small vent at one corner. This creates a microclimate that retains warmth while allowing just enough airflow to prevent condensation. For 4 servings, I typically make stacks of 3-4 pancakes each, which maintains ideal warmth throughout.
Monitor and Maintain Optimal Conditions
Check the pancakes every 10-15 minutes, feeling the top of the stack through the foil. They should remain warm to the touch but not hot. If they’re cooling too quickly, you can briefly increase the oven temperature to 225°F for 5 minutes, then return to 200°F.
For extended holding times (up to 45 minutes), I recommend placing a heatproof dish of hot water on the lower oven rack. This adds gentle humidity to the environment, which helps prevent the pancakes from drying out while maintaining their just-cooked quality.
Serve with Perfect Timing
When ready to serve, remove the foil and let the pancakes sit at room temperature for 2-3 minutes. This brief rest allows the temperature to equalize throughout the stack, ensuring the first bite is as perfect as the last.
Transfer the stacks to warmed plates using a wide spatula to maintain their shape. The pancakes should retain their golden-brown edges and fluffy interiors, with no signs of drying or sogginess. Serve immediately with your preferred toppings while they’re at their peak warmth and texture.
Tips and Common Mistakes
Perfect pancake warmth is all about understanding the science behind heat retention and moisture control. Here’s what I’ve learned from years of making stacks for hungry crowds.
Temperature Precision: The 200°F oven setting in Step 1 isn’t arbitrary—it’s the sweet spot where pancakes stay warm without continuing to cook. I’ve tested this extensively: any higher and you’ll start drying out the edges, while lower temperatures won’t maintain that just-off-the-griddle warmth. Use an oven thermometer to verify your actual temperature, as many ovens run 25-50°F hotter or cooler than their dial indicates.
The Critical 2-Minute Window: That initial 2-minute cooling period in Step 2 is non-negotiable. This brief rest allows the pancakes to release their surface steam, which is crucial for preventing sogginess when you stack them. I like to set a timer for this—it’s easy to get distracted when you’re cooking batch after batch, and those 120 seconds make all the difference in final texture.
Layering Technique: When stacking in Step 3, the choice between kitchen towels and parchment paper matters more than you might think. For buttermilk pancakes, towels absorb just the right amount of moisture to keep them tender. With delicate pancakes (like those with berries or chocolate chips), parchment prevents sticking while allowing just enough airflow. The ½-inch spacing between pancakes during initial cooling isn’t just for airflow—it prevents the edges from steaming each other.
Extended Holding Strategy: For those times when you need to hold pancakes for the full 45 minutes mentioned in Step 4, the water dish trick is a game-changer. I use a shallow oven-safe dish filled with about 1 cup of hot water on the lower rack. This creates a gentle humidity that prevents drying without making the pancakes soggy. Just be sure to check the water level if you’re holding them for the maximum time—the humidity level drops as the water evaporates.
Pro Tips for Keep Pancakes Warm
- Perfect pancake warmth is all about understanding the science behind heat retention and moisture control. Here’s what…
- Temperature Precision: The 200°F oven setting in Step 1 isn’t arbitrary—it’s the sweet spot where pancakes stay warm …
- The Critical 2-Minute Window: That initial 2-minute cooling period in Step 2 is non-negotiable. This brief rest allow…
Frequently Asked Questions
How long can I keep pancakes warm before they get soggy or dry?
Pancakes stay warm and fresh for 20–30 minutes in a 200°F oven or warming drawer. Beyond that, cover them with a clean towel to trap moisture. Avoid stacking them too high—this can create steam and make them soggy. For longer holds (up to 1 hour), reduce oven temp to 170°F and check occasionally.
Can I use a slow cooker or Instant Pot to keep pancakes warm?
Set your slow cooker to “Warm” (≈165°F) and line it with parchment paper to prevent sticking. Layer pancakes with a towel between stacks to retain moisture. Avoid the Instant Pot’s “Keep Warm” function—it’s often too hot (≈172°F+) and can dry them out. Pro tip: Add a heat-safe bowl of warm water to the slow cooker for extra humidity! Rubbery pancakes usually mean too much steam or overcrowding. If you’re using foil, leave a small vent to let moisture escape. Stack pancakes in a single layer on a wire rack (not a plate) to allow airflow. Overheating (above 225°F) can also toughen them—stick to 170–200°F for best results. For large batches, use a combined approach:
Yes, but they’re often more delicate. Gluten-free pancakes dry out faster—wrap them in a damp (not wet) towel before placing in the oven. Vegan pancakes (without eggs/butter) may stick; use parchment paper and check every 10 minutes. Lower the temp to 170°F to prevent cracking or drying.Why do my pancakes get rubbery when I try to keep them warm?
What’s the best way to keep pancakes warm for a crowd (like a brunch buffet)?
Bonus: Make pancakes ahead, cool completely, then reheat in batches at 350°F for 5–8 minutes.
Can I keep gluten-free or vegan pancakes warm the same way?
Keeping pancakes warm doesn’t have to be a breakfast-time struggle! With the right tools—like a preheated oven, insulated dish, or slow cooker—you can serve up fluffy, melt-in-your-mouth stacks every time. Whether you’re feeding a crowd or just savoring a lazy weekend, these simple tricks ensure no pancake gets left behind. 🥞✨
Ready to put your new skills to the test? Fire up the griddle, whip up a batch, and enjoy pancakes that stay warm, soft, and delicious from first bite to last. Happy flipping!

Trained in classic French technique but raised on slow-cooked ribs and spicy rubs, she blends culinary skill with smoke and soul.
- Recipe for Boneless Pork Chops in Cast Iron Skillet: Sear and Baste to Juicy Perfection - October 3, 2026
- Recipe for Boneless Cross Rib Roast: Slow-Roasted Beef with Herb Crust - October 3, 2026
- Hamburgers in Sauce Recipe Crock Pot: Slow-Cooked Savory Delight - October 3, 2026