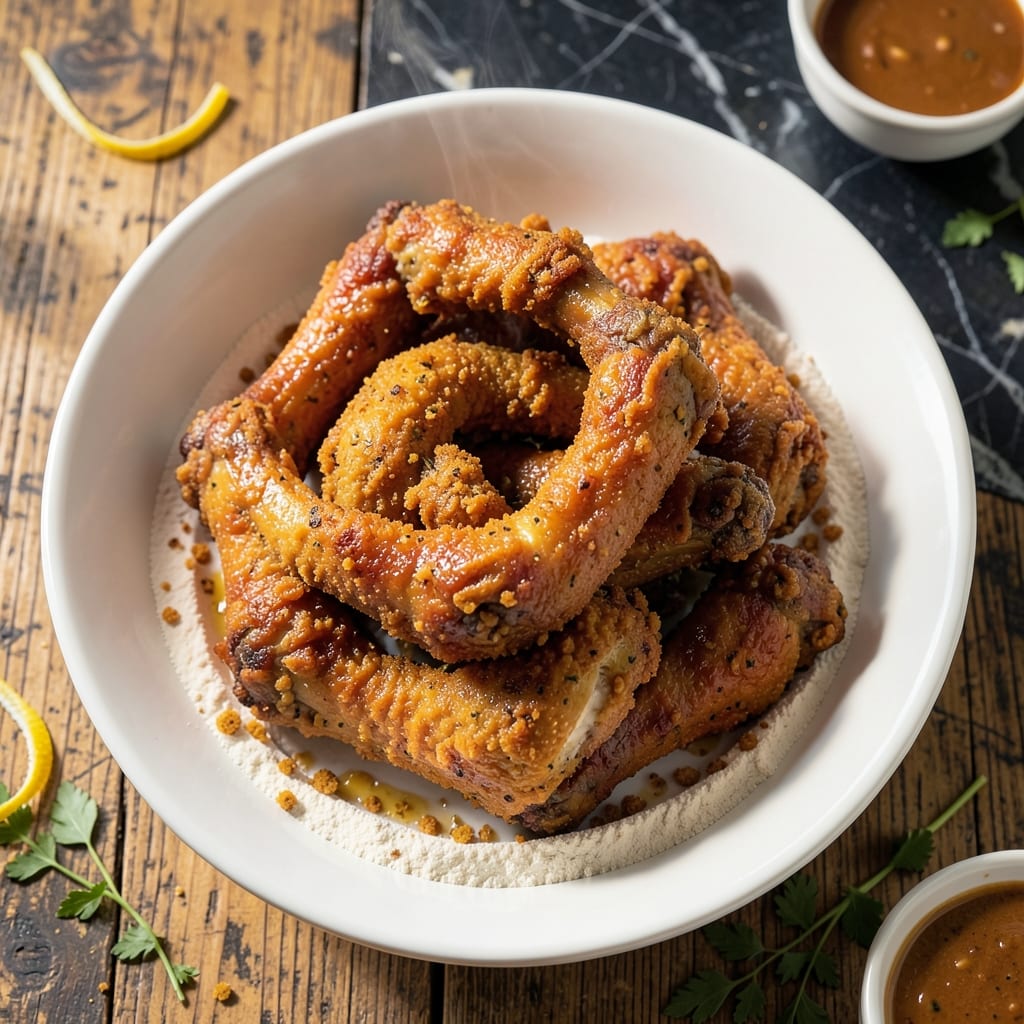
I’ve spent years perfecting this method to achieve that signature crispy, golden crust without compromising on flavor. The secret lies in the precise blend of 11 herbs and spices that coat every piece of chicken before frying.
This recipe uses a double-dredging technique to ensure maximum crunch and seasoning adhesion. The chicken is first dipped in egg wash, then coated in flour, and finally pressed into the spice mix for an even, flavorful layer.
The frying process at 350°F guarantees a perfectly cooked interior while creating that unmistakable shatteringly crispy exterior. Each bite delivers the iconic balance of savory, herby, and slightly spicy notes.
Whether you’re cooking for a crowd or meal prepping, this method delivers consistent, restaurant-quality results every time. The key is patience—let the oil return to temperature between batches.
Ingredients for Kentucky Fried Chicken Recipe 11 Herbs and Spices
Eleven herbs and spices create that iconic crispy crust on every piece of chicken.
| Ingredient | Amount | Notes |
|---|---|---|
| Chicken Drumsticks 🍗 | 8 pieces | Skin-on, bone-in preferred |
| Chicken Thighs 🍗 | 8 pieces | Skin-on, bone-in preferred |
| All-Purpose Flour 🌾 | 3 cups | For double-dredging process |
| Large Eggs 🥚 | 4 whole | Beaten for egg wash |
| Salt 🧂 | 2 tbsp | Diamond Crystal kosher salt |
| Black Pepper 🌶️ | 2 tsp | Freshly ground preferred |
| Dried Thyme 🍃 | 1 tbsp | Rubbed between fingers |
| Dried Basil 🌿 | 1 tbsp | Crushed for even distribution |
| Dried Oregano 🌿 | 1 tbsp | Mediterranean variety preferred |
| Celery Salt 🌿 | 1 tbsp | Fine grain for even coating |
| Dried Mustard 🌶️ | 1 tbsp | Powdered for consistency |
| Garlic Powder 🧄 | 1 tbsp | Not garlic salt |
| Paprika 🌶️ | 1 tbsp | Sweet or smoked variety |
| Ground Ginger 🌿 | 1 tsp | Freshly ground ideal |
| White Pepper 🌶️ | 1 tsp | Subtle heat without color |
| Vegetable Oil 🫒 | 4 cups | For deep frying at 350°F |
[recipe_ingredient_scaler]
The herb blend is non-negotiable for authenticity. Penzeys or bulk spices from Whole Foods deliver optimal freshness—avoid those dusty jars at the back of your cabinet. For the chicken, thighs and drumsticks provide the juiciest results with maximum surface area for coating. The flour creates the base layer, so all-purpose is ideal (avoid self-rising or cake flour). The egg wash ensures the seasoning adheres properly.
No celery salt? Equal parts salt and celery seed works in a pinch. Swap sweet paprika for smoked if you prefer depth. Fresh herbs won’t work here—dried is essential for the proper texture and concentration. For the oil, peanut or canola can replace vegetable oil (all have similar smoke points around 400°F). The ginger can be omitted if necessary, but it adds that signature warmth.
The spice blend can be mixed in advance and stored in an airtight container for up to 3 months. Raw chicken keeps in the fridge for 2 days—don’t marinate it in the seasoning. Leftover fried chicken? Reheat in a 375°F oven for 15 minutes to restore crispiness. Never microwave—it’ll turn soggy instantly.
Why You’ll Love This Recipe
- One Pan Magic: I just toss the drumsticks and thighs in flour, dip in egg, and fry—no fancy steps, no extra bowls.
- That Secret Crunch: The 11 herbs and spices in the flour coating give it that signature crispy, flavorful bite every time.
- Crowd Pleaser: I serve this for Sunday dinner, game day, or even just because—everyone from my picky nephew to my foodie friend asks for seconds.
- Budget Friendly: A big batch of thighs and drumsticks costs less than takeout, and leftovers taste just as good the next day.
Step-by-Step Instructions for Kentucky Fried Chicken
Master the double-dredging technique for that signature crispy, golden crust we all crave.
Step 1: Prepare the Spiced Flour Coating
In a large bowl, whisk together the 3 cups All-Purpose Flour, 2 tbsp Salt, 2 tsp Black Pepper, 1 tbsp Dried Thyme, 1 tbsp Dried Basil, 1 tbsp Dried Oregano, 1 tbsp Celery Salt, 1 tbsp Dried Mustard, 1 tbsp Garlic Powder, 1 tbsp Paprika, 1 tsp Ground Ginger, and 1 tsp White Pepper until evenly distributed.
This blend of eleven herbs and spices creates the iconic flavor profile. I rub the dried herbs between my fingers as I add them to release their essential oils and ensure maximum flavor dispersion throughout the coating.
Step 2: Set Up the Double-Dredging Station
Beat the 4 whole Large Eggs in a shallow dish until fully combined and slightly frothy. This egg wash will act as the adhesive for your flour coating. Place the spiced flour in another shallow dish—you’ll need enough room to fully coat each piece of chicken.
Pat the 8 pieces Chicken Drumsticks and 8 pieces Chicken Thighs completely dry with paper towels first. Any moisture will prevent the coating from adhering properly, resulting in patchy, uneven coverage rather than that perfect crispy shell.
Step 3: Double-Dredge for Maximum Crispiness
Working one piece at a time, dredge each chicken piece in the spiced flour, pressing firmly to ensure full coverage. Shake off any excess, then dip it in the beaten eggs, allowing any excess to drip off. Immediately dredge it again in the spiced flour, pressing once more to create a thick, even coating.
Place the coated chicken on a wire rack set over a baking sheet. This setup allows air to circulate around each piece, preventing the coating from becoming soggy as it rests. Let the chicken rest for 10-15 minutes—this helps the coating set and adhere better during frying.
Step 4: Deep-Fry to Golden Perfection
In a large, heavy-bottomed pot or Dutch oven, heat the 4 cups Vegetable Oil to 350°F. Use a deep-fry thermometer to monitor the temperature precisely—this is crucial for achieving that perfect crispy exterior without overcooking the meat inside.
Working in batches to avoid overcrowding (which lowers the oil temperature), carefully lower 3-4 pieces of chicken into the hot oil. Fry for 12-15 minutes for the chicken thighs and 14-16 minutes for the drumsticks, turning occasionally, until the coating is deep golden brown and the internal temperature reaches 165°F.
Step 5: Drain and Rest Before Serving
Transfer the fried chicken to a clean wire rack or paper towel-lined plate to drain excess oil. The rack method is superior as it prevents the crispy coating from steaming and becoming soggy. Allow the chicken to rest for 5-10 minutes before serving—this final rest ensures the juices redistribute throughout the meat.
Serve immediately while hot and crispy. The coating should have a satisfying crunch that gives way to tender, juicy meat inside. Each bite should deliver that perfect balance of savory, herby, and slightly spicy notes that make this dish legendary.
Pro Tips For Making Kentucky Fried Chicken Recipe 11 Herbs And Spices
- Double-Fry for Crisp: Fry the chicken at 325°F until cooked through, then crank the heat to 375°F for 2-3 minutes to get that signature crunch. I learned this the hard way—first batch was golden but soggy.
- Dry the Chicken: Pat the drumsticks and thighs completely dry with paper towels before dredging. Sounds tedious, but it actually changes the outcome—wet chicken makes the coating slide right off.
- Rest the Coated Pieces: Let the floured chicken rest for 10 minutes before frying. My grandmother swore by this, and she was right: it helps the coating adhere better and keeps it from flaking off in the oil.
- Use a Wire Rack: After frying, drain the chicken on a wire rack instead of paper towels. Steer clear of stacking pieces—this keeps the bottoms crisp instead of steaming them into rubber.
Storing and Reheating This Dish
Refrigerator Storage
Let your fried chicken cool completely before storing—this prevents condensation from making the coating soggy. I use airtight containers with paper towels lining the bottom to absorb any excess oil. It keeps well in the fridge at 40°F or below for up to 4 days. 🥗
Freezer Storage
For longer storage, freeze cooked chicken in a single layer on a baking sheet first, then transfer to freezer bags. This prevents pieces from sticking together. It stays fresh for up to 3 months without losing flavor. Squeeze out all air before sealing to prevent freezer burn.
Oven Reheating
Preheat your oven to 375°F and place chicken on a wire rack over a baking sheet. Reheat for 15-20 minutes until the internal temperature reaches 165°F. This method restores crispiness almost as good as fresh. 🔥
Air Fryer Reheating
Arrange pieces in a single layer in your air fryer basket. Cook at 375°F for 6-8 minutes, shaking halfway through. The circulating air revives the crust beautifully. Check that the center is hot before serving.
Avoid the Microwave
Microwaving turns the coating rubbery and soggy within seconds. If you must use one, place a damp paper towel over the chicken and use 50% power for 1-2 minutes. Even then, expect a significant texture compromise.
Nutrition Facts
Frequently Asked Questions
Can I use boneless chicken for this recipe?
Bone-in works best for flavor and moisture, but boneless thighs or breasts can be used. Reduce frying time to 8-10 minutes since they cook faster. The coating may not adhere as well to smoother surfaces.
Why is the oil temperature so important?
At 350°F, the coating crisps quickly while the meat cooks through. Too low and it’ll absorb oil; too high and it’ll burn outside before cooking inside. Use a thermometer for accuracy.
Can I bake instead of fry?
Yes! Bake at 400°F for 25-30 minutes on a wire rack. Brush with oil first for extra crispiness. The texture won’t be identical, but it’s a healthier alternative.
How do I fix spice blend that’s too salty?
Balance it by adding more dried herbs like thyme or oregano. Start with 1 tsp increments and taste as you go. Avoid adding plain flour—it’ll dilute the flavor.

Trained in classic French technique but raised on slow-cooked ribs and spicy rubs, she blends culinary skill with smoke and soul.
- Recipe for Boneless Pork Chops in Cast Iron Skillet: Sear and Baste to Juicy Perfection - October 3, 2026
- Recipe for Boneless Cross Rib Roast: Slow-Roasted Beef with Herb Crust - October 3, 2026
- Hamburgers in Sauce Recipe Crock Pot: Slow-Cooked Savory Delight - October 3, 2026