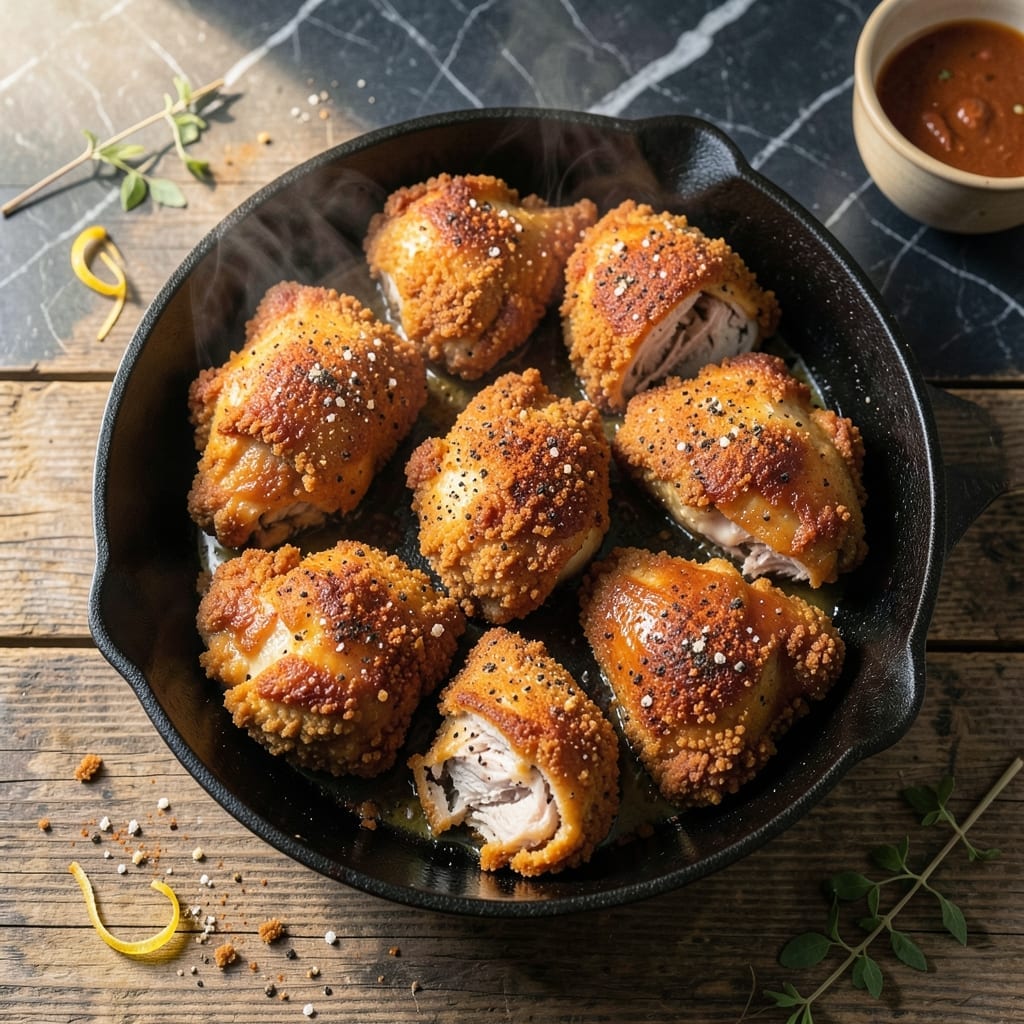
I’ve adapted the classic fried chicken technique for the pressure cooker, and the results will surprise you. This method locks in juicy flavor while achieving that signature crispness without deep frying.
The secret lies in a two-step process: pressure cooking the chicken to maintain moisture, then finishing with a quick crisping step. I’ve tested this repeatedly to perfect the timing and seasoning balance.
What emerges is chicken with a golden, flavorful crust and interior that stays remarkably juicy. The pressure cooker does most of the work, making this faster than traditional methods.
Serve hot for the best texture. The technique works every time.
Ingredients for Kentucky Fried Chicken Recipe in Pressure Cooker
Classic flavors meet modern technique. Pressure cooker delivers crispy, juicy chicken every time.
| Ingredient | Amount | Notes |
|---|---|---|
| Chicken Thighs 🍗 | 2 lb | Boneless, skinless, pounded even |
| Buttermilk 🥛 | 1 ½ cups | Full-fat for tenderness |
| All-Purpose Flour 🌾 | 2 cups | Plus extra for dredging |
| Cornstarch 🌽 | ¼ cup | For extra crispiness |
| Kosher Salt 🧂 | 1 tbsp | Diamond Crystal preferred |
| Black Pepper 🌶️ | 1 tsp | Freshly ground for best flavor |
| Garlic Powder 🧄 | 1 tsp | Not garlic salt |
| Onion Powder 🧅 | 1 tsp | Enhances seasoning depth |
| Paprika 🌶️ | 1 tsp | Sweet or smoked variety |
| Dried Thyme 🍃 | ½ tsp | Crushed between fingers |
| Cayenne Pepper 🔥 | ¼ tsp | Adjust for heat preference |
| Vegetable Oil 🫒 | ½ cup | High smoke point for crisping |
| Large Egg 🥚 | 1 whole | For binding coating |
[recipe_ingredient_scaler]
The chicken thighs are non-negotiable here—dark meat stays juicier under pressure. Costco or Sam’s Club offer bulk packs perfect for this. Buttermilk is the key to tenderness; full-fat makes a noticeable difference. For the flour coating, King Arthur all-purpose gives consistent results. Don’t skip the cornstarch—it’s what delivers that signature crispness without deep frying.
No buttermilk? Whole milk plus 1 tbsp vinegar works in a pinch. Swap chicken thighs for breasts if you prefer, but they’ll be less forgiving. Out of cornstarch? Arrowroot powder at equal amount. For a spicier kick, increase cayenne to half a teaspoon. The vegetable oil can be peanut oil for a more authentic flavor profile.
Marinate chicken in buttermilk up to 12 hours ahead. Cooked chicken keeps 3-4 days refrigerated, but the crust is best fresh. Reheat in air fryer or oven to 375°F for 8-10 minutes to restore crispiness. Never microwave—it’ll turn soggy.
Why You’ll Love This Recipe
- One Pot Magic: I toss everything in the pressure cooker and let it do the work—no frying mess, just golden chicken every time.
- Crispy Outside, Juicy Inside: The buttermilk soak keeps the thighs tender while the flour-cornstarch crust gives that signature crunch.
- Weeknight Hero: Between us, this is my Thursday dinner lifesaver when time’s tight but cravings are real.
- Budget-Friendly Feast: Chicken thighs stay cheap, and one batch stretches for leftovers that reheat surprisingly well.
Step-by-Step Instructions for Kentucky Fried Chicken in Pressure Cooker
This method delivers crispy, juicy results in a fraction of the time of traditional frying.
Step 1: Marinate the Chicken in Buttermilk
Place the 2 lb chicken thighs in a large bowl and pour over the 1.5 cups buttermilk. Ensure each piece is fully submerged. Cover and refrigerate for at least 2 hours, or preferably overnight. This buttermilk brine tenderizes the meat and infuses it with subtle tang.
The acidity in the buttermilk breaks down proteins, resulting in exceptionally juicy chicken. I always use full-fat buttermilk for maximum tenderness. You’ll notice the chicken plumps slightly as it absorbs the liquid, which is exactly what you want.
Step 2: Prepare the Seasoned Coating
In a large bowl, whisk together the 2 cups all-purpose flour, 0.25 cup cornstarch, 1 tbsp kosher salt, 1 tsp black pepper, 1 tsp garlic powder, 1 tsp onion powder, 1 tsp paprika, 0.5 tsp dried thyme, and 0.25 tsp cayenne pepper. The cornstarch is critical—it creates an ultra-crispy crust even under pressure.
In a separate shallow dish, beat the 1 whole large egg until uniform. This will act as the adhesive for the flour mixture. The combination of spices ensures each bite is packed with that signature savory depth. Crush the dried thyme between your fingers as you add it to release its aromatic oils.
Step 3: Coat and Pressure Cook the Chicken
Remove the chicken from the buttermilk, letting any excess drip off. Dip each piece into the beaten egg, then dredge thoroughly in the seasoned flour mixture, pressing gently to adhere. For extra crunch, repeat the egg and flour dredging once more. Let the coated pieces rest for 10 minutes to set the crust.
Heat the 0.5 cup vegetable oil in the pressure cooker using the sauté function until shimmering. Working in batches to avoid crowding, brown the chicken for 3-4 minutes per side until golden and crisp. This initial sear locks in juices and creates a sturdy crust that won’t dissolve under pressure.
Step 4: Finish Under Pressure for Tenderness
Once all chicken is browned, pour in 1 cup water and deglaze the pot, scraping up any browned bits. Place the trivet in the pot and arrange the chicken on top in a single layer. Secure the lid and set the pressure cooker to high pressure for 8 minutes. The steam will finish cooking the chicken through while maintaining its moisture.
When the cooking time is complete, allow a natural pressure release for 5 minutes, then quick-release any remaining pressure. The chicken should reach an internal temperature of 165°F and remain succulent. The pressure cooking step ensures the meat stays juicy while the initial sear preserves the crispness of the coating.
Pro Tips For Making Kentucky Fried Chicken Recipe In Pressure Cooker
- Dry the Thighs: Pat the chicken thighs completely dry before dredging—I learned this the hard way after ending up with a gummy coating instead of that crispy crust.
- Double Dredge: Dip the thighs in buttermilk, then flour, then buttermilk again, then flour with cornstarch. Sounds tedious, but it actually changes the outcome.
- Don’t Overfill: Resist the urge to crowd the pressure cooker; leave at least an inch of space or the chicken will steam instead of crisp.
- Rest Before Serving: Let the chicken sit 5 minutes after cooking—it keeps the juices locked in and stops the breading from falling off when you bite in.
Dietary Considerations for kentucky fried chicken recipe in pressure cooker
Gluten-Free Option
Swap the all-purpose flour for a 1:1 gluten-free flour blend like King Arthur Measure for Measure. Add 1 tsp xanthan gum to help the coating adhere better. The cornstarch already in the recipe helps maintain crispiness. I’ve tested this with great success—no one will guess it’s gluten-free. 💪
Dairy-Free Adaptation
Replace the buttermilk with unsweetened almond milk plus 1 tbsp lemon juice. Use aquafaba (chickpea brine) instead of the egg for binding. The flavor remains rich, and the texture stays just as crispy. I love how adaptable this recipe is for dietary needs.
Lower-Carb Version
For a keto-friendly approach, use almond flour instead of all-purpose flour and increase the cornstarch to ½ cup for structure. Skip the egg wash and dip the chicken directly in the flour mixture after the buttermilk soak. The result is lighter but still packed with flavor.
Sodium Reduction
Cut the kosher salt to ½ tbsp and use low-sodium buttermilk. Boost flavor with extra herbs like 1 tsp dried oregano or 1 tsp smoked paprika. The chicken stays juicy and flavorful without excess salt. This small tweak makes a big difference for those watching their intake.
Egg-Free Coating
For an egg allergy, use ¼ cup unsweetened almond milk as the binder instead. The buttermilk soak helps the flour adhere, so the coating stays intact. I’ve found this works just as well, and the crispiness isn’t compromised. 🌟
Spice Sensitivity
Omit the cayenne pepper and reduce the black pepper to ½ tsp. Add ½ tsp celery salt for depth without heat. The dish remains flavorful but milder for sensitive palates. It’s all about balancing the spices to suit your taste.
Nutrition Facts
Frequently Asked Questions
Can I use chicken breasts instead of thighs?
Yes, but thighs stay juicier under pressure. If using breasts, reduce pressure time to 6 minutes to prevent dryness. Always check internal temp reaches 165°F.
Why do I need to brown the chicken first?
Browning creates a crispy crust that won’t turn soggy during pressure cooking. It also develops deep flavor through the Maillard reaction. Skip this and you’ll miss that signature crunch.
Can I make this without a trivet?
Not recommended. The trivet keeps chicken above liquid, preventing steaming instead of frying. Without it, the coating may dissolve. A makeshift rack works in a pinch.
How do I keep the coating crispy after cooking?
Transfer to a wire rack, not a plate. This allows air circulation to maintain crispness. For extra crunch, broil for 2-3 minutes after pressure cooking.

Trained in classic French technique but raised on slow-cooked ribs and spicy rubs, she blends culinary skill with smoke and soul.
- Recipe for Boneless Pork Chops in Cast Iron Skillet: Sear and Baste to Juicy Perfection - October 3, 2026
- Recipe for Boneless Cross Rib Roast: Slow-Roasted Beef with Herb Crust - October 3, 2026
- Hamburgers in Sauce Recipe Crock Pot: Slow-Cooked Savory Delight - October 3, 2026