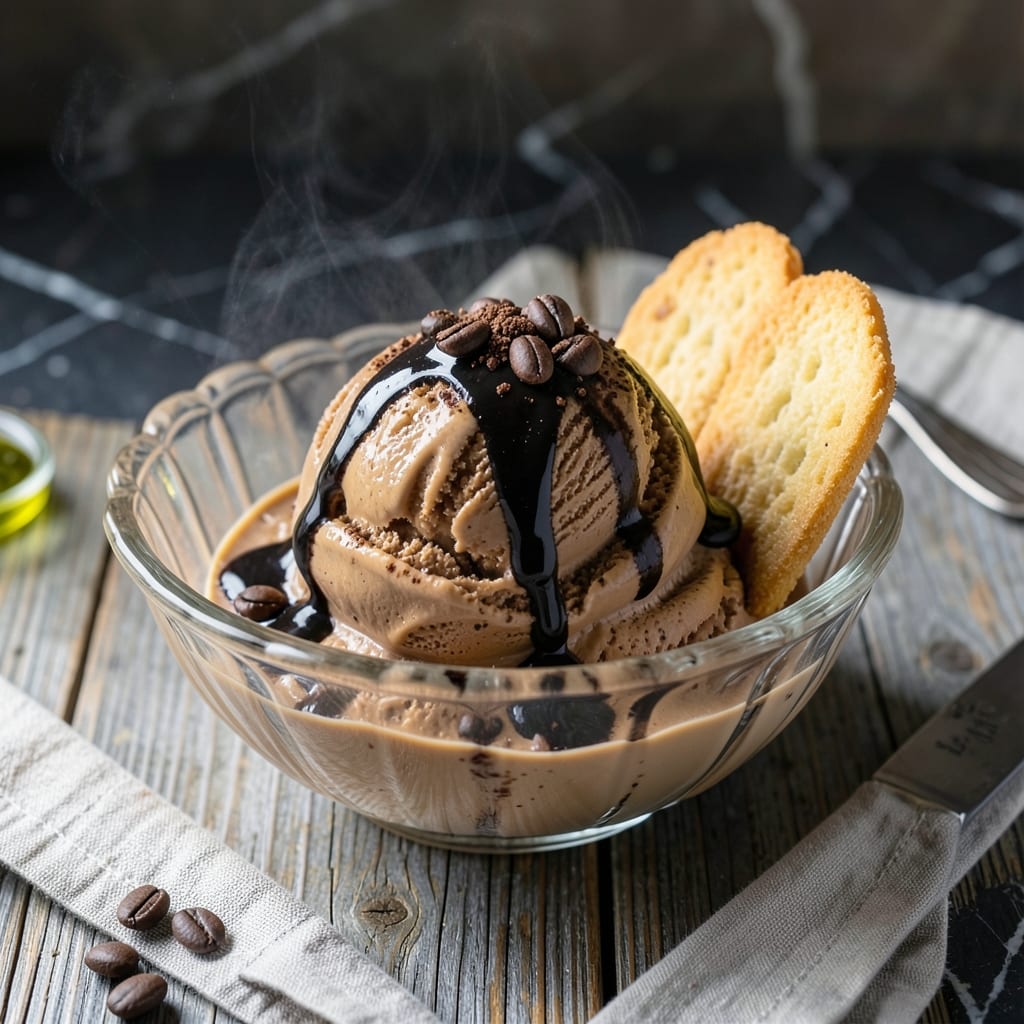
There’s nothing like homemade coffee ice cream with its deep, robust espresso flavor and velvety texture. This recipe transforms your KitchenAid mixer into an ice cream machine, delivering professional results with minimal effort.
The secret lies in using strongly brewed coffee and a touch of vanilla to enhance the rich coffee taste. The custard base ensures a creamy consistency, while the churning process incorporates air for that perfect scoopable texture.
You’ll love how the espresso swirls through each bite, offering bold flavor without overpowering sweetness. The process is straightforward, with clear steps for both the custard and churning stages.
Ideal for coffee lovers, this ice cream is a restaurant-quality dessert that’s surprisingly simple to make at home.
Ingredients for Kitchenaid Coffee Ice Cream
Just a handful of quality ingredients for coffee ice cream that tastes like a café treat.
| Ingredient | Amount | Notes |
|---|---|---|
| Heavy Cream 🥛 | 2 cups | Full-fat for smooth texture |
| Whole Milk 🥛 | 1 cup | Cold, for custard base |
| Granulated Sugar 🍚 | ¾ cup | Dissolved in warm cream |
| Egg Yolks 🥚 | 6 whole | Large eggs, room temperature |
| Strongly Brewed Coffee ☕ | 1 cup | Chilled, espresso preferred |
| Vanilla Extract 🌿 | 2 tsp | Pure vanilla for depth |
| Instant Espresso Powder ☕ | 2 tbsp | Dissolved in hot water |
| Salt 🧂 | ¼ tsp | Fine sea salt preferred |
| Vanilla Bean 🌿 | 1 whole | Split and scraped (optional) |
| Dark Chocolate 🍫 | ½ cup | Chopped, for swirl |
[recipe_ingredient_scaler]
The cream and milk are non-negotiable for that velvety texture—Organic Valley or Whole Foods brands are my go-to. Egg yolks should be the deep orange kind (pasture-raised if possible). For the coffee, use whatever you’d drink—Cold brew concentrate works great if you want extra punch. The espresso powder is key for that deep flavor, so don’t skip it (find it near the coffee at most grocery stores).
No espresso powder? Extra strong brewed coffee reduced by half gets close. In a pinch, instant coffee at double the amount works too. Vanilla bean is fancy but extract is fine—just use the good stuff. For a lighter version, half-and-half instead of cream (but texture won’t be as rich). The chocolate is optional, but 70% cacao gives the best contrast against the coffee.
Custard base keeps 2 days in the fridge before churning. Once churned, freeze in an airtight container for up to 2 weeks. Let it sit at room temperature 10 minutes before scooping for that perfect scoopable consistency.
Why You’ll Love This Recipe
- Hands-Off Churning: I just let my KitchenAid do the work while I sip the leftover coffee.
- Deep Coffee Kick: The strongly brewed coffee gives it that bold, rich flavor without any bitterness.
- Make Ahead Magic: Honestly, it’s even better after a night in the freezer—perfect for unexpected guests.
- No Waste Win: I use up egg yolks and that last cup of morning coffee in one delicious batch.
Step-by-Step Instructions for Kitchenaid Coffee Ice Cream
Follow this proven custard method for ultra-creamy results with bold coffee flavor in every bite.
Step 1: Infuse Cream and Prepare Coffee Base
In a medium saucepan, combine the 2 cups Heavy Cream and 0.75 cup Granulated Sugar. Heat over medium heat, stirring occasionally, until the sugar fully dissolves and the mixture just begins to steam—don’t let it boil. If using the 1 whole Vanilla Bean, split and scrape the seeds into the cream now.
While the cream heats, dissolve the 2 tbsp Instant Espresso Powder in 2 tablespoons of hot water to create a concentrated espresso paste. Stir this into the 1 cup Strongly Brewed Coffee and set aside. This ensures maximum coffee intensity that won’t dilute your custard base.
Step 2: Temper Egg Yolks for Silky Custard
In a separate bowl, whisk the 6 whole Egg Yolks until smooth and slightly pale. Slowly ladle about 1 cup of the warm cream mixture into the yolks while whisking constantly—this tempering prevents scrambled eggs. Pour the tempered yolks back into the saucepan with the remaining cream.
Return the mixture to low heat and cook, stirring constantly with a silicone spatula, until it thickens enough to coat the back of a spoon. This should take 5-7 minutes. Remove from heat immediately when you see the first hint of steam rising—overcooking will curdle the custard.
Step 3: Chill and Flavor the Base
Strain the custard through a fine-mesh sieve into a clean bowl to remove any cooked bits. Stir in the 1 cup Strongly Brewed Coffee mixture, 2 tsp Vanilla Extract, 1 cup Whole Milk, and 0.25 tsp Salt. Press plastic wrap directly onto the surface to prevent a skin from forming.
Refrigerate for at least 4 hours or overnight until completely chilled (40°F or below). This chilling step is non-negotiable—it ensures a smooth texture and prevents ice crystals from forming during churning. I always make the base the night before for convenience.
Step 4: Churn and Add Chocolate Swirl
Pour the chilled base into your Kitchenaid ice cream maker and churn according to the manufacturer’s instructions, typically 20-25 minutes. The mixture should resemble soft-serve when finished. While it churns, melt the 0.5 cup Dark Chocolate in a double boiler or microwave in 20-second bursts, stirring between each, until smooth.
During the last 2 minutes of churning, drizzle in the melted chocolate in a slow, steady stream. This creates those beautiful ribbons throughout the ice cream. The chocolate will firm up slightly as it hits the cold custard, creating perfect swirls without hardening into chunks.
Step 5: Freeze to Perfect Scoopable Texture
Transfer the ice cream to a lidded container, pressing parchment paper directly against the surface to minimize ice crystals. Freeze for at least 4 hours or until firm enough to scoop. For best texture, let it sit at room temperature for 5-10 minutes before serving.
The final ice cream should have a rich, velvety texture with distinct coffee flavor and chocolate ribbons throughout. Each scoop delivers that intense espresso taste balanced by the sweet cream base, with pockets of dark chocolate adding depth. Serve in chilled bowls for the ultimate experience.
Pro Tips For Making Kitchenaid Coffee Ice Cream
- Chill the Base: After mixing your custard, refrigerate it for at least 4 hours—overnight if you can. I learned this the hard way when my first batch came out soupy instead of creamy.
- Use Fresh Coffee: Brew your coffee extra strong and use it immediately—stale or weak coffee will leave your ice cream tasting dull. About 1 ½ cups of freshly brewed, cooled coffee does the trick.
- Temper the Eggs: Slowly pour the hot milk mixture into your egg yolks while whisking constantly, or you’ll end up with scrambled eggs in your custard. Sounds tedious, but it works.
- Pre-Freeze the Bowl: Pop your KitchenAid mixer bowl in the freezer for 15-20 minutes before churning. This helps the ice cream set faster and keeps it from melting into a sad, runny mess.
Best Sauces and Condiments for This Recipe
Hot Fudge Drizzle
Warm ½ cup of your favorite fudge sauce and drizzle over scoops. The rich chocolate complements the coffee perfectly. I love Hershey’s or Ghirardelli brands for their deep cocoa flavor. 🔥
Caramel Sauce Swirl
A salty caramel sauce adds a sweet contrast. Heat ¼ cup caramel with a pinch of sea salt for 20 seconds in the microwave. Drizzle generously over each serving.
Whipped Cream Topping
Fresh whipped cream lightens the rich ice cream. Whip 1 cup Heavy Cream with 2 tbsp sugar until soft peaks form. Dollop on top for a creamy finish.
Crushed Coffee Beans
Toast 2 tbsp coffee beans in a dry pan for 2-3 minutes, then coarsely crush. Sprinkle over the ice cream for added crunch and a boost of espresso aroma.
Chocolate Shavings
Use a vegetable peeler on a dark chocolate bar to create delicate curls. Scatter over the top for an elegant presentation and extra chocolate flavor. ✨
Espresso Syrup
Mix 2 tbsp espresso powder with ¼ cup hot water and 2 tbsp sugar. Cool and drizzle lightly for an intense coffee kick without overpowering the dessert.
Nutrition Facts
Frequently Asked Questions
Can I use instant coffee instead of espresso powder?
Yes, but use double the amount for equivalent flavor. Dissolve it in hot water first to maximize the coffee taste.
Why do I need to chill the custard overnight?
Chilling prevents ice crystals and ensures a smooth texture. It also deepens the coffee flavor as it rests.
Can I add mix-ins besides chocolate?
Try crushed biscotti, caramel swirls, or toasted nuts. Add them during the last 2 minutes of churning.
What if my custard curdles?
Strain it immediately through a sieve to remove lumps. Next time, temper the eggs more slowly and keep heat low.

Trained in classic French technique but raised on slow-cooked ribs and spicy rubs, she blends culinary skill with smoke and soul.
- Recipe for Boneless Pork Chops in Cast Iron Skillet: Sear and Baste to Juicy Perfection - October 3, 2026
- Recipe for Boneless Cross Rib Roast: Slow-Roasted Beef with Herb Crust - October 3, 2026
- Hamburgers in Sauce Recipe Crock Pot: Slow-Cooked Savory Delight - October 3, 2026