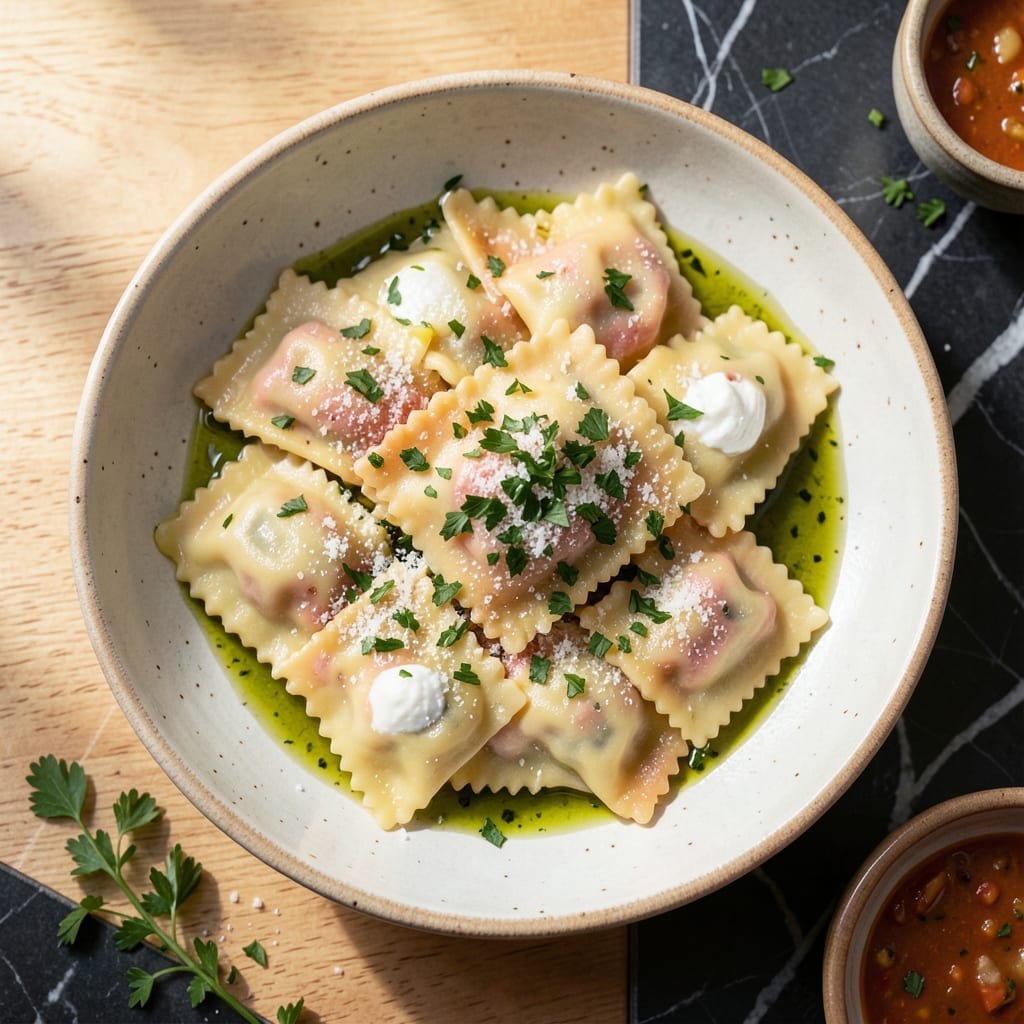
Homemade ravioli is a game-changer, and your KitchenAid makes it surprisingly simple. The pasta dough comes together effortlessly with the mixer’s dough hook, creating a smooth, elastic base ready for rolling.
Filling these pockets with herb-infused ricotta adds fresh, creamy richness that pairs perfectly with the delicate pasta. The herb blend can be adjusted to your taste, making each batch uniquely yours.
Once assembled, these homemade ravioli cook in just 2-3 minutes, floating to the surface when ready. The result is tender pasta encapsulating a burst of herbed ricotta with every bite.
Serve with your favorite sauce or a simple drizzle of olive oil and fresh herbs. This method delivers restaurant-quality results with minimal effort.
Ingredients for Kitchenaid Pasta Recipe Ravioli
Simple ingredients transform into restaurant-quality pasta with your KitchenAid doing most of the work.
| Ingredient | Amount | Notes |
|---|---|---|
| All-Purpose Flour 🌾 | 2 ½ cups | Plus extra for dusting surfaces |
| Large Eggs 🥚 | 3 whole | Room temperature preferred |
| Olive Oil 🫒 | 1 tbsp | Extra-virgin for richness |
| Salt 🧂 | ½ tsp | Fine sea salt preferred |
| Whole Milk Ricotta Cheese 🧀 | 1 cup | Well-drained for filling |
| Parmesan Cheese 🧀 | ½ cup | Freshly grated from wedge |
| Fresh Basil Leaves 🌿 | ¼ cup | Finely chopped for filling |
| Fresh Parsley Leaves 🌿 | ¼ cup | Finely chopped for filling |
| Garlic Cloves 🧄 | 2 cloves | Minced for herb blend |
| Lemon Zest 🍋 | 1 tsp | From one medium lemon |
| Black Pepper 🌶️ | ¼ tsp | Freshly ground preferred |
| Nutmeg 🌰 | 0.125 tsp | Freshly grated preferred |
| Water 💧 | 1 tbsp | As needed for dough consistency |
[recipe_ingredient_scaler]
The flour is the foundation—King Arthur or Bob’s Red Mill for consistent results. Ricotta is key here: whole milk gives the creamy texture you want (low-fat gets watery). For the Parmesan, Parmigiano-Reggiano from the deli counter is worth the extra dollar or two. Fresh herbs make a difference, so grab them from the produce section rather than the dried rack.
No KitchenAid? A stand mixer with dough hook works too, or go old-school with a rolling pin. Can’t find whole milk ricotta? Full-fat cottage cheese blended smooth gets close. Swap basil for thyme or chives if that’s what’s fresh. The lemon zest isn’t optional—brightens the whole filling. For the Parmesan, pre-grated works in a pinch (but loses some texture).
Dough rests best covered at room temp for 30 minutes before rolling. Filling keeps 2 days in the fridge, but assemble ravioli just before cooking. Cooked ravioli can be frozen on a tray first, then stored in bags for up to 3 months (trust me on this one).
Why You’ll Love This Recipe
- KitchenAid Magic: The stand mixer does all the kneading—just dump in the flour, eggs, and a pinch of salt, and let it work while I prep the ricotta filling.
- Creamy Dream Filling: That whole milk ricotta with a hint of olive oil is so rich and smooth, it turns simple pasta dough into something restaurant-worthy.
- Freezer-Friendly Feast: I make a double batch on Sunday, freeze half, and pull it straight from the freezer to boiling water on busy nights. Yes, even on a Tuesday night.
- Budget Luxury: All-purpose flour and eggs cost pennies, yet this tastes like a fancy Italian dinner. Honestly, it’s my secret weapon for impressing guests without the price tag.
Step-by-Step Instructions for Homemade Ravioli
Here’s the method I use to create perfect herb-filled pasta pockets with my stand mixer.
Step 1: Craft the Pasta Dough in Your Stand Mixer
Attach the dough hook to your KitchenAid mixer. In the mixing bowl, combine the 2.5 cups All-Purpose Flour and 0.5 tsp Salt. With the mixer running on low speed, add the 3 whole Large Eggs one at a time, followed by the 1 tbsp Olive Oil.
Increase the speed to medium and knead for 8-10 minutes until the dough forms a smooth, elastic ball. If the dough feels too dry, add the 1 tbsp Water gradually. The dough should be slightly tacky but not sticky. This extended kneading develops the gluten properly for that perfect al dente texture.
Step 2: Prepare the Herb-Infused Ricotta Filling
In a mixing bowl, combine the 1 cup Whole Milk Ricotta Cheese, 0.5 cup Parmesan Cheese, 0.25 cup Fresh Basil Leaves, and 0.25 cup Fresh Parsley Leaves. Add the 2 cloves Garlic Cloves (minced), 1 tsp Lemon Zest, 0.25 tsp Black Pepper, and 0.125 tsp Nutmeg.
Mix thoroughly until all ingredients are evenly incorporated. The filling should be thick but spreadable. I always taste at this point and adjust the seasoning if needed—remember, the ricotta will mellow slightly when cooked. Cover and refrigerate while you roll out the pasta.
Step 3: Roll and Shape the Pasta Sheets
Divide the pasta dough into quarters. On a lightly floured surface, flatten one piece into a rough rectangle about ¼-inch thick. Set your KitchenAid pasta roller to the widest setting and feed the dough through, folding it in half between passes for the first few times.
Gradually decrease the thickness setting, passing the dough through each level once until you reach the second-to-thinnest setting. You should have a long, thin sheet that’s nearly translucent. Repeat with the remaining dough, keeping finished sheets covered with a damp towel to prevent drying.
Step 4: Assemble and Seal the Ravioli
Lay one pasta sheet on a floured surface. Place 1-teaspoon portions of the ricotta filling about 2 inches apart in a grid pattern. Be careful not to overfill—this is the most common mistake that leads to bursting during cooking.
Brush the area around each filling mound with water, then lay a second pasta sheet on top. Press down gently around each mound to seal, being careful to remove any air pockets. Use a ravioli cutter or sharp knife to cut into individual squares. Press the edges firmly to ensure a good seal.
Step 5: Cook and Serve Your Homemade Ravioli
Bring a large pot of salted water to a rolling boil. Add the ravioli in batches, being careful not to overcrowd the pot. Cook for 2-3 minutes after they float to the surface—they should be tender but still have a slight bite.
Remove with a slotted spoon and serve immediately. The pasta should have a delicate, slightly chewy texture, and the filling should be creamy with a bright, herby flavor. I like to toss mine with a little brown butter and sage for serving, but they’re delicious with just a simple tomato sauce too.
Pro Tips For Making Kitchenaid Pasta Recipe Ravioli
- Knead Just Enough: Once the dough comes together in the Kitchenaid, stop the mixer—overworking it makes the pasta tough. I learned this the hard way after my first batch came out like chewy cardboard.
- Drain the Ricotta: Spread the whole milk ricotta on a paper towel for 10 minutes before filling to remove excess moisture. Sounds tedious, but it prevents soggy ravioli every time.
- Avoid Thick Edges: Roll the pasta sheets to the thinnest setting your Kitchenaid allows, especially at the edges where dough tends to bunch. This guarantees even cooking and no doughy bites.
- Chill Before Cutting: Pop the filled ravioli in the fridge for 15 minutes before boiling to firm them up. My grandmother swore by this, and she was right—it keeps them from bursting open in the pot.
Health Benefits of This Recipe
Rich Protein Source
This dish delivers 18-20 grams of protein per serving from the ricotta and Parmesan, supporting muscle repair and satiety. The whole milk ricotta adds healthy fats that help your body absorb fat-soluble vitamins from the fresh herbs. I find this keeps me full for hours after eating. 💪
B Vitamin Boost
The eggs in the pasta dough provide a significant dose of B vitamins, particularly B12 and riboflavin, which are essential for energy metabolism. You’ll also get a healthy amount of choline, which supports brain health and function.
Calcium Powerhouse
Between the ricotta and Parmesan, you’re looking at about 30% of your daily calcium needs per serving. This mineral is crucial for bone health and also plays a role in muscle contraction and nerve function. The combination of dairy sources maximizes calcium absorption.
Antioxidant Herbs
Fresh basil and parsley bring more than flavor—they’re packed with antioxidants like vitamin C and flavonoids. These compounds help combat oxidative stress in your body. The garlic adds allicin, known for its immune-supporting properties.
Low Glycemic Impact
While pasta often gets a bad rap, homemade versions like this have a lower glycemic index than store-bought. The whole eggs and olive oil in the dough slow digestion, providing more stable blood sugar levels. Plus, the protein and fat from the filling help balance the meal. 🌟
Heart-Healthy Fats
The extra-virgin olive oil and dairy fats in this recipe contain monounsaturated and saturated fats that support heart health when consumed as part of a balanced diet. These fats also help your body absorb the fat-soluble vitamins A, D, E, and K from the other ingredients.
Nutrition Facts
Frequently Asked Questions
Can I make the dough without a stand mixer?
Yes! Knead by hand on a floured surface for 10-12 minutes until smooth. The texture should match mixer-made dough. Let it rest 30 minutes before rolling.
How thin should the pasta sheets be?
Roll to the second-to-thinnest setting on your machine, about 1-2mm thick. The sheets should be nearly translucent but not tear when handled.
Why do my ravioli burst while cooking?
Overfilling or trapped air pockets are the usual culprits. Use 1 teaspoon filling per piece and press edges firmly to seal. Cook in batches to avoid crowding.
Can I freeze homemade ravioli?
Freeze uncooked ravioli on a tray first, then transfer to bags. They’ll keep for 3 months. Cook from frozen—add 1 extra minute to cooking time.

Trained in classic French technique but raised on slow-cooked ribs and spicy rubs, she blends culinary skill with smoke and soul.
- Recipe for Boneless Pork Chops in Cast Iron Skillet: Sear and Baste to Juicy Perfection - October 3, 2026
- Recipe for Boneless Cross Rib Roast: Slow-Roasted Beef with Herb Crust - October 3, 2026
- Hamburgers in Sauce Recipe Crock Pot: Slow-Cooked Savory Delight - October 3, 2026