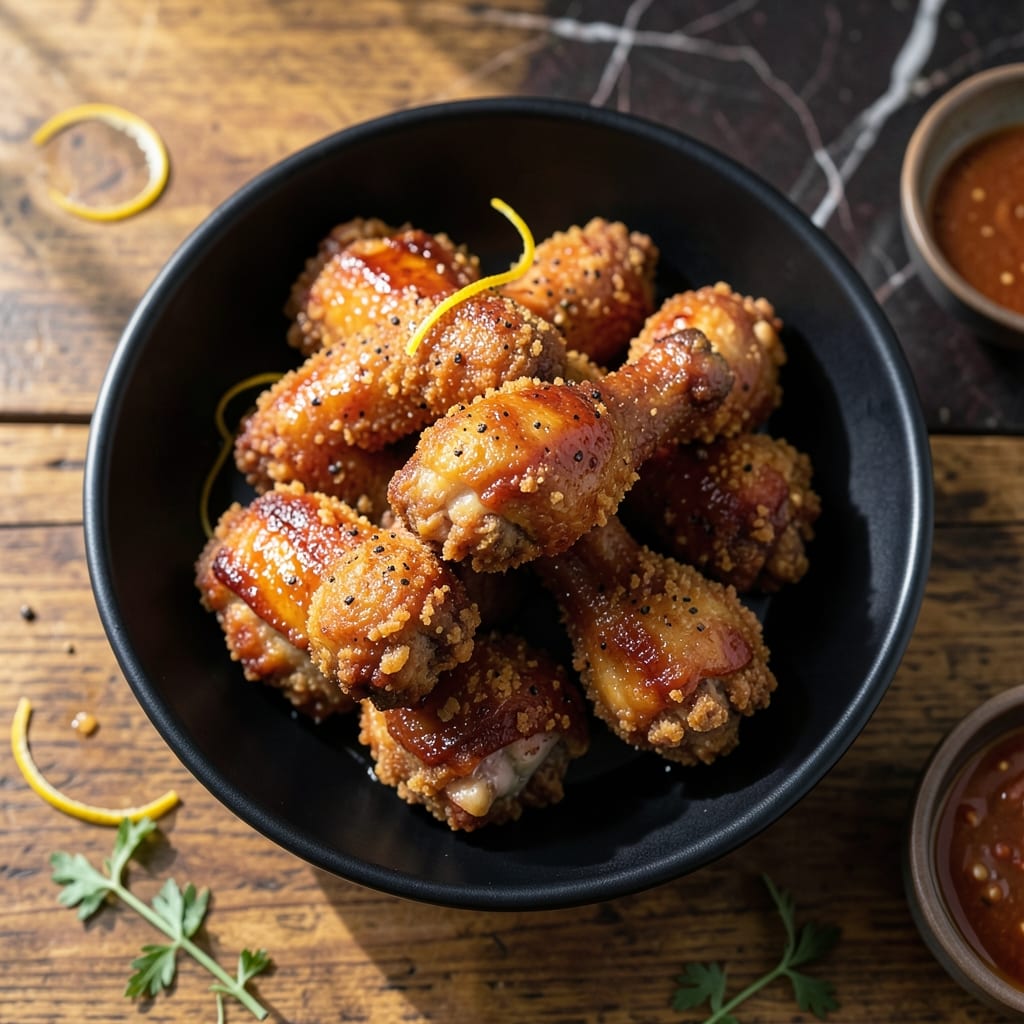
This Korean fried chicken achieves shatteringly crispy perfection through a double-fry technique and potato starch coating. The starch creates an ultra-crunchy exterior that stays crispy long after frying, while the double-fry method ensures thorough cooking without sacrificing texture.
Potato starch is the secret weapon for that signature Korean fried chicken crunch. Unlike regular flour, it creates a lighter, crispier coating that doesn’t absorb as much oil. The first fry cooks the chicken through, while the second fry at a higher temperature delivers that restaurant-quality crispness.
Each piece emerges golden and crispy with a delicate interior. The potato starch forms a shell so sturdy it holds up to sauces, whether you prefer sweet-spicy gochujang glaze or classic soy-garlic.
Serve immediately for maximum crunch, with extra sauce on the side. This method guarantees the crispy texture that defines authentic Korean fried chicken.
Ingredients for Korean Fried Chicken Recipe Potato Starch
Double-fry method with potato starch creates that signature shatteringly crispy texture. These ingredients deliver it perfectly.
| Ingredient | Amount | Notes |
|---|---|---|
| Chicken Thighs 🍗 | 2 lb | Boneless, skin-on, cut into bite-sized pieces |
| Potato Starch 🥔 | 1 cup | For ultra-crispy coating |
| All-Purpose Flour 🌾 | ¼ cup | Helps starch adhere to chicken |
| Baking Powder 🧂 | 1 tsp | Enhances crispiness |
| Kosher Salt 🧂 | 1 tsp | Diamond Crystal preferred |
| Ground Black Pepper 🌶️ | ½ tsp | Freshly ground preferred |
| Garlic Powder 🧄 | 1 tsp | Adds savory depth |
| Vegetable Oil 🫒 | 4 cups | High smoke point for frying |
| Gochujang Sauce 🌶️ | ½ cup | For sweet-spicy glaze |
| Soy Sauce 🥫 | ¼ cup | Low-sodium preferred |
| Honey 🍯 | ¼ cup | Balances heat in sauce |
| Rice Vinegar 🍚 | 1 tbsp | Adds tang to glaze |
| Minced Garlic 🧄 | 3 cloves | Freshly minced for sauce |
| Sesame Seeds 🌰 | 1 tbsp | For garnish |
| Green Onions 🧅 | 4 whole | Thinly sliced for garnish |
[recipe_ingredient_scaler]
The potato starch is non-negotiable for authentic texture—Bob’s Red Mill or Asian markets carry it. Chicken thighs (skin-on, bone-in for flavor) work best; Costco or Whole Foods have good options. Baking powder in the coating creates micro-bubbles for extra crunch. Use a high-smoke-point oil like peanut or vegetable—avoid olive oil for frying. The gochujang should be Korean-made for proper heat and sweetness balance.
No potato starch? Cornstarch works in a pinch (texture won’t be identical). Swap chicken thighs for breasts if preferred, but they dry out faster. Sriracha plus honey at 1:1 ratio approximates gochujang. Soy sauce can be tamari for gluten-free. Rice vinegar is key—apple cider vinegar at half the amount works but alters flavor slightly. Fresh garlic is mandatory; jarred lacks the punch.
Fry in batches to avoid crowding—temperature drops cause soggy chicken. Sauces can be made 2 days ahead and reheated gently. Leftovers keep 3-4 days but lose crispiness—re-crisp in a 400°F oven for 10 minutes. Never store dressed chicken; keep sauce separate until serving.
Why You’ll Love This Recipe
- One Bowl Wonder: I mix everything in a single bowl—potato starch, flour, baking powder—and the chicken practically fries itself.
- Crispy Magic: That potato starch coating gives it an insane crunch that stays put, even when I drown it in sauce.
- Feeds a Hungry Crowd: I’ve served this at game nights and weeknight dinners alike—everyone’s always reaching for seconds.
- Budget-Friendly Win: Chicken thighs stay cheap, and a bag of potato starch lasts me through multiple batches.
Step-by-Step Instructions for Korean Fried Chicken
Master the double-fry technique for shatteringly crisp chicken with an irresistible sweet-spicy glaze.
Step 1: Coat the Chicken in the Starch Mixture
Pat the 2 lb Chicken Thighs completely dry with paper towels—moisture prevents crispiness. In a large bowl, whisk together the 1 cup Potato Starch, 0.25 cup All-Purpose Flour, 1 tsp Baking Powder, 1 tsp Kosher Salt, 0.5 tsp Ground Black Pepper, and 1 tsp Garlic Powder until fully combined.
Add the chicken pieces to the starch mixture and toss thoroughly with your hands, pressing gently to ensure each piece is evenly coated. The mixture should cling to the chicken in a thin, even layer. Let the coated chicken rest for 10 minutes—this allows the starch to adhere better during frying.
Step 2: First Fry for Even Cooking
Heat the 4 cups Vegetable Oil in a deep, heavy pot or Dutch oven over medium-high heat until it reaches 325°F. Use a deep-fry or candy thermometer for accuracy—oil temperature is critical for proper cooking. Carefully lower half the chicken pieces into the oil, ensuring they’re not crowded.
Fry for 6-8 minutes, turning occasionally, until the chicken is pale golden and cooked through (internal temperature should reach 165°F). The pieces will not yet be crispy—this first fry ensures the chicken is fully cooked before the final crisping step. Transfer the fried chicken to a wire rack set over a baking sheet to drain.
Step 3: Second Fry for Maximum Crispiness
Increase the oil temperature to 375°F. Once the oil is at temperature, return the first batch of chicken to the pot and fry for an additional 3-4 minutes until deep golden brown and ultra-crispy. The coating should be so crisp that it audibly cracks when you bite into it.
Repeat the process with the remaining chicken. Work in batches to avoid overcrowding the pot, which would lower the oil temperature and result in soggy chicken. Transfer the crispy chicken to the wire rack again to drain any excess oil.
Step 4: Toss in the Gochujang Glaze
In a large bowl, whisk together the 0.5 cup Gochujang Sauce, 0.25 cup Soy Sauce, 0.25 cup Honey, 1 tbsp Rice Vinegar, and 3 cloves Minced Garlic until smooth. The glaze should be thick but pourable. If it’s too stiff, warm it slightly in the microwave for 10-15 seconds.
Add the hot, crispy chicken to the bowl and toss gently until each piece is evenly coated with the glaze. The heat from the chicken will help the sauce cling beautifully. Garnish with 1 tbsp Sesame Seeds and thinly sliced 4 whole Green Onions just before serving. Serve immediately for the best texture.
Pro Tips For Making Korean Fried Chicken Recipe Potato Starch
- Double Fry for Crisp: Fry the chicken once at 325°F for 6-7 minutes, rest it, then fry again at 375°F for 2-3 minutes. I learned this the hard way—single frying leaves the crust soggy under the sauce.
- Dry the Thighs: Pat the chicken thighs bone-dry with paper towels before dredging. After burning three batches, I finally figured out that moisture ruins the potato starch coating.
- Skip the Crowding: Fry in small batches so the oil temperature doesn’t drop. Sounds weird, but it works—crowding gives you greasy, steamed chicken instead of crispy.
- Use Cold Chicken: Chill the dredged chicken for 10 minutes before frying to help the coating adhere. My grandmother swore by this, and she was right—it prevents patchy, bare spots in the crust.
Storing and Reheating Leftovers
Fridge Storage
Let the chicken cool completely, then store in a single layer in an airtight container. It keeps for 3-4 days in the fridge. I line my containers with paper towels to absorb excess moisture and prevent sogginess. ❄️
Freezer Method
For longer storage, freeze uncoated, fried chicken on a tray first, then transfer to a freezer bag. It stays fresh for up to 3 months. Never freeze dressed chicken—sauce makes it mushy upon thawing.
Oven Reheating
Preheat to 400°F and spread chicken on a wire rack over a baking sheet. Heat for 10-15 minutes until crispy and reaching 165°F internally. This method restores crunch better than any other. 🔥
Air Fryer Revival
Place chicken in a single layer in your air fryer at 375°F for 5-7 minutes. Shake halfway. My Ninja Foodi works wonders for this. The circulating air crisps it beautifully without drying it out.
Sauce Storage
Keep any leftover glaze in a separate glass jar in the fridge for up to 1 week. Reheat gently in the microwave for 20-30 seconds before tossing with fresh or reheated chicken.
Nutrition Facts
Frequently Asked Questions
Why use potato starch instead of flour?
Potato starch creates a lighter, crispier coating that absorbs less oil. It forms micro-bubbles during frying for extra crunch. Cornstarch works in a pinch but won’t be identical.
Can I bake instead of frying?
Baking won’t achieve the same crispiness. For best results, use a deep fryer or heavy pot with 375°F oil. The double-fry method is key for authentic texture.
How do I keep it crispy after frying?
Drain on a wire rack, not paper towels, to prevent steam. Serve immediately for maximum crunch. Store sauce separately until ready to eat.
What if my sauce is too thick?
Warm it in the microwave for 10-15 seconds to loosen. Thin with a splash of water if needed. The heat from fresh chicken also helps the sauce cling better.

Trained in classic French technique but raised on slow-cooked ribs and spicy rubs, she blends culinary skill with smoke and soul.
- Recipe for Boneless Pork Chops in Cast Iron Skillet: Sear and Baste to Juicy Perfection - October 3, 2026
- Recipe for Boneless Cross Rib Roast: Slow-Roasted Beef with Herb Crust - October 3, 2026
- Hamburgers in Sauce Recipe Crock Pot: Slow-Cooked Savory Delight - October 3, 2026