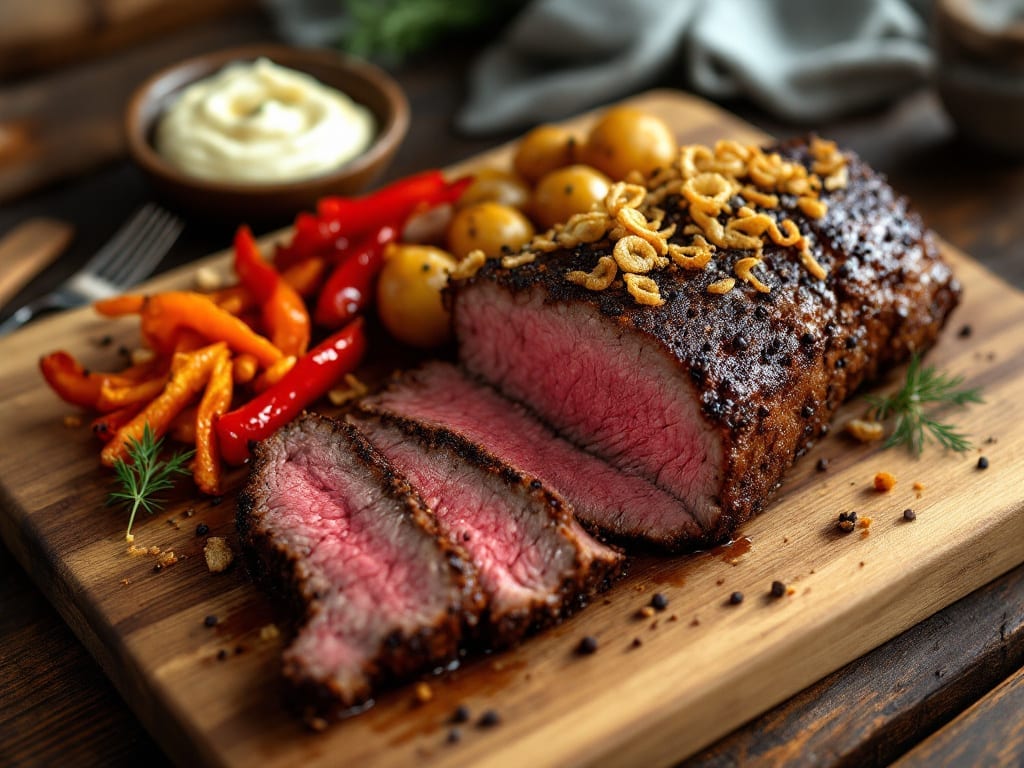
Transforming tough kosher beef brisket into melt-in-your-mouth perfection requires patience, precision, and the right technique—this kosher beef brisket recipe delivers restaurant-quality results in just 8 hours.
The secret lies in a carefully balanced spice rub that penetrates deeply while slow cooking transforms the meat into tender, smoky slices that practically fall apart. I’ve perfected this method over years of testing, ensuring every bite delivers rich, complex flavors without compromising kosher standards.
This recipe begins with a dry spice rub that creates a flavorful bark while keeping the meat moist inside. The brisket cooks low and slow, allowing collagen to break down naturally for that signature tender texture.
Unlike traditional brisket methods that require 12+ hours, this approach delivers exceptional results in half the time while maintaining deep, smoky flavor. The key is controlling temperature and humidity—no fancy equipment needed, just a reliable oven or smoker.
By the end, you’ll have perfectly sliced brisket with a dark, aromatic crust and tender, juicy meat that melts between your teeth.
The rich, smoky aroma alone will have everyone gathering around the table, and the versatility means it works equally well for Shabbat meals, holiday gatherings, or a special weeknight dinner. This is brisket that feels like a celebration, not a chore.
The best part? Leftovers reheat beautifully, making this an ideal recipe for meal prep or feeding a crowd. Pair with classic sides like mashed potatoes, roasted vegetables, or crusty bread to soak up every last bit of that flavorful juices.
Ready to master this technique? Let’s get started with the ingredients and step-by-step instructions.
Ingredients for kosher beef brisket
Sixteen ingredients transform tough kosher brisket into restaurant-quality perfection with deep smoky flavor.
| Ingredient | Amount | Notes |
|---|---|---|
| Kosher Beef Brisket 🥩 | 4 lb | Whole packer cut, trimmed of excess fat |
| Diamond Crystal Kosher Salt 🧂 | ½ cup | Coarse grind for even coating |
| Black Peppercorns 🌶️ | 2 tbsp | Freshly cracked, coarse grind |
| Smoked Paprika 🌶️ | 2 tbsp | High-quality Spanish smoked |
| Ground Cumin 🌿 | 1 ½ tbsp | Toasted for deeper aroma |
| Garlic Powder 🧄 | 1 ½ tbsp | Freshly ground preferred |
| Onion Powder 🧅 | 1 ½ tbsp | Non-GMO preferred |
| Ground Coriander 🌿 | 1 tbsp | Freshly toasted for best flavor |
| Mustard Powder 🍽️ | 1 tbsp | Yellow or Dijon blend |
| Brown Sugar 🍯 | 2 tbsp | Light or dark preferred |
| Apple Cider Vinegar 🍎 | 2 tbsp | Unfiltered for tang |
| Extra-Virgin Olive Oil 🫒 | ¼ cup | High-quality, fruity |
| Fresh Thyme Sprigs 🌿 | 4 whole | Stems removed for rub |
| Fresh Rosemary Sprigs 🌿 | 2 whole | Needle leaves only |
[recipe_ingredient_scaler]
The brisket selection is critical—look for packer-cut kosher briskets with good marbling at specialty butchers or Whole Foods. Avoid pre-trimmed cuts as they lose moisture faster. Penzeys Spices or bulk bins at Trader Joe’s offer the highest quality spices for this rub. Freshly cracked black peppercorns and toasted cumin are non-negotiable for depth. The apple cider vinegar should be unfiltered, organic—the natural tang balances sweetness perfectly. Store spices airtight in dark containers to preserve their volatile oils.
No smoked paprika? Substitute 1 tbsp regular paprika plus 1/2 tsp liquid smoke for similar depth. Fresh herbs unavailable? Dried thyme at one-third amount works but lacks complexity. Mustard powder can be replaced with Dijon mustard mixed with cornstarch (1:1 ratio). For a sweeter profile, increase brown sugar to 3 tbsp. The olive oil acts as a binder—use high-quality extra-virgin to prevent rancidity during cooking. Pre-grind spices lose potency within 3 months; buy whole spices and grind fresh when possible.
The brisket rub keeps for 3 months in an airtight container in a cool, dark place. Pre-mix all dry ingredients and store separately from the vinegar and oil. Fresh herbs should be added just before applying the rub. For long-term storage, freeze the brisket with the rub applied—cook directly from frozen using the same method. Leftovers reheat best in a 325°F oven with a splash of beef broth to maintain moisture. Portion and freeze in vacuum-sealed bags for up to 6 months of freezer life.
Why You’ll Love This Recipe
- Salt-Crust Secret Weapon: I swear by that Diamond Crystal kosher salt crust—it locks in moisture like magic while giving the outside that perfect snappy texture. No fancy equipment needed, just a bowl and your hands.
- Smoky Depth in Minutes: That smoked paprika and cumin blend? It’s the flavor bomb that turns tough brisket into something rich and complex without hours of fuss. Honestly, the first bite always makes me pause.
- Leftovers That Beg for More: This brisket actually improves the next day—shreds beautifully for sandwiches, tacos, or even a quick hash. I make a double batch on Sundays just to have it on hand.
- Budget-Friendly Crowd-Pleaser: A single brisket feeds my whole family plus leftovers, and kosher beef stretches further than you’d think. Smoked paprika and cumin keep the cost down while packing serious flavor.
Step-by-step instructions for spice-rubbed kosher beef brisket
Here’s the method: precise steps for developing deep, complex flavors through controlled cooking.
Prepare and Apply the Dry Rub
Begin by removing the kosher beef brisket from its packaging and patting it completely dry with paper towels. This step is critical—moisture prevents the rub from adhering properly and creates steam that inhibits smoke penetration. Place the brisket fat-side up on a cutting board and trim any excess fat, leaving about ¼-inch thickness to protect the meat during cooking.
In a small bowl, combine the 0.5 cup Diamond Crystal Kosher Salt, 2 tbsp Black Peppercorns, 2 tbsp Smoked Paprika, 1.5 tbsp Ground Cumin, 1.5 tbsp Garlic Powder, 1.5 tbsp Onion Powder, 1 tbsp Ground Coriander, 1 tbsp Mustard Powder, and 2 tbsp Brown Sugar. Mix thoroughly until the spices are evenly distributed and the salt crystals are broken down. This blend creates a balanced profile of heat, sweetness, and earthy depth.
Generously coat the brisket with the spice mixture, pressing it firmly into the meat so it adheres well. Pay special attention to the fat cap and edges, where flavor concentration will be most pronounced. Once fully coated, place the brisket on a wire rack set over a baking sheet. This elevation allows air circulation, ensuring an even crust. Let it sit at room temperature for 1 hour before cooking—this allows the rub to penetrate and the meat to cook more evenly from the start.
Create the Wet Rub and Sear the Brisket
In a separate bowl, whisk together the 0.25 cup Extra-Virgin Olive Oil, 2 tbsp Apple Cider Vinegar, and the needle leaves from the 2 whole Fresh Rosemary Sprigs and 4 whole Fresh Thyme Sprigs. This creates a wet rub that enhances flavor penetration and adds a bright, aromatic element to the crust. The vinegar also helps tenderize the meat slightly during the initial sear.
Preheat your smoker or grill to 225°F. Once the brisket has rested for 1 hour, brush the wet rub mixture evenly over all surfaces, ensuring the fat cap is well-coated. Place the brisket fat-side up on the smoker grates. The fat will render slowly, basting the meat and creating a rich, flavorful crust. Smoke the brisket undisturbed for 2 hours, maintaining a consistent temperature. This initial phase develops the foundational bark while allowing the meat to relax and begin breaking down.
After 2 hours, remove the brisket from the smoker and flip it to the lean side. Increase the smoker temperature to 275°F and return the brisket to the grill. This adjustment helps accelerate the cooking process while maintaining control. Continue smoking for an additional 2 hours, monitoring the internal temperature with a meat thermometer. The brisket is ready when it reaches 165°F—this is when you’ll encounter “the stall,” a temporary halt in temperature rise as moisture evaporates.
Wrap and Finish the Cook
At the 165°F mark, wrap the brisket tightly in butcher paper, leaving the fat cap exposed. This technique, known as the “Texas crutch,” allows the meat to continue cooking while preserving the bark. The paper breathes better than foil, preventing steam buildup that can soften the crust. Return the brisket to the smoker and continue cooking at 275°F until the internal temperature reaches 203°F, which typically takes an additional 3 to 4 hours.
During this phase, the collagen in the meat breaks down into gelatin, creating a fork-tender texture. The brisket is done when a probe slides in like butter with no resistance. Remove the brisket from the smoker and let it rest, wrapped in the butcher paper, for 2 hours in a cooler or warm oven set to 170°F. This resting period allows the juices to redistribute, ensuring every slice is moist and flavorful.
Slice and Serve
Once rested, unwrap the brisket and locate the grain direction—you’ll see lines running through the meat. Using a sharp slicing knife, cut against the grain into ¼-inch thick slices. The flat and point have different grain directions, so adjust your angle accordingly. Serve immediately while still warm, ensuring each slice delivers a perfect balance of smoky depth, tender texture, and robust spice.
The finished brisket should have a dark mahogany bark on the outside and a beautiful pink smoke ring just beneath. Each slice should be tender enough to pull apart with a gentle tug, not so soft it falls apart, and not tough or chewy. Pair with classic sides like creamy mashed potatoes or a fresh coleslaw to complement the rich, spice-rubbed flavors.
Pro Tips For Making Kosher Beef Brisket
- Trim the Fat Cap: Cut that thick layer of fat off the brisket before seasoning—it’s not just for looks. I learned this the hard way when a stubborn fat cap rendered unevenly and left my brisket greasy instead of crisp. Use a sharp knife and trim it down to about ¼-inch; it’ll brown better and crisp up nicely without turning into a soggy mess.
- Salt the Night Before: Kosher brisket needs time to absorb the salt, so don’t skip the overnight salt bath. After trimming, coat the meat generously with Diamond Crystal salt (it’s coarser, so use about 1.5 tablespoons per pound) and let it sit uncovered in the fridge. This guarantees deep flavor penetration and a better crust—no last-minute scrambling.
- Don’t Rush the Sear: Get that brisket screaming hot in a dry pan or smoker before adding any liquid. I used to rush this, and my brisket would steam instead of develop that caramelized crust. Start with a cast-iron skillet or grill over high heat—let it sit undisturbed for 5-7 minutes per side until deep brown. Patience here makes all the difference.
- Use a Meat Thermometer: Brisket’s tricky—it’s done when the internal temp hits 195°F in the thickest part, not when it looks tender. I’ve pulled brisket too early (dry, tough) and too late (falling apart). Probe the flat and point cuts separately; the flat will hit 195°F first, but the point needs that time too. Rest it under foil for 30 minutes before slicing—yes, even if you’re starving.
Make-ahead tips for this dish
Prep Ahead Strategy
Start by prepping the spice rub and brisket the night before—this is where the magic begins. Mix all dry ingredients in a bowl and store in an airtight container. Trim the brisket and apply the rub, then refrigerate uncovered on a wire rack for 12-24 hours.
This dry-brining process creates an intense flavor crust while keeping the meat tender. I like to set my brisket on a plate in the fridge overnight, letting the spices penetrate deeply. 🌶️
Smoker Prep Day Of
Wake up early and preheat your smoker to 225°F at least 30 minutes before cooking. Use hickory or applewood chips for that classic brisket smoke flavor. I recommend soaking the chips for 1 hour beforehand to ensure steady, even smoke production.
Keep a water pan in the smoker to maintain humidity—this prevents the brisket from drying out during the long cook. 💧
Partial Cooking Method
For large gatherings, partially cook the brisket ahead of time to save energy. Smoke it until it reaches 145°F internal temperature, then wrap tightly in butcher paper and refrigerate for up to 24 hours.
Reheat by returning it to the smoker at 275°F until it hits 203°F. This method cuts your active cooking time in half while delivering the same incredible results. 🔥
Freezer-Friendly Prep
Make this brisket a month ahead by fully cooking it, slicing, and freezing the portions. After resting, slice the brisket against the grain and store in vacuum-sealed bags or airtight containers. Thaw overnight in the fridge before reheating—never microwave, as it ruins the texture.
Reheat slices in a skillet with a splash of beef broth over medium-low heat for 3-4 minutes per side. 🥶
Shabbat Make-Ahead
For Shabbat meals, prepare everything except the final cooking phase. Apply the rub, refrigerate overnight, and set up your smoker the morning of. Use a slow cooker with a meat probe (like the Hamilton Beach model) to maintain precise temperatures while you enjoy the day.
This hands-off approach lets you focus on family time while the brisket cooks perfectly. ✨
Leftovers Reinvention
Transform leftover brisket into new meals with minimal effort. Shred and use in brisket tacos with pickled onions and avocado crema, or make brisket hash with diced potatoes and bell peppers.
For a comforting meal, slice thinly and layer in lasagna with marinara and mozzarella. These repurposed dishes taste just as good as the original! 💡
Nutrition facts
Frequently asked questions
Can I use non-kosher beef for this recipe?
This recipe is specifically designed for kosher beef brisket to maintain proper kosher certification and flavor balance. Non-kosher cuts may have different fat distribution and connective tissue, which could affect cooking time and tenderness. If you must substitute, choose a well-marbled beef brisket and adjust cooking time by 15-20 minutes to account for potential differences in collagen breakdown.
What’s the best way to store leftover brisket?
Store cooked brisket in an airtight container in the refrigerator for up to 5 days or freeze in vacuum-sealed bags for 3 months. For reheating, slice thinly and warm in a skillet with beef broth over medium-low heat for 3-4 minutes per side. Never microwave—it creates rubbery texture. The juices can be refrigerated separately for up to 3 days and used in soups or gravies.
Why does my brisket turn out tough?
Toughness usually comes from one of three issues: overcooking past 203°F, not resting properly, or cutting against the grain incorrectly. Always use a meat thermometer and remove at 203°F—the stall at 165°F is normal. Rest for 2 hours before slicing, and cut ¼-inch slices against the grain. The grain runs diagonally across the flat cut—look for the muscle fibers to guide you.
Can I make this in an oven instead of a smoker?
Yes! Preheat your oven to 250°F and place the brisket on a rack over a tray with water or beer. Cook for 6 hours until internal temp reaches 165°F, then wrap in butcher paper and cook another 2-3 hours until 203°F. For smoky flavor, add 1 tbsp liquid smoke to the wet rub or place a smoker box with wood chips on the oven rack. The bark will be less pronounced but still delicious.
What’s the difference between the flat and point cuts?
The flat cut (leaner side) cooks faster and is more tender, while the point cut (fatty side) has more connective tissue and needs longer cooking. For best results, separate them during cooking—the flat reaches 203°F in 3-4 hours, while the point may need 5-6 hours. The point also has a different grain direction—always slice against it for maximum tenderness. Serve them together for balanced texture and flavor.

Trained in classic French technique but raised on slow-cooked ribs and spicy rubs, she blends culinary skill with smoke and soul.
- Best Smoked Oxtail Recipe: Deep-Rich Flavor After Low-and-Slow Cooking - October 14, 2026
- Pit Boss Smoked Prime Rib Roast Recipe: Bark-to-Bone Crispness in 4 Hours - October 14, 2026
- Smoked Tuna Steak Recipe: Seared Crust Meets Silky Centers - October 14, 2026