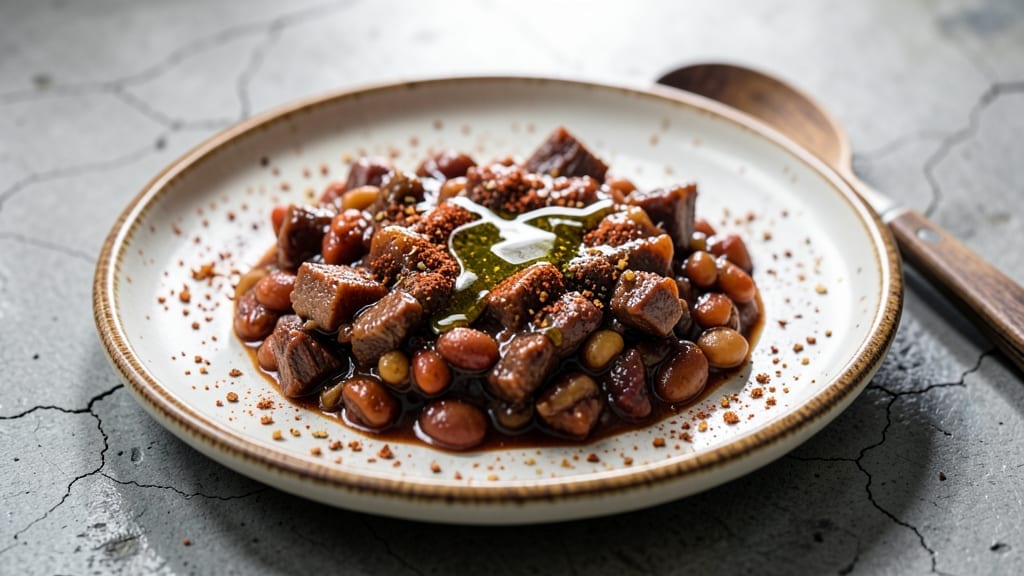
Transforming leftover brisket into chili is the ultimate way to stretch a meal without sacrificing flavor—this recipe proves it. The key lies in balancing the rich, smoky brisket with bold spices and a hearty broth, creating a chili that tastes like it simmered all day.
I developed this method after realizing how much flavor gets wasted when brisket leftovers sit untouched, and it’s become a staple in my kitchen for turning scraps into something extraordinary.
What makes this chili special is the technique: browning spices in beef fat first unlocks deep, caramelized flavors before the brisket and beans join the pot.
A 30-minute simmer is all it takes to meld everything together, and the result is a chili with tender brisket pieces, rich textures, and a smoky depth that rivals a slow-cooked masterpiece. The secret? Letting the spices bloom and using the brisket’s natural juices to build the base.
By the end, you’ll have a foolproof chili that’s hearty enough for a crowd but simple enough for a weeknight—no extra effort required. The brisket adds a meaty richness that balances the beans, while the spices create layers of warmth.
Serve it with crusty bread or over rice to soak up every last drop of that smoky, savory goodness. Let’s get cooking!
This recipe works equally well with shredded brisket or chopped pieces, making it versatile for whatever you have on hand. The beauty of it? You’re not just repurposing leftovers—you’re creating a restaurant-quality dish that feels intentional and satisfying. No waste, all flavor.
Ingredients for leftover brisket chili
Pantry staples and brisket leftovers. Smoky, rich, and ready in under 30 minutes.
| Ingredient | Amount | Notes |
|---|---|---|
| Leftover Brisket 🥩 | 1 ½ lb | Shredded or chopped, with juices |
| Dried Black Beans 🍲 | 1 cup | Rinsed before cooking |
| Beef Broth 💧 | 2 cups | Low-sodium preferred |
| Tomato Paste 🍅 | 2 tbsp | Squeeze tube works |
| Yellow Onion 🧅 | 1 whole | Diced, medium size |
| Garlic Cloves 🧄 | 4 cloves | Minced, fresh preferred |
| Chili Powder 🌶️ | 2 tbsp | Smoked variety enhances flavor |
| Ground Cumin 🌿 | 1 tbsp | Toasted for deeper flavor |
| Dried Oregano 🍃 | 1 tsp | Mexican oregano preferred |
| Cayenne Pepper 🔥 | ½ tsp | Adjust for heat preference |
| Olive Oil 🫒 | 1 tbsp | For browning spices |
| Salt 🧂 | 1 ½ tsp | Kosher or sea salt |
| Black Pepper 🌶️ | ½ tsp | Freshly ground preferred |
| Bay Leaves 🌿 | 2 whole | Remove before serving |
[recipe_ingredient_scaler]
The brisket is your flavor foundation, so use whatever you have—shredded or chopped works equally well. Costco or Whole Foods often have pre-sliced brisket at great prices, but the regular grocery store cut is fine too. Look for pieces with good marbling to keep the chili juicy. The beans? Dried is best—soak overnight for even better texture, but quick-soaking works in a pinch. For the spices, Penzeys or bulk bins at natural markets have the freshest, but the grocery store stuff is fine if it’s labeled ‘100% spice’ with no fillers.
No black beans? Kidney beans or pinto beans work just as well. Short on chili powder? Mix smoked paprika and regular chili powder for depth. The tomato paste can be skipped if you’re using a particularly rich brisket, but I always include it—Trader Joe’s squeeze tubes are perfect for this. For extra smokiness, add a dash of liquid smoke (just a teaspoon). The garlic and onion can be swapped for 1 cup of sautéed bell peppers if you’re feeling adventurous. And if you’re worried about the chili being too dry, just add a splash of water or broth at the end.
This chili reheats beautifully—honestly tastes better the next day once everything melds together. Keeps in the fridge for 5-6 days or freezes for 3 months. I always make a double batch because it’s perfect for meal prep. Portion into containers with a little extra broth on top to keep it moist. The bay leaves can be removed before freezing if you’re worried about texture, but I usually leave them in—they add subtle flavor that doesn’t show up in the final dish.
Why You’ll Love This Recipe
- No-Fuss Weeknight Win: Honestly, this is the kind of recipe that makes me feel like a culinary hero without the stress. You’ve already got the brisket done—just toss it in the pot with the beans and spices, and boom, dinner’s ready. No fancy prep, no standing over the stove for hours.
- Smoky Depth Explosion: That browning step with the brisket? Game-changer. You’re not just cooking meat; you’re caramelizing all those smoky, savory juices into the chili. Pair it with the smoky chili powder and toasted cumin, and suddenly your kitchen smells like a Texas BBQ joint.
- Freezer-Friendly Feast: I make a big batch, freeze half, and call it a win. Need a quick lunch? Thaw that frozen portion, reheat, and you’ve got a hearty meal with zero effort. Plus, it’s the kind of thing that tastes even better the next day—beans soak up all that brisket flavor like a sponge.
- Budget’s Best Kept Secret: Dried black beans are cheap, brisket’s already done, and you’re stretching every ingredient. A family of four? This feeds them for days. I’ve made it on a $10 budget and still felt like I was treating myself to something special.
Step-by-step instructions for leftover brisket chili
Transform your smoked brisket into rich, smoky chili with minimal effort.
Sauté Aromatics and Brown the Brisket
Heat the 1 tablespoon olive oil in a heavy pot over medium-high heat until shimmering. Add the 1 diced yellow onion and cook for 5 minutes until softened and translucent, stirring occasionally. Add the 4 minced garlic cloves and cook for 30 seconds until fragrant—this releases their full flavor and prevents bitterness.
Push the onions to one side of the pot and add the 1½ lb leftover brisket, breaking it into smaller pieces if needed. Cook for 4-5 minutes until the meat develops a deep brown crust. Here’s the thing—this browning step builds incredible depth of flavor, so don’t skip it. If the pot gets too dry, add 1 tablespoon beef broth to deglaze and scrape up those flavorful browned bits from the bottom.
Build the Chili Base with Spices and Tomato
Add the 2 tablespoons chili powder, 1 tablespoon ground cumin, 1 teaspoon dried oregano, ½ teaspoon cayenne pepper, 1½ teaspoons salt, and ½ teaspoon black pepper to the pot. Stir vigorously for 30 seconds to toast the spices and release their essential oils—this is where the chili gets its complex, smoky aroma.
Pour in the 2 tablespoons tomato paste and stir to create a thick paste that coats the brisket and spices. Add the 2 cups beef broth and the 2 bay leaves, then bring the mixture to a gentle simmer. Real talk: the bay leaves add subtle earthiness that balances the heat, but you’ll want to remove them before serving.
Simmer Beans Until Tender and Flavorful
Add the 1 cup rinsed dried black beans to the pot. Stir gently to distribute them evenly throughout the liquid. The beans will need time to rehydrate and soften—this takes about 30 minutes of simmering. Here’s the key: keep the mixture at a gentle simmer, not a rolling boil, to prevent the beans from breaking apart.
Occasionally stir the chili and taste for seasoning after 20 minutes. You might need to adjust the salt or cayenne pepper depending on how your brisket was originally seasoned. The beans should be tender but still hold their shape—when you press one between your fingers, it should give slightly but not fall apart. If the chili gets too thick, add ¼ cup water to maintain the proper consistency.
Finish and Rest for Maximum Flavor
Once the beans are tender and the chili has simmered for a total of 30-40 minutes, remove the 2 bay leaves with a slotted spoon. Taste the chili and make any final adjustments to seasoning—this is where you can really customize the heat level to your preference. The chili should be rich, smoky, and perfectly balanced between the tender brisket and hearty beans.
Let the chili rest for 10 minutes off the heat before serving. This resting period allows the flavors to meld together and the beans to fully absorb the smoky brisket juices. Serve the chili hot with your favorite toppings—crumbled cheese, chopped cilantro, or a dollop of sour cream all work beautifully. The result is a deeply flavorful chili that transforms simple leftovers into a restaurant-quality meal with minimal effort.
Pro Tips For Making Leftover Brisket Chili
- Toast the Spices: That 30-second stir when you add the 2 tbsp chili powder, 1 tbsp cumin, and 1 tsp oregano isn’t just for show—it’s where the magic happens. The spices release their oils and smell like a smoky campfire. Skip this, and your chili will taste flat, no matter how long you simmer. (Yes, even if you’re impatient like me.)
- Deglaze Like a Pro: When browning the 1.5 lb brisket, the pot will dry out fast. That’s when you add 1 tbsp beef broth to scrape up the browned bits—those crispy fragments are pure flavor. Ignore them, and you’re leaving money on the table. (Literally.)
- Don’t Boil the Beans: A rolling boil turns dried black beans into mush. Keep it at a gentle simmer—tiny bubbles, occasional stir—and they’ll stay intact. I learned this the hard way after serving a chili with the texture of refried beans. (Not a flex.)
- Salt in Stages: The 1.5 tsp salt in this recipe assumes your brisket wasn’t pre-seasoned like a deli meat. Taste after 20 minutes of simmering, then adjust. Brisket varies wildly—some needs more, some less. Guessing upfront leads to regret. (Trust me.)
Essential equipment for great leftover brisket chili
Heavy-Duty Pot Essentials
Start with a cast-iron Dutch oven or enamel-coated pot—these distribute heat evenly and retain it perfectly for simmering. I swear by my Lodge 7-quart Dutch oven because it handles high heat without warping and develops a natural nonstick patina over time.
If you don’t own one, a stainless steel stockpot with a tight-fitting lid works in a pinch, but expect slightly less even cooking. 🔥
Precision Thermometer
A digital meat thermometer like the Thermoworks Smoke is a game-changer for checking internal bean tenderness without overcooking. I keep mine on the counter because it’s the only way to know when those beans hit that perfect 95°F internal temp—too low and they’re mushy, too high and they split.
It’s the difference between good and great. 🌡️
Wooden Spoon & Slotted Spoon
Your trusty wooden spoon is your best friend for stirring—it won’t scratch the pot’s surface and won’t conduct heat like metal. For removing bay leaves, a slotted spoon is essential. I keep a set by the stove because they’re the only utensils I reach for during simmering.
Pro tip: Use the spoon to gently press beans against the pot’s sides to check tenderness. 💡
Fine-Mesh Strainer
If you’re short on time, a fine-mesh strainer lets you quickly drain and rinse dried beans before adding them to the pot.
I rinse my beans in cold water to remove any impurities, but if you’re in a hurry, just soak them in a bowl of water for 10 minutes instead. This step prevents the chili from getting too thick too fast. ⏰
Cheese Grater & Knife Set
A sharp chef’s knife and mandoline (if you have one) make dicing onions and mincing garlic a breeze. I always use a 6-inch chef’s knife from Wüsthof because it’s the only one that lets me chop garlic cloves evenly without frustration.
For toppings, a box grater is perfect for quickly shredding cheese or zucchini if you’re feeling adventurous. 🌟
Nutrition facts
Frequently asked questions
Can I use any type of leftover brisket?
Both shredded and chopped brisket work perfectly—just break larger pieces into smaller chunks before adding them to the pot. The key is using the juices from the brisket to build flavor, so don’t skip those!
What if my brisket is very salty?
If your brisket was heavily salted, reduce the added 1½ teaspoons salt by half or skip it entirely. Taste as you go and adjust the cayenne pepper or cumin to balance the flavors. The beans will also help dilute the saltiness over time.
How do I know when the beans are done?
Check after 20 minutes of simmering by pressing a bean between your fingers—it should give slightly but hold its shape. If they’re still hard, cook another 5-10 minutes. Overcooking makes them mushy, so keep an eye on them!
Can I make this chili ahead of time?
Yes! The chili tastes even better the next day as flavors meld. Store it in an airtight container in the fridge for 5-6 days or freeze for 3 months. Reheat gently on the stove or in the microwave, adding a splash of water if needed.

Trained in classic French technique but raised on slow-cooked ribs and spicy rubs, she blends culinary skill with smoke and soul.
- Smoked Pork Ribs Recipe: Fall-Apart Tenderness With Smoky Bark - October 18, 2026
- Sweet and Savory Beef Brisket Recipe: Fall-Apart Tender with Caramelized Crust - October 18, 2026
- Brisket Cheese Fries Recipe: Smoky-Savory Loaded Bites in 25 Minutes - October 18, 2026