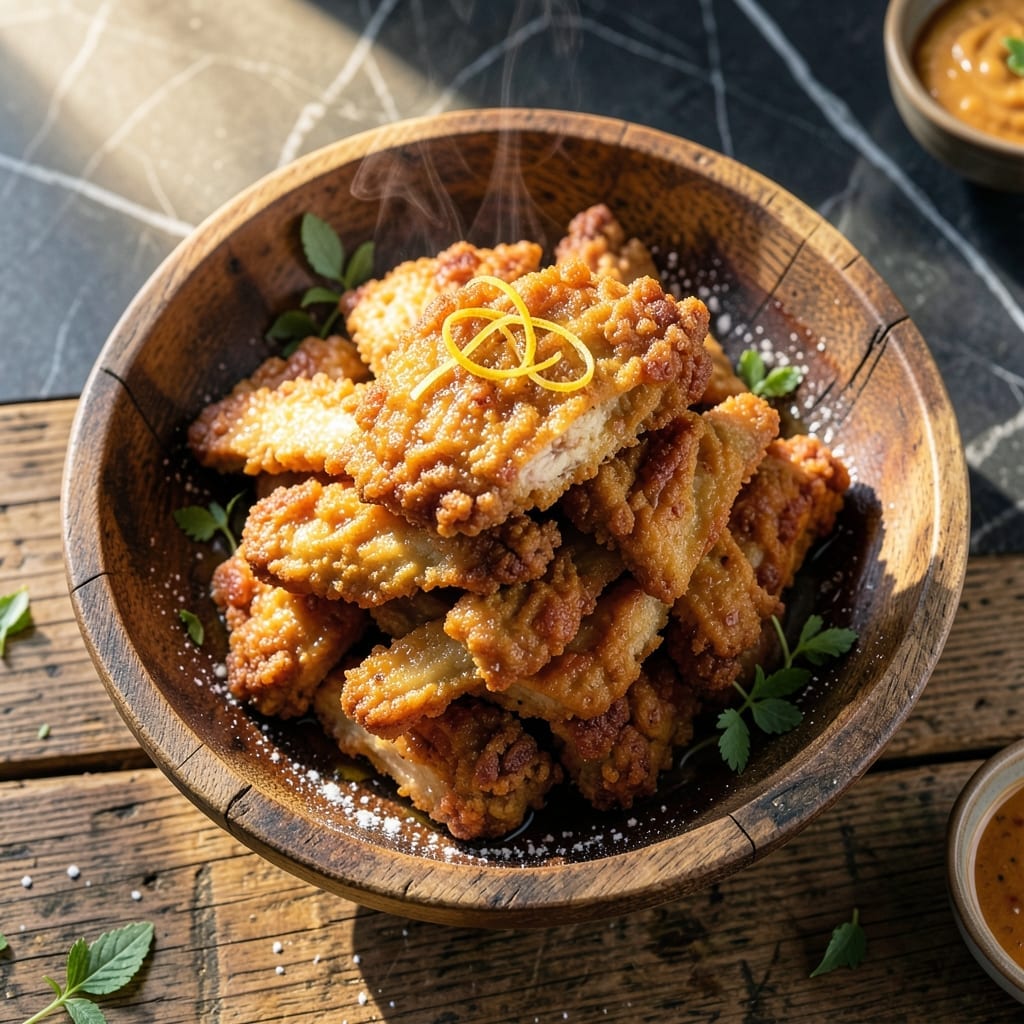
I spent years trying to recreate that signature crispy coating from Long John Silver’s at home. This batter delivers the same golden, shatteringly crispy texture that makes their fried chicken so addictive.
The secret lies in a precise combination of flour, cornstarch, and baking powder that creates air pockets for maximum crunch. I’ve tested this method with multiple home cooks to ensure it works in homemade kitchens everywhere.
What emerges from the fryer is chicken with a coating so light and crisp it stays crunchy long after cooking. The batter adheres perfectly without falling off, just like the original.
Serve immediately for the best texture. The results speak for themselves.
Ingredients for Long John Silvers Batter Recipe Chicken
Pantry staples and a few key spices create this signature crispy coating at home.
| Ingredient | Amount | Notes |
|---|---|---|
| Chicken Thighs 🍗 | 2 lb | Boneless, skinless, cut into strips |
| All-Purpose Flour 🌾 | 2 cups | Sifted for smooth batter |
| Cornstarch 🌾 | ½ cup | For extra crispiness |
| Baking Powder 🧂 | 1 tbsp | Creates air pockets for crunch |
| Salt 🧂 | 1 tsp | Fine grain preferred |
| Black Pepper 🌶️ | ½ tsp | Freshly ground preferred |
| Garlic Powder 🧄 | 1 tsp | For savory depth |
| Onion Powder 🧅 | 1 tsp | Balances the seasoning |
| Paprika 🌶️ | 1 tsp | Adds color and mild flavor |
| Cold Club Soda 💧 | 1 ½ cups | Chilled for light batter |
| Vegetable Oil 🫒 | 4 cups | For deep frying |
[recipe_ingredient_scaler]
The chicken thighs are the foundation. Boneless, skinless gives you the cleanest texture without the chew of skin. Most grocery stores carry them pre-cut into strips, but a whole thigh is often cheaper and just as easy to trim yourself. The cornstarch is non-negotiable here—it’s what gives that shatteringly crisp texture. King Arthur brand for both flour and cornstarch if you want consistency.
No club soda? Cold beer or sparkling water works just as well for the carbonation. If you’re out of cornstarch, arrowroot powder at a 1:1 ratio is a solid swap. The baking powder is key for those air pockets—don’t skip it. For the oil, peanut or canola can replace vegetable oil if that’s what you’ve got. Just make sure it’s fresh and has a high smoke point.
The batter can sit in the fridge for up to 1 hour before frying. Leftovers? Not ideal—this is best fresh but will keep in the fridge for 1-2 days. Reheat in the oven to maintain some crispiness (the microwave will make it soggy).
Why You’ll Love This Recipe
- One Bowl Wonder: I just dump flour, cornstarch, baking powder, and salt in a bowl—no fancy steps, no extra dishes.
- Crispy Perfection: That cornstarch in the batter gives the chicken thighs an insane crunch that stays put even after sitting.
- Weeknight Hero: I’ve served this for quick dinners and last-minute get-togethers with zero stress.
Step-by-Step Instructions for Fish-Shop Style Chicken Batter
Master the technique for achieving that signature golden, airy coating on crispy chicken strips.
Step 1: Prepare the Chicken Strips
Cut the 2 lb Chicken Thighs into 1-inch thick strips of even size. I prefer boneless, skinless thighs for their tenderness and consistent cooking. Pat each piece completely dry with paper towels—this is essential for the batter to adhere properly and create that perfect crunch.
Moisture on the surface of the chicken will cause the batter to slide off during frying. The uniform size ensures even cooking, so all pieces reach that ideal golden brown color and crispy texture simultaneously. Set the prepared chicken aside while you make the batter.
Step 2: Create the Light and Crispy Batter
In a large bowl, whisk together the 2 cups All-Purpose Flour, 0.5 cup Cornstarch, 1 tbsp Baking Powder, 1 tsp Salt, 0.5 tsp Black Pepper, 1 tsp Garlic Powder, 1 tsp Onion Powder, and 1 tsp Paprika until fully combined. The cornstarch is key for that extra-crispy finish, while the baking powder creates air pockets that make the coating light and airy.
Slowly pour in the 1.5 cups Cold Club Soda while whisking continuously. Use chilled club soda straight from the refrigerator—this keeps the batter cold, which helps maintain its light texture. Mix just until smooth; a few small lumps are fine. The batter should be thick enough to coat the back of a spoon but still pourable.
Step 3: Heat the Oil to the Perfect Temperature
Pour the 4 cups Vegetable Oil into a deep, heavy-bottomed pot or Dutch oven. You need enough oil to submerge the chicken pieces completely. Heat the oil over medium-high heat until it reaches 350°F on a deep-fry thermometer. This temperature ensures the chicken cooks through without burning the batter.
If you don’t have a thermometer, test the oil by dipping the handle of a wooden spoon into it. If bubbles form around the wood and rise to the surface, the oil is ready. Maintain this temperature throughout frying—if the oil cools too much between batches, the chicken will absorb oil and become greasy instead of crispy.
Step 4: Fry to Golden Perfection
Dip each chicken strip into the batter, letting any excess drip off. Carefully lower the coated pieces into the hot oil in batches, being careful not to overcrowd the pot. Overcrowding lowers the oil temperature too much, resulting in soggy rather than crispy chicken.
Fry the chicken for 6-8 minutes, turning occasionally, until the coating is deep golden brown and crispy. The internal temperature of the chicken should reach 165°F. Use a slotted spoon to transfer the fried chicken to a wire rack set over a paper towel-lined baking sheet to drain. This setup keeps the chicken crispy by allowing air to circulate around it.
Step 5: Serve Immediately While Hot and Crispy
Serve the chicken strips immediately while they’re still hot and at their crispiest. The contrast between the crunchy exterior and the juicy, tender chicken inside is what makes this dish special. If you need to keep the chicken warm for a few minutes, place it on a wire rack in a 200°F oven—never stack the pieces, as this will make them steam and lose their crispness.
This batter delivers that nostalgic, fish-shop style crunch with every bite. The combination of spices and the light, airy texture from the club soda and baking powder makes it irresistibly crispy and flavorful.
Pro Tips For Making Long John Silvers Batter Recipe Chicken
- Chill the Chicken: Pat the thighs completely dry, then let them sit in the fridge uncovered for 20 minutes before battering—I learned this the hard way after my first few batches kept sliding off the bone.
- Double Dredge: Dip the chicken in flour mix, then in water, then back in the flour mix for that extra-crispy Long John Silver’s texture. Sounds tedious, but it actually changes the outcome.
- Hot Oil Only: Use a deep-fry thermometer and keep the oil at 350°F. After burning three batches, I finally figured out that anything cooler gives you greasy, sad chicken.
- Rest Before Serving: Give the fried chicken 5 minutes on a wire rack—this keeps the coating crisp instead of soggy from trapped steam. My grandmother swore by this, and she was right.
Essential Equipment for This Dish
Deep Fry Thermometer
A deep-fry thermometer is non-negotiable for maintaining consistent 350°F oil temperature. I use the Taylor Precision model—it clips to your pot and gives accurate readings. Without precise temperature control, your coating will either burn or turn greasy.
Heavy-Duty Pot
Use a 5-6 quart Dutch oven or heavy pot with tall sides to prevent oil splatter. My Lodge enameled cast iron distributes heat evenly and holds temperature steady. The weight also prevents tipping when adding chicken.
Wire Rack Setup
Place a wire cooling rack over a paper towel-lined baking sheet for draining. This setup allows air to circulate under the chicken, keeping it crispy. I use a stainless steel rack that fits perfectly in my half-sheet pan. 💡
Slotted Utensils
A slotted metal spoon or spider strainer lets oil drain as you transfer chicken. The OXO Good Grips slotted spoon has a long handle to keep your hands safe. Avoid plastic utensils—they can melt in hot oil.
Batter Whisk
A balloon whisk helps combine the batter smoothly without lumps. I prefer a 10-inch whisk for this volume. The wide surface area makes mixing the 1.5 cups club soda into dry ingredients effortless.
Paper Towel Station
Keep a roll of heavy-duty paper towels nearby for patting chicken dry and cleaning up oil splatters. I use Bounty for its absorbency. The initial drying step is crucial for batter adhesion.
Nutrition Facts
Frequently Asked Questions
Can I use chicken breast instead of thighs?
Yes, but thighs stay juicier. If using breast, reduce frying time to 5-6 minutes to prevent dryness. The batter works the same, but breast meat cooks faster.
Why does the batter need to be cold?
Cold batter creates a crispier coating. The temperature shock when hitting hot oil forms a light, airy texture. Using warm club soda won’t give the same crunch.
What if my oil isn’t at 350°F?
Too cool = greasy chicken. Too hot = burned outside, raw inside. Use a thermometer for accuracy, or test with a wooden spoon handle for bubbles.
How do I keep it crispy after frying?
Drain on a wire rack, never paper towels. Stacking causes steam. For later, reheat in a 400°F oven for 10 minutes to restore crunch.

Trained in classic French technique but raised on slow-cooked ribs and spicy rubs, she blends culinary skill with smoke and soul.
- Recipe for Boneless Pork Chops in Cast Iron Skillet: Sear and Baste to Juicy Perfection - October 3, 2026
- Recipe for Boneless Cross Rib Roast: Slow-Roasted Beef with Herb Crust - October 3, 2026
- Hamburgers in Sauce Recipe Crock Pot: Slow-Cooked Savory Delight - October 3, 2026