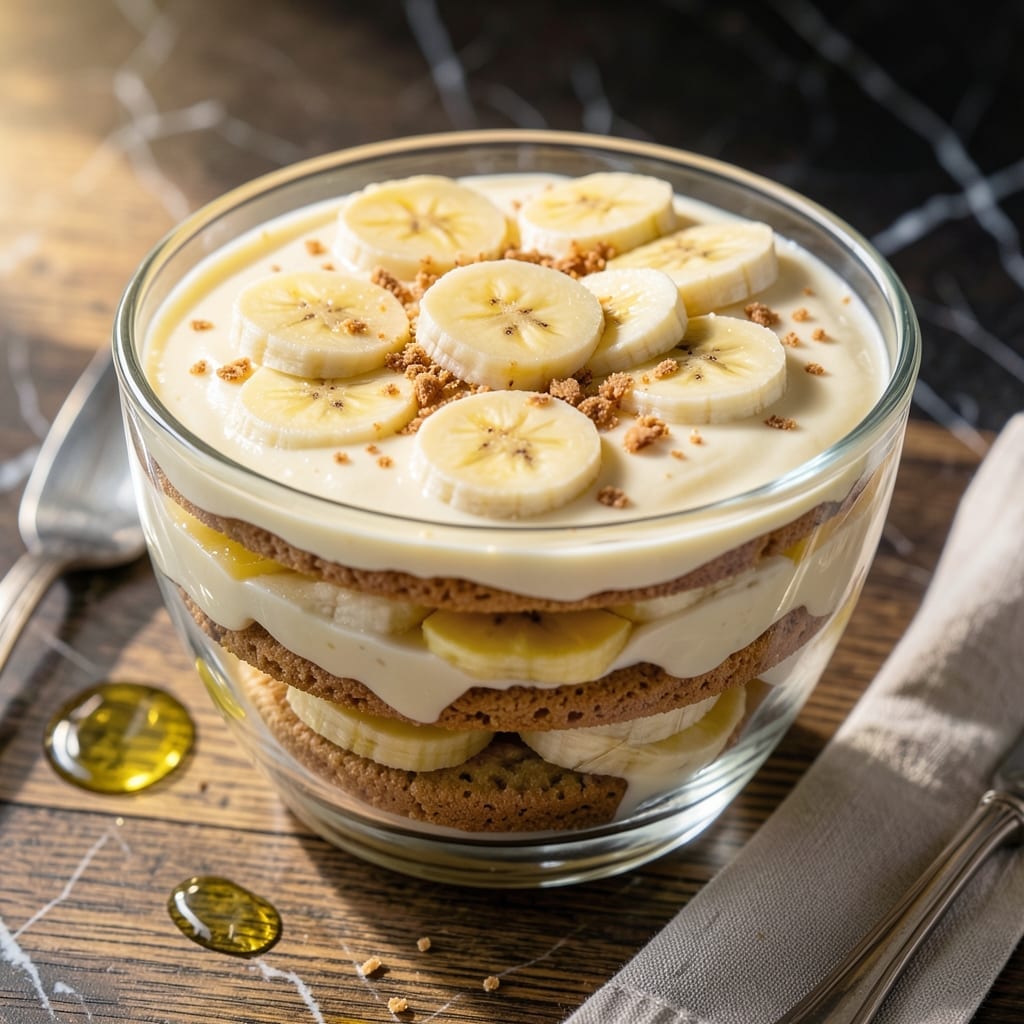
This lightened version delivers all the classic flavors you love without the guilt. I’ve perfected a method that keeps the creamy texture and rich vanilla taste while cutting unnecessary fat.
The secret lies in using low-fat dairy and a smart layering technique that ensures every bite has the right balance of pudding, bananas, and wafers. No artificial substitutes—just real ingredients prepared thoughtfully.
What you’ll get is a dessert that’s satisfying yet lighter, with the same comforting layers you remember. The vanilla pudding stays silky, the bananas stay fresh, and the wafers keep their signature crunch.
Perfect for gatherings or a wholesome treat anytime. Here’s how to make it right.
Ingredients for Low Fat Banana Pudding Recipe from Scratch
A handful of wholesome ingredients deliver classic banana pudding with a lighter touch.
| Ingredient | Amount | Notes |
|---|---|---|
| Vanilla Wafer Cookies 🍪 | 30 pieces | Low-fat variety if available |
| Ripe Bananas 🍌 | 4 whole | Sliced just before assembly |
| Low-Fat Milk 🥛 | 2 cups | 2% or skim for best results |
| Granulated Sugar 🍚 | ½ cup | Can reduce by 2 tbsp |
| Cornstarch 🌾 | 3 tbsp | For thickening pudding |
| Salt 🧂 | ¼ tsp | Fine sea salt preferred |
| Vanilla Extract 🌿 | 2 tsp | Pure extract, not imitation |
| Large Egg Whites 🥚 | 2 whole | Pasteurized for safety |
| Low-Fat Vanilla Yogurt 🥛 | ½ cup | Greek style for creaminess |
| Light Whipped Topping ☁️ | 1 cup | Thawed if frozen |
[recipe_ingredient_scaler]
The wafers are key—Nilla Wafers are classic, but any vanilla wafer works. I grab mine from the baking aisle at Kroger or Walmart. For the milk, 2% or skim keeps it light without sacrificing creaminess. The cornstarch is your thickener here, so don’t skip it. It’s cheap and lasts forever in the pantry. Vanilla extract matters—pure extract has that rich, deep flavor imitation just can’t match.
No low-fat yogurt? Regular vanilla yogurt works too (just drain off excess liquid). Out of egg whites? One whole egg can substitute, but it’ll add a bit more fat. Want it sweeter? Add 1-2 tbsp more sugar to the pudding. The bananas should be ripe but firm—not overripe or they’ll turn mushy. For the whipped topping, Cool Whip Light is what I usually keep on hand.
Assemble right before serving so the wafers stay crisp. Keeps in the fridge for 2-3 days (though the wafers soften the longer it sits). The pudding itself stays fresh for 4-5 days if stored separately. Best served chilled, straight from the fridge.
Why You’ll Love This Recipe
- No-Fuss Mixing: I just whisk the cornstarch and sugar into the milk—no fancy techniques, and it thickens beautifully every time.
- Nostalgic Comfort: The vanilla wafers soften into this creamy, banana-kissed layer that tastes like childhood but lighter.
- Crowd-Pleasing Dessert: I bring it to potlucks, and honestly, no one believes it’s low-fat when they taste how rich the pudding is.
- Budget Stretcher: Ripe bananas and basic pantry staples mean I can make this for pennies, and leftovers keep well for days.
Step-by-Step Instructions for Low Fat Banana Pudding From Scratch
Here’s how to build those perfect layers with professional technique and light ingredients.
Step 1: Craft the Vanilla Pudding Base
In a medium saucepan, whisk together the 2 cups Low-Fat Milk, 0.5 cup Granulated Sugar, 3 tbsp Cornstarch, and 0.25 tsp Salt until smooth. Place over medium heat and cook, stirring constantly with a wooden spoon, until the mixture thickens and comes to a gentle boil.
Once boiling, continue cooking for 1 full minute while stirring—this ensures the cornstarch fully activates and eliminates any raw starch taste. The pudding should coat the back of the spoon thickly. Remove from heat and stir in the 2 tsp Vanilla Extract.
In a separate bowl, lightly beat the 2 whole Large Egg Whites until frothy. Slowly temper the egg whites by whisking in about ½ cup of the hot pudding mixture, then pour this back into the saucepan. Return to low heat and cook for 2 additional minutes, stirring constantly, until thickened again.
Step 2: Cool and Enrich the Pudding
Transfer the pudding to a clean bowl and let it cool at room temperature for 10 minutes, stirring occasionally to prevent a skin from forming. This brief rest allows the pudding to set slightly without becoming lumpy.
Once slightly cooled, gently fold in the 0.5 cup Low-Fat Vanilla Yogurt using a silicone spatula. The yogurt adds a tangy depth and extra creaminess without the fat. Fold just until fully incorporated—overmixing can deflate the pudding. Cover the surface directly with plastic wrap to prevent a skin from forming and refrigerate for 30 minutes.
Step 3: Prepare the Fruit and Wafer Layers
Just before assembling, slice the 4 whole Ripe Bananas into ¼-inch thick rounds. Toss them gently with a squeeze of lemon juice if you have it (optional)—this prevents browning. Set aside until ready to layer.
Arrange 15 pieces Vanilla Wafer Cookies in a single layer at the bottom of a 2-quart dish or individual serving glasses. The cookies should be placed flat side down for even layers. Reserve the remaining 15 pieces Vanilla Wafer Cookies for the top and middle layers.
Step 4: Assemble the Pudding Parfait
Remove the pudding from the refrigerator. It should be thick but still spoonable. Spread half of the pudding evenly over the vanilla wafer layer, creating a smooth base for the bananas.
Arrange half of the sliced bananas in an even layer over the pudding, then add another layer of 10 pieces Vanilla Wafer Cookies. Repeat with the remaining pudding, bananas, and finish with the last 5 pieces Vanilla Wafer Cookies.
Step 5: Chill and Add the Whipped Topping
Cover the dish with plastic wrap and refrigerate for at least 4 hours, or preferably overnight. This chilling time allows the vanilla wafer cookies to soften slightly and absorb the pudding flavors, creating that classic banana pudding texture.
Just before serving, spread the 1 cup Light Whipped Topping evenly over the top layer. For a decorative touch, crumble a few extra vanilla wafer pieces or add a banana slice garnish. Serve chilled and enjoy the perfect balance of creamy pudding, fresh banana, and crispy wafer in every bite.
Pro Tips For Making Low Fat Banana Pudding Recipe From Scratch
- Whisk Cornstarch First: Mix the cornstarch with a little cold milk before adding it to the warm mixture—this prevents clumping and gives you that silky texture every time.
- Use Spotty Bananas: The riper the bananas, the sweeter your pudding. I learned this the hard way after using green ones and wondering why my dessert tasted bland.
- Layer While Warm: Assemble the pudding while the custard is still warm so the vanilla wafers soften just enough without turning to mush.
- Chill Completely: Give it at least 4 hours in the fridge—any less and the layers won’t set properly, no matter how impatient you are.
Make-Ahead Tips for This Recipe
Overnight Assembly
For the best texture, assemble this dessert the night before serving. The pudding needs at least 4 hours to set properly, but overnight chilling lets the flavors meld beautifully. I always prep mine after dinner so it’s ready for lunch the next day. ✨
Pudding Prep Ahead
You can make the vanilla pudding base up to 2 days in advance. Store it in an airtight container with plastic wrap pressed directly on the surface to prevent a skin. Keep the bananas uncut until assembly to maintain freshness.
Wafer Storage
Keep your vanilla wafers in their original package at room temperature until you’re ready to layer. If you’ve opened the package, store them in an airtight container with a slice of bread to maintain freshness.
Banana Treatment
Slice bananas just before assembling to prevent browning. If you must prep them early, toss with 1 tbsp lemon juice and store in an airtight container in the fridge for up to 2 hours. This keeps them looking fresh.
Whipped Topping
Add the light whipped topping just before serving. If using frozen, thaw it in the fridge overnight. For a homemade touch, you can whip 1 cup cold low-fat milk with 2 tbsp powdered sugar right before assembly.
Portable Servings
For potlucks, assemble in individual 8-ounce mason jars up to 12 hours ahead. Layer pudding, bananas, and wafers, then seal with lids. Add the whipped topping at the destination to keep it looking perfect. 💡
Nutrition Facts
Frequently Asked Questions
Can I use whole milk instead of low-fat?
Yes, but it will add more fat. Stick to 2% or skim milk to keep it light while maintaining creaminess. The pudding will still set properly with any milk type.
How do I prevent the wafers from getting soggy?
Assemble the pudding right before serving, or refrigerate for no more than 4 hours. For longer storage, keep wafers separate and add them just before eating.
Can I make this without eggs?
Yes! Skip the egg whites and add an extra 1 tbsp cornstarch to thicken. The pudding will be slightly less rich but still delicious.
What’s the best way to store leftovers?
Cover tightly with plastic wrap and refrigerate for up to 2-3 days. The wafers will soften the longer it sits, so enjoy it fresh when possible.

Trained in classic French technique but raised on slow-cooked ribs and spicy rubs, she blends culinary skill with smoke and soul.
- Recipe for Boneless Pork Chops in Cast Iron Skillet: Sear and Baste to Juicy Perfection - October 3, 2026
- Recipe for Boneless Cross Rib Roast: Slow-Roasted Beef with Herb Crust - October 3, 2026
- Hamburgers in Sauce Recipe Crock Pot: Slow-Cooked Savory Delight - October 3, 2026