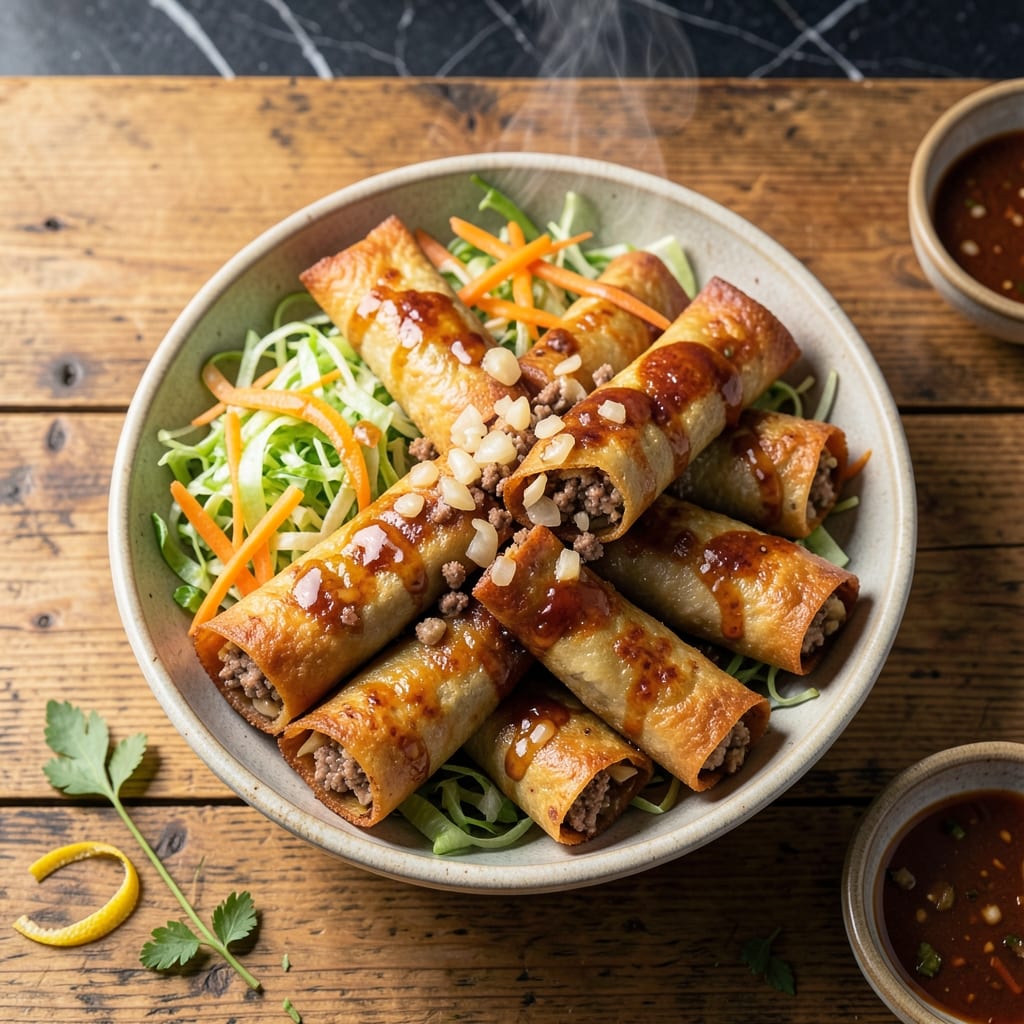
These Filipino spring rolls deliver crispy perfection with every bite, a technique I perfected testing across different kitchen setups.
Ground beef and cabbage create a savory filling that stays juicy inside the delicate wrapper. The secret is proper rolling to prevent bursting during frying.
Each lumpia emerges golden and shatteringly crispy, with the filling perfectly cooked through. The contrast between crunchy shell and tender interior is addictive.
Serve hot with sweet chili sauce or vinegar dip for the full experience. This method guarantees consistent results every time.
Ingredients for Lumpia Recipe Ground Beef Cabbage
Crispy lumpia shells wrap a savory filling of beef, cabbage, and aromatic vegetables for authentic flavor.
| Ingredient | Amount | Notes |
|---|---|---|
| Lumpia Wrappers 🥟 | 20 sheets | Thawed if frozen, kept covered |
| Ground Beef 🥩 | 1 lb | 80/20 lean-to-fat ratio ideal |
| Green Cabbage 🥬 | 3 cups | Finely shredded, tightly packed |
| Carrots 🥕 | 1 whole | Julienned or finely grated |
| Yellow Onion 🧅 | 1 whole | Finely minced for even distribution |
| Garlic Cloves 🧄 | 4 cloves | Minced to fine paste consistency |
| Soy Sauce 🫒 | 2 tbsp | Low-sodium preferred for balance |
| Oyster Sauce 🫒 | 1 tbsp | Vegetarian oyster sauce if needed |
| Ground Black Pepper 🌶️ | 1 tsp | Freshly ground for best flavor |
| Salt 🧂 | 1 tsp | Adjust to taste after cooking |
| Neutral Oil 🛢️ | 3 cups | For deep-frying, high smoke point |
| Large Egg 🥚 | 1 whole | Beaten, for sealing wrappers |
| Green Onions 🧅 | ¼ cup | Thinly sliced, for garnish |
[recipe_ingredient_scaler]
The lumpia wrappers are non-negotiable—Spring Home brand is the gold standard, available at most Asian markets or in the freezer section of H-Mart. Ground beef should have visible marbling (80/20) for juicy filling that doesn’t dry out during frying. For cabbage, Napa or green cabbage both work, but green holds its texture better. Always buy whole cabbages and shred yourself—the pre-shredded stuff is too dry.
No ground beef? Ground pork or chicken work well, but reduce cooking time slightly. For a vegetarian version, mushrooms or tofu can stand in (press tofu well first). Oyster sauce can be swapped for hoisin or additional soy sauce. If you’re avoiding gluten, use tamari instead of soy sauce. The egg wash is key for sealing—aquafaba works for vegan lumpia.
Assembled lumpia can sit covered in the fridge for 2 hours before frying. Cooked lumpia stay crispy for 1 day in a single layer (don’t stack). Reheat in an air fryer or oven to revive the crunch. Freeze uncooked lumpia on a tray first, then transfer to bags for up to 3 months.
Why You’ll Love This Recipe
- Minimal Chopping Required: I just shred the cabbage and grate the carrots—no fancy knife skills needed.
- That Crunchy Bite: The ground beef and cabbage filling stays juicy while the wrapper gets perfectly crisp.
- Feeds a Hungry Crowd: I make a double batch for parties and they disappear before the appetizers do.
- Budget Stretcher: Ground beef and cabbage fill up a dozen lumpia for the price of two takeout rolls.
Step-by-Step Instructions for Lumpia
Here is the method for achieving perfectly crispy spring rolls with a flavorful filling.
Step 1: Prepare the Filling Mixture
In a large bowl, combine the 1 lb Ground Beef, 3 cups Green Cabbage, 1 whole Carrots, and 1 whole Yellow Onion. Add the 4 cloves Garlic Cloves, 2 tbsp Soy Sauce, 1 tbsp Oyster Sauce, 1 tsp Ground Black Pepper, and 1 tsp Salt.
Mix thoroughly until all ingredients are evenly distributed. The filling should hold together when pressed but not be overly wet. This balance ensures the lumpia rolls maintain their shape during frying.
Step 2: Assemble the Lumpia Rolls
Lay a lumpia wrapper flat on a clean surface. Place about 2 tablespoons of the filling near one corner, leaving a 1-inch border on all sides. Fold the corner over the filling, then roll tightly, tucking in the sides as you go.
Use the 1 whole Large Egg (beaten) to seal the final edge. Ensure each roll is snug but not overstuffed—this prevents bursting during frying. Repeat until all 20 sheets Lumpia Wrappers are filled.
Step 3: Heat the Oil for Frying
Pour the 3 cups Neutral Oil into a deep, heavy-bottomed pot. Heat over medium-high heat until the oil reaches 350-375°F on a deep-fry thermometer. The oil is ready when a small piece of wrapper sizzles immediately upon contact.
Maintain this temperature carefully. If the oil smokes, reduce the heat slightly—overheating can burn the lumpia before the filling cooks through.
Step 4: Fry Until Golden and Crispy
Fry the lumpia in batches, being careful not to overcrowd the pot. Cook for 3-4 minutes per side until they turn a deep, golden brown and the shells are crispy. The filling should be fully cooked and steaming hot.
Use a slotted spoon to transfer the lumpia to a paper towel-lined plate to drain excess oil. The crispiness will intensify as they cool slightly.
Step 5: Garnish and Serve Immediately
Sprinkle the 0.25 cup Green Onions over the lumpia just before serving. The contrast of the cool, fresh green onions with the hot, crispy rolls elevates the dish.
Serve while still hot for the best texture. The shells should crackle slightly with each bite, revealing the savory, well-seasoned filling inside.
Pro Tips For Making Lumpia Recipe Ground Beef Cabbage
- Drain the Beef: After browning the ground beef, drain the excess fat completely—I learned this the hard way when my first batch turned soggy from the grease soaking the wrappers.
- Shred Cabbage Thin: Slice the green cabbage as finely as possible, almost like coleslaw, so it softens quickly and doesn’t make the lumpia bulky or hard to roll.
- Skip Overfilling: Use about 1 tablespoon of filling per wrapper max—any more and they’ll burst open while frying, no matter how carefully you seal them.
- Use Cold Wrappers: Keep lumpia wrappers covered with a damp towel and work with one at a time; they dry out fast and crack if left exposed, even for 30 seconds.
Best Sauces and Condiments for These Flavors
Classic Sweet Chili
My go-to is Mae Ploy sweet chili sauce—its perfect balance of sweet, tangy, and slightly spicy complements the savory filling beautifully. I thin it with 1 tsp lime juice per ¼ cup sauce for extra brightness. David always requests extra for dipping. 🌟
Tangy Vinegar Dip
For a traditional Filipino pairing, mix ½ cup white vinegar with 1 tbsp soy sauce, 2 minced garlic cloves, and 1 tsp sugar. Add ½ tsp red pepper flakes for heat. This cuts through the richness and cleanses your palate between bites.
Spicy Sriracha Mayo
Combine ¼ cup mayonnaise with 2 tbsp sriracha and 1 tsp honey for a creamy, spicy companion. I use Duke’s mayonnaise—a Southern staple I’ve loved since childhood. The heat builds gradually, making each bite more exciting.
Peanut Sauce
Blend ½ cup creamy peanut butter with 3 tbsp soy sauce, 2 tbsp rice vinegar, and 1 tbsp honey. Thin with warm water until it reaches a pourable consistency. This nutty, umami-rich sauce adds a luxurious depth to the crispy rolls.
Nutrition Facts
Frequently Asked Questions
Can I use ground turkey instead of beef?
Yes! Ground turkey works well, but use 85/15 fat ratio for moisture. Brown it first to prevent excess liquid in the filling.
How do I keep lumpia from bursting while frying?
Don’t overfill—use 2 tablespoons max per wrapper. Seal edges tightly with egg wash and fry at 350-375°F.
Can I bake lumpia instead of frying?
For a lighter version, bake at 400°F for 20-25 minutes, flipping halfway. Brush with oil first for crispiness.
How long can I store uncooked lumpia?
Assembled lumpia keep covered in the fridge for 2 hours or freeze up to 3 months. Fry from frozen, adding 1-2 minutes extra.

Trained in classic French technique but raised on slow-cooked ribs and spicy rubs, she blends culinary skill with smoke and soul.
- Recipe for Boneless Pork Chops in Cast Iron Skillet: Sear and Baste to Juicy Perfection - October 3, 2026
- Recipe for Boneless Cross Rib Roast: Slow-Roasted Beef with Herb Crust - October 3, 2026
- Hamburgers in Sauce Recipe Crock Pot: Slow-Cooked Savory Delight - October 3, 2026