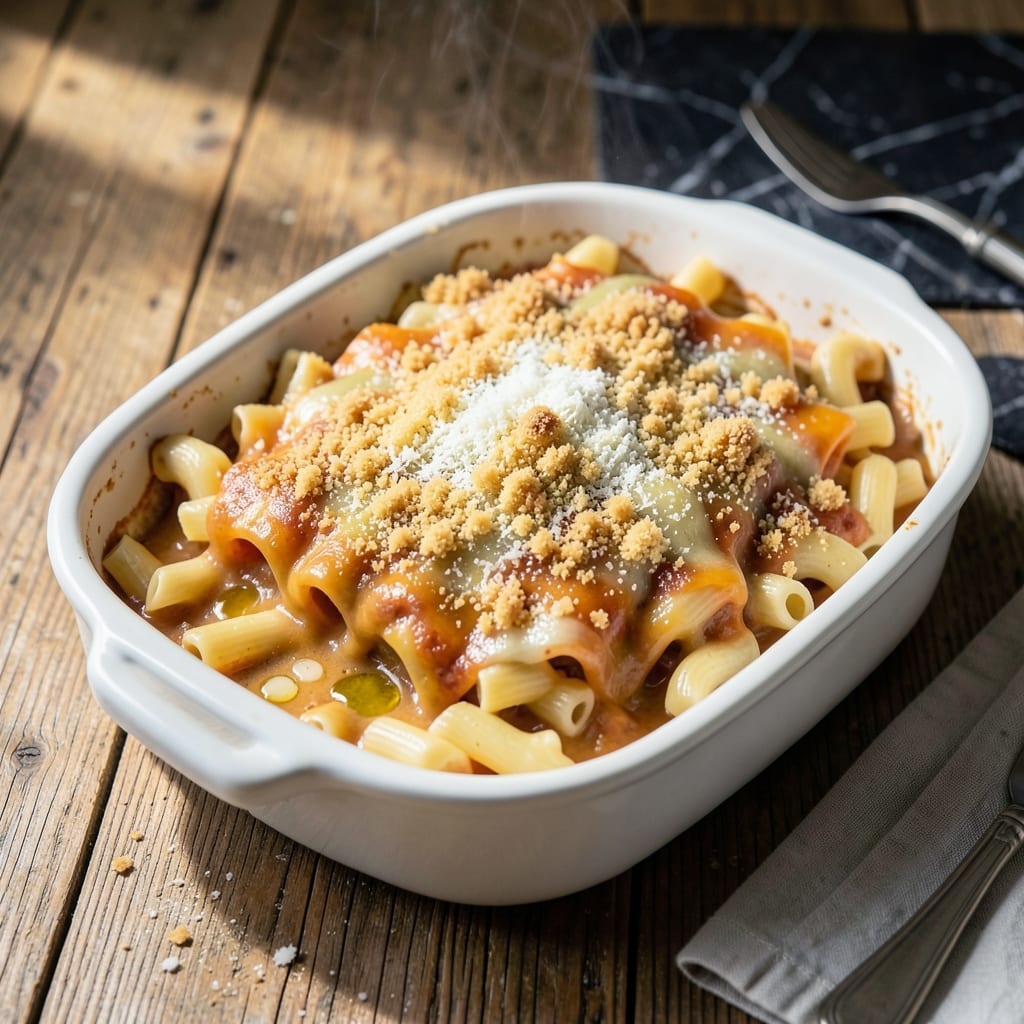
There’s something deeply satisfying about a perfectly executed mac and cheese that delivers on its creamy promise every time. This vegetarian version proves you don’t need meat to create a dish that’s rich, comforting, and utterly satisfying.
I developed this recipe after testing countless variations in my small Boston kitchen, always searching for that ideal combination of creamy sauce and perfectly cooked pasta. The secret lies in the cheese blend and a simple cooking technique that prevents the sauce from separating.
What you’ll achieve is a velvety mac and cheese with a sauce that clings to every noodle, delivering that classic comfort food experience. The vegetarian approach lets the cheese flavors shine without competition from meat.
Build this dish with confidence, knowing each ingredient plays a crucial role in creating that perfect texture and flavor.
Ingredients for Mac and Cheese Recipe Ingredients List
A carefully curated list of cheeses and pantry staples creates that perfect creamy texture.
| Ingredient | Amount | Notes |
|---|---|---|
| Elbow Macaroni 🍝 | 12 oz | Or cavatappi for extra sauce cling |
| Unsalted Butter 🧈 | ½ cup | Divided for roux and topping |
| All-Purpose Flour 🌾 | ⅓ cup | For velvety roux base |
| Whole Milk 🥛 | 3 cups | Full-fat for creaminess |
| Sharp Cheddar Cheese 🧀 | 2 cups | Freshly shredded from block |
| Gruyère Cheese 🧀 | 1 ½ cups | Freshly shredded for depth |
| Parmesan Cheese 🧀 | ½ cup | Freshly grated for umami |
| Dijon Mustard 🟡 | 1 tbsp | For subtle tangy complexity |
| Worcestershire Sauce 💧 | 1 tsp | Vegetarian version required |
| Garlic Powder 🧄 | ½ tsp | For aromatic depth |
| Onion Powder 🧅 | ½ tsp | Balances cheese richness |
| Kosher Salt 🧂 | 1 tsp | Adjust to taste |
| Ground Black Pepper 🌶️ | ½ tsp | Freshly ground preferred |
| Ground Nutmeg 🌰 | 0.125 tsp | Freshly grated for warmth |
| Panko Breadcrumbs 🍞 | ½ cup | For crispy topping |
[recipe_ingredient_scaler]
The cheese blend is everything here. Sharp cheddar from Cabot or Tillamook gives that classic mac flavor, while Gruyère (look for it at Whole Foods or Trader Joe’s) adds nutty depth. Always shred your own—pre-shredded has anti-caking agents that make the sauce grainy. For the milk, whole is non-negotiable for that velvety texture (skim just won’t cut it).
No Gruyère? Fontina or Monterey Jack melt beautifully. Vegetarian Worcestershire is key—Annie’s makes a great version. The mustard might seem odd but just 1 tbsp brightens all that richness without tasting like mustard. If using pre-shredded cheese (in a pinch), rinse it first to remove excess starch. Panko can be swapped for crushed Ritz if you want extra buttery crunch.
This keeps 3-4 days in the fridge—reheat with a splash of milk to restore creaminess. Freezes beautifully for 2 months (portion before freezing). The sauce thickens as it cools, so don’t panic if it looks thin at first. Best served immediately though, straight from the pot.
Why You’ll Love This Recipe
- One Pot Wonder: I love that I only need a saucepan and a wooden spoon—no colander, no extra bowls, just melt, whisk, and stir.
- Sharp Cheddar Magic: That tangy bite from the aged cheddar cuts through the creamy sauce in the best way. Honestly, it’s the reason I make this weekly.
- Feeds the Crowd: It stretches easily—double the pasta, double the cheese, and suddenly I’ve got a party dish with zero extra effort.
- Leftovers? Yes Please: The next day, the flavors deepen and the top gets this slightly crisp edge. Between us, I sometimes make extra just for that.
Step-by-Step Instructions for Mac and Cheese
Here’s the method I use to achieve that perfect creamy texture you’re after.
Step 1: Cook the Elbow Macaroni to Al Dente
Bring a large pot of salted water to a rolling boil. Add the 12 oz Elbow Macaroni and cook according to package instructions minus 1 minute—you want it slightly underdone because it’ll finish cooking in the oven.
The pasta should have a tiny bite to it when tasted. Drain well and set aside. Don’t rinse the pasta; the starch helps the sauce cling better. Real talk: this small detail makes a huge difference in your final dish.
Step 2: Create a Velvety Roux Base
In a saucepan over medium heat, melt 0.5 cup Unsalted Butter. Once foaming subsides, whisk in the 0.33 cup All-Purpose Flour to form a smooth paste. Cook for 1-2 minutes until the mixture turns a light golden color and smells slightly nutty.
This roux is the foundation of your cheese sauce. I’ve found that cooking it for the full 2 minutes removes any raw flour taste. The mixture should bubble gently but not brown—if it does, lower your heat immediately.
Step 3: Build the Creamy Cheese Sauce
Gradually whisk in the 3 cups Whole Milk, 1 cup at a time, ensuring each addition is fully incorporated before adding more. Bring to a gentle simmer and cook for 3-4 minutes until the sauce thickens enough to coat the back of a spoon.
Reduce heat to low and stir in the 2 cups Sharp Cheddar Cheese, 1.5 cups Gruyère Cheese, 0.5 cup Parmesan Cheese, 1 tbsp Dijon Mustard, 1 tsp Worcestershire Sauce, 0.5 tsp Garlic Powder, 0.5 tsp Onion Powder, 1 tsp Kosher Salt, 0.5 tsp Ground Black Pepper, and 0.125 tsp Ground Nutmeg. Stir until all the cheese is melted and the sauce is smooth.
Step 4: Combine and Top with Crispy Breadcrumbs
Fold the cooked elbow macaroni into the cheese sauce until every piece is well coated. Transfer the mixture to a greased baking dish. This is the moment that matters: make sure the pasta is evenly distributed and the sauce isn’t pooling at the bottom.
In a small bowl, melt 2 tablespoons of the remaining unsalted butter and mix with the 0.5 cup Panko Breadcrumbs. Sprinkle this evenly over the macaroni. The topping should look generous but not overpowering.
Step 5: Bake to Golden Perfection
Bake in a preheated 375°F oven for 20-25 minutes until the top is golden brown and the edges are bubbling. You’ll see the cheese sauce peeking through the breadcrumbs in spots—this is exactly what you want.
Let it rest for 5 minutes before serving. This allows the sauce to thicken slightly and makes serving easier. The top should be crispy, the inside creamy, and every bite should have that perfect balance of cheesy richness and subtle seasoning.
Pro Tips For Making Mac And Cheese Recipe Ingredients List
- Cook Pasta Al Dente: Boil the elbow macaroni for 1 minute less than the package says—I learned this the hard way after ending up with mushy mac and cheese more times than I’d like to admit.
- Grate Your Own Cheese: Skip the pre-shredded sharp cheddar; it’s coated in anti-caking agents that make the sauce grainy. Freshly grated melts smoother and tastes way better.
- Warm the Milk: Take the whole milk out of the fridge 10 minutes before starting, or warm it gently in the microwave for 30 seconds. Cold milk can make your roux seize up.
- Salt Every Layer: Add a pinch of salt to the pasta water, the roux, and the cheese sauce—unsalted butter means you’ll need to season more than you think.
Make-Ahead Tips for Leftovers
Prep Ahead Strategy
You can shred all 3.5 cups of cheese (cheddar, Gruyère, Parmesan) and store in the fridge for up to 2 days before cooking. I do this in my tiny Boston kitchen to save time on busy nights. Just keep the cheeses in separate bags to prevent them from sticking together. 🧀
Pasta Prep
Cook the 12 oz elbow macaroni up to 2 days ahead and store in the fridge. Toss with 1 tsp olive oil to prevent sticking. When ready to assemble, just rinse under warm water to remove the oil and proceed with the recipe.
Sauce Base
Make the roux and cheese sauce completely, then store in an airtight container in the fridge for up to 2 days. The sauce will thicken as it cools—just warm it gently over low heat while whisking before combining with pasta.
Freezer-Friendly
Assemble the entire dish (including panko topping) and freeze before baking. Wrap tightly with plastic wrap and foil. It keeps for 2 months. Bake from frozen at 375°F for 45-50 minutes, covered for the first 30 minutes. ❄️
Reheating Tips
For previously baked mac and cheese, cover with aluminum foil and reheat at 350°F for 15-20 minutes. Add a splash of milk to restore creaminess if needed. The topping will soften but will crisp up again under the broiler for 1-2 minutes.
Pro Make-Ahead Tip
I intentionally undercook the pasta by 2 minutes when making ahead. It finishes perfectly during the baking step, preventing that mushy texture that often plagues make-ahead mac and cheese. This trick saved me after my infamous pot pie disaster in 2019. 💡
Nutrition Facts
Frequently Asked Questions
Can I use pre-shredded cheese?
It’s best to avoid it. Pre-shredded cheese has anti-caking agents that can make your sauce grainy. If you must, rinse it first to remove excess starch. Freshly shredded from the block always yields the creamiest results.
Why use three types of cheese?
The blend creates depth of flavor. Sharp cheddar provides classic taste, Gruyère adds nutty richness, and Parmesan gives it a salty kick. Together they create that perfect balance.
Can I make this gluten-free?
Substitute gluten-free pasta and 1:1 gluten-free flour for the roux. Ensure all sauces and toppings are certified gluten-free. The texture remains just as creamy.
What if my sauce is too thick?
Stir in 1/4 cup warm milk at a time until it reaches your desired consistency. The sauce thickens as it cools, so be patient before adjusting.

Trained in classic French technique but raised on slow-cooked ribs and spicy rubs, she blends culinary skill with smoke and soul.
- Recipe for Boneless Pork Chops in Cast Iron Skillet: Sear and Baste to Juicy Perfection - October 3, 2026
- Recipe for Boneless Cross Rib Roast: Slow-Roasted Beef with Herb Crust - October 3, 2026
- Hamburgers in Sauce Recipe Crock Pot: Slow-Cooked Savory Delight - October 3, 2026