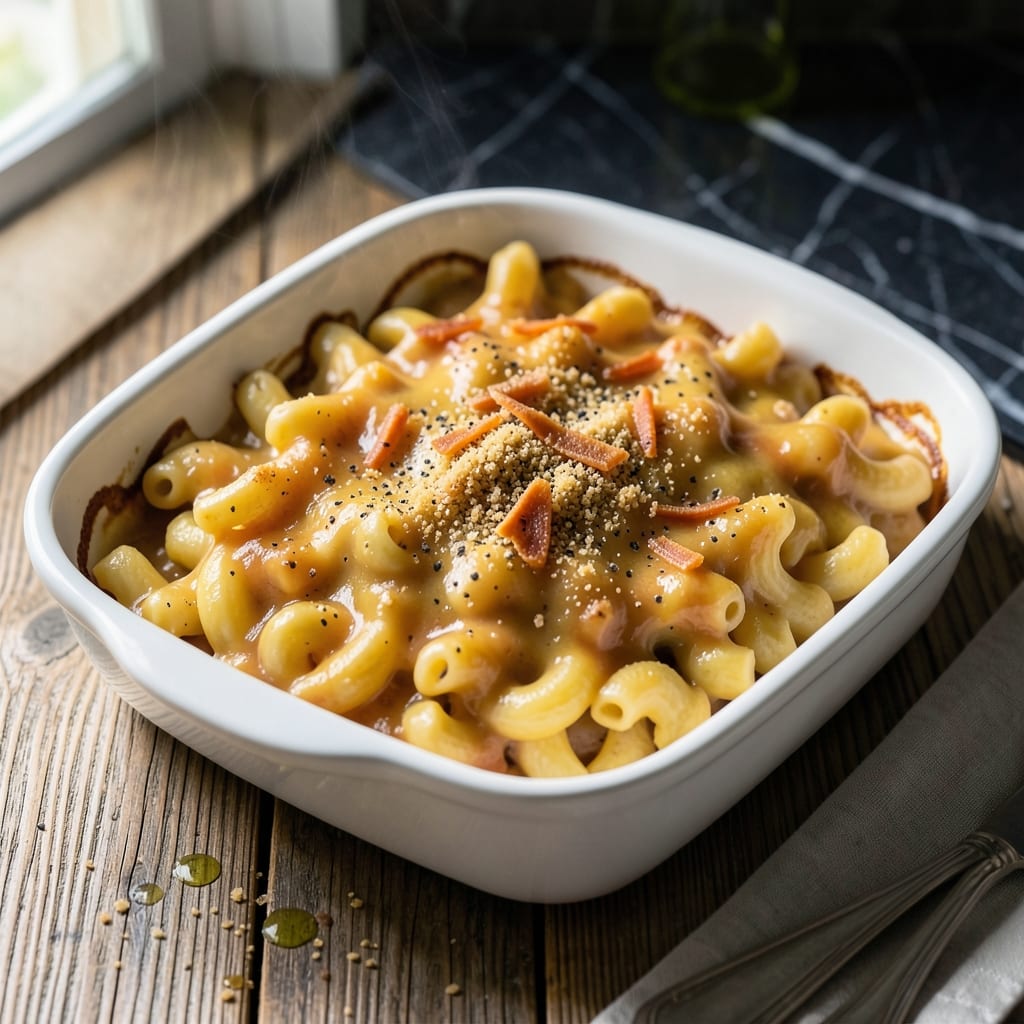
There’s a reason Jamie Oliver’s mac and cheese stands out—it’s all about the silky texture. I’ve spent years decoding professional techniques to recreate that restaurant-quality result at home.
This version uses a precise method of building the cheese sauce slowly, ensuring it never separates. Three types of cheese create depth while pasta cooks to perfectly al dente in the same pot.
The final dish delivers creamy, velvety sauce clinging to every noodle with a golden breadcrumb topping. It’s the kind of comfort food that feels indulgent but is surprisingly straightforward.
Ready in under 45 minutes, this proves great mac and cheese doesn’t need a fancy kitchen.
Ingredients for Macaroni and Cheese Recipe Jamie Oliver
Professional techniques meet humble ingredients for that signature Jamie Oliver silky finish.
| Ingredient | Amount | Notes |
|---|---|---|
| Elbow Macaroni 🍝 | 12 oz | Or cavatappi for sauce cling |
| Whole Milk 🥛 | 2 cups | Full-fat for creaminess |
| Unsalted Butter 🧈 | 4 tbsp | Divided, for sauce and topping |
| All-Purpose Flour 🌾 | 4 tbsp | For roux, sifted if lumpy |
| Sharp Cheddar Cheese 🧀 | 2 cups | Freshly grated, block preferred |
| Gruyere Cheese 🧀 | 1 cup | Freshly grated for nutty depth |
| Parmesan Cheese 🧀 | ½ cup | Freshly grated, Parmigiano-Reggiano |
| Dijon Mustard 🟡 | 1 tsp | For tang and emulsion |
| Worcestershire Sauce 💧 | 1 tsp | Vegetarian version required |
| Nutmeg 🌰 | ¼ tsp | Freshly grated if possible |
| Kosher Salt 🧂 | 1 tsp | Diamond Crystal preferred |
| Freshly Ground Black Pepper 🌶️ | ½ tsp | Coarse grind for texture |
| Panko Breadcrumbs 🍞 | ½ cup | For crisp golden topping |
[recipe_ingredient_scaler]
The cheese selection is non-negotiable for authentic texture. Sharp cheddar provides the base, while Gruyere adds complexity and Parmesan delivers umami depth. Source blocks from Whole Foods or specialty counters—pre-shredded contains anti-caking agents that prevent smooth melting. For the vegetarian Worcestershire, Annie’s or Edward & Sons brands are reliable substitutes.
No Gruyere? Fontina or Monterey Jack melt beautifully. Swap panko for fresh breadcrumbs (process stale sourdough with a pinch of thyme). The milk can be reduced-fat but avoid skim—fat content is critical for emulsion. For gluten-free, use brown rice pasta and gluten-free flour blend. The mustard can be yellow if Dijon isn’t available, though the flavor profile will be milder.
Store cheeses wrapped in parchment then foil for up to 1 week. The sauce keeps 3 days refrigerated but separates when reheated—best made fresh. Panko topping can be prepped ahead and stored at room temperature in an airtight container for 2 weeks.
Why You’ll Love This Recipe
- One Pot Wonder: I love that this comes together in a single pan—just cook the pasta, whisk in the butter-flour roux, and melt in the sharp cheddar. No colander, no extra bowls.
- Velvety Sharpness: The combo of whole milk and sharp cheddar creates this ridiculously creamy sauce with a tangy bite. Honestly, it’s the cheesiest without being cloying.
- Crowd-Pleasing Classic: Whether it’s a lazy Sunday or a last-minute potluck dish, this mac and cheese disappears fast. My niece even eats the leftovers cold the next day.
- Budget Stretcher: Elbow macaroni and block cheddar are cheap, and this recipe feeds four easily. I’ll be real: it’s my go-to when I need to fill bellies without breaking the bank.
Step-by-Step Instructions for Macaroni and Cheese
Master the technique for ultra-creamy, three-cheese perfection with this proven method.
Step 1: Cook Elbow Macaroni Al Dente
Bring a large pot of salted water to a rolling boil. Add the 12 oz Elbow Macaroni and cook for 1 minute less than package instructions specify—it should be just shy of tender. This prevents it from turning mushy when baked with the sauce.
Drain the pasta thoroughly in a colander but don’t rinse it. The residual starch helps the sauce cling to each piece. Return the pasta to the pot and set it aside while you prepare the cheese sauce—keeping it warm prevents cooling and sticking.
Step 2: Create a Silky Cheese Sauce
In a separate saucepan, melt 4 tbsp Unsalted Butter over medium heat. Once foaming subsides, whisk in the 4 tbsp All-Purpose Flour to form a roux. Cook for 2 minutes until the mixture turns a pale golden color and smells slightly nutty.
Gradually pour in the 2 cups Whole Milk, whisking constantly to avoid lumps. Stir in the 1 tsp Dijon Mustard, 1 tsp Worcestershire Sauce, 0.25 tsp Nutmeg, 1 tsp Kosher Salt, and 0.5 tsp Freshly Ground Black Pepper. Simmer for 5-7 minutes until the sauce thickens enough to coat the back of a spoon.
Step 3: Incorporate the Cheeses
Reduce the heat to low and begin adding the cheeses in stages. First, stir in the 2 cups Sharp Cheddar Cheese and 1 cup Gruyere Cheese, allowing each addition to melt completely before adding more. This gradual process ensures a smooth, lump-free sauce.
Once melted, remove the sauce from heat and stir in the 0.5 cup Parmesan Cheese. The residual heat will incorporate it perfectly. Taste and adjust seasoning if needed—cheeses vary in saltiness, so this step matters.
Step 4: Combine Pasta and Sauce
Pour the cheese sauce over the cooked Elbow Macaroni in the pot. Stir gently but thoroughly to coat every piece evenly. The sauce should cling to the pasta with a glossy finish. If it seems too thick, add a splash of warm milk to loosen it slightly.
Transfer the mixture to a greased baking dish, spreading it evenly. This ensures uniform baking and a consistent texture throughout the dish.
Step 5: Add Crispy Topping and Bake
Melt the remaining 4 tbsp Unsalted Butter and toss it with the 0.5 cup Panko Breadcrumbs until evenly coated. Sprinkle this mixture over the macaroni and cheese, pressing lightly to adhere. The butter ensures a golden, crispy topping.
Bake at 375°F for 20-25 minutes until the top is golden brown and the edges are bubbling. Let it rest for 5 minutes before serving to allow the sauce to set slightly—this makes serving easier and enhances the texture.
Pro Tips For Making Macaroni And Cheese Recipe Jamie Oliver
- Undercook the Pasta: Pull the elbow macaroni off the heat 1-2 minutes before it’s fully tender—it’ll finish cooking in the cheese sauce and soak up more flavor.
- Grate the Cheese Fresh: Skip pre-shredded cheddar; it’s coated in anti-caking agents that make the sauce grainy. I learned this the hard way after three lumps of sad, stringy cheese.
- Temper the Milk: Warm the whole milk slightly before adding it to the roux—cold milk can make the sauce seize up and turn lumpy.
- Add Pasta Water: Stir in a splash or two of the starchy pasta water to the cheese sauce—it helps bind everything together and gives it a silky texture.
Essential Equipment for Perfect Results
Essential Pot
I always reach for my 5-quart Dutch oven—it’s the perfect size for boiling pasta and later combining everything. The heavy base prevents scorching when making the roux. Le Creuset or Lodge brands distribute heat beautifully. 💪
Saucepan Choice
A 3-quart saucepan with a heavy bottom is ideal for your cheese sauce. I use my All-Clad stainless steel—it responds quickly to temperature changes, crucial for preventing the sauce from breaking. Avoid nonstick for this step.
Whisk Matters
Invest in a balloon whisk for the roux and sauce stages. The shape helps incorporate air while whisking, creating that silky texture. I keep a 12-inch whisk from OXO in my drawer—it’s comfortable and durable.
Grater for Cheese
Freshly grated cheese melts smoothly, so a box grater is essential. I prefer the Microplane for Parmesan—it creates fine, fluffy shreds that incorporate effortlessly. Avoid pre-shredded cheese; the anti-caking agents ruin the texture.
Baking Dish
A 9×13-inch baking dish gives the perfect depth for even baking and a crispy top. I love my stoneware dish from the local pottery shop—it retains heat and looks beautiful on the table. Glass works too, but watch for hot spots. 🔥
Mixing Tools
Use a wooden spoon or silicone spatula to fold the sauce and pasta together. These won’t scratch your pot and help coat every noodle evenly. I also keep a ladle handy for serving perfect portions.
Nutrition Facts
Frequently Asked Questions
Can I use pre-shredded cheese?
It’s not recommended. Pre-shredded contains anti-caking agents that prevent smooth melting. For best results, always grate your own cheese for that signature silky texture.
Why bake when the sauce is already creamy?
Baking transforms the dish by creating a golden, crispy topping while allowing the flavors to meld together. The 5-minute rest after baking ensures perfect serving consistency.
What if my sauce turns grainy?
This usually happens if the cheese is added too quickly or at too high heat. Remove from heat immediately and whisk in 1-2 tbsp of warm milk to restore smoothness.
Can I make this ahead of time?
The sauce keeps for 3 days refrigerated, but it’s best made fresh. Assemble the dish up to the baking step, then refrigerate. Add 5-10 minutes to baking time if cooking from cold.

Trained in classic French technique but raised on slow-cooked ribs and spicy rubs, she blends culinary skill with smoke and soul.
- Recipe for Boneless Pork Chops in Cast Iron Skillet: Sear and Baste to Juicy Perfection - October 3, 2026
- Recipe for Boneless Cross Rib Roast: Slow-Roasted Beef with Herb Crust - October 3, 2026
- Hamburgers in Sauce Recipe Crock Pot: Slow-Cooked Savory Delight - October 3, 2026