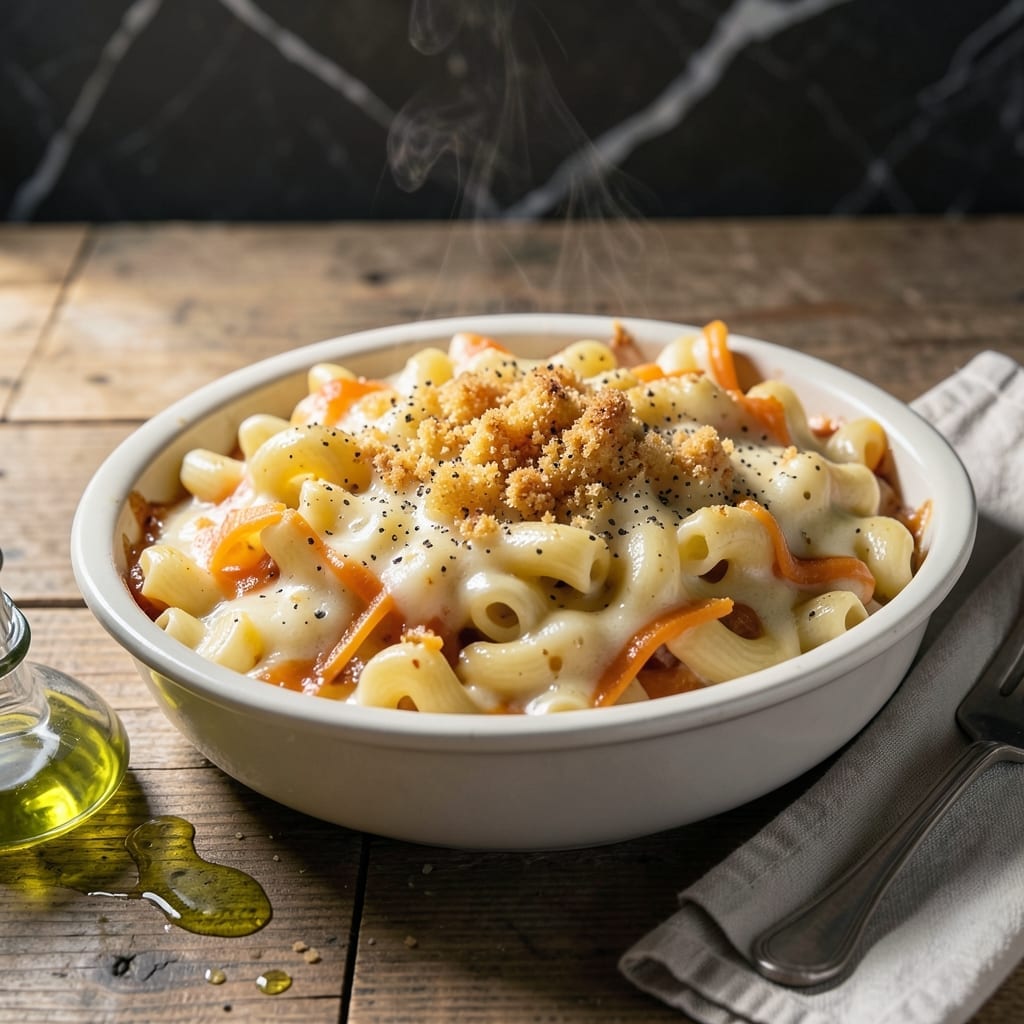
This step-by-step guide delivers the perfect macaroni and cheese every time with foolproof techniques and visual cues.
I developed this method after testing countless variations to achieve consistently creamy results without curdling or clumping. The secret lies in the roux base and gradual cheese incorporation.
You’ll find clear instructions with precise temperatures and timing to ensure your sauce turns out velvety smooth. Each step includes visual references to guide you through the process.
Whether you prefer classic or gourmet versions, this recipe provides the foundation for creamy perfection that never fails to impress.
Ingredients for Macaroni and Cheese Recipe Step by Step with Pictures
Pantry staples and a few quality cheeses create velvety, restaurant-worthy comfort food.
| Ingredient | Amount | Notes |
|---|---|---|
| Elbow Macaroni 🍝 | 12 oz | Or any short pasta shape |
| Unsalted Butter 🧈 | 4 tbsp | For roux base |
| All-Purpose Flour 🌾 | ¼ cup | Creates smooth roux |
| Whole Milk 🥛 | 2 cups | Warm for best results |
| Heavy Cream 🥣 | 1 cup | Ensures creamy texture |
| Sharp Cheddar Cheese 🧀 | 8 oz | Freshly grated from block |
| Gruyère Cheese 🧀 | 4 oz | Freshly grated, adds depth |
| Parmesan Cheese 🧀 | 2 oz | Freshly grated for finish |
| Dijon Mustard 🟡 | 1 tsp | Balances richness |
| Garlic Powder 🧄 | ½ tsp | For subtle savory note |
| Onion Powder 🧅 | ½ tsp | Enhances flavor base |
| Kosher Salt 🧂 | 1 tsp | Adjust to taste |
| Ground Black Pepper 🌶️ | ½ tsp | Freshly ground preferred |
| Pinch of Cayenne Pepper 🔥 | 1 pinch | Optional for heat |
[recipe_ingredient_scaler]
The cheese is non-negotiable here. Sharp cheddar from a block melts smoother than pre-shredded (which has anti-caking agents). Gruyère adds nutty depth—splurge on Whole Foods or Trader Joe’s for good quality. Whole milk and heavy cream are key for that luscious texture; don’t swap for low-fat. The pasta? Classic elbow macaroni holds sauce perfectly, but cavatappi or shells work too (whatever’s on sale).
No Gruyère? Fontina or Monterey Jack melt beautifully. Out of heavy cream? Half-and-half plus 2 tbsp butter gets close. Mustard haters can skip the Dijon—just add extra black pepper for balance. For a smoother sauce, grate the cheese yourself (pre-shredded often has cellulose that prevents melting). The roux needs to cook until golden, not brown—this takes about 2-3 minutes on medium heat.
Leftovers thicken as they cool—stir in a splash of warm milk to revive. Stores in the fridge for 3-4 days or freezes for 1 month (though texture changes slightly). Reheat gently on the stove with extra cream (microwave can make it grainy). Pro tip: undercook the pasta by 1 minute—it’ll finish in the sauce.
Why You’ll Love This Recipe
- One Pot Wonder: I love that I only need a saucepan and a baking dish—no colander, no extra bowls, just melt butter, whisk in flour, and pour in the milk and cream.
- Velvety Dream: The combo of whole milk and heavy cream makes the sauce so rich and smooth it clings to every elbow macaroni like it’s giving a hug.
- Kid-Approved Comfort: Between us, my picky nephew devours this, and I’ve served it at potlucks where adults go back for thirds.
- Stretches Far: One batch feeds my family for two nights, and honestly, it reheats even better the next day with that crispy top layer.
Step-by-Step Instructions for Macaroni and Cheese
Here’s my foolproof method for the creamiest, most luxurious version you’ve ever made.
Step 1: Cook the Elbow Macaroni Al Dente
Bring a large pot of salted water to a rolling boil. Add the 12 oz Elbow Macaroni and cook for exactly 1 minute less than the package directs. This ensures it finishes cooking in the sauce without turning mushy.
Stir occasionally to prevent sticking. You’ll know it’s ready when the pasta is slightly firm when bitten but the outer layer has softened. Drain immediately in a colander, but don’t rinse—you need that surface starch for the sauce to cling.
While the pasta cooks, warm the 2 cups Whole Milk and 1 cup Heavy Cream together in a microwave-safe bowl for 1 minute. This prevents the roux from seizing up when you add the cold dairy.
Step 2: Create a Smooth Roux Base
In a large pot over medium heat, melt the 4 tbsp Unsalted Butter until it foams but doesn’t brown. Immediately whisk in the 0.25 cup All-Purpose Flour to form a paste. This is your roux—the foundation of the creamy sauce.
Cook for 2-3 minutes, stirring constantly, until the mixture turns a pale golden color and smells slightly nutty. The roux should bubble gently but not darken. If it browns, you’ve gone too far and the sauce will taste burnt.
Gradually whisk in the warmed Whole Milk and Heavy Cream, a little at a time, until smooth. This slow addition prevents lumps from forming. The mixture will thicken noticeably as it comes to a gentle simmer.
Step 3: Build Flavor and Melt the Cheeses
Reduce heat to medium-low and stir in the 1 tsp Dijon Mustard, 0.5 tsp Garlic Powder, 0.5 tsp Onion Powder, 1 tsp Kosher Salt, 0.5 tsp Ground Black Pepper, and 1 pinch Pinch of Cayenne Pepper. Let it simmer for 2 minutes to meld the flavors.
Begin adding the cheeses in stages: first the 8 oz Sharp Cheddar Cheese, then the 4 oz Gruyère Cheese. Stir constantly until each addition is fully melted and smooth before adding more. This prevents the sauce from breaking or becoming grainy.
The sauce should now be velvety and coat the back of a spoon. If it seems too thick, add a splash of reserved pasta water to loosen it to your desired consistency.
Step 4: Combine Pasta and Sauce for Creamy Perfection
Add the drained Elbow Macaroni to the cheese sauce and stir gently to coat every piece. The pasta will finish cooking in the hot sauce, absorbing the creamy richness as it softens perfectly.
Let it sit off heat for 2 minutes—this allows the pasta to soak up the sauce. Stir once more, then taste and adjust seasoning if needed. I often find it needs an extra pinch of Kosher Salt at this stage.
Step 5: Finish with Parmesan and Serve Immediately
Sprinkle the 2 oz Parmesan Cheese over the top and stir gently one final time. The Parmesan adds a sharp, salty finish that balances the richness of the other cheeses.
Serve immediately while hot and creamy. The sauce will thicken slightly as it cools, so don’t wait too long. For the best texture, enjoy it fresh—this dish doesn’t reheat quite as well as it tastes straight from the pot.
Garnish with extra Ground Black Pepper if desired, and dig in while it’s at its creamy peak.
Pro Tips For Making Macaroni And Cheese Recipe Step By Step With Pictures
- Cook Pasta Al Dente: Boil the elbow macaroni for 1 minute less than the package says—it’ll finish cooking in the sauce. I learned this the hard way after ending up with mushy noodles too many times.
- Warm Your Dairy: Take the whole milk and heavy cream out of the fridge 15 minutes before starting. Cold dairy can make the sauce clump instead of smooth, and nobody wants lumpy mac and cheese.
- Whisk the Roux: Keep the butter and flour mixture moving constantly over medium heat for exactly 2-3 minutes. It should turn a light golden color—any longer and you risk a burnt flavor.
- Add Cheese Last: Stir in your cheese at the very end, off the heat. High temperature can make the sauce stringy, and after ruining a batch, I now pull the pot off the burner first.
Essential Equipment for macaroni and cheese recipe step by step with pictures
Heavy-Bottomed Pot
I always reach for my 3-quart Le Creuset Dutch oven for mac and cheese. The heavy base prevents hot spots that can cause dairy to scorch. David insists it’s the only pot that gives him perfectly even heating every time. 💛
Whisk for Smooth Sauce
A balloon whisk is essential for creating lump-free roux and sauce. I use a 10-inchOXO Good Grips—its comfortable handle and flexible wires reach all edges of the pot. Stainless steel holds up to frequent use.
Cheese Grater
Freshly grated cheese melts better than pre-shredded. My Microplane box grater handles both cheddar and Gruyère easily. The fine side creates melt-perfect shreds. I bought mine at Central Market last year and it’s still going strong.
Wooden Spoon
Once the sauce is made, switch to a wooden spoon for stirring in pasta. It won’t scratch your pot and gently folds the ingredients. I keep a 12-inch bamboo spoon dedicated to cheese sauces—it’s absorbed so much flavor over the years.
Instant-Read Thermometer
For perfect dairy temperature, I use my ThermoWorks Thermapen. It ensures milk and cream stay between 140-160°F when warming. This prevents curdling and guarantees a silky sauce every time.
Colander for Pasta
A large stainless steel colander is crucial for draining pasta quickly. I use a 5-quart one that fits over my sink perfectly. The holes are small enough to catch even tiny elbow macaroni pieces.
Nutrition Facts
Frequently Asked Questions
Can I use pre-shredded cheese?
Pre-shredded cheese contains anti-caking agents that prevent smooth melting. For best results, always grate your own from a block.
How do I prevent a grainy sauce?
Cook your roux to golden but not brown, and add cheese gradually on medium-low heat. Stir constantly until fully melted between additions.
Can I make this ahead of time?
The sauce thickens as it cools. Store in the fridge for up to 3-4 days, then reheat gently with a splash of warm milk.
Why cook pasta al dente first?
The pasta finishes cooking in the hot sauce, absorbing maximum creaminess. Overcooked pasta turns mushy in the final dish.

Trained in classic French technique but raised on slow-cooked ribs and spicy rubs, she blends culinary skill with smoke and soul.
- Recipe for Boneless Pork Chops in Cast Iron Skillet: Sear and Baste to Juicy Perfection - October 3, 2026
- Recipe for Boneless Cross Rib Roast: Slow-Roasted Beef with Herb Crust - October 3, 2026
- Hamburgers in Sauce Recipe Crock Pot: Slow-Cooked Savory Delight - October 3, 2026