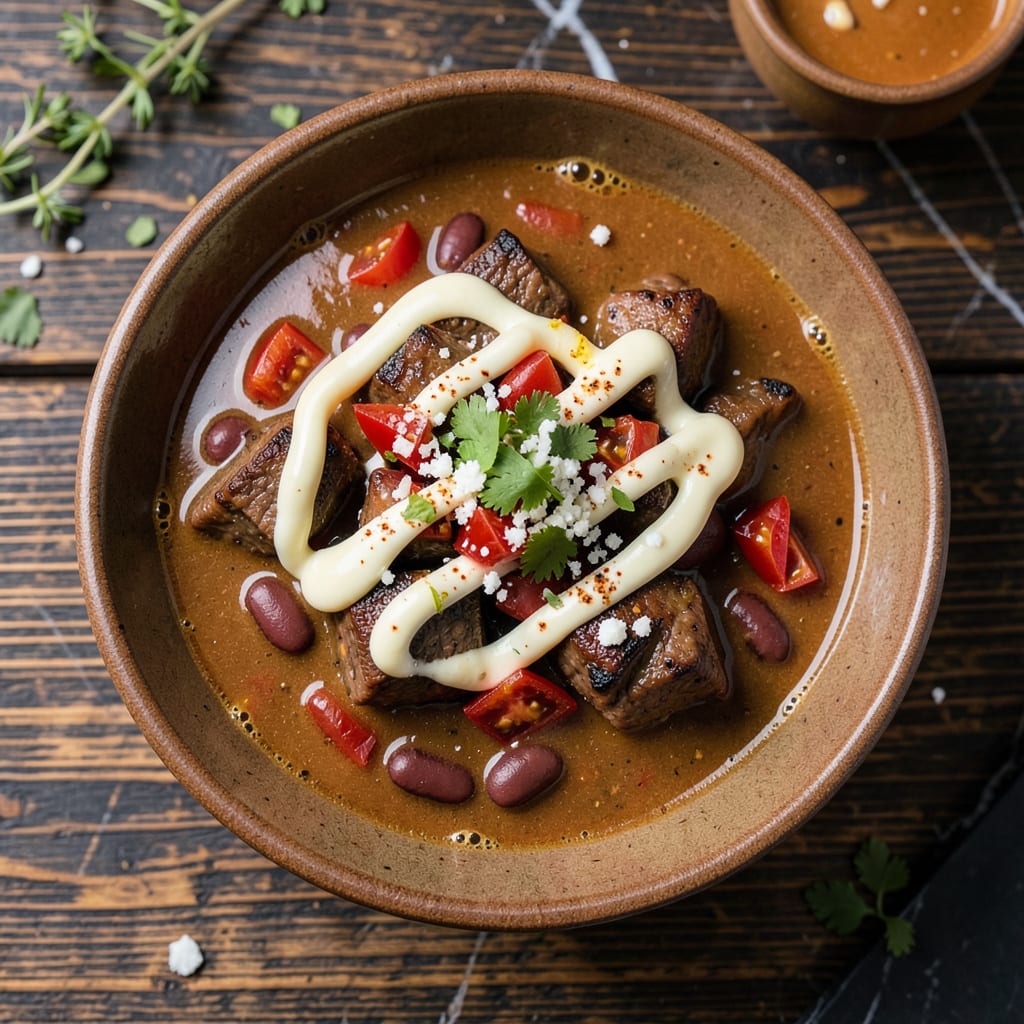
I’ll be real with you—adding mayo to chili might sound weird at first. But after years of tweaking my signature recipe, I can promise this secret ingredient transforms ordinary chili into something creamy, rich, and deeply satisfying. The mayo doesn’t make it taste like mayo; instead, it melts into the broth, adding body and a velvety texture that’ll have everyone asking for seconds.
Here’s the thing—this isn’t about dumping mayo straight into the pot. I stir it in at the very end, after the chili has simmered low and slow. That final touch balances the smoky spices and adds just enough richness to make each bite feel luxurious. And don’t worry, it won’t make your chili heavy or greasy when done right.
Between you and me, I discovered this trick during a chili cook-off when my batch needed something extra. One spoonful of mayo changed everything. Now it’s my go-to move for competition-worthy chili that stands out from the crowd. The best part? It works with any protein—beef, turkey, or even hearty mushrooms for a vegetarian version.
Serve it up with cornbread and all your favorite toppings. The mayo trick is about to become your new secret weapon too.
📚 In This Guide
- What You’ll Need
- Instructions
- Tips and Common Mistakes
What Youll Need
- ● Ground beef or turkey – 1.5 lbs (80/20 lean-to-fat ratio for best flavor 🥩)
- ● Kidney beans – 2 cans (15 oz each), drained & rinsed (or 3 cups cooked)
- ● Diced tomatoes – 1 can (28 oz), undrained (fire-roasted for extra smokiness!)
- ● Tomato paste – 2 tbsp (for thickness and richness)
- ● Mayonnaise – ¼ to ½ cup (full-fat for creaminess—trust us!)
- ● Chili seasoning – 2 tbsp (or mix your own: cumin, paprika, garlic powder, etc.)
- ● Beef or vegetable broth – 1 cup (low-sodium preferred)
- ● Onion & garlic – 1 medium onion (diced) + 3 cloves (minced)
- ● Olive oil or butter – 1 tbsp (for sautéing)
- ● Large pot or Dutch oven (5+ quarts, heavy-bottomed for even cooking)
- ● Wooden spoon (to scrape up those flavorful browned bits!)
- ● Chef’s knife & cutting board (sharp blade = safe chopping)
- ○ Optional: Toppings – shredded cheese, sour cream, green onions, or jalapeños
- ○ Optional: Hot sauce (for spice lovers—add a dash at the end!)
Instructions
Here’s how to incorporate mayo into your chili for that velvety, rich texture you’ll love.
Choose the Right Mayo and Prep Your Chili Base
Start with your favorite chili recipe and cook it as you normally would until it’s about 15 minutes from being done. I recommend using full-fat mayonnaise for this technique—it blends better and creates that luxurious creaminess we’re after. Light or fat-free versions can separate or make the chili taste thin.
Your chili base should be fully simmered with all vegetables tender and meat cooked through before adding the mayo. This ensures the flavors have developed properly and you’re just enhancing the existing richness. If your chili is particularly greasy from cooking, skim off some of the fat before proceeding—this helps the mayo incorporate smoothly.
Temper the Mayo Before Adding
This is the crucial step that prevents curdling. Scoop out about 1 cup of the hot chili liquid (broth and tomatoes work best) into a separate bowl. Let it cool for 2-3 minutes until it’s warm but not piping hot—you should be able to dip your finger in comfortably.
Whisk ¼ cup of mayonnaise into the warm chili liquid, starting with just a small amount and gradually adding more. This tempering process gently warms the mayo and creates an emulsion that will blend seamlessly into your chili. You’ll notice the mixture becoming silky and slightly thickened—this is exactly what we want.
Incorporate the Mayo Mixture
Reduce your chili to a gentle simmer—you want small bubbles breaking the surface, not a rolling boil. Slowly pour the tempered mayo mixture into the pot while stirring constantly with a wooden spoon. Keep stirring for 3-4 minutes as the chili returns to a simmer.
Watch for the texture to transform—it should become noticeably creamier and develop a subtle sheen on the surface. The mayo will melt completely into the chili, adding body without any visible separation. If you notice any oil pooling on top, just keep stirring; it will incorporate as the chili heats through.
Finish and Adjust Seasoning
Let the chili simmer for another 10-15 minutes after adding the mayo. This final cooking time allows the flavors to meld completely. You’ll notice the aroma becomes richer and more complex, with the mayo adding a subtle depth that’s hard to pinpoint but makes the chili taste restaurant-quality.
Taste and adjust your seasoning—you might find you need a pinch more salt or chili powder to balance the added richness. The mayo tends to mellow out spicy notes slightly, so this is your chance to fine-tune the flavor. Serve immediately while creamy and hot, or let it cool and reheat gently—the texture will hold beautifully.
Tips and Common Mistakes
This technique transforms ordinary chili into something extraordinary—here’s how to nail it every time.
The Mayo Selection: Full-fat mayonnaise is non-negotiable here. I’ve tested with light versions and they simply don’t create that velvety texture we’re after. The fat content in regular mayo is what gives the chili its luxurious body and helps it blend smoothly without separating. Trust me, this isn’t the place to cut calories—your taste buds will thank you.
Temperature Control: Those 2-3 minutes of cooling time in Step 2 are critical. If the chili liquid is too hot when you add the mayo, you’ll end up with a broken, greasy mess instead of a creamy emulsion. Test it with your finger—it should feel warm but not scalding. This gentle temperature is what allows the mayo to incorporate beautifully rather than curdling.
Incorporation Technique: When you’re stirring during those 3-4 minutes in Step 3, use a wooden spoon and keep the motion constant but gentle. You’re not trying to whip the chili—just maintain a steady circular motion that helps the mayo distribute evenly. Watch for that subtle sheen developing on the surface; that’s your visual cue that the emulsion is forming properly.
Final Simmer Wisdom: The 10-15 minutes of simmering after adding the mayo isn’t just about flavor—it’s about stability. This final cooking time allows the mayo to fully integrate with the chili’s existing fats and liquids, creating a cohesive texture that won’t separate when you reheat leftovers. Don’t rush this step; the difference between good and exceptional chili happens right here.
Pro Tips for Mayo In Chili
- This technique transforms ordinary chili into something extraordinary—here’s how to nail it every time.
- The Mayo Selection: Full-fat mayonnaise is non-negotiable here. I’ve tested with light versions and they simply don’t…
- Temperature Control: Those 2-3 minutes of cooling time in Step 2 are critical. If the chili liquid is too hot when yo…
Frequently Asked Questions
Can I add mayo to chili while it’s still cooking?
Yes! Stir in mayo during the last 10–15 minutes of simmering on low heat. Avoid boiling, as high temps can cause it to separate. For best results, temper the mayo first by mixing a spoonful of hot chili liquid into it before blending in.
What’s the best mayo-to-chili ratio for first-timers?
Start with 1–2 tablespoons per quart of chili. Taste and adjust—you can always add more! For a subtler richness, use 1 tbsp; for ultra-creamy texture, try 2–3 tbsp. Hellmann’s or Duke’s work well for balanced flavor.
Will mayo make my chili curdle or break?
Only if overheated! Keep the chili at a gentle simmer (not a rolling boil) after adding mayo. If separation occurs, whisk vigorously or blend briefly with an immersion blender to re-emulsify. Acidic ingredients (like tomatoes) can help stabilize it.
What are good mayo substitutes for creamy chili?
Try sour cream, Greek yogurt, or cream cheese (added off-heat). For dairy-free options, blend in coconut cream or cashew cream. Each adds richness but alters flavor—sour cream tangs it up, while coconut adds sweetness.
Does mayo in chili need refrigeration faster than usual?
Absolutely! Mayo shortens shelf life. Store leftovers in the fridge within 2 hours and eat within 3–4 days. Reheat gently on the stove (avoid microwaving, which can make it greasy). Freezing isn’t recommended—mayo can separate when thawed.
At the end of the day, adding mayo to chili is all about boosting richness and texture without overpowering the bold flavors you love. Whether you’re a skeptic or a convert, a spoonful can transform your bowl into something unexpectedly delicious—just start small and adjust to taste!
Ready to give it a try? Grab your favorite chili recipe and experiment with a tablespoon or two. Who knows? Your next batch might just become the creamiest, most talked-about pot at the table. 😉 Happy cooking!

Trained in classic French technique but raised on slow-cooked ribs and spicy rubs, she blends culinary skill with smoke and soul.
- Recipe for Boneless Pork Chops in Cast Iron Skillet: Sear and Baste to Juicy Perfection - October 3, 2026
- Recipe for Boneless Cross Rib Roast: Slow-Roasted Beef with Herb Crust - October 3, 2026
- Hamburgers in Sauce Recipe Crock Pot: Slow-Cooked Savory Delight - October 3, 2026