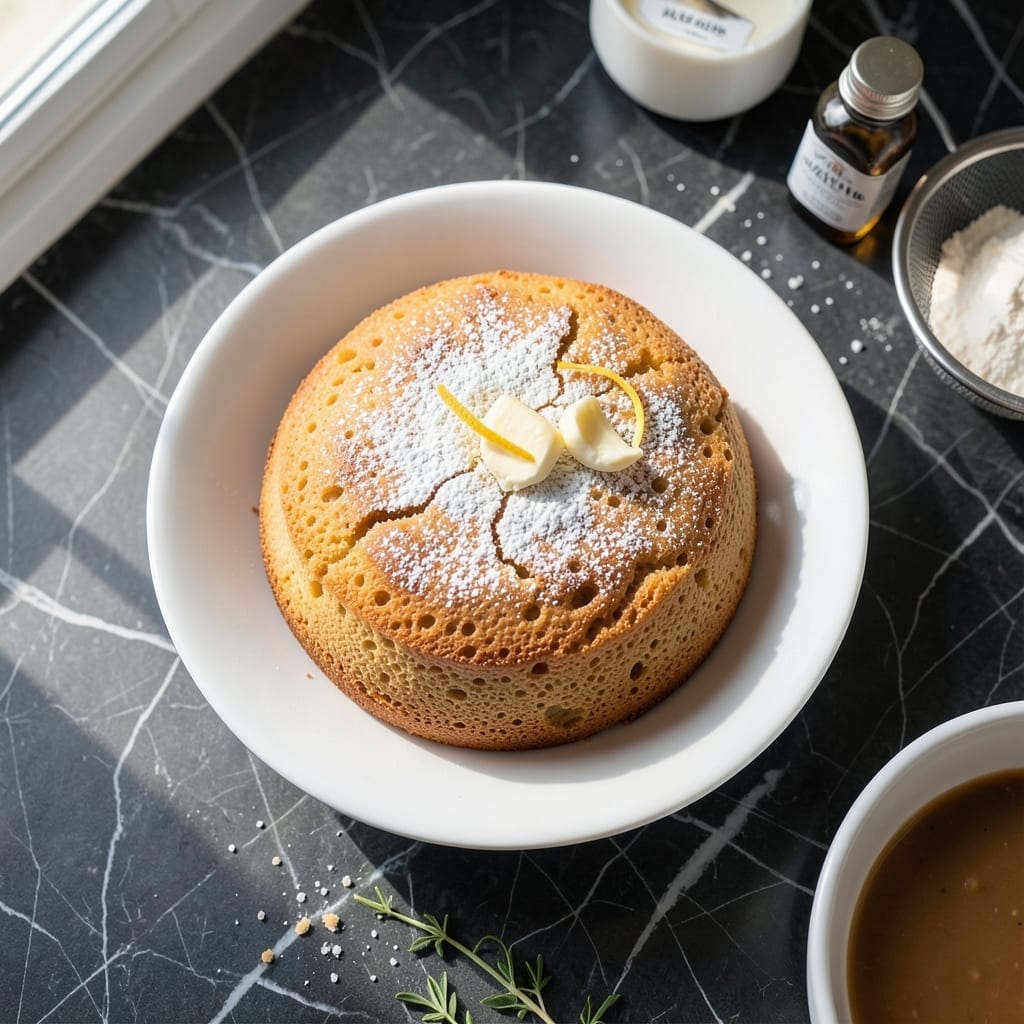
I never thought a microwave could produce light and fluffy cake until I tested this method. The results surprised even my classically trained instincts.
This technique delivers a tender crumb with minimal effort, using basic pantry staples. No oven, no complicated steps—just precise timing and a microwave-safe dish.
The cake rises beautifully in just 5 minutes, emerging golden and springy. A dusting of powdered sugar or fresh berries elevates it to dessert-worthy status.
Perfect for last-minute cravings or when traditional baking isn’t an option. The texture rivals any oven-baked version.
Ingredients for Microwave Sponge Cake
Basic pantry staples transform into a tender, airy dessert with zero oven time.
| Ingredient | Amount | Notes |
|---|---|---|
| All-Purpose Flour 🌾 | 1 cup | Sifted for airiness |
| Granulated Sugar 🍚 | ¾ cup | Fine grain for even distribution |
| Large Eggs 🥚 | 3 whole | Room temperature for best volume |
| Unsalted Butter 🧈 | ½ cup | Melted and cooled slightly |
| Vanilla Extract 🌿 | 1 tsp | Pure extract for best flavor |
| Baking Powder 🧂 | 1 tsp | Ensures proper rise |
| Salt 🧂 | ¼ tsp | Fine sea salt preferred |
| Whole Milk 🥛 | ¼ cup | Room temperature for smooth batter |
| Lemon Juice 🍋 | 1 tbsp | Freshly squeezed for brightness |
| Powdered Sugar 🍚 | 2 tbsp | For dusting, optional garnish |
| Fresh Berries 🍓 | ½ cup | Raspberries or strawberries suggested |
[recipe_ingredient_scaler]
The eggs are doing the heavy lifting here—room temperature is key for maximum volume. I grab mine from Whole Foods or the local farmers market when I can. The butter should be unsalted so you control the salt content. If you’re using salted, skip the added salt. Flour quality matters less than you’d think, but King Arthur is my go-to for consistency.
No whole milk? Any dairy milk works, or unsweetened almond milk in a pinch (the cake’ll be slightly denser). Out of vanilla? Almond extract at half the amount adds a nice twist. For a citrusy note, add the zest of that lemon you’re juicing. The baking powder is non-negotiable—don’t swap for baking soda, or your cake won’t rise right.
Batter comes together in minutes, but don’t let it sit—microwave it right after mixing. Leftovers? 2 days wrapped tight at room temp, or 5 days refrigerated. Freeze slices for up to 1 month (thaw at room temp before serving).
Why You’ll Love This Recipe
- No Oven Needed: I can make a fluffy cake in my microwave using just a mug and these pantry staples.
- Buttery Vanilla Magic: The melted butter and vanilla extract give it that rich, bakery-style taste I crave.
- Last-Minute Dessert: Honestly, it’s my go-to when unexpected guests arrive and I need something sweet fast.
- Budget-Friendly Treat: A handful of basic ingredients, zero waste, and it feeds my family of four for pennies.
Step-by-Step Instructions for Microwave Sponge Cake
This method guarantees a tender, airy texture with minimal effort and maximum speed.
Step 1: Prepare the Dry Ingredients with Precision
In a medium bowl, whisk together the 1 cup All-Purpose Flour, 1 tsp Baking Powder, and 0.25 tsp Salt. I sift the flour first to break up any lumps and ensure a light, airy crumb in the finished cake. The baking powder is your leavening agent here—it’s what gives the sponge its lift in the microwave’s rapid cooking environment.
Set this dry mixture aside while you prepare the wet ingredients. Keeping them separate until the final moment prevents the baking powder from activating prematurely, which would result in a dense, flat cake instead of one with a delicate, open structure.
Step 2: Cream Butter and Sugar for a Light Base
In a large microwave-safe bowl, combine the 0.5 cup Unsalted Butter (melted and slightly cooled) with the 0.75 cup Granulated Sugar. Use a whisk to blend them until the mixture is smooth and slightly pale. The sugar should dissolve almost completely into the butter, creating a glossy, homogeneous base.
This step mimics the creaming process in traditional baking, which incorporates air into the mixture. Even though we’re using the microwave, this initial aeration is critical for achieving that signature sponge cake lightness. Don’t rush—spend 1-2 minutes whisking vigorously to get it just right.
Step 3: Incorporate Eggs, Milk, and Flavorings
Add the 3 whole Large Eggs one at a time, whisking thoroughly after each addition until fully incorporated. Then, stir in the 1 tsp Vanilla Extract and 0.25 cup Whole Milk. The eggs provide structure, while the milk adds moisture and tenderness. The vanilla extract deepens the flavor, so use pure extract for the best results.
Finally, gently fold in the 1 tbsp Lemon Juice with a spatula. The acidity from the lemon juice reacts with the baking powder, enhancing the rise and adding a subtle brightness to the cake’s flavor. Be careful not to overmix—the batter should be smooth but not overworked.
Step 4: Combine Wet and Dry Ingredients
Gradually add the dry ingredient mixture to the wet ingredients, folding gently with a spatula just until no streaks of flour remain. Overmixing at this stage can develop the gluten in the flour, leading to a tougher cake. The batter should be thick but pourable, with a glossy sheen.
Pour the batter into a greased, microwave-safe dish—an 8-inch round cake pan or similar works well. Smooth the top with the spatula to ensure even cooking. The microwave’s heat will penetrate the batter quickly, so an even surface helps the cake rise uniformly.
Step 5: Microwave and Finish with Flourish
Microwave on high power for 4-5 minutes, checking at the 4-minute mark. The cake is done when the top springs back lightly when touched and a toothpick inserted into the center comes out clean. Microwaves vary, so start with 4 minutes and adjust as needed.
Let the cake cool in the dish for 5 minutes, then transfer it to a wire rack. Once completely cooled, dust with 2 tbsp Powdered Sugar and top with 0.5 cup Fresh Berries for a fresh, vibrant finish. Serve warm or at room temperature for the best texture.
Pro Tips For Making Microwave Sponge Cake
- Room Temp Eggs: I learned this the hard way—cold eggs won’t whip up properly. Pull them out 30 minutes before starting so they fluff up like they should.
- Fold, Don’t Stir: After mixing wet and dry ingredients, use a spatula to fold gently. Over-stirring makes the cake dense, and nobody wants that.
- Microwave in Bursts: Cook in 30-second intervals on high, checking after each. Microwaves vary, and 20 seconds too long means a rubbery mess.
- Butter the Bowl: Even if it’s microwave-safe, grease the dish with butter and a dusting of flour. My first cake stuck like glue—I don’t skip this anymore.
Storing and Reheating This microwave sponge cake
Room Temperature Storage
Let your cake cool completely before storing. Wrap it tightly in plastic wrap or place in an airtight container. It’ll stay fresh at room temperature for up to 2 days. I often leave mine on the counter overnight for easy snacking. 💡
Refrigerator Storage
For longer storage, refrigerate your wrapped cake for up to 5 days. The cold can dry it out slightly, so I recommend bringing it to room temperature before serving. A quick 10-second microwave burst can restore its softness.
Freezing for Later
Slice and wrap individual portions in plastic wrap and foil. Freeze for up to 1 month. Thaw at room temperature for 2-3 hours before enjoying. This is perfect for unexpected guests or cravings. ❄️
Reviving Leftovers
If your cake seems dry, brush the top with a simple syrup made from 2 tbsp sugar and 2 tbsp water. Heat for 30 seconds in the microwave, then let it soak in. This trick works wonders for day-old cake.
Serving Warm
For a fresh-baked taste, microwave individual slices on 50% power for 15-20 seconds. The warmth enhances the vanilla and butter flavors beautifully. I love this with a scoop of vanilla ice cream. 🔥
Nutrition Facts
Frequently Asked Questions
Can I use a different pan size?
An 8-inch round works best, but a 9-inch will need 1-2 extra minutes. Avoid glass—it heats unevenly. Stick to microwave-safe ceramic or silicone for best results.
Why did my cake turn out dense?
Overmixing the batter or using cold eggs can prevent proper rise. Ensure eggs are room temperature and fold dry ingredients just until combined. 4-5 minutes on high is ideal for most microwaves.
Is it safe to microwave in plastic?
Only if labeled microwave-safe. For safety, use glass or ceramic dishes. Never use metal or non-microwaveable plastics, as they can melt or cause sparks.
Can I make this ahead of time?
Yes! Bake, cool, and store wrapped at room temp for 2 days or refrigerate for 5 days. Freeze slices for up to 1 month for longer storage.

Trained in classic French technique but raised on slow-cooked ribs and spicy rubs, she blends culinary skill with smoke and soul.
- Recipe for Boneless Pork Chops in Cast Iron Skillet: Sear and Baste to Juicy Perfection - October 3, 2026
- Recipe for Boneless Cross Rib Roast: Slow-Roasted Beef with Herb Crust - October 3, 2026
- Hamburgers in Sauce Recipe Crock Pot: Slow-Cooked Savory Delight - October 3, 2026